
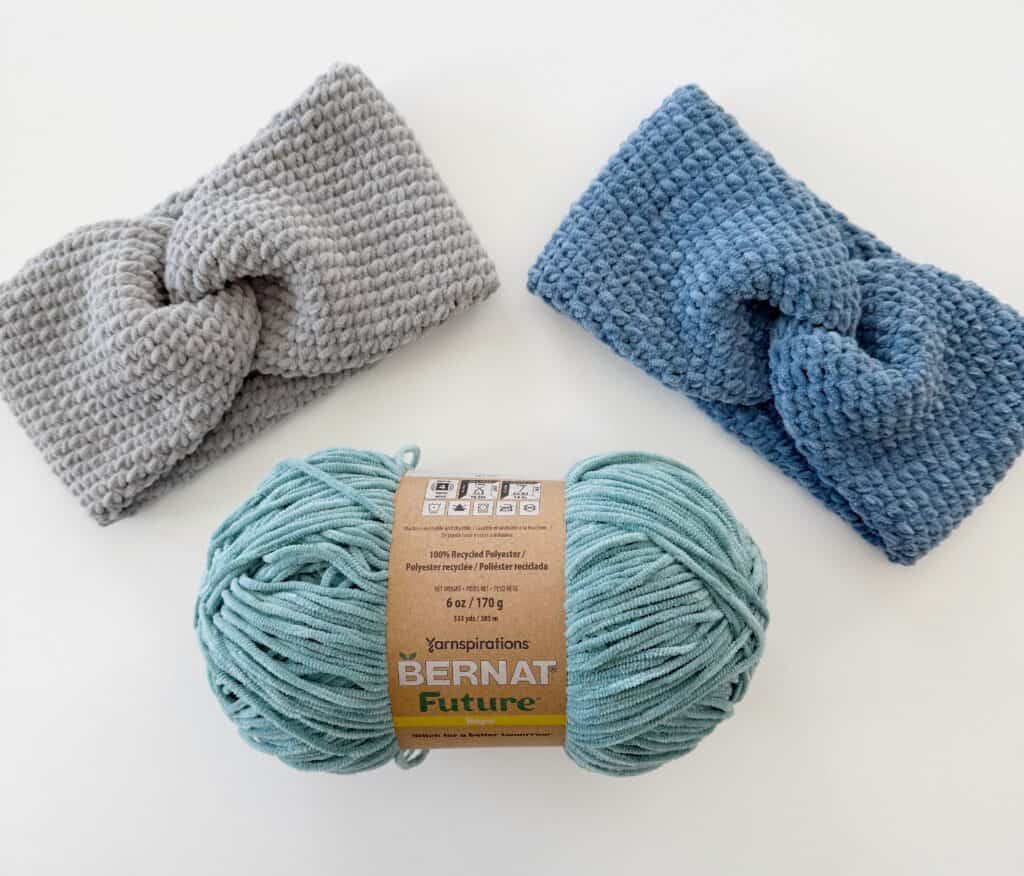
Another new yarn has entered the chat! This is Bernat Future Hope—a very soft chenille-type yarn, very similar to Bernat Tiny from years ago. Here is the good news: it is not as slippery as Bernat Velvet, so the stitches are staying put.
And more good news… you might just be able to find it at your Walmart and actually touch it. It is sold online at Yarnspirations.com, but Walmart is also selling exclusive colors in its stores.
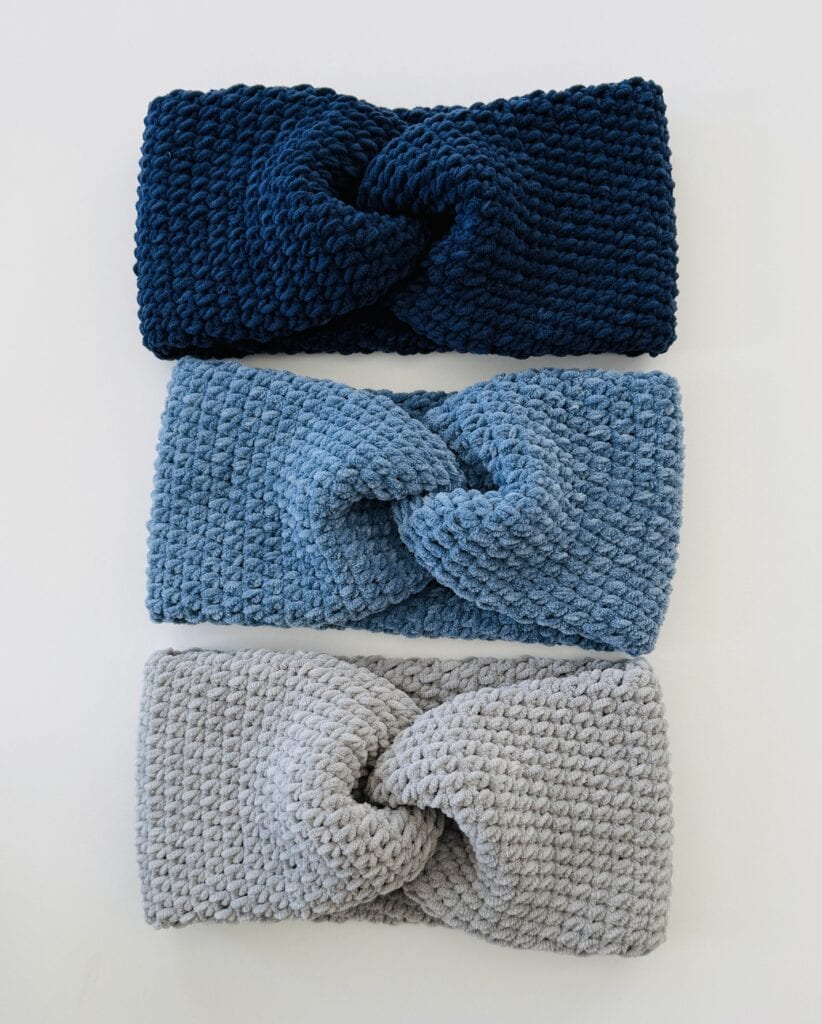
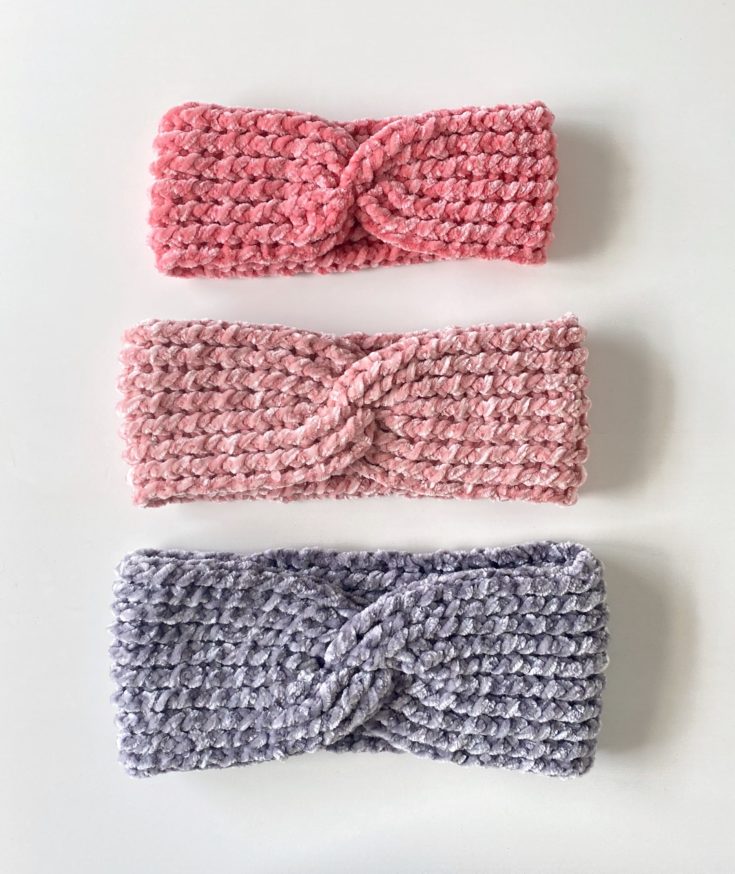
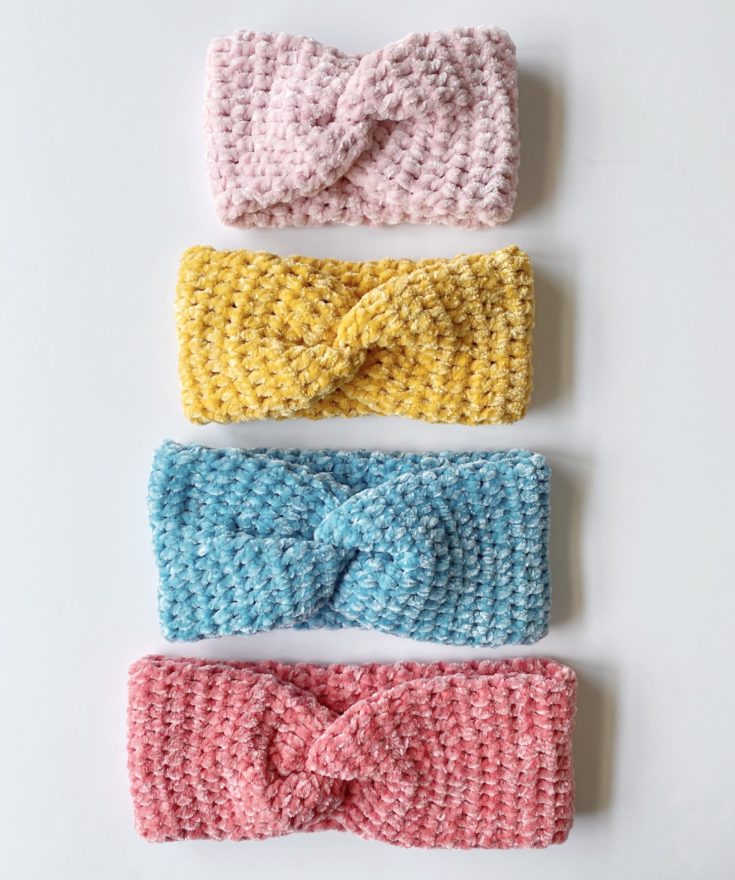
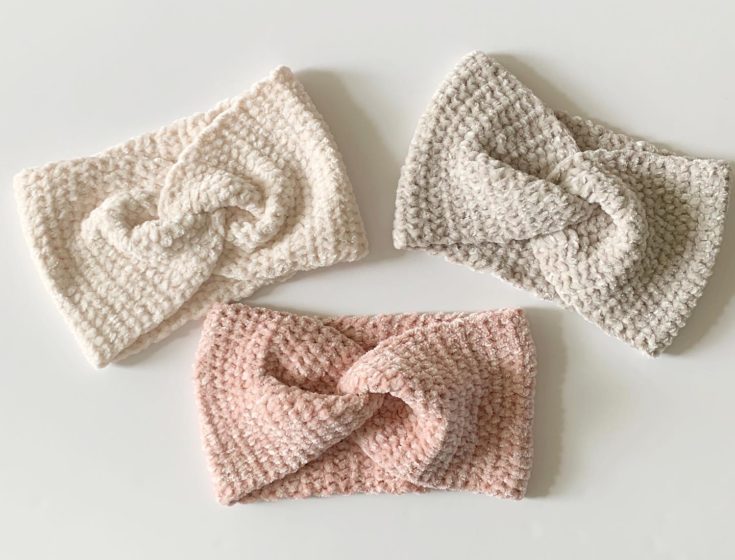
As Stitch Ambassadors for Yarnspirations, we were sent some sample balls a few weeks ago, and I made some easy twist headbands. I wanted to make a quick project to try out this yarn.
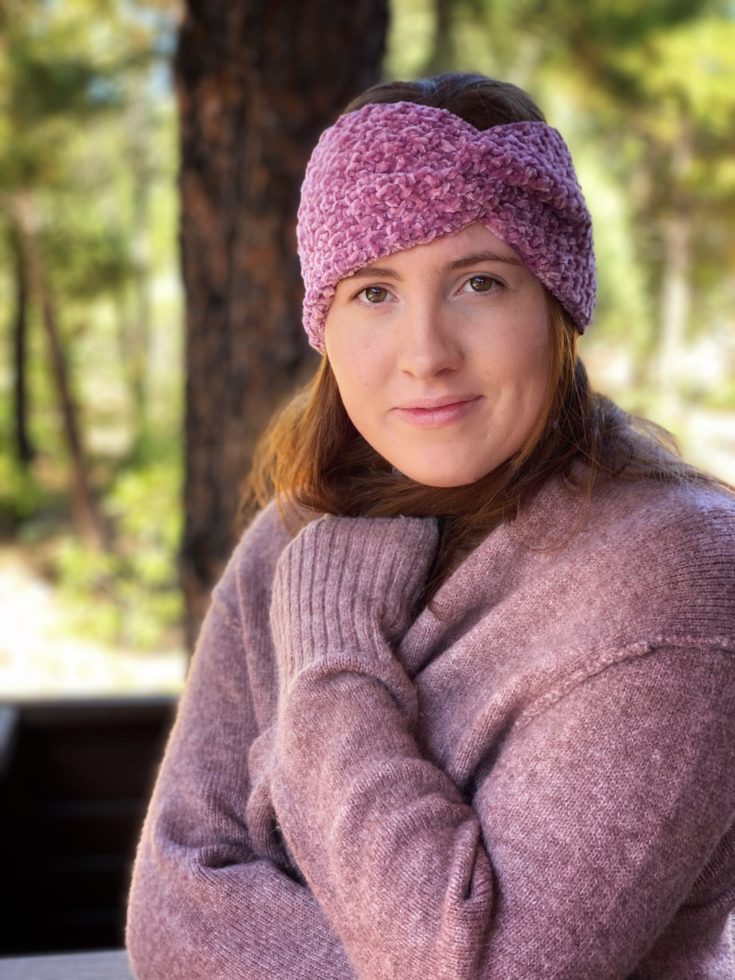
I really, really loved using this yarn for this project. I had fantastic results!
Then I left for Colorado for Christmas and brought the headbands with me. They were absolutely the best to have on hand. They were perfect for morning walks to the park! I kept one in my parka at all times, prepared for the Northern Colorado wind that sneaks up.
Tap here to shop on Yarnspirations.com for Bernat Future Hope
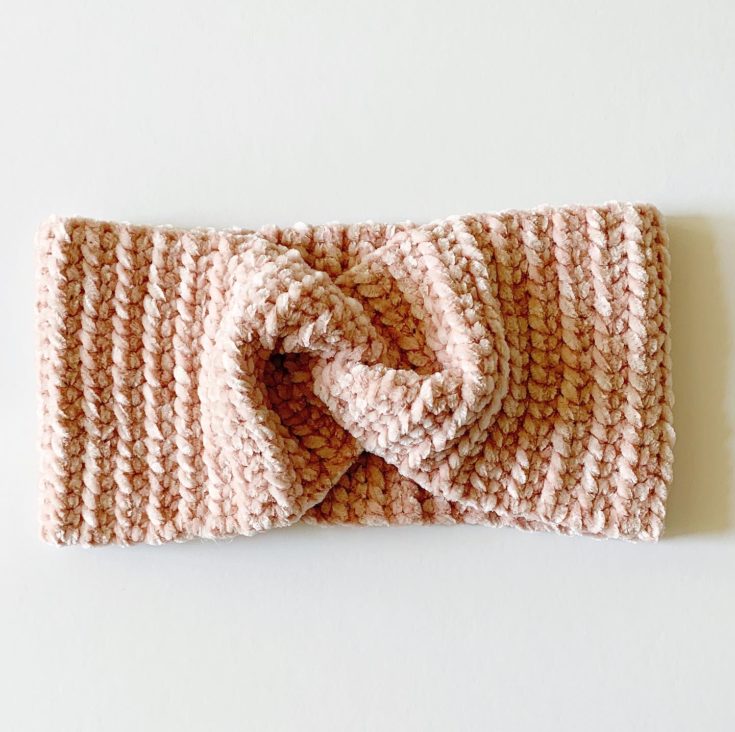
The pattern I used is based on the Mixed Loop Headbands. Where I am making a tube and then sewing them together, the difference is that I am using wide HDC, working between the posts of each HDC. They are double-thick and hold their shape after repeated use. For the last few years, making the headbands double-thick has been our favorite way of making them.
They look seamless as they are sewn together, with a twist so you never see a seam in the back.
I have a YouTube tutorial I made with quick instructions and more of what the yarn is like, so you can see how to fold the headband and sew it together to make the twist.
Materials
One skein Bernat Future Hope (100% recycled polyester, #4 worsted medium, 170 g/6 oz, 305 meters/333 yards)
Size H, 5mm hook, scissors, tapestry needle, tape measure
Stitches
Half Double Crochet (HDC): YO, insert your hook, YO and pull up a loop, YO and pull through all three loops on hook
Wide Half Double Crochet (wHDC): YO, insert your hook in between stitch posts of previous row, YO and pull up a loop, YO and pull through three loops on hook
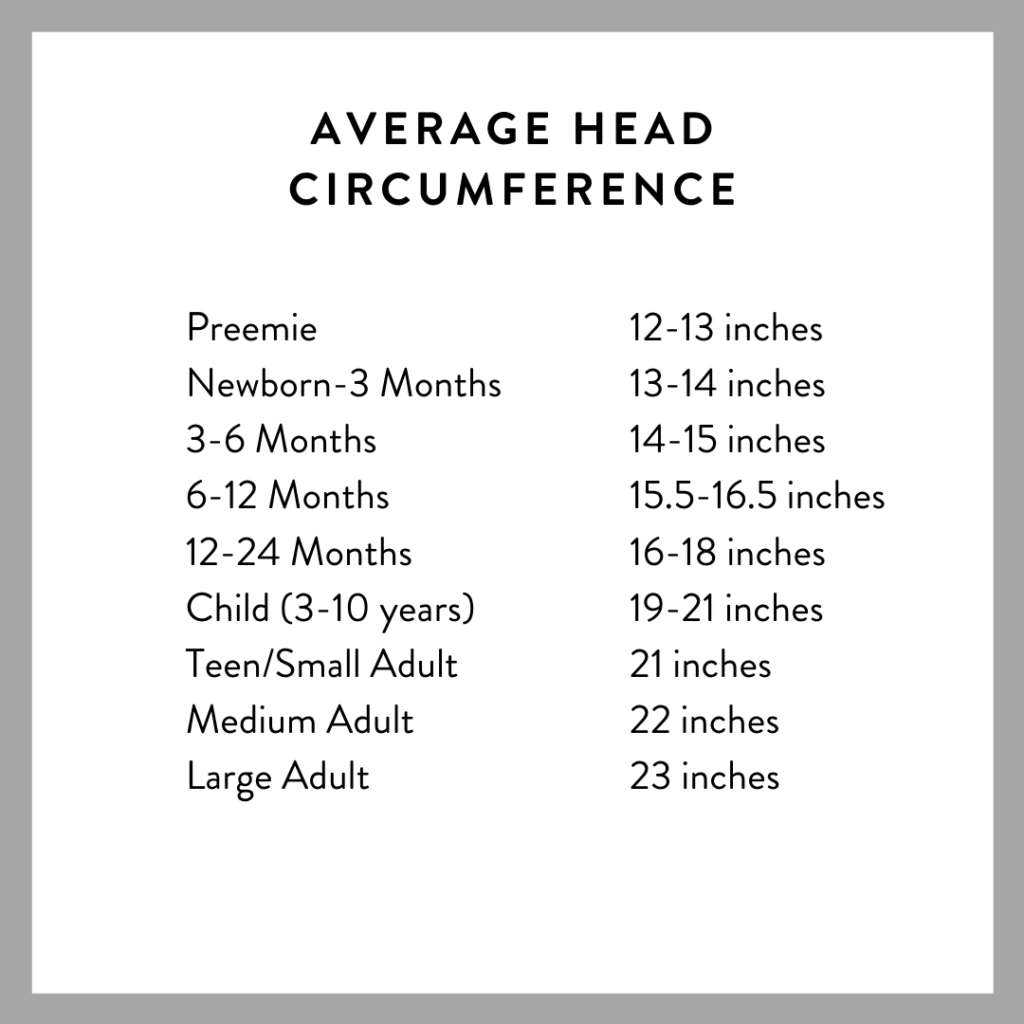
Size Chart
Pattern
For one adult medium 22 inch head circumference
Chain 34, or 9 inches, (7 inches for children,) slip stitch to the first chain to make a circle.
Round 1: Work HDC into each chain around. When you reach the first stitch of the round, do not join. Continue in the same direction.
Round 2 until you have one inch less than head circumference (21 inches): Work wHDC, in between each post, (work under all three loops that an HDC makes.) Continue in the same direction, no joining the rounds or turning.
When you have the appropriate length, tie off with a long tail for sewing.
See the diagram below on how to fold the two ends of the headband:
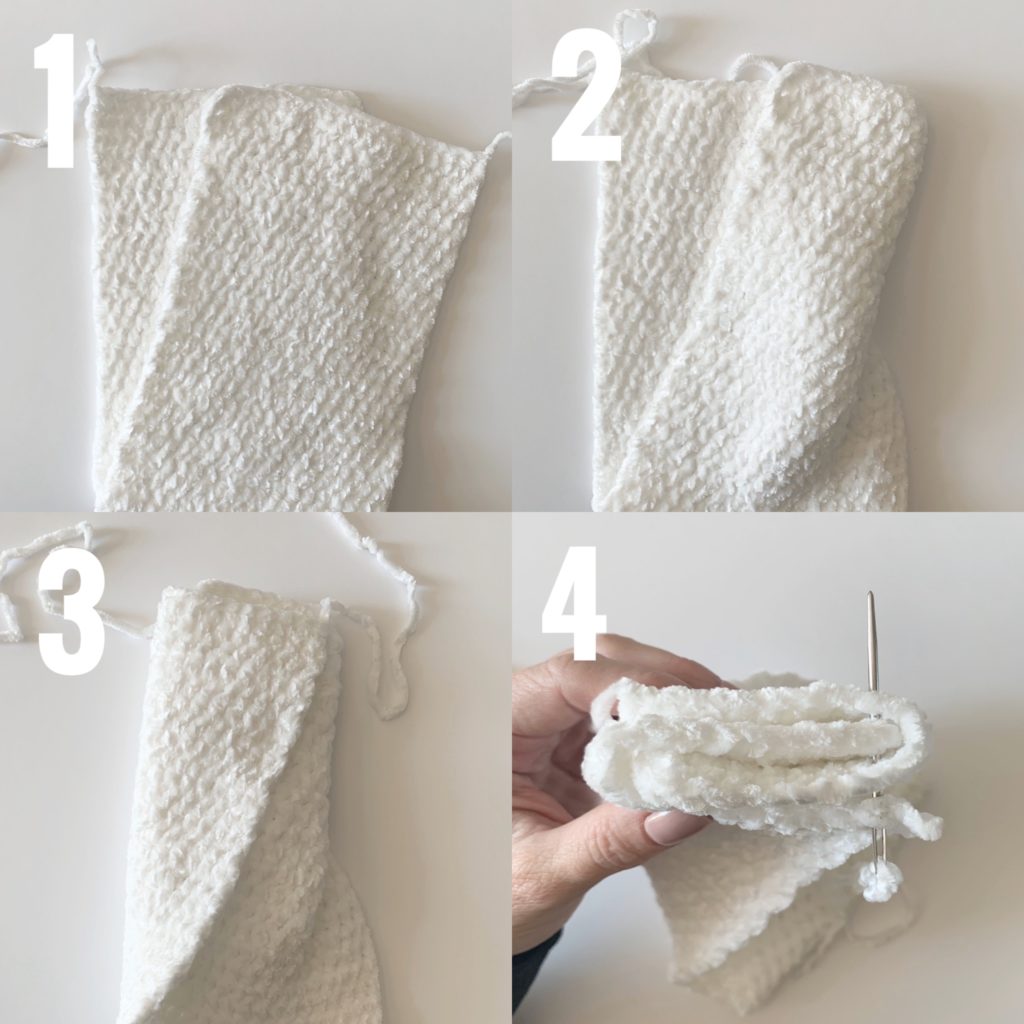
Step 1: Lay the band out, fold it in half, and slide one side of the band across so one end is matched up to the middle of the other.
Step 2: Fold the right-hand side around the back.
Step 3: Fold the left-hand side around the front, giving you four layers.
Step 4: Sew with the tapestry needle through all four layers.
If you need any help at all, please see the video tutorial above. We have more headband patterns on our website if you would like to search for others. Tap here for the full category list of hats and headbands.
Here’s a sample of other headband patterns:
Thank you so much for stopping by! We love to crochet and love sharing what we are making with you. All patterns on Daisy Farm Crafts website are free!
Also, if you haven’t had a chance, please sign up for our newsletter, where you will receive all our latest pattern releases straight to your email.
Happy Crocheting!
XO, Tiffany
Click here or image below to download free pdf.
![]()