Hello crochet friends! Hannah here. It’s been a few weeks since I’ve had a chance to crochet anything new because my husband and I recently moved from New Mexico to Colorado!
We met a lot of wonderful people in New Mexico and we were sad to leave, but we are also excited for this next phase of my husband’s medical training. My mom grew up in Colorado and my grandparents still live here, so it will be fun to be able to live closer to them.
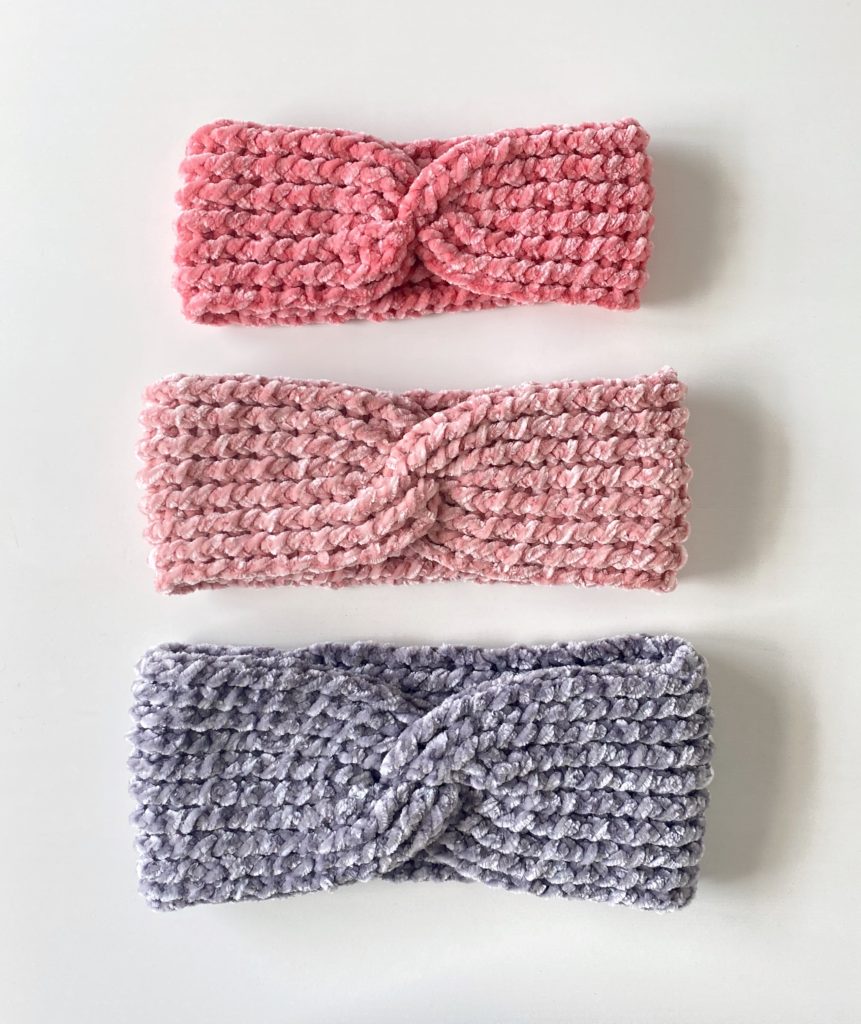
But most importantly I finally have a chance to use all the winter wear I’ve been making lately, including this super comfortable velvet headband!
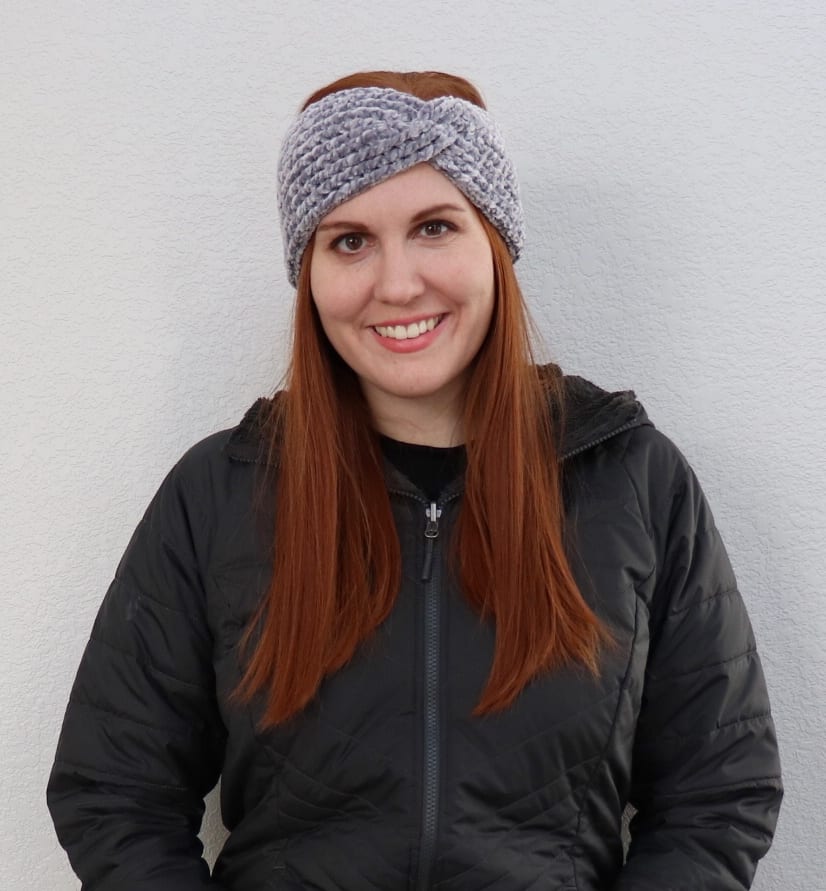
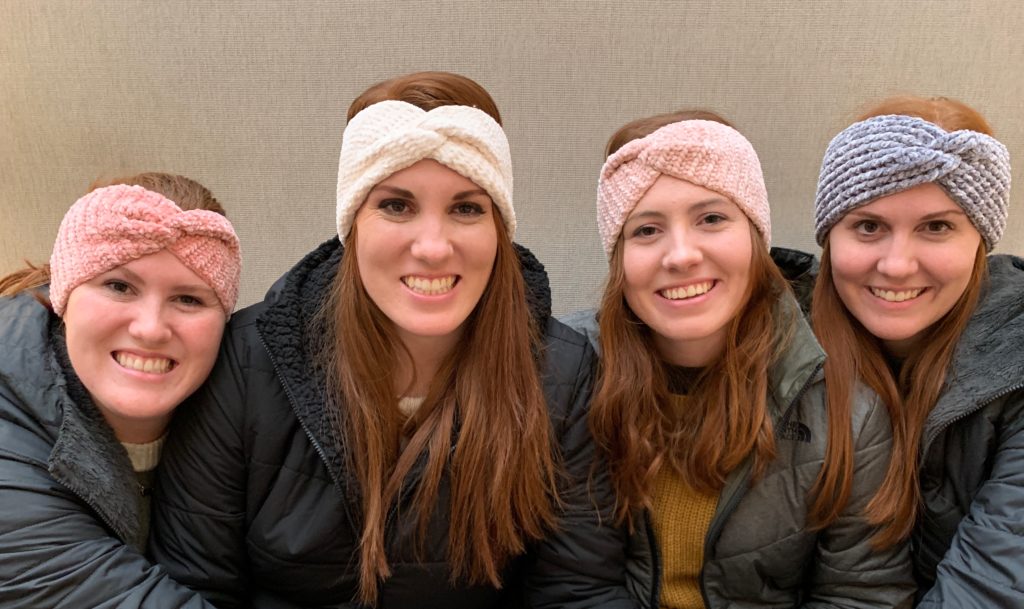
Last week we met up with my family in Salt Lake City the day after Thanksgiving and we were all so glad to have our headbands since it snowed almost the whole time we were there.
We already have patterns for the Crochet Velvet Twist Headband and the Easy Velvet Twist Headband and this new ribbed headband is made in the same way, except I used alternating front and back post double crochet (FPDC & BPDC) for the body of the headband. If you’re not sure how to work those stitches, here is a quick video to show you how:
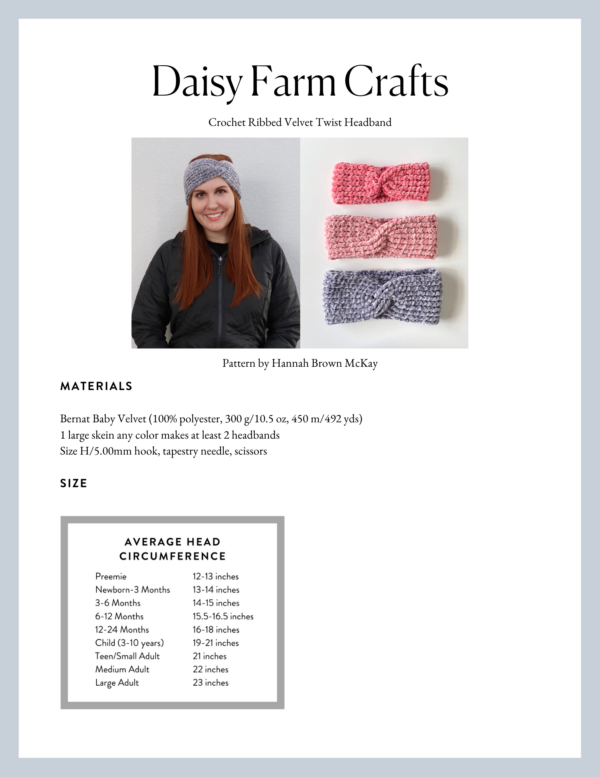
Materials
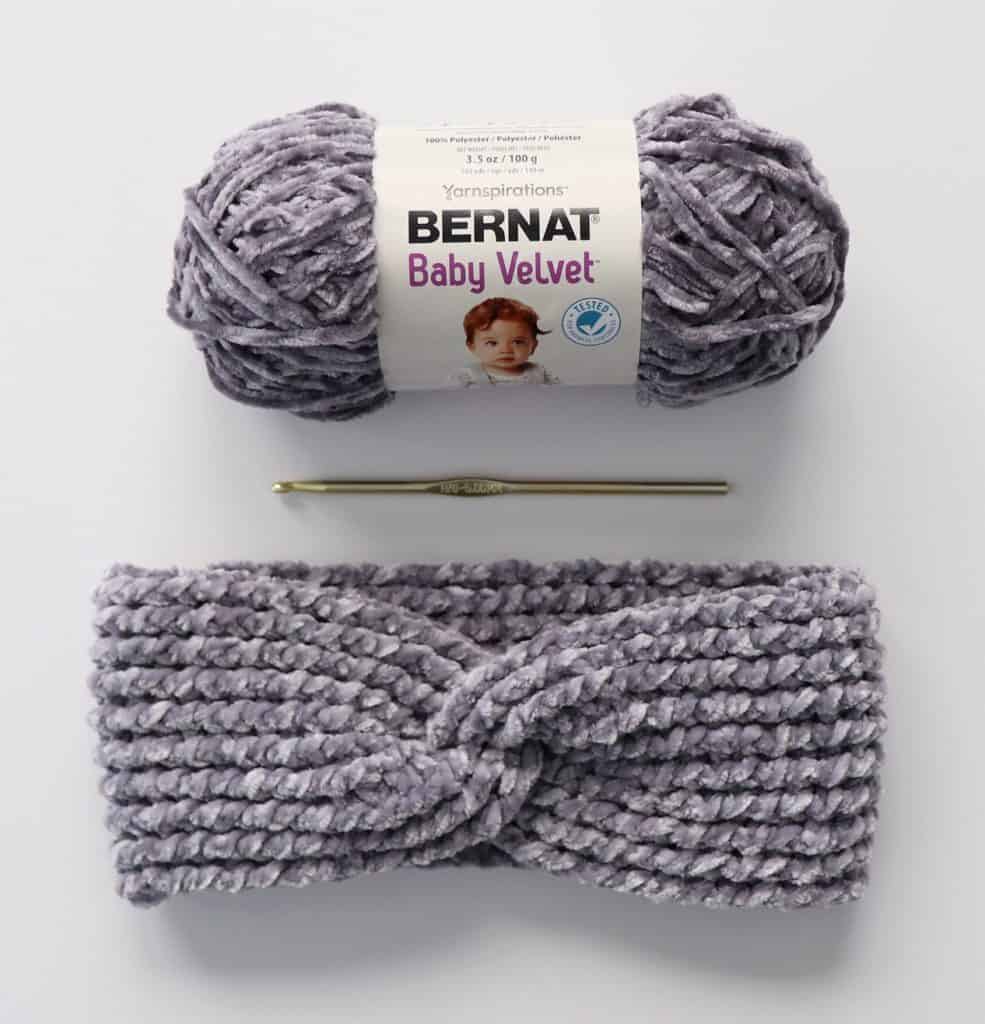
Bernat Baby Velvet (100% polyester, 300 g/10.5 oz, 450 m/492 yds)
1 large skein any color makes at least 2 headbands
Size H/5.00mm hook, tapestry needle, scissors
Stitches
Double Crochet (DC): Yarn over (YO), insert your hook, YO and pull up a loop, YO, pull through two loops, YO, pull through remaining two loops.
Front and Back Post Double Crochet (FPDC & BPDC): A front post DC means you insert your hook from front to back around the post of the next DC and work your DC. A back post DC means you insert your hook from the back to the front and work a DC.
Pattern
Chain 20 for adults, 18 for kids, or 16 for babies.
ROW 1: Starting in the 4th chain from the hook, work a DC in each chain. (YO, insert your hook, pull up a loop, YO, pull through two loops, YO, pull through remaining two loops.) When you reach the end of the chain, chain 2 and turn.
ROW 2: The chain 2 counts as the first stitch. Around the next stitch, work a Front Post Double Crochet (FPDC). An FPDC means you insert your hook from front to back around the post and work your DC. Around the next stitch, work a Back Post Double Crochet (BPDC). A BPDC means you insert your hook from the back to the front of the post and work a DC.
Continue alternating FPDC and BPDC to the end of the row. When you reach the end of the row, work a regular DC underneath the turning chain. Chain 2 and turn.
ROW 3: The chain 2 counts as the first stitch. Continue alternating BPDC and FPDC to the end of the row, always matching the direction you work around the post so that it pops out the same direction as the previous row. When you reach the end of the row, work a regular DC underneath the turning chain. Chain 2 and turn.
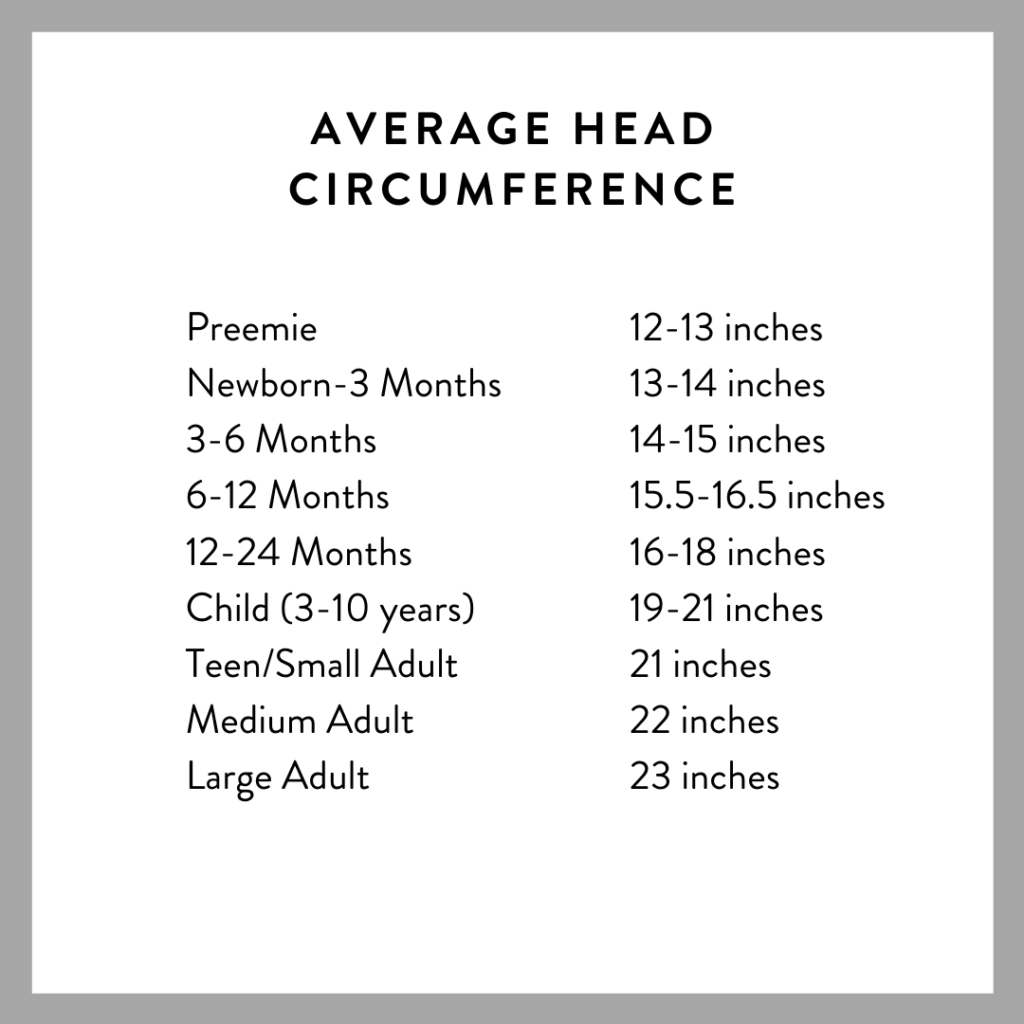
Repeat rows 2 through 3 until headband measures 3 inches less than head circumference. If you are not able to measure in person, here is a standard head size chart you can use:
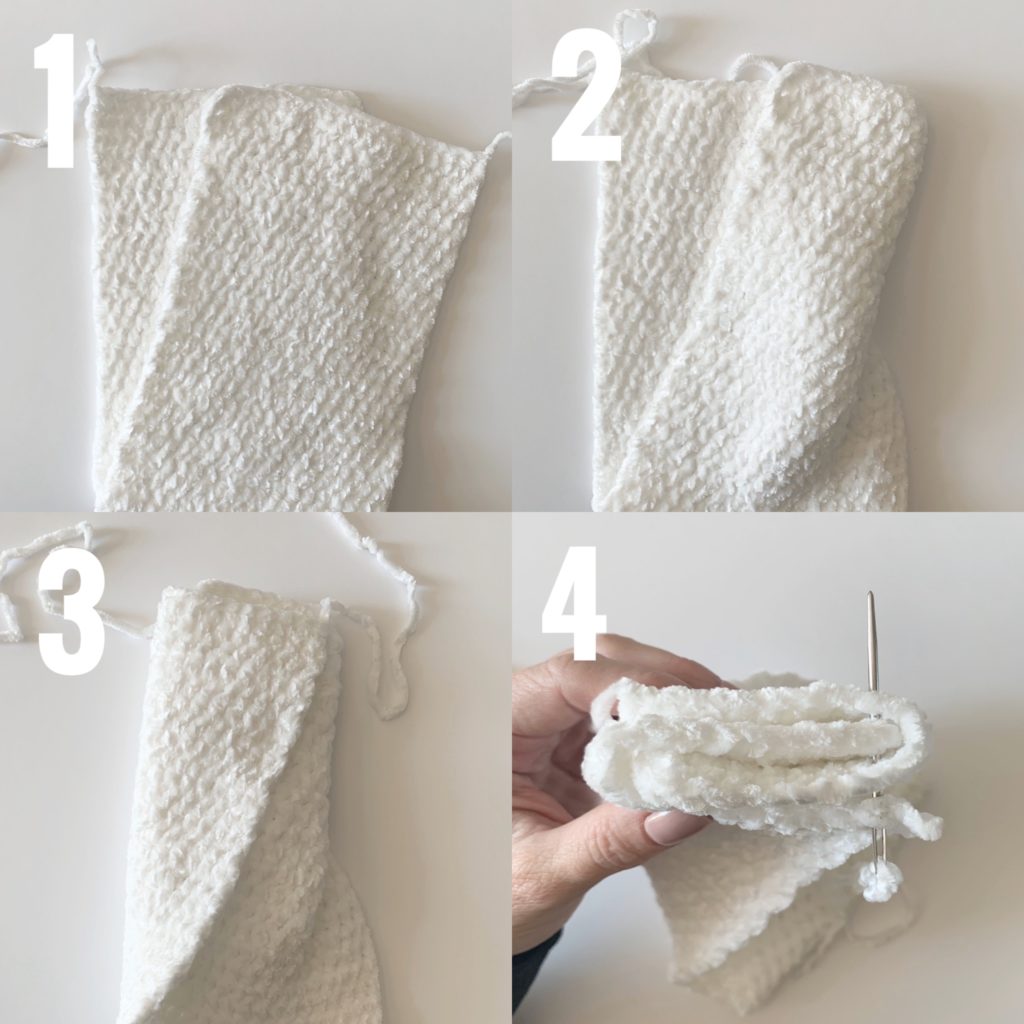
For the twist:
Step 1: Lay the band out and fold in half and slide one side of the band across so one end is matched up to the middle of the other.
Step 2: Fold the right hand side around the back.
Step 3: Fold the left hand side around the front, giving you four layers
Step 4: Sew with the tapestry needle through all four layers, then turn inside out.
After you finish your twist weave in any tails with a tapestry needle and then enjoy your cozy velvet headband!
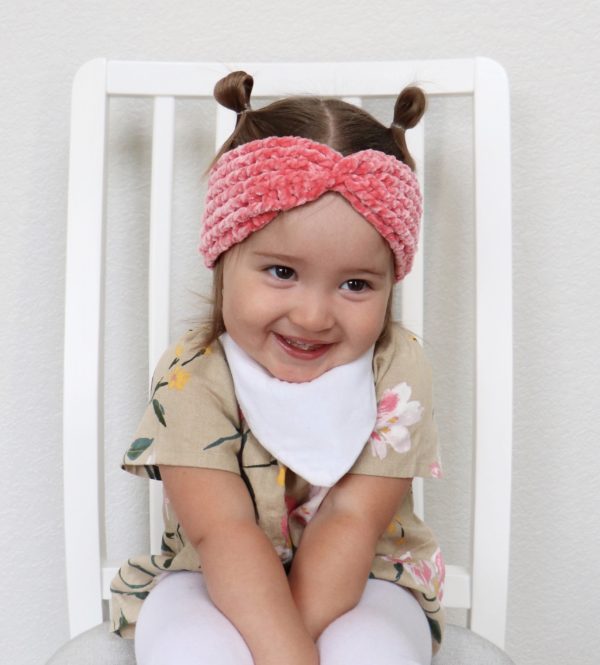
Here is a picture of my little friend Marin wearing her velvet twist headband! Her mom is a good friend of mine and also has the cutest Etsy shop where she sells darling handmade baby clothes and accessories that I love to give away as gifts to go with the things I crochet.
Thank you for coming to visit our website and best of luck with your headband! When you’re finished, please come share a picture with us on Facebook or Instagram, we’d love to see!
xo, Hannah
Click here or on image below for printable pattern