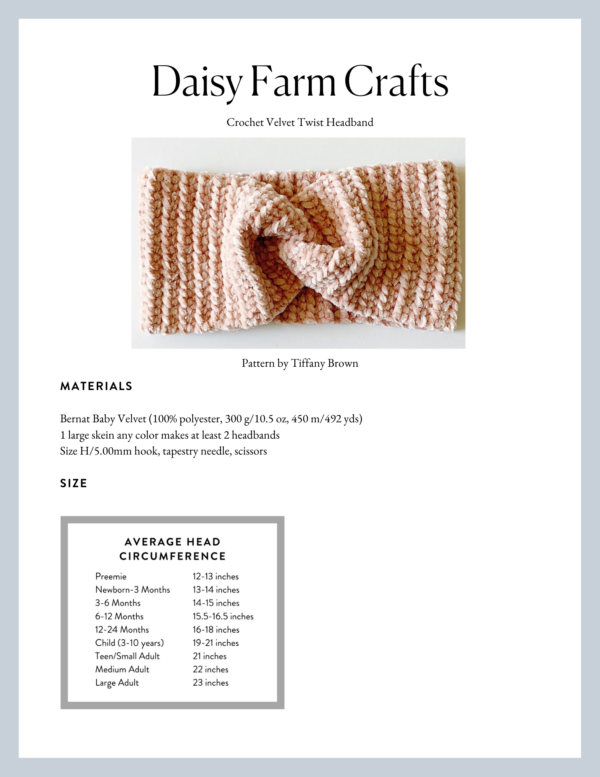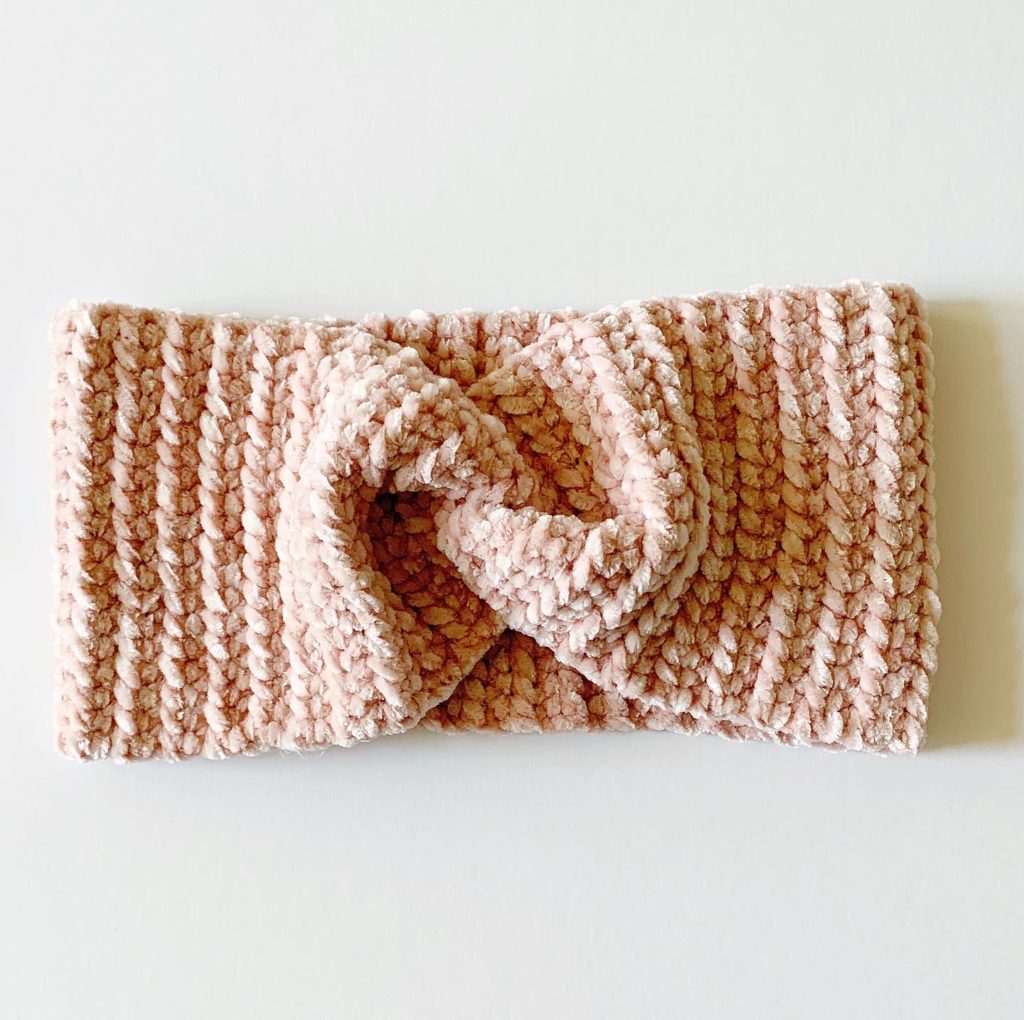
I love a project I can make in a few hours that also looks expensive and luxe! This Bernat Baby Velvet has done the trick. (You also can use regular Bernat Velvet, it will be just a bit thicker of a headband, still luxe and awesome.)
I’ve used one stitch for this headband and it’s called the Half Double Slip Stitch. Some call it a Yarn Over Slip Stitch.
Here is a quick video demonstration if you’ve never seen it worked:
It’s just like a regular slip stitch, you just yarn over first. It takes a few rows to get the hang of it, and to keep pulling through all the extra loops, but you’ll get into a rhythm and love it. I use a Susan Bates hook to help with grabbing the yarn. So if you are having trouble keep that tip in mind and that might help you.
(I crochet will all sorts of types of hooks depending on the yarn type. My favorite though are the Susan Bates Comfort Grip Hooks.)
Now, here are a few things about velvet I want you to be aware of. It is slippery and if you feel after a few practice swatches your loops are “worming” free, switch to a smaller hook. I do think this half double slip stitch prevents the yarn slipping free, but I’ve practiced a lot with it so I might not be a good indicator.
If you feel like washing the project before gifting, We either hand wash or place in a laundry bag and lay out to dry. We have not placed this in a dryer. Only lay it out to dry.
Materials
Bernat Baby Velvet (100% polyester, 300 g/10.5 oz, 450 m/492 yds)
1 large skein any color makes at least 2 headbands
Size H/5.00mm hook, scissors, tapestry needle
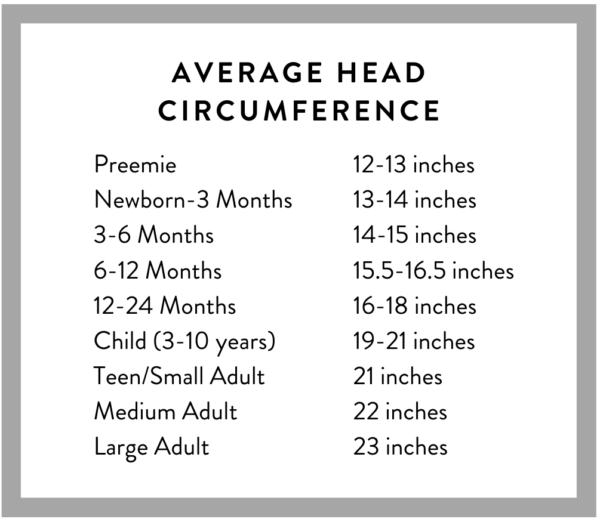
Size
Stitch
Half Double Slip Stitch (HDSS): Yarn over (YO), insert your hook, YO, pull up a loop and pull directly through loops on hook.
Pattern
Chain 20.
ROW 1: Work Half Double Slip Stitch (HDSS) in second chain from the hook and into each chain across the row. CH 1 and turn.
ROW 2: *Work HDSS in each stitch across the row, CH 1 and turn. Repeat from * until band measures 2 inches smaller than head circumference. Average adult is 22 inches make the band 20 inches. This was 68 rows for me.
For a child: Chain 16 and use the same instructions.
For the twist:
Step 1: Lay the band out and fold in half and slide one side of the band across so one end is matched up to the middle of the other.
Step 2: Fold the right hand side around the back.
Step 3: Fold the left hand side around the front, giving you four layers
Step 4: Sew with the tapestry needle through all four layers.
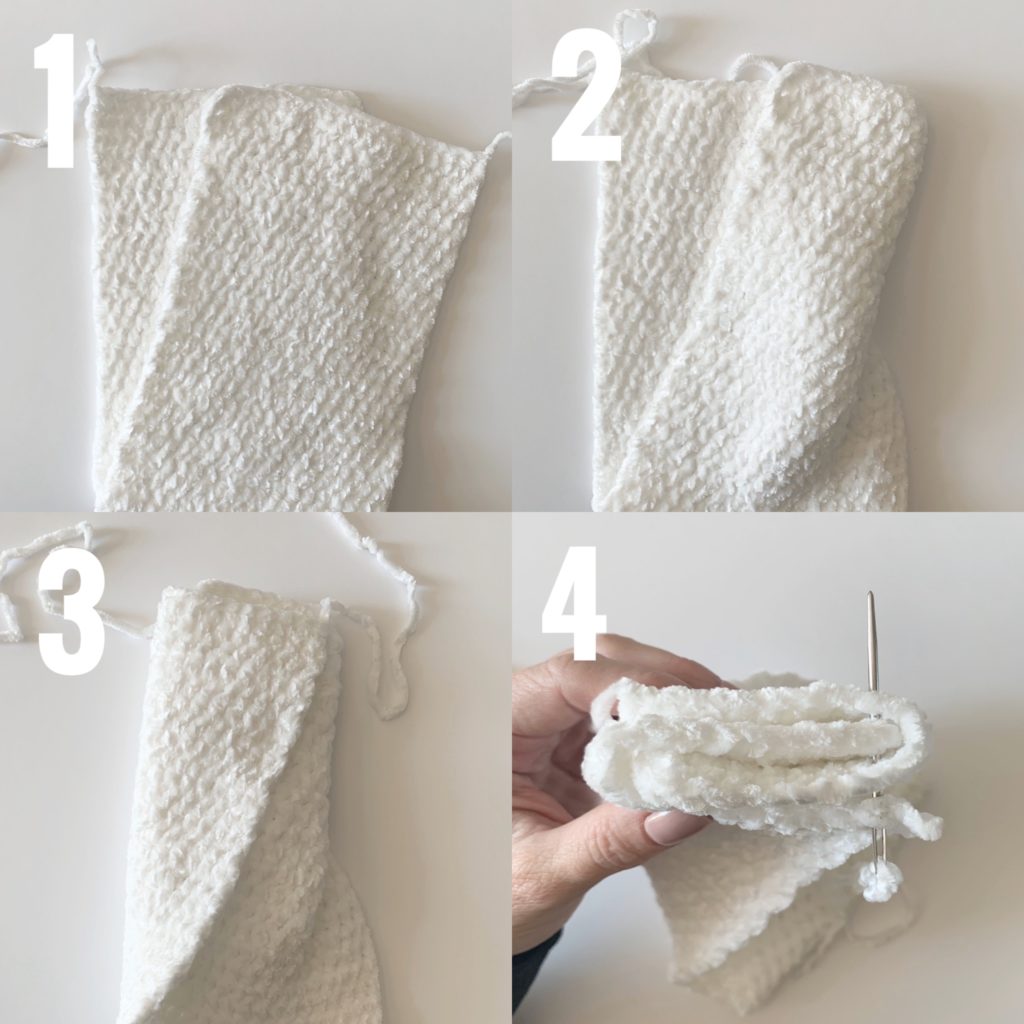
If that isn’t clear, please watch the video tutorial and you’ll see how uncomplicated it is to actually do. Explaining it is harder than actually doing it. Here’s the video:
Thanks for coming by and good luck on your Velvet Twist Headband! For more velvet twist headband variations, check out this post, 6 Ways to Make a Velvet Twist Headband.
And as always, we love to share your Daisy Farm projects so come by and leave a photo on our Facebook page or tag your Instagram post with #daisyfarmcrafts.
xo, Tiffany
Click here or on image below for printable pattern