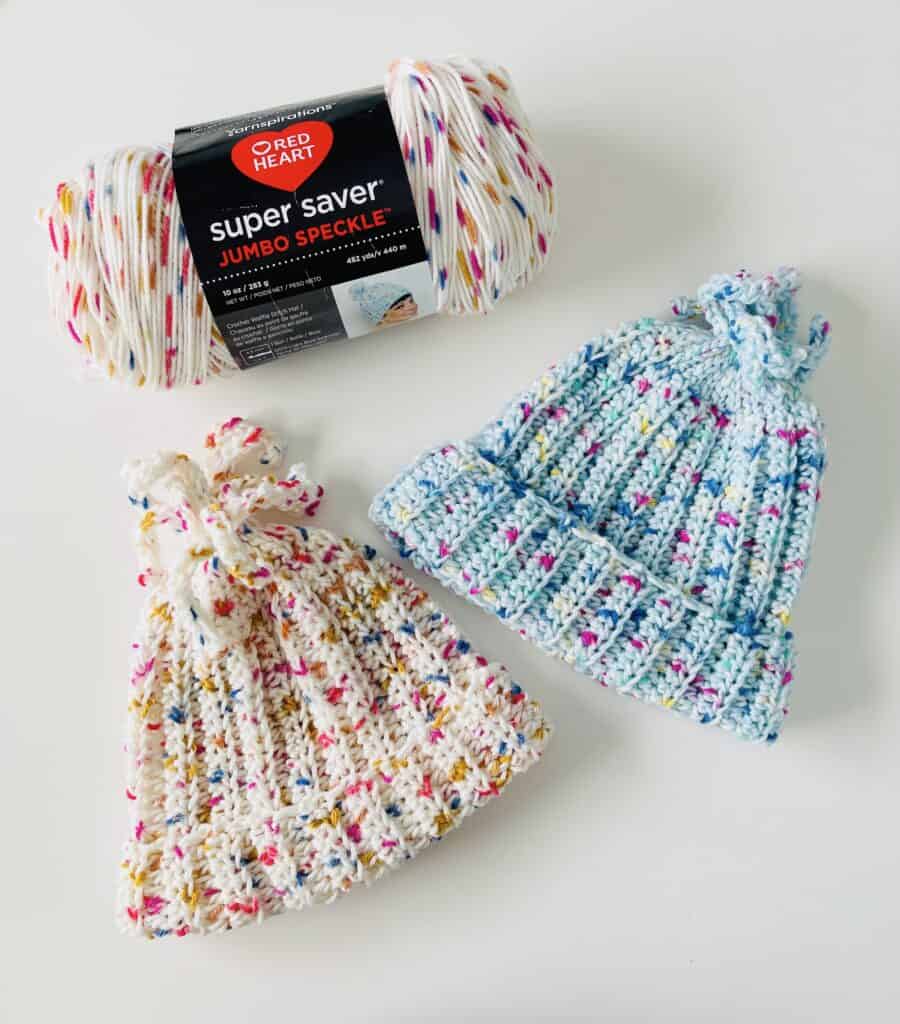
As Stitch Ambassadors for Yarnspirations, from time to time, we receive new yarn to try. This is new in the Red Heart Super Saver line of yarn called Jumbo Speckle.
We thought that our Fun Fringe Hat would look awesome worked with this speckled yarn so we gave it a try. Working fun fringe on the top of a hat has made it so convenient to have the hat finished all at once and not have to add a pom pom.
Of course, this pattern is easily made without the fun fringe. You can make it as a simple beanie and be done.
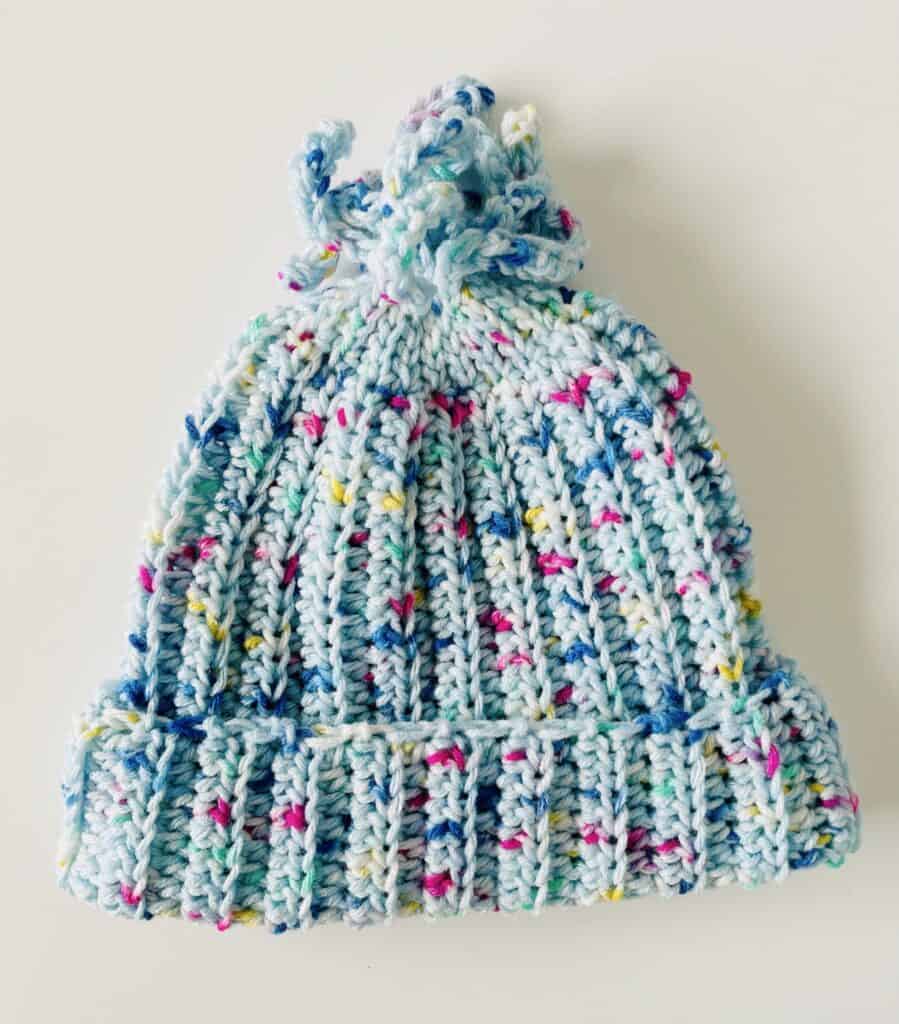
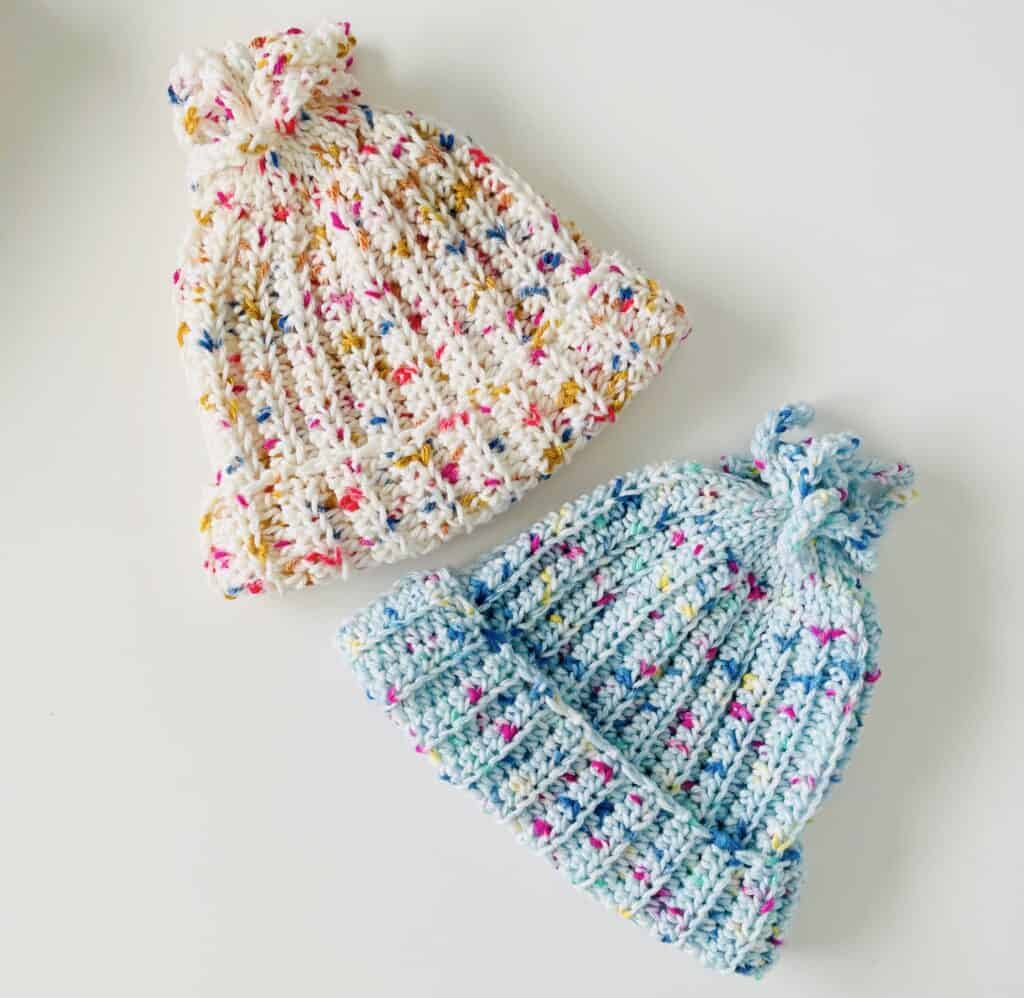
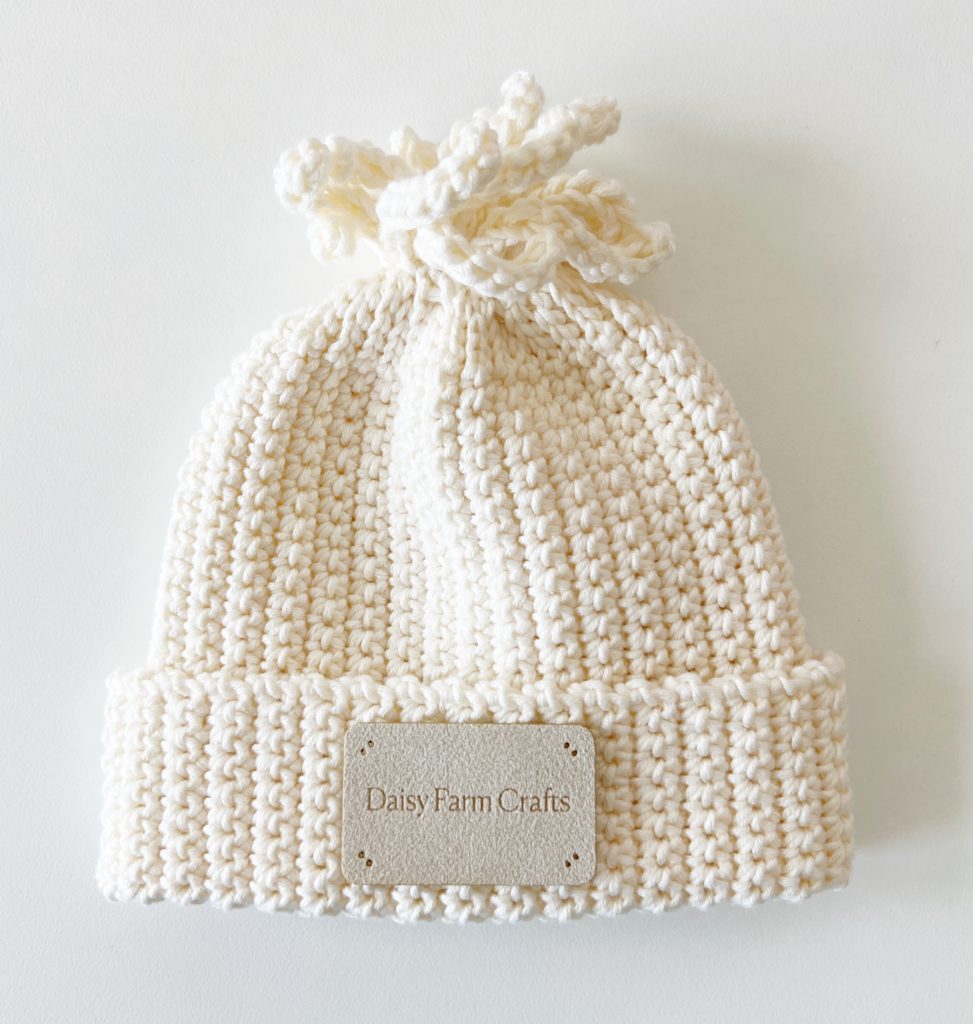
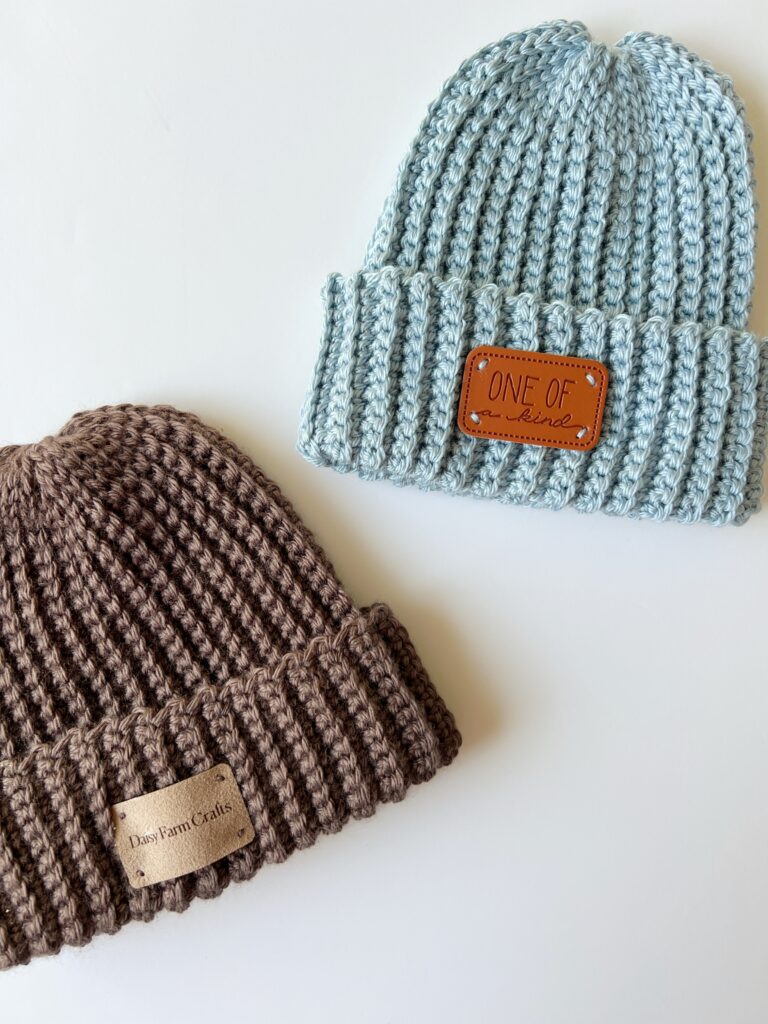
You will definitely have a lot of yarn to make plenty of hats as Super Saver Jumbo Speckle has 482 yards in each skein. They also have a lot more colors to choose from. We chose to make our hats with the colors white speckle and light blue speckle.
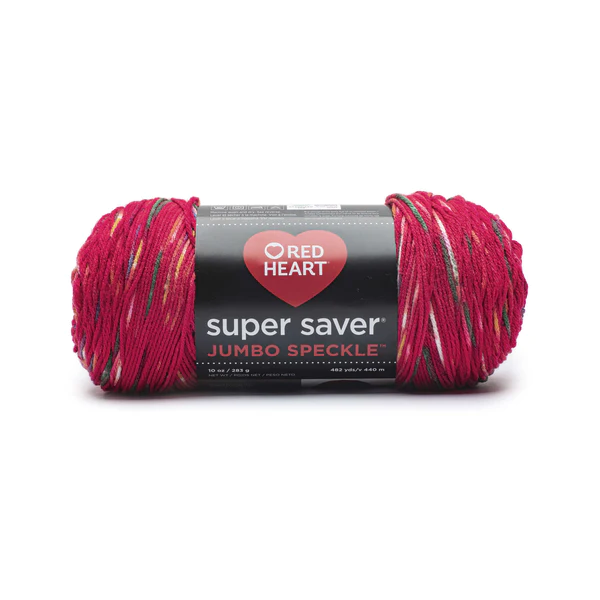
But they also have Bubblegum Speckle (a light pink background), Cherry Speckle (a red background), Dusty Gray Speckle (a gray background), and Soft Navy Speckle (a blue background.)
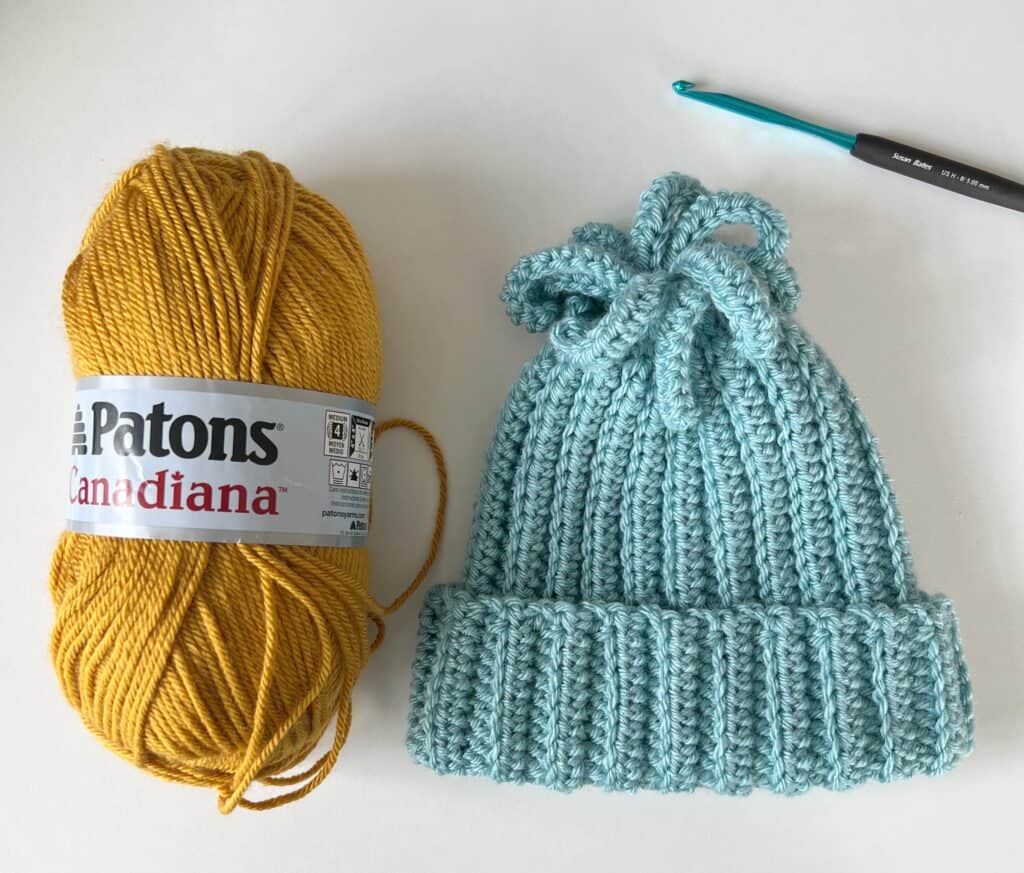
The stitch used in these fun fringe hats is the back loop half double crochet. That is the stitch used for the main portion of the hat. The last 5 stitches worked for the hat are back loop slip stitch. Then, the fringe is made by working 10 chains, and then working a half double slip stitch, or some call it a yarn over slip stitch, into each chain back toward the top of the hat.
The hat is made from the bottom to the top, back and forth, and then the two sides are seamed together with a tapestry needle. Then use the needle to further gather in the base of the fringe. Weave in your ends and you are done.
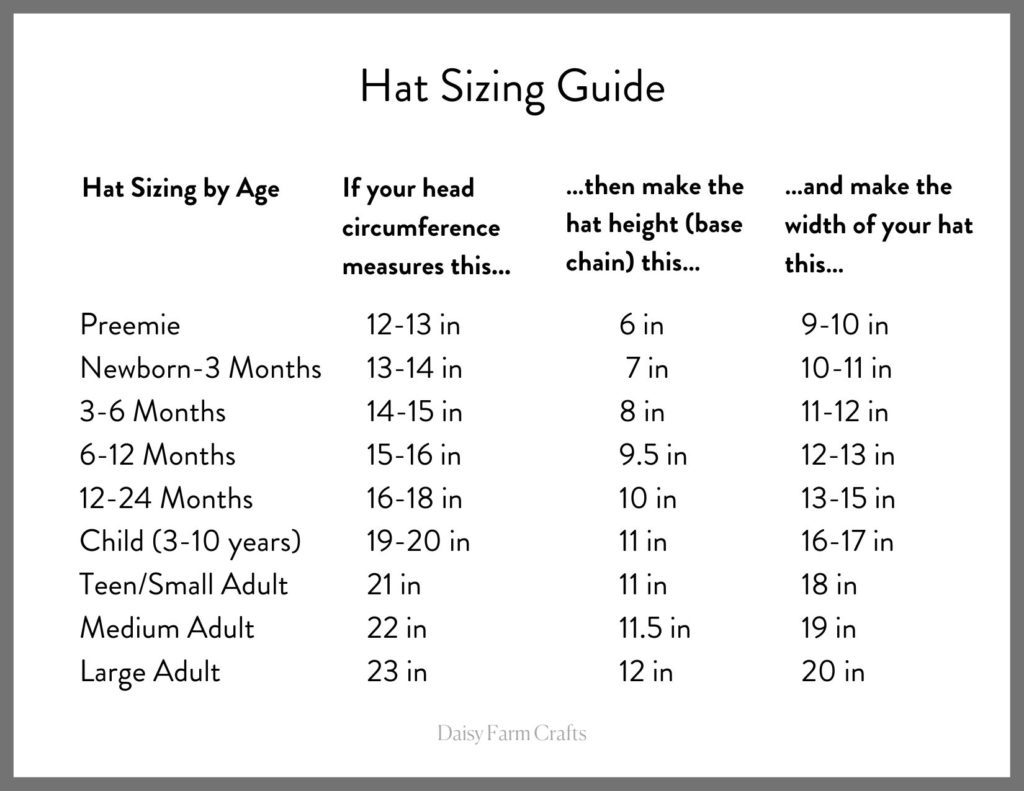
We are allowing for a 2-inch brim for this pattern, but you can make these hats any size that you would like. They can be slouchy or they can fit tight.
We will share a hat size chart that will help you make your hat the size that you need. In the chart, the hat height measurement includes the 2-inch brim, so make your starting chain longer if you want a slouchy hat or more brim. Or, subtract two inches if you don’t want a brim at all.
There are so many options for fun fringe. We have made the following hat with Paton’s Canadiana and made the fringe thicker by using just half double crochet, instead of the yarn over slip stitch.
Tap here if you’d like the pattern for the Crochet Ribbed HDC Fun Fringe Hat
The original fun fringe hat was shared as just using all single crochet. That one can be modified as well to use back loop single crochet if you’d like.
Tap here for the original Fun Fringe Beanie pattern.
And if you really don’t want to make fringe, you can leave it off and make the hat after this pattern below.
Tap here for the Easy Crochet Beanie
Overall, we really were pleased with our hats made with Red Heart Super Saver Jumbo Speckle. The yarn felt just like regular Super Saver and worked in the same manner. We like to toss our projects made with Super Saver into a hot dryer with a damp towel to remove the sizing from the yarn and soften it.
So if you are looking for an affordable yarn that makes really cute hats and lots of them from just one skein, give this yarn a try!
Be sure and scroll to the end of the post for the free printable pattern. If you need video tutorial help, please look through our other fun fringe hat patterns that are linked above. We do have video tutorials for those hats on Youtube.
Stitches
HALF DOUBLE CROCHET (HDC): YO, insert your hook, YO and pull up a loop, YO and pull through all three loops on hook.
SLIP STITCH (SL ST): Insert your hook, YO and pull a loop back through and through loop on hook.
HALF DOUBLE SLIP STITCH (HDSLST): YO, insert your hook into back loop, YO, pull up a loop and pull directly through two loops on hook.
Materials
Red Heart Super Saver Jumbo Speckle
(tap name of yarn to buy on Yarnspirations.com)
Size I 5.5mm hook, tapestry needle, stitch markers, scissors
Pattern
Chain to the length needed according to the size chart above or chain 32 for an adult medium size. (However, still measure the chain and make sure you have the length desired. You can chain any number for these hats)
ROW 1: Begin in the third chain from the hook with HDC. HDC into each of the chains until 5 remain. Work SL ST into the final 5 chains, CH 1 and turn.
ROW 2: In the back loop of the first st, work 1 SL ST, back loop SL ST into the remaining SL STs. Work HDC into the back loops of all HDC. CH 2 and turn.
ROW 3: HDC into the back loop of each HDC, SL ST into the back loop of final 5 SL ST, chain 10 and turn.
Tip: use your stitch markers to mark the final SL ST before you chain 10, so you’ll know when to begin SLST’s after the fringe is made.
ROW 4: Beginning in the second chain from the hook, HDSLST into each chain (fringe made). Back loop SL ST into each SL ST, back loop HDC into each HDC. CH 2 and turn.
ROW 5: HDC into the back loop of each HDC, SL ST into the back loop of final SL STs, chain 1 and turn.
Repeat rows 2 through 5 until you have the width needed for size.
Option: If it is proving difficult for you to make 5 slip stitches at the top of the hat, those may be omitted entirely, your hat will just be a bit more bulky at the top.
Thank you so much for stopping by!
XO, Tiffany
Click here or image below for free printable pdf.
![]()