Re-sharing this darling hat I made for Jack a few years ago. It is so easy to make and makes the best gift to add to a baby blanket. Enjoy!

We are having to get even more creative with our photoshoots with baby Jack. Thank heavens for yummy cookies! Our little guy is not the biggest fan of wearing hats, but with a cookie in his mouth, he left it on for a few photos.

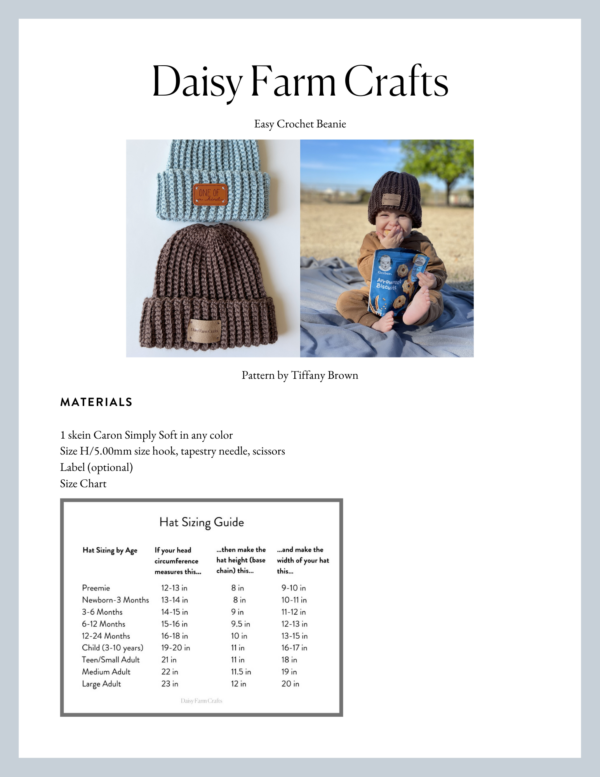
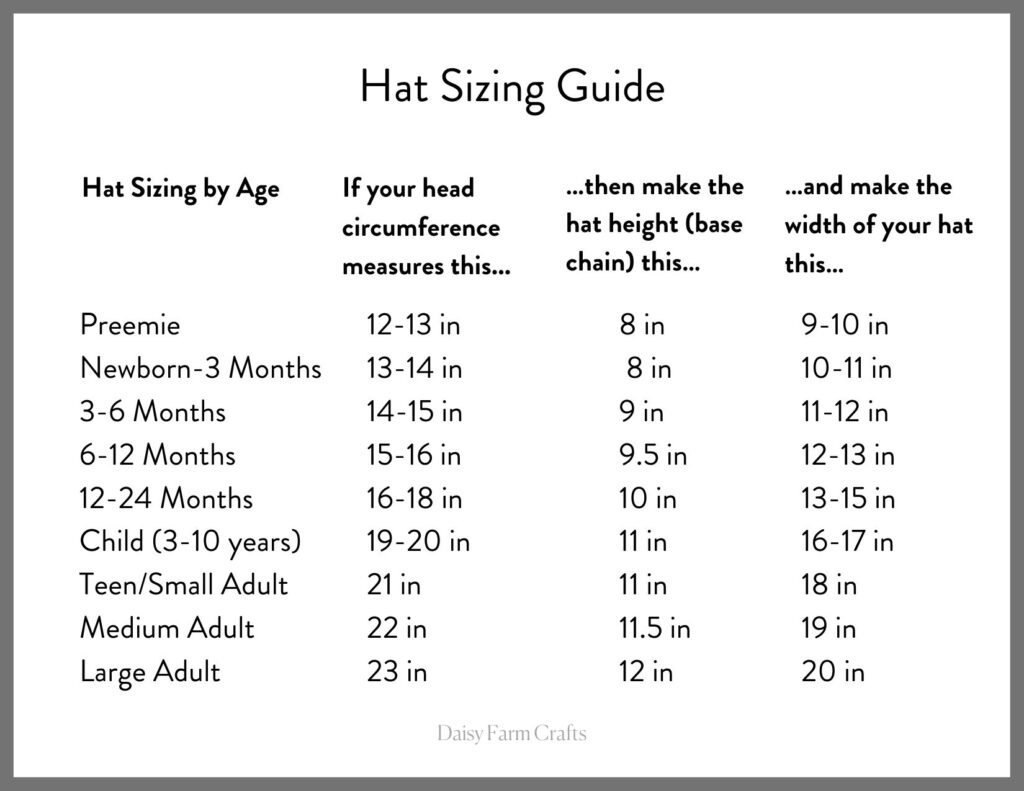
This is a really easy pattern, perfect for beginners that want to make a hat any size. I’ll post a chart below in the pattern so you can customize it to what you need. It’s a basic beanie that is versatile to add a pom-pom if you wish or just keep it plain.
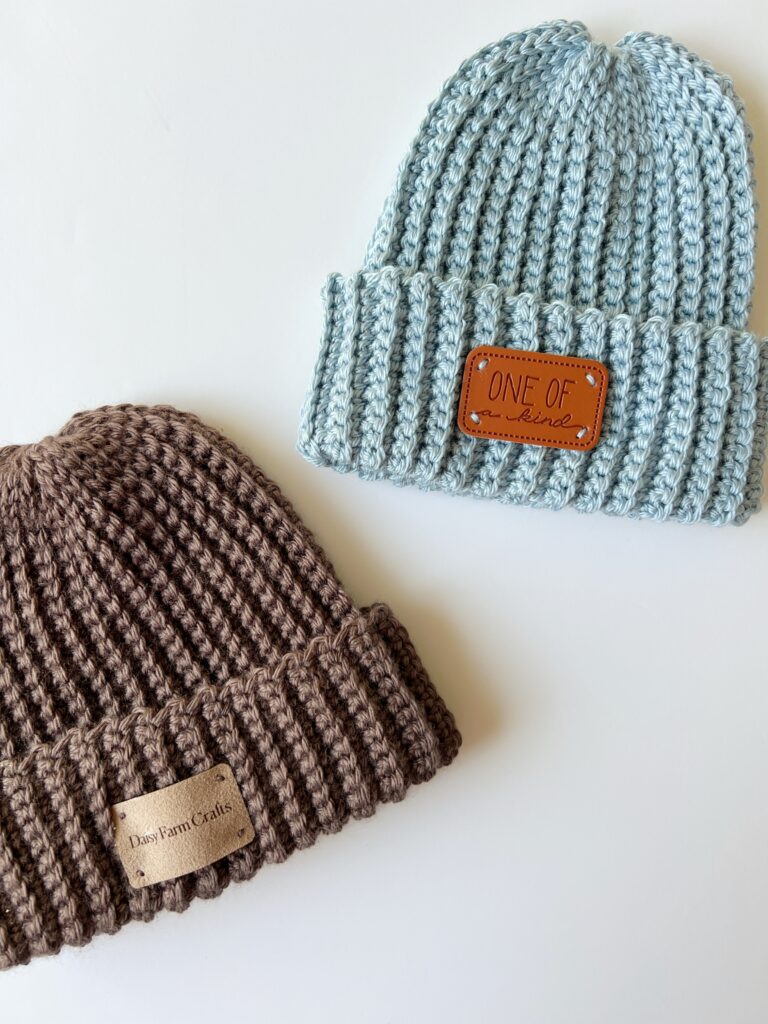
The finishing touch is adding a cute label! I happen to have leather labels with our name on them, but the “One Of a Kind” one I bought in a pack of labels from Michaels Craft Store. I bet you can find lots on Etsy as well.
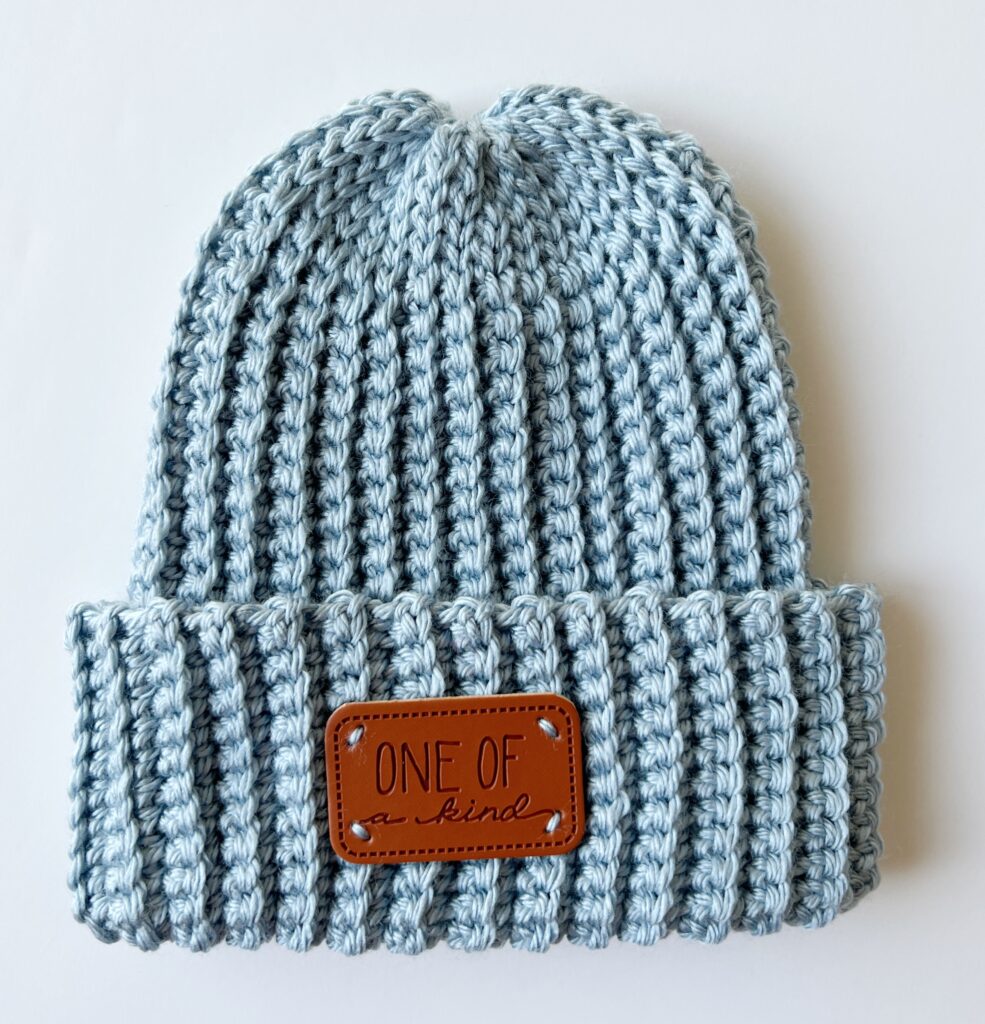
If you’ll notice the top of the hat the stitching is a bit different. I used slip stitches at the top of the hat to make the gathering in of the hat less bulky. The rest of the hat is back loop single crochet.
I made a Youtube tutorial if you need a visual, I’ll link it at the end of the post as well as the free printable version.
Materials
1 skein Caron Simply Soft in any color
Size H/5.00mm size hook, tapestry needle, scissors
Label (optional)
Size Chart
Stitches
Back Loop Slip Stitch (SL ST): Insert hook into back loop of stitch, yarn over, pull loop back through and through loop on hook.
Back Loop Single Crochet (SC): Insert hook into back loop of stitch, yarn over and pull up a loop, yarn over and pull through two loops on hook.
Pattern
Make a chain to the length of the hat height that you need. For baby Jack I made the chain 10 inches long and chained 40.
(I haven’t tested other sizes, but adding three inches to the measurement of the tip of the nose to the crown of the head is a good guideline. This will make sure you have enough for the brim to fold up. If you want a slouchy hat, add even more length to the base chain.)
Row 1: Beginning in the second chain from the hook, work 1 SL ST under the back loop. Work 1 SL ST into each of the next 4 chains. SC into each chain to the end. CH 1 and turn.
Row 2: Work 1 SC into the back loop of each SC. Work 1 SL ST into the back loop of each of the remaining 5 sts. CH 1 and turn. (Keep your sl stitches loose, especially the last one before you chain and turn.)
Row 3: Work 1 SL ST into the back loop of each SL ST. Work 1 SC into the back loop of each SC to the end of the row. CH 1 and turn.
Repeat rows 2 and 3 until the hat measures 3 inches less that the circumference of the head. For baby Jack this was about 62 rows. He has a 17 inch head circumference.
End the last row on Row 2 instructions so the tail is at the top of the hat. Tie off leaving a long tail for sewing.
Weave in and out of the top of the hat to gather close, then sew the two sides together. Tie off and weave in the ends. Roll up the brim and attach label.
Enjoy and take cute photos of your baby and come share with us! Thank you for stopping by! Happy Crocheting xo, Tiffany
Click here or on image below for printable pattern