POST EDIT:
Hi there! It’s Tiffany, I loved Cyndi’s new pattern so much, I quickly whipped up a baby hat version in Bernat Softee Cotton to give it a try.
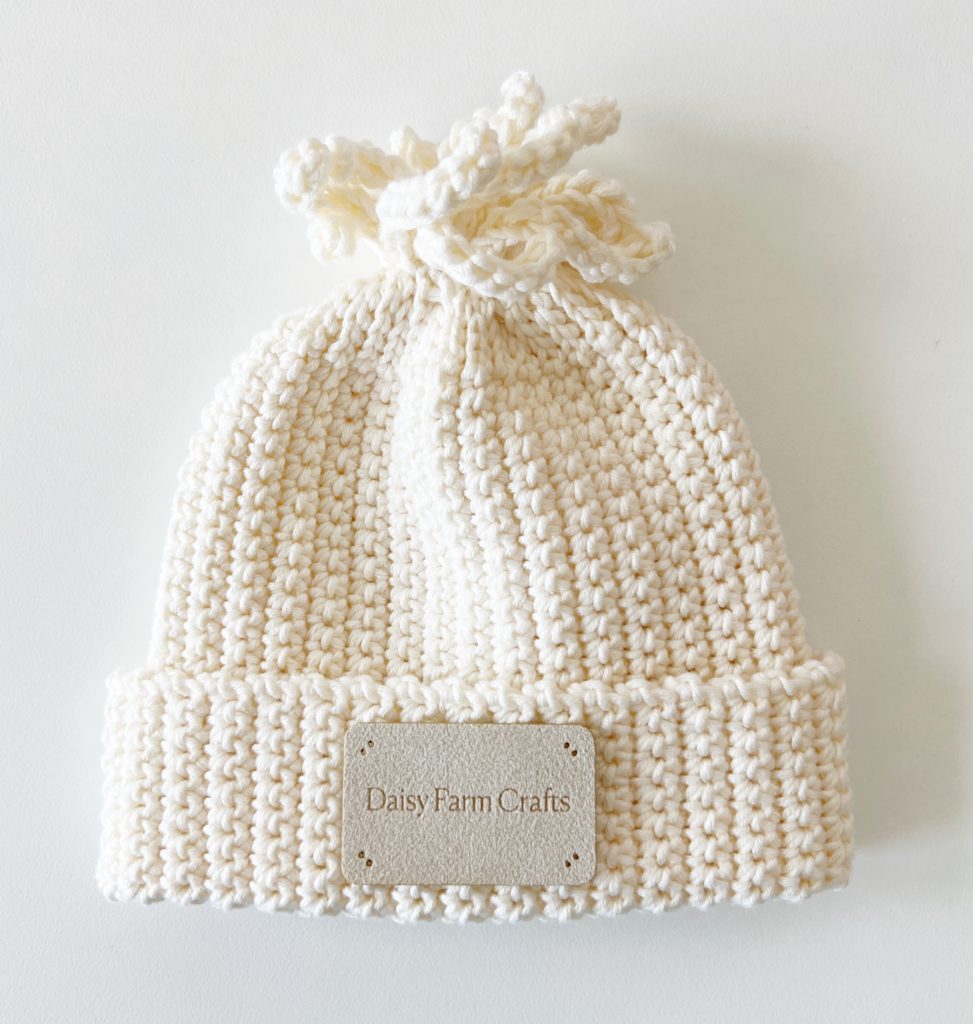
I adjusted the starting chain to be 7 inches which was about 40 chains. But worked the rest of the pattern the same. I used a G 4.00mm size hook, and 1 skein of Bernat Softee Cotton. I worked until I had 13 inches of width.
I also have a short video tutorial to help you too.
I can’t wait to try this on my grandbaby!
Okay, keep reading for Cyndi’s experience….

Hello Crochet friends!
It’s Cyndi and today I am sharing this crochet fun fringe beanie. It’s an all-in-one beanie that has built-in top fringe.

I’ve made a couple of scarves over the past few months since Tiff started teaching me to crochet. And I have found that traditional cut fringe is really difficult for me to do well.
I cut it too short, or the ends don’t match, I make a big mess, it takes a lot of time– fringe was not my friend.
If you have followed along with me on my crochet journey, you might have noticed the Single Crochet Weave Scarf with the fantastic fringe I designed.
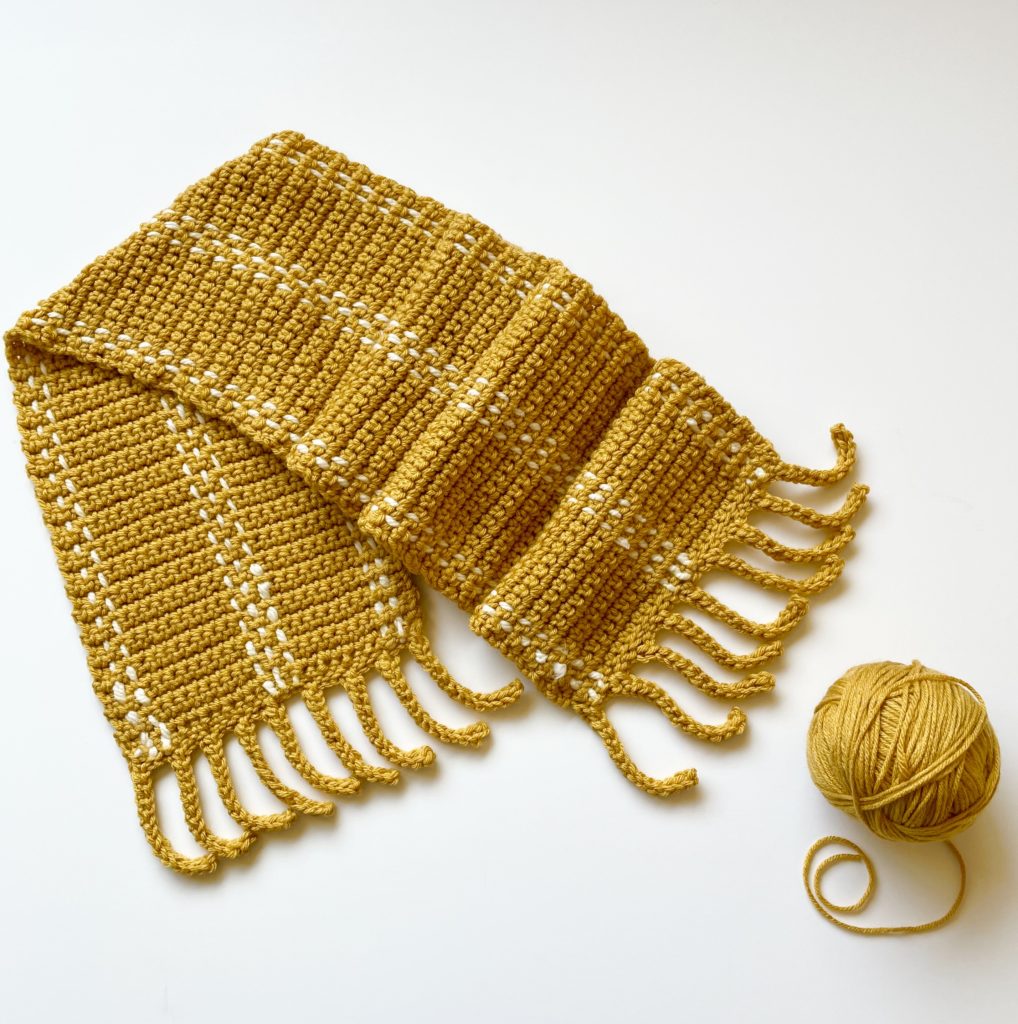
For that one, I made the fringe out of the Half Double Crochet Slip Stitch. I was very pleased with how that turned out and so I decided to make a matching hat!
For my first try on the hat, I stitched a Single Crochet square and then went back and slip-stitched the fringe on the edge separately. It worked okay, but it was a little messy crocheting on the non-stitch edge.
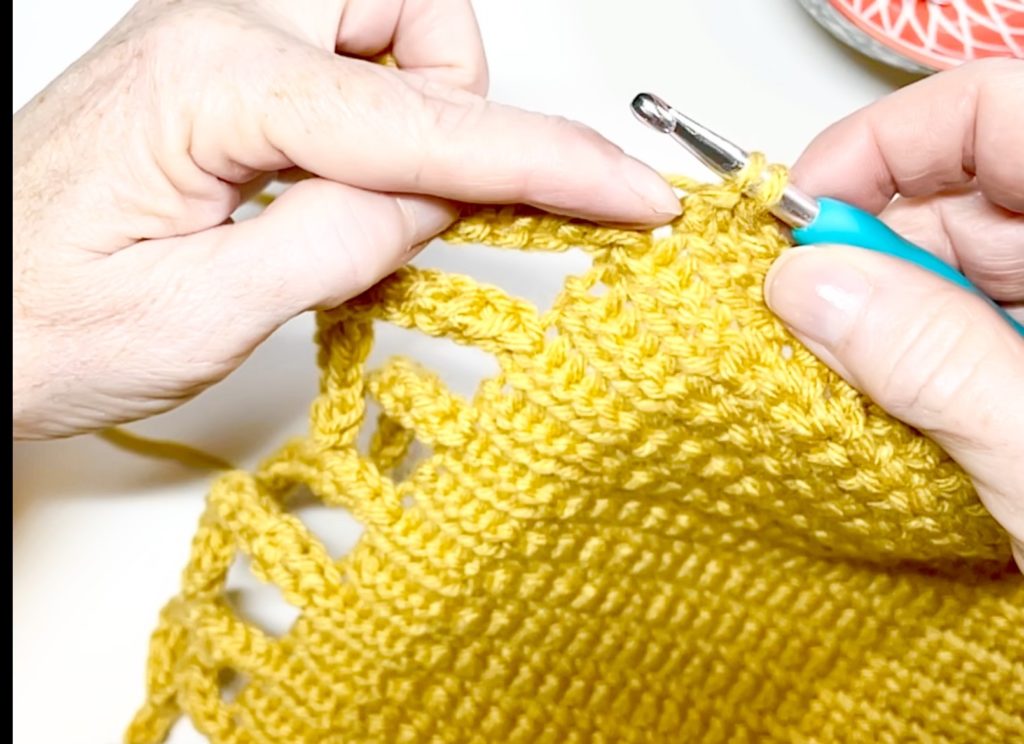
When I showed it to Tiff, she suggested I design the hat’s pattern with the fringe as part of a row. By doing it that way, it made making the hat and the top fringe a seamless process. 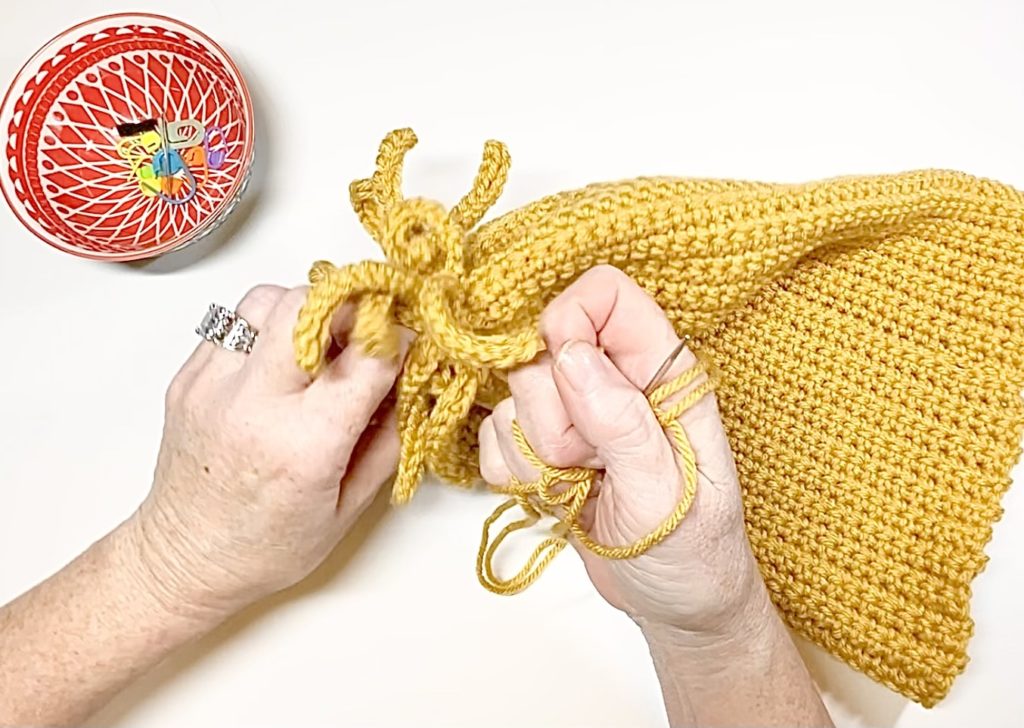
She explained to me how to do it and lo and behold, I followed her instructions and it worked!
It really turned out great and I love Tiff’s design addition. I think you will too!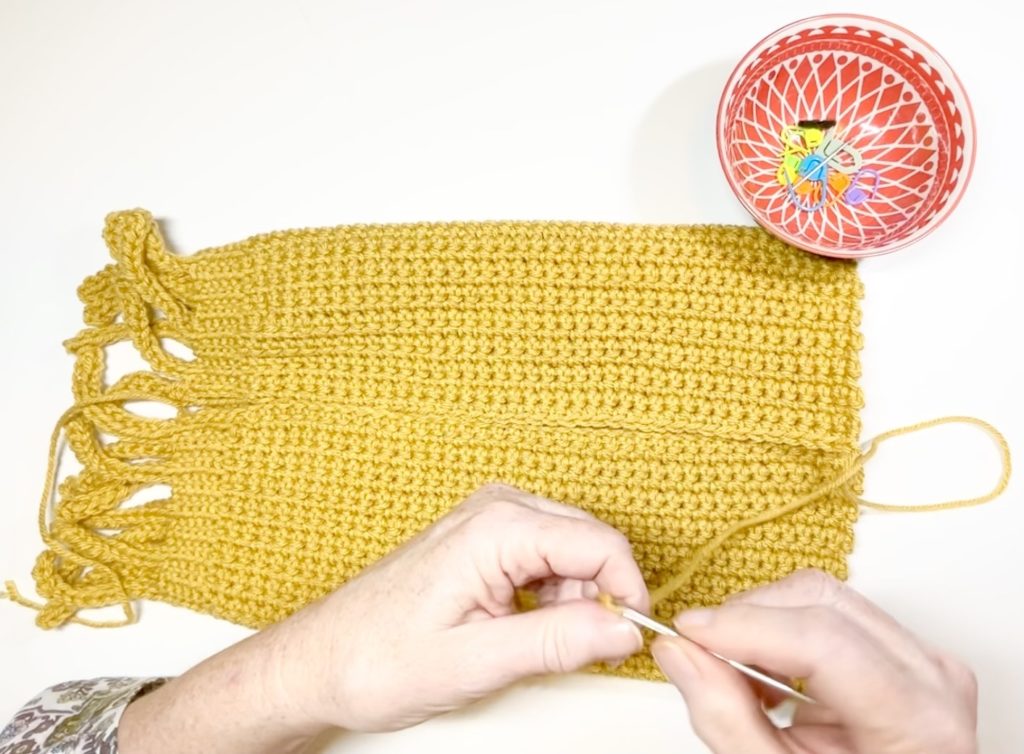
(Also, if you are interested, I made an experimental variation of the beanie that Tiff and I discussed on our Crochet Sister Chat on YouTube. Is it a hat? Or. . . is it a hair net? You be the judge!)
Materials
Caron One Pound (100% acrylic, 7 oz/198g, 364 yds/ 333 m, 4 weight worsted)
1 skein Dijon
5.5 crochet hook, tapestry needle, measuring tape, button (optional)
Stitches
SINGLE CROCHET (SC) – Insert your hook, YO and pull up a loop, YO and pull through two loops on hook.
HALF DOUBLE CROCHET SLIP STITCH (HDSS) –YO, insert your hook into back loop, YO, pull up a loop and pull directly through two loops on hook.
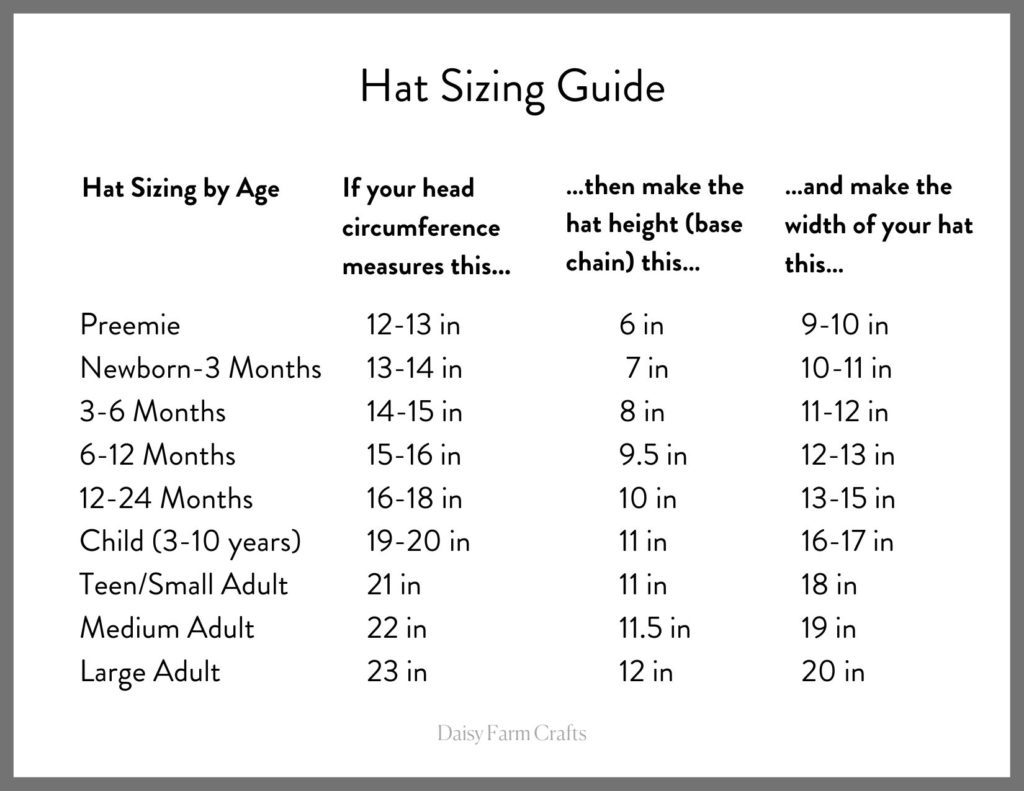
Size
The size I made for this pattern fits my 22-inch circumference head but here is a rough size guideline. The hat height includes two to three inches for the brim that you roll up. If you want a less slouchy hat, make your starting chain shorter.
Pattern
HOW TO DETERMINE HAT SIZE:
The best way to make sure your hat fits is to make your base chain the measurement from your chin to the crown of your head for a slouchy look, about your nose to the crown for less slouchy. You are making this hat lengthwise, so the length of your base chain will be your hat height.
Chain 51.
ROW 1: Starting in the 2nd chain from hook, work 1 SC. Work 1 SC into 45 chains across. Slip Stitch (SL ST) into 5 remaining chains. Chain (CH) 13 (for fringe) and turn.
ROW 2: Begin in the second chain from the hook, work 1 Half Double Crochet Slip Stitch (HDSS) into each of the next 12 sts. SL ST into back loops of each of the next 5 sts. SC into each SC. CH 1 and turn.
ROW 3: SC into each of the next 45 sts. SL ST into back loops of each of the next 5 sts. CH 1 and turn.
ROW 4: SL ST into back loops of each of the next 5 sts, SC into each SC. CH 1 and turn.
ROW 5: Work 1 SC into each SC. Work 1 SL ST into each of the next 5 back loops of SL ST. Chain 13 and turn.
Repeat ROWS 2 through 5 until you have the width you need for size. (Make the hat 3 inches less than the circumference of the head. For example, a 22-inch head, make the hat 19 inches wide.)
Make one last Row 4 instruction to tie off at the bottom of the hat.
Tie off and leave a really long tail (probably about 15 to 20 inches). Fold hat length wise with fringe on one end. Sew the sides together.
Use the rest of the tail to weave in and out around top of the hat and at the base of the fringe, pulling it tight to gather in. (Optional: finish the inside gathered spot with a button for style.)
If the part about sewing up the sides and gathering the top doesn’t make sense, see video below for help.
https://youtu.be/-WWGlInArxk
Tiff and I will be back with Crochet Sister Chat the first week of November! See you then!!
XOXO
Cyndi
Click here or picture below for pattern.
![]()