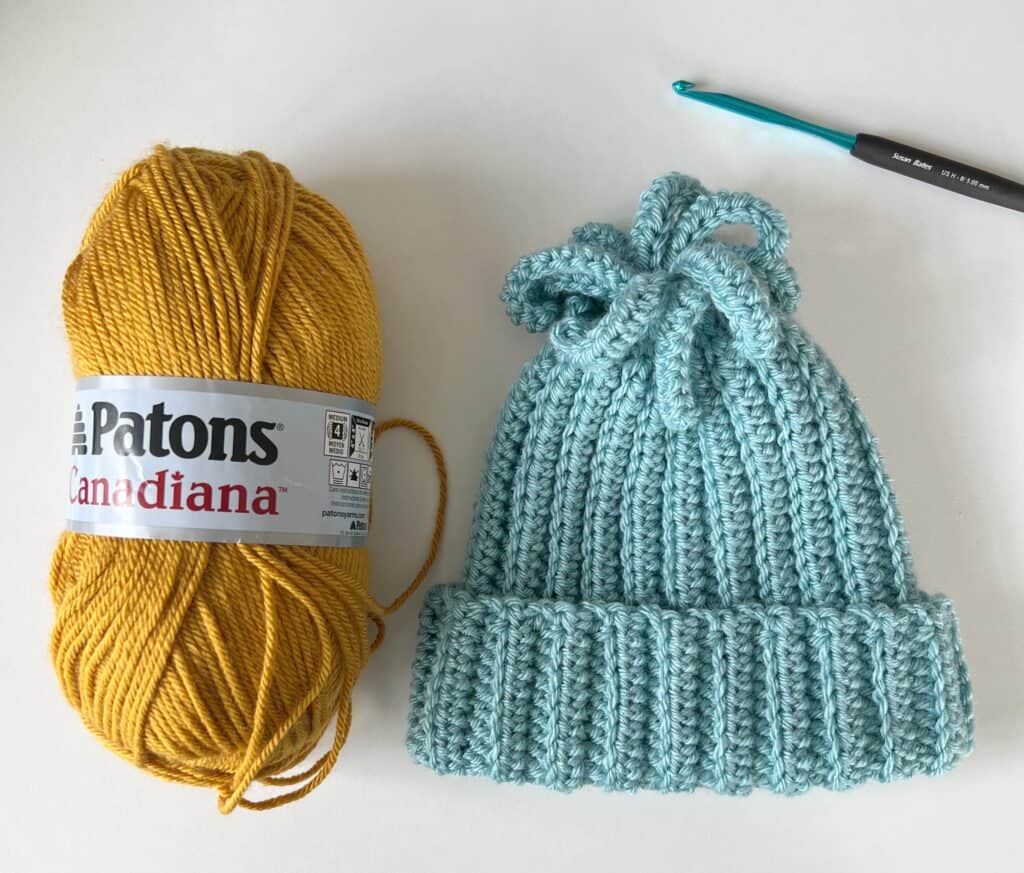
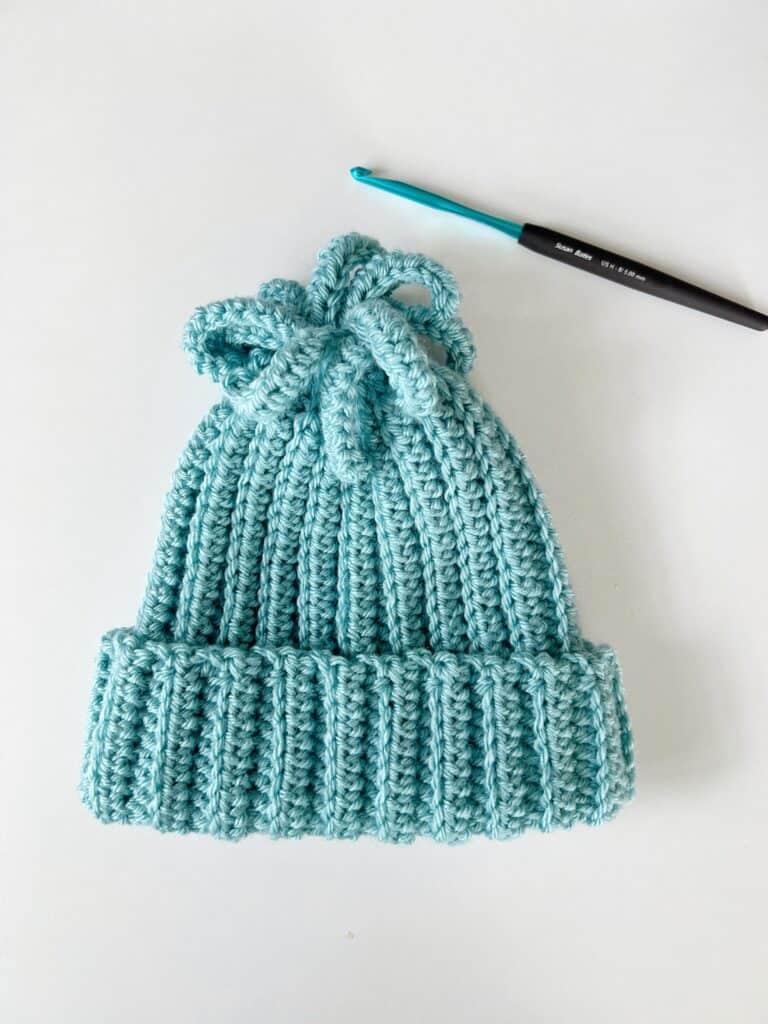
Three cheers for Fun Fringe! This has been such a game changer for those of us who don’t like making pom poms for the top of hats.
I’ve loved making the extra fringe at the same time as the hat as well. They work up so fast and easy. I made one for baby James and he wore it hiking!

I had a feeling that Patons Canadiana would become a favorite yarn for the Fun Fringe hat.
It is one of the nicest acrylics to work with. It has the right amount of softness and the right amount of bounce. It also has an array of beautiful colors to choose from.
We recently rounded up all 28 patterns we have made with Patons Canadiana if you’d like to see more projects that we’ve made with it. (We happen to be also collaborating with Yarnspirations.com for a discount code through the end of October 2025. See the post with the 28 pattern round up for more information.)
Here’s one more picture of baby James out hiking with his mommy and daddy:

And here he is chilling on the Ribbed Velvet Throw:

Stitches
Half Double Crochet (HDC): YO, insert your hook, YO and pull up a loop, YO and pull through all three loops on hook.
Slip Stitch (SL ST): Insert your hook, YO and pull a loop back through and through loop on hook.
Materials
Patons Canadiana (tap name to shop on Yarnpsirations.com)
1 ball any color
- Ball Size – 100 g / 3.5 oz, 187 m / 205 yds
Size H, 5mm crochet hook, tapestry needle, scissors
Size Chart
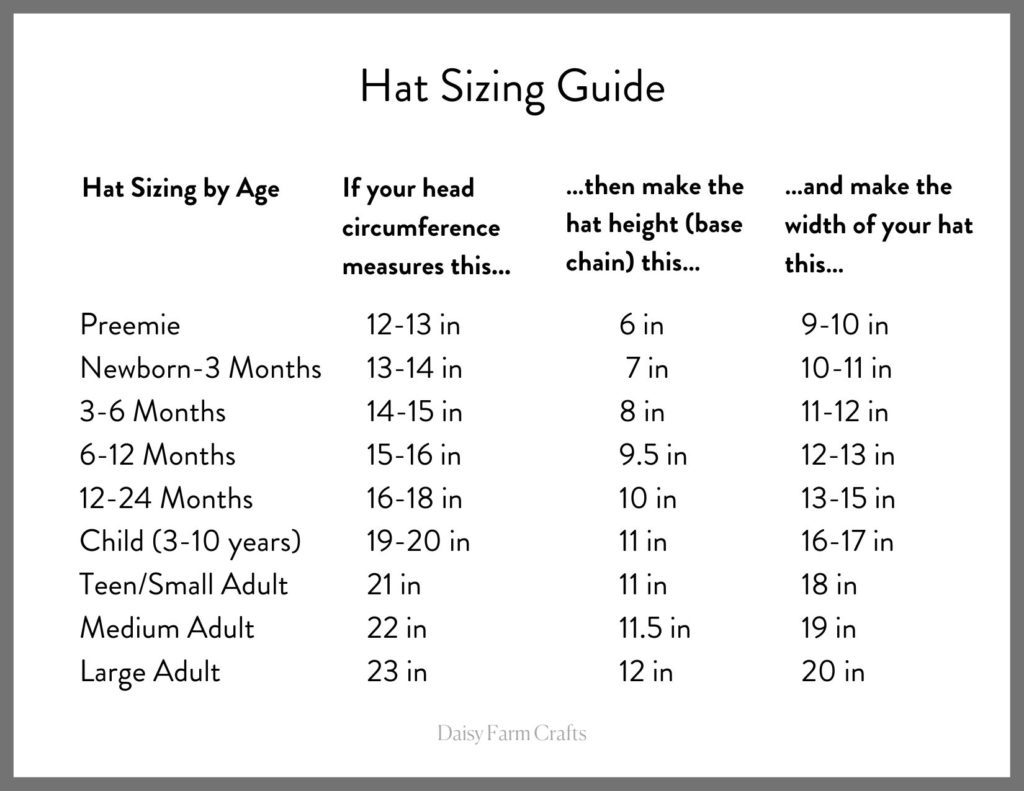
The hat height given in the above chart includes 2 inches of brim that is rolled up. If you want your hat slouchier, add an extra inch.
Pattern
This written pattern is for a size 6 to 12 months, use the chart above for different sizes.
Chain 36 or length needed for hat height of size desired.
ROW 1: Begin in the third chain from the hook with HDC. HDC into each of the next 31 chains. Work SL ST into the final 3 chains, CH 1 and turn.
ROW 2: In the back loop of the first st, work 1 SL ST, back loop SL ST into the remaining 2 SL ST. Work HDC into the back loops of all HDC. CH 2 and turn.
ROW 3: HDC into the back loop of each HDC, SL ST into the back loop of final 3 SL ST, chain 12 and turn.
ROW 4: Beginning in the third chain from the hook, HDC into each chain (fringe made). Back loop SL ST into each of the 3 SL ST, back loop HDC into each HDC. CH 2 and turn.
ROW 5: HDC into the back loop of each HDC, SL ST into the back loop of final 3 SL ST, chain 1 and turn.
Repeat rows 2 through 5 until you have 41 rows or the width needed for size.
Tip: make your last row end at the brim of the hat if you’d like to slip stitch the two sides together.
To join the hat, match the last row and the first row together. Work slip stitch in the front loop of the HDC and underneath the chain of the first row.
Tie off with a long tail. Using a tapestry needle, gather the top of the hat together, just under the fringe. Work the tail around the base of the fringes several times to secure. Weave in the end and clip.
See the video below if you’d like a video tutorial:
Happy Crocheting,
XOXO, Tiffany
Click here or image below for free pdf download of pattern.
![]()