Hello! Nicolina here with another crochet beginner-friendly blanket- the Sedge Stitch.
This stitch may look complicated but I promise it isn’t and this type of yarn made it even easier.
The stitches used are single crochet, half double crochet and double crochet. It is really good practice to learn how each stitch is made.
After a while, it felt very rhythmic and I really enjoyed the relaxing nature of this particular stitch pattern. The Sedge Stitch is definitely a classic stitch in crochet.
I designed my stripes to be a little atypical and follow a repeating pattern but in an interesting way.

The Sedge Stitch pattern is flexible in whatever way you’d like to design your stripes. If you want other design ideas, check out the post below.
Tap here if you would like to see the roundup post with Sedge Stitch Blankets.
I first learned this stitch and wanted to try it from a blanket that my older sister Hannah designed.

I loved the look of the little clusters so I was curious about how she did it. I hope to learn how to make the border she did someday!
Tap here if you want to see Hannah’s version of the Sedge Stitch Baby Blanket.
But about borders, if you are a beginner like me, this is a great blanket to make because you do not have to put a border on it. Once you make the blanket, you weave in the ends and you are done.
Borders are sometimes hard to add on after if you are a beginner because the spacing on the sides of the blankets are difficult to know exactly where to place your hook.
I was happy to not have to do a border and the blanket still looked amazing!
The best thing I did, before starting the blanket, was watch this quick clip on about how to make the Sedge Stitch that my mom recorded on YouTube.
Tap here to watch it on Youtube or tap the Youtube play button below:
My mom actually has a lot of stitch tutorials on her Youtube channel if you want to check it out, they are quick and so helpful when you want to create a crochet project!
Tap this link if you want to see the whole Crochet Stitches Playlist on Youtube.
Let’s get to the pattern! Be sure and scroll to the very end of the post if you’d like a printable version of the pattern.
Enjoy!
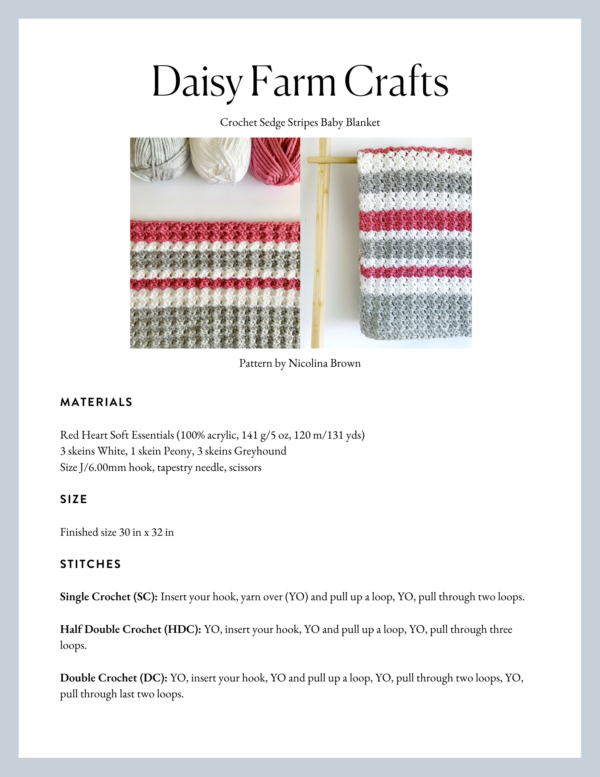
Materials
Red Heart Soft Essentials (100% acrylic, 141 g/5 oz, 120 m/131 yds)
3 skeins White, 1 skein Peony, 3 skeins Greyhound
Size J/6.00mm hook, tapestry needle, scissors
Size
Finished size 30 in x 32 in
Stitches
Single Crochet (SC): Insert your hook, yarn over (YO) and pull up a loop, YO, pull through two loops.
Half Double Crochet (HDC): YO, insert your hook, YO and pull up a loop, YO, pull through three loops.
Double Crochet (DC): YO, insert your hook, YO and pull up a loop, YO, pull through two loops, YO, pull through last two loops.
Pattern
With Gray, chain 99. (To make your blanket bigger or smaller, start with a chain that is any multiple of 3.)
ROW 1: In the second chain from the hook, HDC (half double crochet) and a DC (double crochet), skip two chains and in the next work SC, HDC, DC. Skip two chains and repeat “SC, HDC, DC” into the next space. Repeat across to the end and there is one chain left. Work 1 SC and turn.
ROW 2: Chain one (this counts as your first SC), HDC and DC into the top of the SC you just made. Skip over the DC and HDC, “SC, HDC, DC” into the SC. You’ll always be looking for the SC to do your “SC, HDC, DC” into. Repeat the pattern across ending the last stitch with one single crochet. Chain one and turn.
Repeat row 2 for the remainder of the blanket.
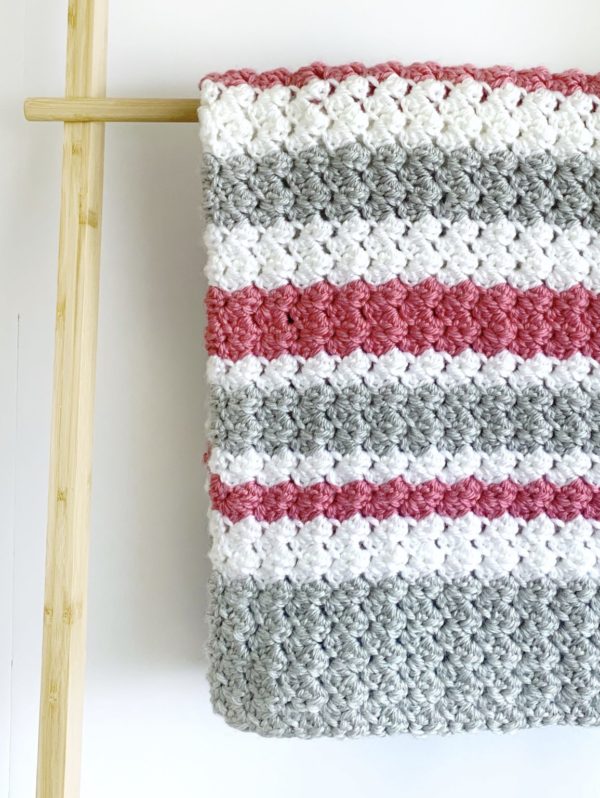
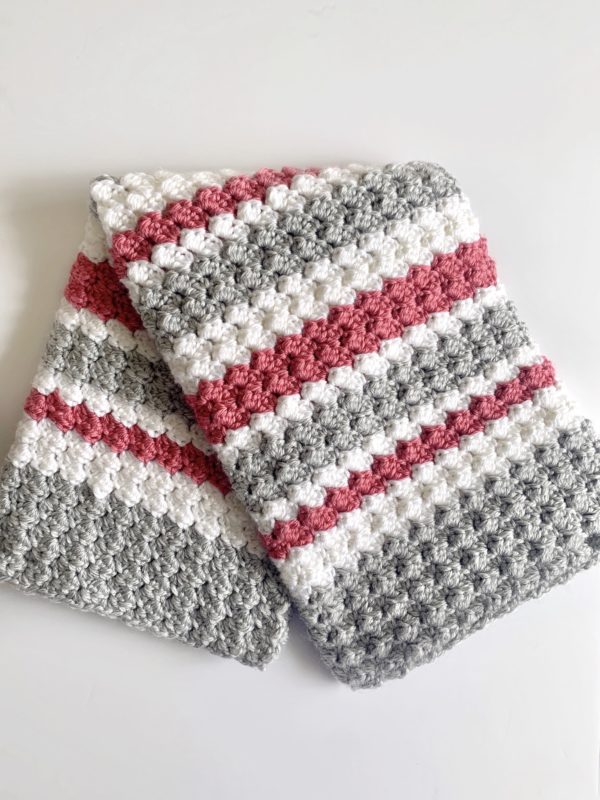
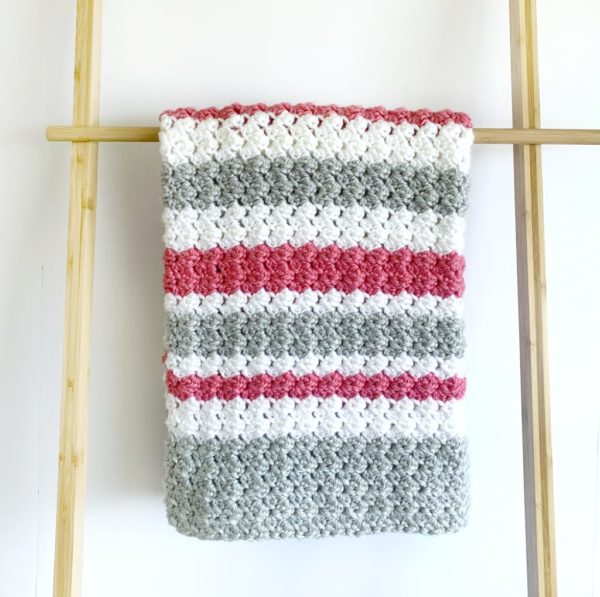
Here’s how I did my color changes: 8 rows Greyhound, 4 rows White, 2 rows Peony, 2 rows White, 4 rows Greyhound, 2 rows White, 4 rows Peony, 4 rows White, 4 rows Greyhound, 2 rows White, 2 rows Peony, 4 rows White, 4 rows Greyhound, 4 rows White, 4 rows Peony, 2 rows White, 4 rows Greyhound, 2 rows White, 2 rows Peony, 4 rows White, 8 rows Greyhound.
![]()
When changing colors, you want to pull through with the new color on the last SC of the row. Pull through with the new color just before you finish the stitch, when you still have two loops on your hook.
Then cut off the old color, leaving about a six inch tail that you can weave into the blanket with a tapestry needle later.
When you are finished with the blanket, tie off and weave in ends.
As I mentioned before, I decided to not do a border on this one.
The sides of the blanket have a nice straight finish and I didn’t think a border was necessary.
We do have a borders section here on the website, tap here if you want to browse through if you choose to add one.
To smooth out the blanket and ensure its shape, you may want to block it by using a spray bottle filled with water and getting the blanket wet.
Smooth out the blanket and leave it to dry.
Thanks so much for coming to read this pattern!
When you are finished with your blanket, please come share a picture with us on Facebook or Instagram using #daisyfarmcrafts, we’d love to see! xo, Nicolina
Click here or on image below for printable pattern