
Hello and welcome to my website! So many of you have found me because of this adorable Hudson Bay stripes inspired sweater and are anxiously awaiting the pattern. First, I’d like to introduce myself a little because I’m feeling nervous about this pattern I’m going to share. I am not a crochet professional by any means! I started crocheting again a few years ago, (I did learn as a young girl) in hopes I’d become a grandma. If you’d like to read about that more specifically, go here. I started making blankets wishing that if I crocheted it, they would come. (No grandbabies for us yet, but other babies did come!)
Anyway, I shared all about the blankets and other items on Instagram where many asked about the patterns. So, I started this website and I’ve loved sharing! So many have made the gingham blanket, the chevron blanket, or the modern granny and tagged me to see your lovely work. And now, it feels like that every blanket made from these patterns is just one more prayer sent heavenward to help my daughter and her husband start their little family. So, I thank you! You probably had no idea it meant that much to me, but it does.
Here’s the important thing you need to know about this project, it’s only the second sweater pattern I’ve written in my whole life. As I was writing it, I wished there was a crochet school I could have attended to learn the proper way! But, I have found with my other patterns that if I explain it as if I am sitting next to you, it turns out okay.
I previously have made a baby blanket inspired by the Hudson’s Bay colors and in my research, I kept seeing a cardigan. After I finished the blanket, I thought I’d take a stab at it and as I think you’ll agree, oh my gosh isn’t it the cutest? I’m praying so hard this pattern will work for you because every little one is just going to be adorable wearing this!
So enough about me, here we go, here is the pattern. Start praying.
P.S. I’d like to thank Yarnspirations.com for sending me the yarn to make this project. If you are a beginner, I’d like to recommend this brand.
Materials
Caron Simply Soft (100% acrylic, 170 g/6 oz, 288 m/315 yds)
3 skeins Off White, 1 skein each Sage, Autumn Red, Gold, Charcoal Heather
Tapestry needle, scissors, 4 stitch markers
Size I/5.5mm hook (I am suggesting Susan Bates for this stitch, for some reason that hook grabbed the yarn easily and let me work the stitch easier.)
Stitches
Herringbone Half Double Crochet (HHDC): YO, insert your hook, YO, pull up a loop and pull directly through first loop on hook, YO and pull through remaining two loops on hook.
If you’d like a refresher on how to make a Herringbone Half Double Crochet, watch the video clip below:
Double Crochet (DC): YO, insert your hook, YO and pull up a loop, YO and pull through two loops, YO and pull through remaining two loops.
Front and Back Post Double Crochet (FPDC & BPDC): A front post double crochet means you insert your hook from front to back around the post of the next DC and work a DC. A back post double crochet means you insert your hook from back to front around the post of the next DC and work a DC.
Size
(This sweater is approximately a 2T. The arms measured 11 inches from the shoulder to the wrist, 12 inches across the shoulders, and about 14 inches from shoulder to mid thigh.)
Pattern (Body)
Chain 44 in off-white
ROW 1: In the third chain from the hook, HHDC, and into each chain across. Chain 2 and turn. Stop here and we are going to put stitch markers into the 8th stitch from the hook, (count the stitch sitting at the bottom of the chain 2 as your first stitch,) 13th, 29th, and 34th.
ROW 2: In the second stitch from the hook, (the chain 2 counts as the first HHDC,) HHDC. Work a HHDC in each space until you reach a marker. In each of these marked places, you will be working 3 HHDC into that stitch. (This forms the shape for the neck.) Continue working HHDC in each stitch and 3 HHDC into the mark stitches and remove the stitch markers when you are finished. Make sure you are working the last stitch into the very first chain two. So there should be 9 HHDC worked after that last corner.
ROW 3: Chain 2 and turn, (This will always act as your first HHDC, so make sure you are working into the next stitch.) HHDC in each stitch across, working 3 into the middle 3 stitch you did for the corners. Remember your last stitch will be in the turning chain. (Pain, I know.) chain 2 and turn.
ROW 4 and 5: Repeat ROW 3. (Don’t forget to work the 3 HHDC into the middle stitch of the row below. If you are having problems finding it, take the time to just use your stitch markers if you need and mark them ahead of time.)
CHANGE COLOR to sage before finishing the last stitch of row 5 and work your chain 2 in the new color.
ROW 6, 7, 8 and 9: repeat ROW 3.
CHANGE COLOR to off-white before finishing the last stitch, work chain 2 in the new color.
ROW 10, 11, 12, 13: Repeat ROW 3.
CHANGE COLOR to red before finishing the last stitch, work chain 2 in new color.
ROW 14: (The armhole making row) Work your HHDC in each stitch to the first corner (the 3 HHDC’s that are in one stitch.) Work only ONE HHDC into the middle stitch, chain 4, and then skip over all the stitches to the next HHDC corner and work only ONE HHDC into the middle stitch, work your HHDC in each stitch across to the next corner and only work ONE HHDC into the middle stitch, chain 4, skip over all the stitches to the next HHDC corner, work ONE HHDC into that corner and then work the remaining stitches to the end. You just made armholes! Lay the sweater out at this point and make sure you put 4 chains in the armpit area. This will add some width to the rest of the sweater for the chest, and it helps to shape the sleeves.
ROW 15: Chain 2 and turn, work HHDC to the chain 4’s, go ahead and work 4 HHDC’s around those chains, then continue working across the back, put 4 HHDC’s in the next armhole too. Continue working your HHDC’s to the end, chain 2 and turn.
ROW 16 and 17: HHDC across, on the 17th row, when you finish, pull through with off-white. (Are you still remembering that the last stitch worked is into the chain 2 turning chain and that the chain 2 turning chain counts as the first HHDC of the next row? Double check.)
Row 18,19,20,21: Work HHDC in off-white, pull through at the end of the 21st row with gold.
ROW 22,23,24,25: Work HHDC in gold, pull through at the end of the 25th row with off-white.
ROW 26,27,28,29: Work HHDC across in off-white, at the end of the 29th row, pull through with charcoal heather.
ROW 30,31,32,33: Work HHDC across in Charcoal Heather, pull through at the end of row 33 with off-white.
ROW 34,35,36,37: Work HHDC across in off-white. CH 3 and turn.
ROW 38: Work DC in each stitch across the bottom of the sweater. The turning chain counts as your first DC. Chain 3 and turn.
ROW 39: FPDC around the next DC, and BPDC around the next. Continue across the whole row alternating FPDC and BPDC ending your last stitch with a regular DC into the top of the turning chain.
ROW 40,41,42: Continue working the FPDC and BPDC in an alternating fashion around each stitch, always ending with a regular DC into the turning chain, and always chaining 3 before you turn. Make sure you are working around the post of the DC, that’s how you will get the crochet to look like ribbing.
When you finish the last row, do not tie off, but do pull a large loop, you want to make sure the stitch doesn’t come undone, while you stop and weave in all the ends. You will be coming back to that spot and continuing on, but you do need to weave in the ends on the front of the sweater.
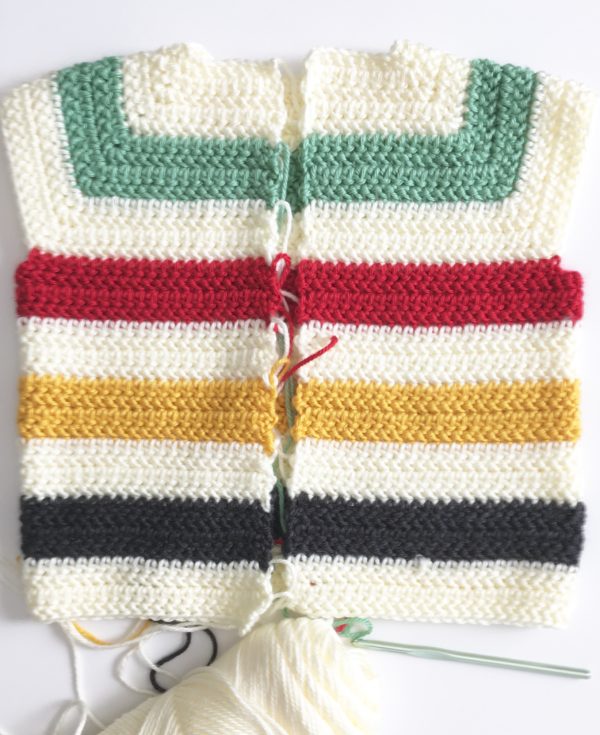
(The above picture does not show the ribbing, but I thought it would be helpful to show what you should have so far, except for the bottom ribbing.)
Collar and Front
ROW 1: Now it’s time to work DC up one side of the sweater and around the neck and back down the other side. Start with the chain 3, it will act as your first DC, work 2 DC per the side of a DC and work 1 DC per the side of a HHDC. When you reach the neck, work 2 DC into one stitch to round the corner, but not the inside corners, those will still receive only one DC. Continue your DC’s down the other side.
ROW 2: Now it’s time to work your alternating FPDC and BPDC stitches all the way around to the other side. Only work one stitch per stitch. (Your first stitch will be the first DC, not the turning chain.) No need to work 2 around the corners. End your last stitch into the top of the turning chain 3. CH 3 and turn.
ROW 3: Work the alternating FPDC and BPDC around each stitch, making sure you are inserting your hook the correct direction to form lines, or ribs.(Do not start with working around the turning chain. You will always work the last stitch into the chain 3, never work a post stitch around it.) Work all the way up the side, around the neck, and back down the other side, end with your last stitch into the top of a turning chain.
ROW 4: Work the ribbing stitch up the side and all the way around the neck, but STOP at the corner stitch, before you head down the other side, (where you previously worked 2 DC to turn the corner in ROW 1) and instead of working around the post with a DC, work a SC around the post, CH 1 and turn.
ROW 5: Work the ribbing stitch around the back of the neck to the other corner with your alternating FPDC and BPDC stitches, and substitute a SC for the DC, just as you did in ROW 4, CH 1 and turn.
ROW 6: Work around the back of the neck to the stitch just before the SC post stitch of the previous row and work another SC around the post, instead of a DC, CH 1 and turn.
ROW 7: Work around the back of the neck and repeat the instructions in ROW 6.
ROW 8: (Last time around the neck) (The trickiest part of the whole entire sweater, take a deep breath and I hope all your prayers are working as I explain this next part.) Work your way around the back of the neck and when you reach the stitches where you worked a SC instead of the DC, if you can see those SC posts, work around them, if not, reach down to the row below and just work around the DC. Continue on down the side making ribs. End with a SC into the last turning chain instead of a chain 3. CH 1 and turn.
(I hope that made sense!)
ROW 9: SC into each stitch up the side, around the neck, down the other side, around the bottom and back to where you started working 2 SC to round the corners when needed. SL ST to the first stitch, and now tie off and weave in the ends.
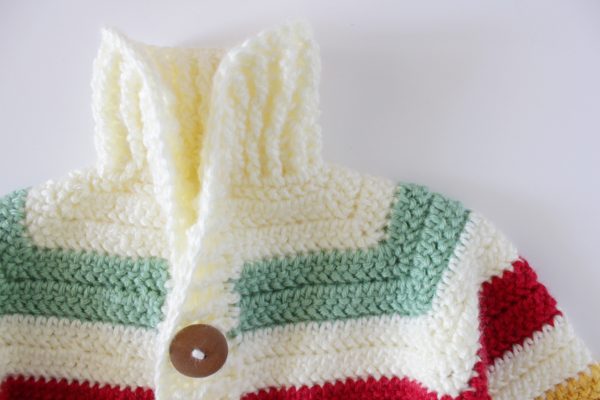
Whew! Here’s a picture of the collar: (buttons are the last thing you do.)
Now for the sleeves. TIP: Before you start, really look at the direction the stitches are facing before you pull up a loop to begin the sleeves. You want to make sure you will be going in the opposite direction as if you chained 2 and turned-just like how we were making the bodice. The best way I can tell is when you look down at the top of the stitch, make sure the smallest point of the V is pointing left, or on your left. then you know to crochet in that direction. (This is if you are right handed.) And the reason you need to make sure is so the herringbone pattern will line up correctly.
Sleeves
ROW 1: With red, pull up a loop and chain 2 in between the 4 HHDC that you worked around the 4 chains in the armpit area. Work a HHDC into the same space that you pulled up the loop. In the next two red spaces, HHDC2tog, and in the next two spaces after that, (one red and one off-white.) You just made 4 spaces into 2 stitches. Also, it helps to fill in the gaps and not have holes in the underarm. Now work 1 HHDC into each space around until you get to the very last off-white space. You will decrease again the last 4 stitches, starting with that last off-white space, with 2 sets of HHDC2tog in the same manner as before. Slip stitch into the top of the first HHDC you made, ignore the chain 2 just this row. CH 2 and turn. STOP here and COUNT. The goal is to have 30. If you have 31, or more, don’t worry, you can always decrease the next few rows. But if you have more than 33, maybe go back and do a HHDC3tog instead.
ROW 2: Now work 1 HHDC into each stitch around. (The goal is to have 29 of them HHDC and 1 the turning chain, to make a total of 30.) SL ST at the end of each round into the top of the CH 2, (confession, I cheat and just go under the chains, not into them, don’t tell my mom.)
Now, if you are needing to decrease, just SL ST into the first HHDC, that should reduce by one each row. I’d only do that twice. You want it to be to 30 stitches by the time you change back to the off-white.
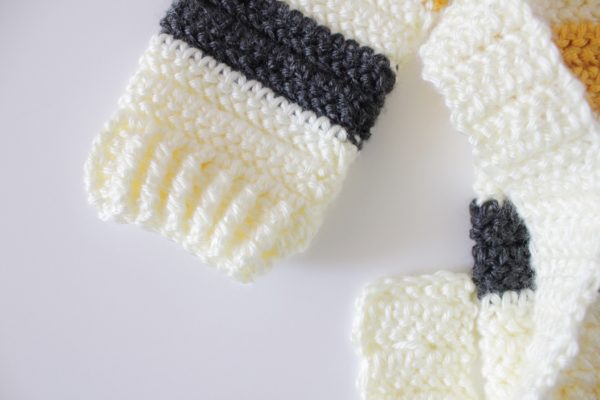
Finish the rest of the sleeve, changing colors as appropriate every four rows. When you finish with the last row of off-white, CH 3 and turn, work a DC into each stitch around, SL ST into the turning chain, then work 4 more rows of the alternating FPDC and BPDC which you are now a PRO! and make sure you are always SL ST-ing into the chain 3 turning chain.
In the very last turning chain, however, work a SC, chain 1 and turn and SC into each stitch around to make it look finished, tie off and weave in the ends.
Make your other sleeve! Then weave in all the ends.
Pocket (Make 2)
CH 12 in off-white, in the 3rd chain from the hook, HHDC. HHDC in each chain across, (10 HHDC).
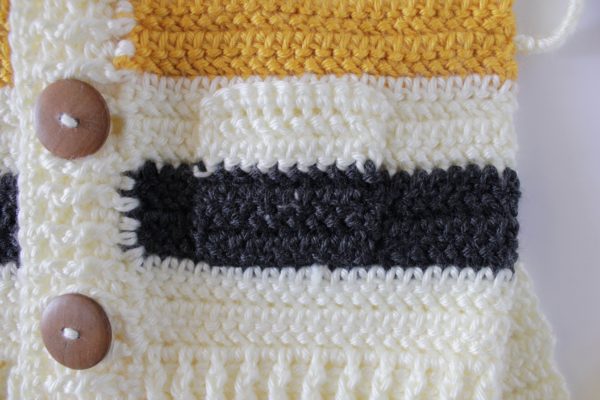
CH 2 and turn, the chain 2 counts as your first HHDC, HHDC in each stitch across, including the top of the first 2 chains. (11 HHDC). Work 2 more rows in off-white. Switch to Charcoal and work 4 more rows. Leave long tails of each color so you can sew the pockets onto the sweater. Line them up like in the picture and sew them with the long tails.
Belt
Chain 10 in off-white, in the 3rd chain HHDC. *HHDC in each stitch across. CH2 and turn, HHDC across and in the first chain 2. Repeat * until the belt is desired length. Cut and weave in the ends.
Belt Loops
Decide on the placement of the loops, pull up a loop, chain 10, slip stitch into the sweater to the second desired location, (about an inch or inch and a half a part from where you pulled up a loop.) SC around the chain 10 times and slip stitch to the starting space. Tie off and secure the ends.
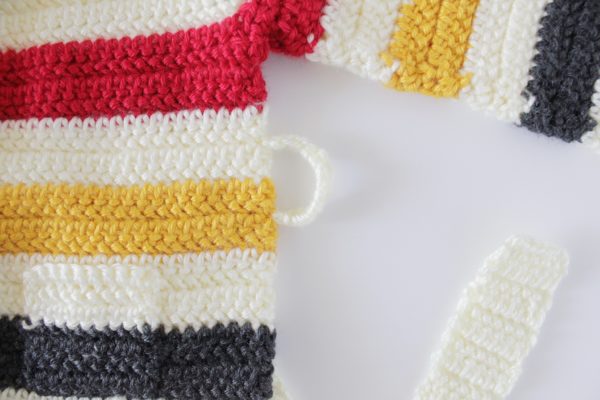
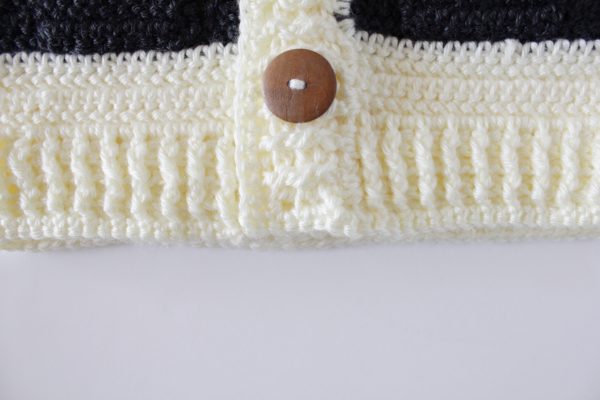
YOU’RE DONE! (Oh except add buttons. Make sure they fit through the ribbing. I took the sweater to Hobby Lobby and matched them up.)
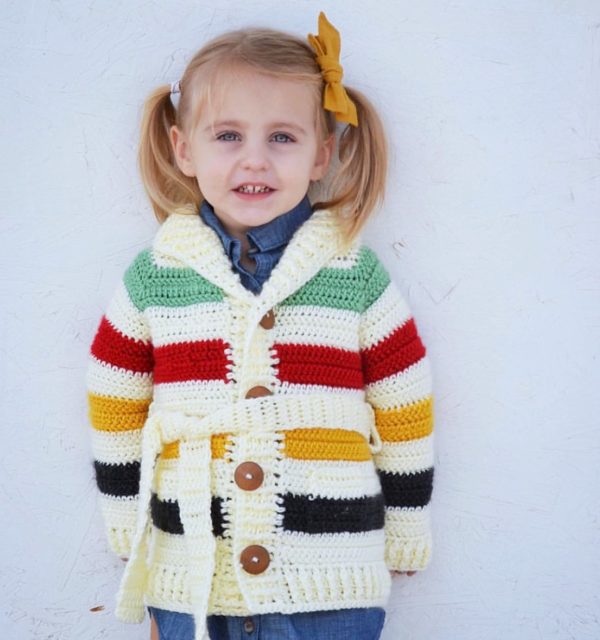
And..presenting Della! ahhh! How cute is that sweater on her! Love it!
Now, share a picture with us all! Tag me on Instagram @daisyfarmcrafts and use the #daisyfarmcrafts. Or post to my Facebook Page. I’d love to see the colors you choose! Please let me know of anything that needs clarifying about this pattern. Thank you for letting me share with you!
xo, Tiffany
