For a long time I’ve always thought it would be cute to have a go-to crochet pattern for little baby sweater shrug to go with all the adorable sleeveless dresses I see and always want to buy. (Honestly, I never was a fan of the sleeveless look for babies because I thought it would make them too cold, so maybe that was where my original desire came from!)
And then the other day, as Haley, Annie and I were out having lunch, which happened to be right next door to a baby clothes store, what was in the window but an adorable gingham dress! A crochet baby sweater shrug must be made for it! I immediately thought to myself. We popped into the store and bought it right away.
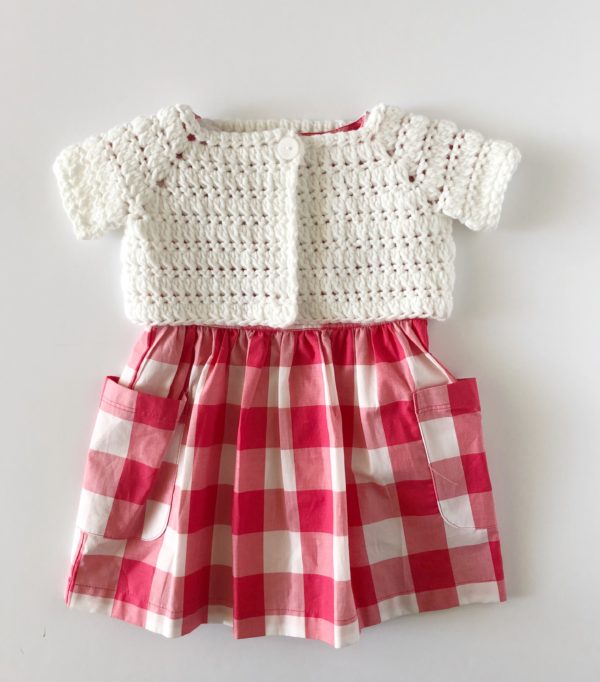
Now, you might be saying what is the big deal about gingham? Especially if you are just popping over from Pinterest and don’t follow me on Instagram or Facebook. Not to worry! I’ll show you why I love gingham:
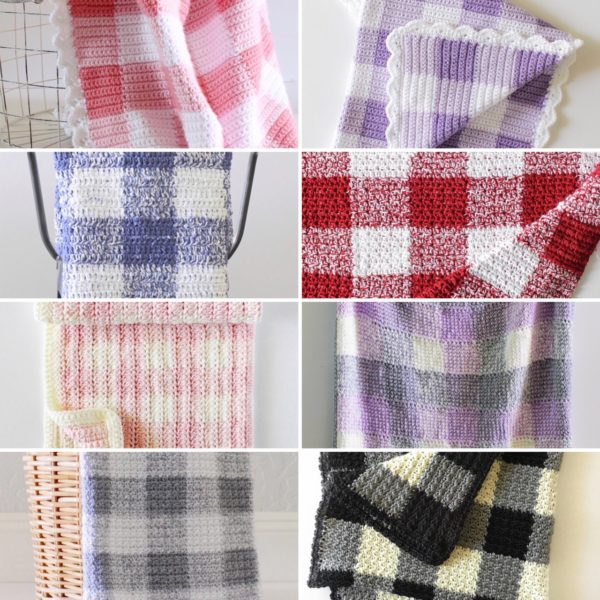
Last year I was brainstorming around for a new blanket idea and really wanted to make a gingham look blanket. I started with learning how to carry yarn through my work with a checkerboard blanket pattern. Which then eventually led me to use three colors and turning it into gingham check. I’ve loved it ever since and have made eight gingham blankets. All the patterns are here on my site, just click the highlighted words and you can choose which you’d like to make yourself if you happen to love that look too!
So back to the baby sweater though. I have used this stitch before in a light pink gingham blanket and have a video clip demonstrating how to make the double crochet two together cluster stitch (DC2TOG) if you need a refresher on how it is worked:
Here are the stitches explained that are used in this sweater:
A DC2TOG is made by combining two DC together into a cluster. Yarn over, (YO) insert your hook into the designated stitch, YO and pull through. YO and pull through the first two loops on your hook and stop. YO and insert your hook into the exact same stitch, YO and pull through. YO and pull through the first two loops again, then YO and pull through all three loops remaining on your hook. The stitch is completed.
A single crochet (SC) stitch is made by inserting your hook directly into the designated stitch, YO and pull through, YO and pull through all loops on the hook.
A half double crochet (HDC) stitch is made by YO and inserting your hook into the designated stitch, YO and pull through, YO and pull through all loops on the hook.
Material
For the sweater pictured, I used a size 4 weight yarn by Loops and Thread. I bought at Michael’s and it was an acrylic, nylon and lycra type blend of yarn. (I bought it for the color.) It turned out too stretchy and boxy and thick so I made another in “I Love This Cotton” by Hobby Lobby and it still is a 4 weight yarn, but the drape was much better even though it was a whiter white than I wanted.
Whatever size 4 weight yarn you choose, you’ll need about 200 yards.
I used an I size hook for the cotton, and a K for the nylon/acrylic. I’m going to leave it up to you what size hook to choose, because from experience, most people use different yarn than I did anyway. So use the hook you need to go with the yarn you choose. (Just do a practice swatch to make sure the yarn isn’t curling up on you, that’s a sign it’s too tight and you need to go up a hook size.)
Scissors, tapestry needle
Size
Size 12 month to 18 month old
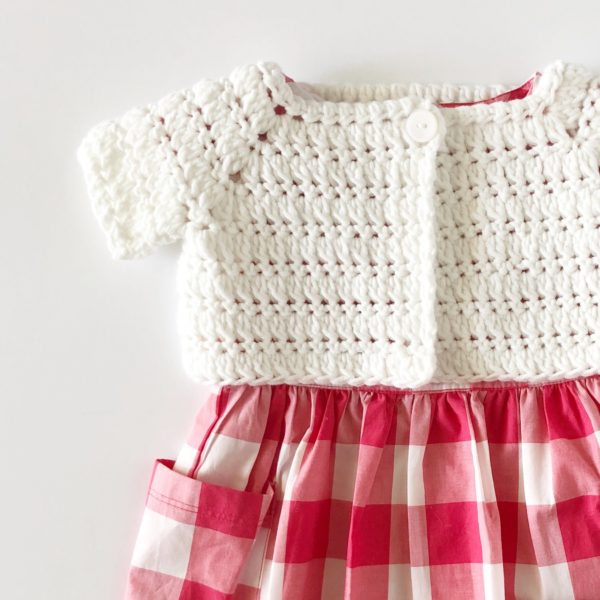
Stitches
Single Crochet (SC): Insert your hook, yarn over (YO) and pull up a loop, YO, pull through two loops on hook.
Half Double Crochet (HDC): YO, insert your hook, YO and pull up a loop, YO and pull through three loops on hook.
DC2TOG Cluster: YO, insert hook into designated space, YO, pull up a loop, YO, pull through 2 loops, YO, insert hook into the same space, YO, pull up a loop, YO, pull through 2 loops, YO, pull through all 3 loops left on hook.
Pattern
Chain (CH) 46.
Row 1: In the third CH from the hook, HDC. HDC in each stitch across. CH 2 and turn. (44 HDC)
Row 2: In the top of the first stitch, work one DC. (This will count as the first cluster along with the CH 2 turning chain.) DC2TOG cluster in the next 7 stitches. In the next stitch work DC2TOG, CH, DC2TOG, DC2TOG next 4 stitches, in the next stitch work DC2TOG, CH, DC2TOG, DC2TOG next 16 stitches, in the next stitch work DC2TOG, CH, DC2TOG, DC2TOG next 4 stitches, in the next stitch work DC2TOG, CH, DC2TOG, DC2TOG in the next 8 stitches, CH 1 and turn.
Row 3: SC in the first stitch and each stitch to the CH space that separates the two DC2TOG clusters. Work 3 SC into the chain space. Continue working a SC in each stitch around always working 3 SC into the CH space of each corner. CH 2 and turn.
Row 4: DC into first stitch, DC2TOG in each SC to the corner. Work DC2TOG, CH, DC2TOG, in the middle SC stitch of each corner. CH 1 and turn.
Row 5: Repeat row 3. Remember to always work 3 SC into the Chain space in between the clusters on each corner.
Row 6: Repeat row 4. Remember to always work DC2tog, CH, DC2TOG, in the middle SC of each corner.
Rows 7 and 8: Repeat rows 3 and 4.
Row 9: Joining for the armholes. (If you want your sweater bigger, keep increasing the rows. I suggest you have the dress you are making this for so you can measure how wide you need to go. Just make sure you are joining for the armholes on an all SC row.)
SC in each stitch to the corner. Work one SC into the middle SC of the row below, CH 1, skip over all the SC and find the middle SC of the next corner, work 1 SC into that SC. Continue working SC across the back of your sweater to the next corner SC, SC into the middle SC of the row below, CH 1, skip over all the SC and find the middle SC of the next corner, work 1 SC into that SC, continue working SC to the end of the row, CH 2 and turn.
(If that made zero sense, please watch the video help at the very end of this post and it will help you.)
Work the DC2TOG cluster in each SC stitch across, CH 1 and turn.
Work SC in each cluster stitch across, CH 2 and turn.
Repeat alternating the rows for as many as you need to get the desired length of your shrug. Tie off and weave in all ends.
Attach a button and you can be finished right here. Keep reading if you want sleeves.
Sleeves
Pull up a loop in the CH space under the arm, and SC. SC2TOG over the next 2 spaces, SC in each stitch around the arm to the last 2 spaces. SC2TOG the last two spaces, join with first SC. Chain 2 and turn. Work a DC into the first space, (just as you have been doing it counts as the first cluster along with the turning chain.) DC2tog cluster in each stitch around, join with a slip stitch to the turning chain.
Repeat alternating rows of SC and rows of cluster 2 times, or to the length of sleeve you desire.
Please watch this video for more help and ideas about making your sweater larger.
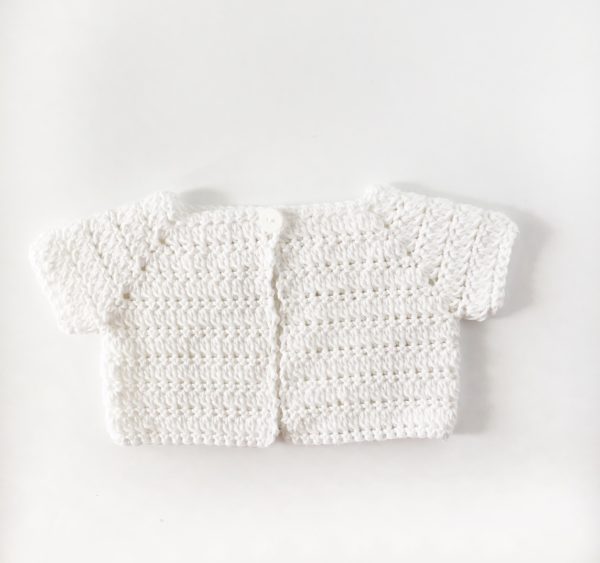
Here are pictures of the completed sweater in cotton. Can you tell it’s just a bit lighter looking weight wise? I liked the drape of this cotton better than the loop and thread nylon acrylic blend yarn.
Oh I forgot to say to grab any button you have and sew it on one side of the sweater. It should fit right into the first row of clusters. If not, you can also make a loop with several chains to the size you need to fit the button you have on hand.
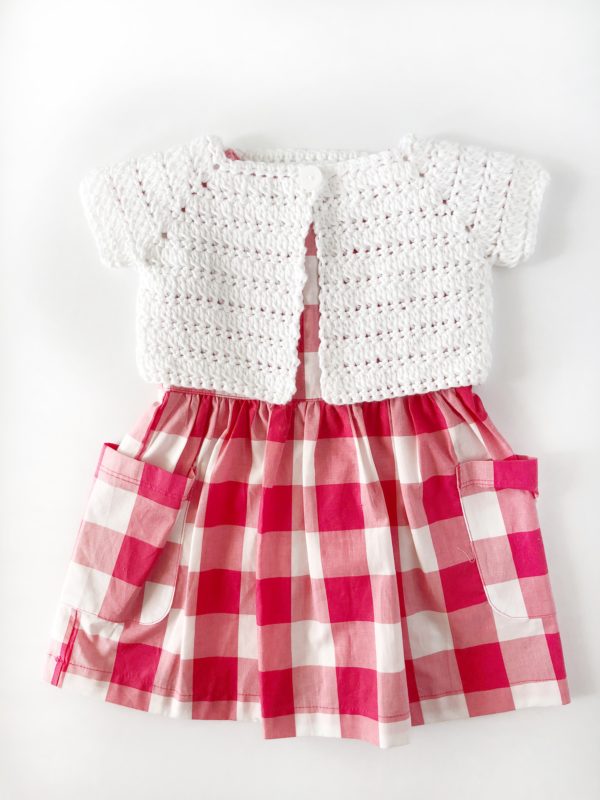
Come and find me on Instagram or Facebook and share a picture of your completed sweater! I hope it’s an easy and fast project for you.
xo, Tiffany
