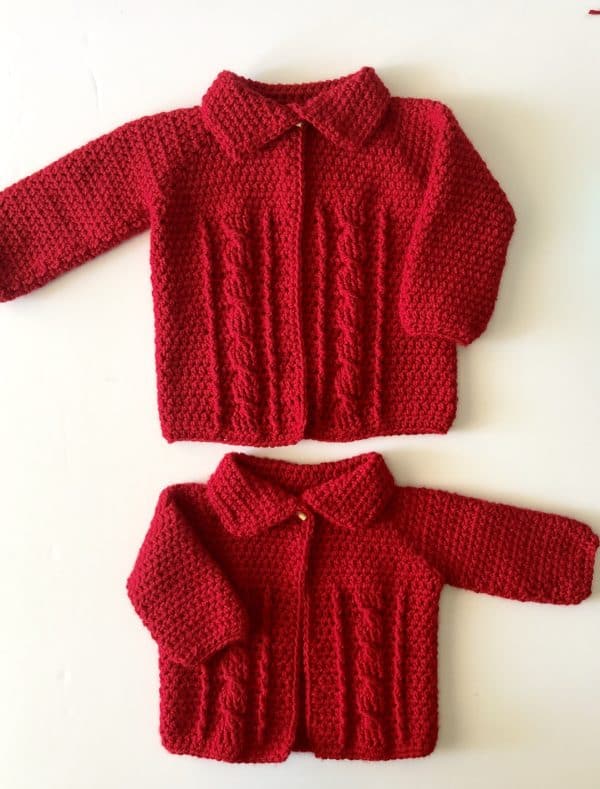
After making the simple cable baby sweater, Hannah and I thought that the cable would look so great in mittens! And now that they are finished, we both love them! So if you’ve already made the baby sweater, this will be a piece of cake!
First, I’d like to show you how they are constructed in case you are worried this is going to be a counting in the round nightmare type of project. (Trust me, I am not a work in the round type person, the more I can avoid it, the happier I am..)
These are made in a flat panel, sewn up the side, leaving a hole for your thumb. You’ll work the thumb in an easy no join, spiral method, skipping one stitch at the base of the thumb to angle the work upward. Trust me it works, and so easy!
You will be using your tapestry needle to gather the top of the mitten in, and the top of the thumb.

Also, notice in the pictures above that the base row is the top of the mitten. So you will be working from the top down, the last rows are the ribbing part for the wrists.
The trickiest part for me, was that I somehow ended up making samples of the left hand only! But I figured out how I needed to start each end differently and now they are fine. But here is a picture of all the samples I made:

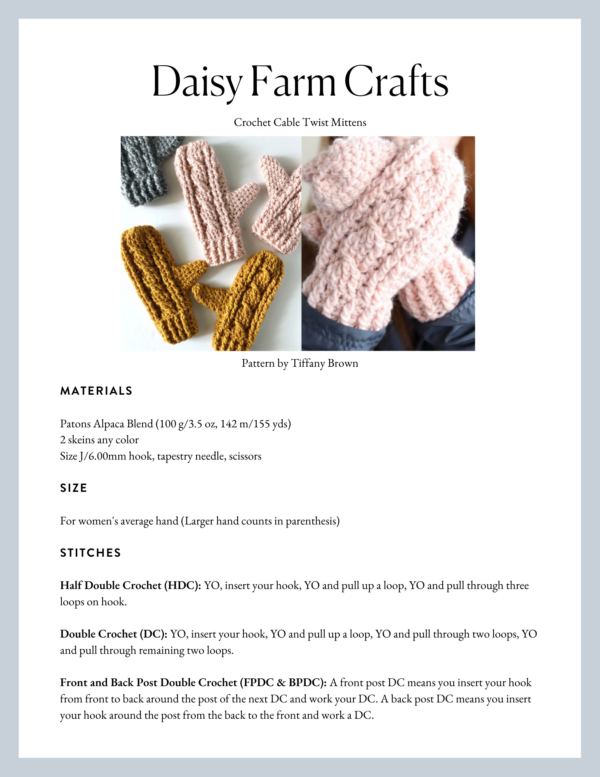
Before we get to the pattern, I’d like to talk about the yarn I used and how it worked up. The pink and the grey are made with Patons Wool Roving, the mustard in Patons Alpaca Blend. The Alpaca Blend is just a tad softer and have more drape, the wool roving is a slight bit stiffer. I can’t attest to the warmth factor quite yet! It’s still in the 70’s here in AZ, I’ll have to wait for our one week in January when the temps drop into the 50’s.
One last thing, the chain counts are based on my hand. Feel free to measure and adjust to your hand size, but I did experiment with two different chain lengths and have the bigger suggestion in ().
Materials
Patons Alpaca Blend (100 g/3.5 oz, 142 m/155 yds)
2 skeins any color
Size J/6.00mm hook, tapestry needle, scissors
Size
For women’s average hand (Larger hand counts in parenthesis)
Stitches
Half Double Crochet (HDC): YO, insert your hook, YO and pull up a loop, YO and pull through three loops on hook.
Double Crochet (DC): YO, insert your hook, YO and pull up a loop, YO and pull through two loops, YO and pull through remaining two loops.
Front and Back Post Double Crochet (FPDC & BPDC): A front post DC means you insert your hook from front to back around the post of the next DC and work your DC. A back post DC means you insert your hook around the post from the back to the front and work a DC.
Front Post Treble Crochet (FPTC): Insert your hook from front to back around the post and work a treble crochet: YO twice, insert your hook, YO and pull up a loop, YO and pull through two loops, YO and pull through two loops again, YO and pull through remaining two loops.
Pattern
RIGHT HAND
With a long tail to sew with later, make a loop and chain 24, (26)
Row 1: In the third chain from the hook work HDC. Work 1 HDC in each of the remaining chains. (22 HDC) (24 HDC)
Row 2: CH 2 and turn. 1 HDC in between each of the next 11 (13) spaces. (You are working under all three loops that a half double crochet makes or in between each post.) Work 1 DC in each of the next 2 spaces. Work 1 HDC in the next space. Work 1 DC in each of the next 4 spaces. 1 HDC in the next space. 1 DC in each of the next 2 spaces. 1 HDC in last space of the row, (should be the space in between the turning chain and last HDC.)
Row 3: CH 2 and turn. 1 HDC in first space. 1 FPDC around each of the next 2 DC posts. 1 HDC in next space, (be careful to work to the left of the next HDC and not the space to the left of the post you just worked.) 1 FPDC around each of the next 4 posts. 1 HDC in next space. 1 FPDC around each of the next 2 DC posts. 1 HDC in each of the remaining 11 (13) spaces.
Row 4: CH 2 and turn. 1 HDC in each of the next 11(13) spaces. 1 BPDC around each of the next 2 posts, 1 HDC, 1 BPDC around each of the next 4 posts. 1 HDC. 1 BPDC around each of the next 2 posts. 1 HDC.
Row 5: CH 2 and turn. 1 HDC in first space, 1 FPDC around each of the next 2 posts. 1 HDC. Skip next 3 posts and work 1 FPTC around the 4th post. Then work 1 FPTC around 3rd post, 1 FPTC around 2nd post, 1 FPTC around 1st post. Twist the work and 1 HDC in next space. 1 FPDC around each of the next 2 posts. 1 HDC in each of the next 11 spaces.
Row 6: Repeat row 4, making sure you keep the cable twisted.
Rows 7 & 8: Repeat Row 3 & 4.
Row 9: Repeat Row 5.
Repeat rows 6 – 9 two more times for a total of 4 cable twists. Then work one extra row of row 6.
Chain 3 and turn. Work DC into the next stitch (turning chain counts as first stitch) and DC into each stitch across the row.
*CH 3 and turn. Work alternating FPDC and BPDC around each post across the row. Work 1 DC around the turning ch. Repeat * for a total of 4 rows of ribbing. Tie off and leave a long tail for sewing.
Fold mitten in half. Gather the top with a tapestry needle, pull tight and then sew from the top down with a whip stitch along the two seams approximately 11 rows down, (measure against your hand.) Leave off and the end undone. Sew from the bottom up about 3 inches, (again, measure against your hand and adjust as needed,) leaving an opening for your thumb.
Pull up a loop in the top of the thumb opening, work 7 HDC down one side, (the 7th one is worked as close to the bottom seam as possible) then 6 HDC up the other side, do not join, you will be working in a spiral. Now start working in between the posts as before. Work each stitch toward the bottom, skip the space at the very bottom (that 7th stitch), and continue working each space back up and around. Skip a stitch in every round at the base of the thumb. This will angle the thumb and decrease the width. Work about 7 or 8 spiral rounds. (Keep trying it on and see how many you need.) Gather the end and tie off.
Weave in all the ends, closing up any holes around the base of the thumb if needed.
LEFT HAND
With a long tail to sew with later, make a loop and chain 24, (26)
Row 1: In the third chain from the hook work HDC. Work 1 HDC in each of the remaining chains. (22 HDC) (24 HDC)
Row 2: CH 2 and turn. 1 HDC in first space. Work 1 DC in each of the next 2 spaces. Work 1 HDC in the next space. Work 1 DC in each of the next 4 spaces. 1 HDC in the next space. 1 DC in each of the next 2 spaces. Work 1 HDC in each of the remaining 11 (13) spaces.
Row 3: CH 2 and turn. 1 HDC in each of the next 11 (13) spaces. 1 FPDC around each of the next 2 DC posts. 1 HDC in next space, (be careful to work to the left of the next HDC and not the space to the left of the post you just worked.) 1 FPDC around each of the next 4 posts. 1 HDC in next space. 1 FPDC around each of the next 2 DC posts. 1 HDC in last space.
Row 4: CH 2 and turn. 1 HDC in first space. 1 BPDC around each of the next 2 posts, 1 HDC, 1 BPDC around each of the next 4 posts. 1 HDC. 1 BPDC around each of the next 2 posts. 1 HDC in each of the remaining 11 (13) spaces.
Row 5: CH 2 and turn. 1 HDC in each of the next 11 (13) spaces, 1 FPDC around each of the next 2 posts. 1 HDC in the next. Skip next 3 posts and work 1 FPTC around the 4th post. Then work 1 FPTC around 3rd post, 1 FPTC around 2nd post, 1 FPTC around 1st post. Twist the work and 1 HDC in next space. 1 FPDC around each of the next 2 posts. 1 HDC in last space.
Row 6: Repeat row 4, making sure you keep the cable twisted.
Rows 7 & 8: Repeat Row 3 & 4.
Row 9: Repeat Row 5.
Repeat rows 6 – 9 two more times for a total of 4 cable twists. Then work one extra row of row 6.
Chain 3 and turn. Work DC into the next stitch (turning chain counts as first stitch) and DC into each stitch across the row.
*CH 3 and turn. Work alternating FPDC and BPDC around each post across the row. Work 1 DC around the turning ch. Repeat * for a total of 4 rows of ribbing. Tie off and leave a long tail for sewing.
Fold mitten in half. Gather the top with a tapestry needle, pull tight and then sew from the top down with a whip stitch along the two seams approximately 11 rows down, (measure against your hand.) Leave off and the end undone. Sew from the bottom up about 3 inches, (again, measure against your hand and adjust as needed,) leaving an opening for your thumb.
Pull up a loop in the top of the thumb opening, work 7 HDC down one side, then 6 HDC up the other side, do not join, you will be working in a spiral. Now start working in between the posts as before. Work each stitch toward the bottom, skip the space at the very bottom, and continue working each space back up and around. Skip a stitch in every round at the base of the thumb. This will angle the thumb and decrease the width. Work about 7 or 8 spiral rounds. (Keep trying it on and see how many you need.) Gather the end and tie off.
Weave in all the ends, closing up any holes around the base of the thumb if needed.
Videos that will help you if this is your first time working a cable stitch, (it’s easier than you think!) (if the videos below don’t load, click here to see on YouTube. And, here is the second video on YouTube.
If you need help with the ribbing stitch, watch this video: (Again, if the video doesn’t load, watch on Youtube here.)
I hope you have much success with your mittens! Please do visit the post about the cable stitch sweater if you want more video help about cables. I think the trickiest part is where to insert your hook after you work a post. There will be a giant gap and you’ll be tempted to insert your hook there, but don’t, find the space to the left of the next stitch. That way your stitch counts will always work out.
Thank you as always for stopping by! Come and find me on Instagram or Facebook and say hello! Also, feel free to click the sign-up button at the top right-hand side of the page and join our newsletter, it’s an email every time we publish a new post! You’ll stay up to date on what Hannah and I are making.
xo, Tiffany

Click here or on image below for printable pattern