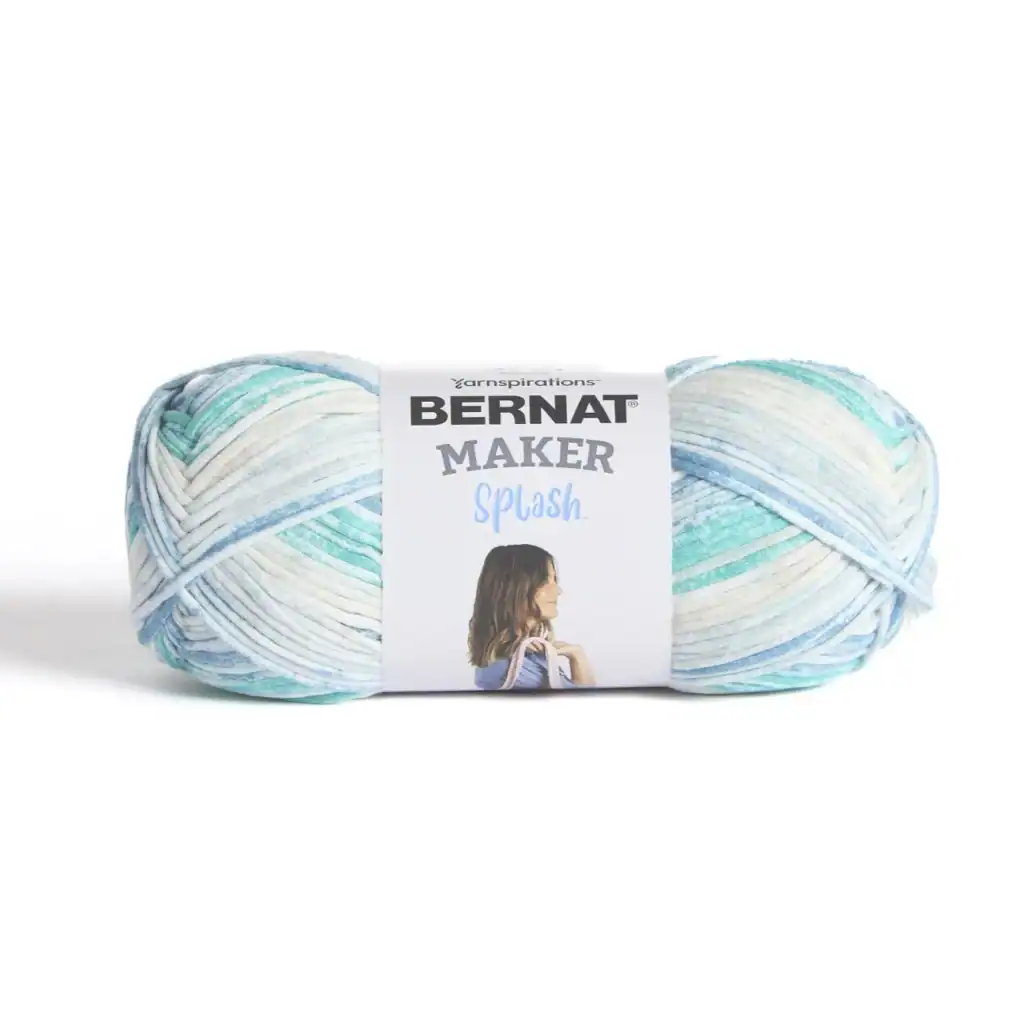
Hello friends, thanks for stopping by! Unfortunately, the brand of yarn, Bernat Baby Marly, I originally used for this pattern is no longer available. I’d like to offer you suggestions of similar brands as alternatives you could consider.
Although any yarn can be used with this pattern, we offer the pattern repeat so you can adjust the starting chain to the size you need.
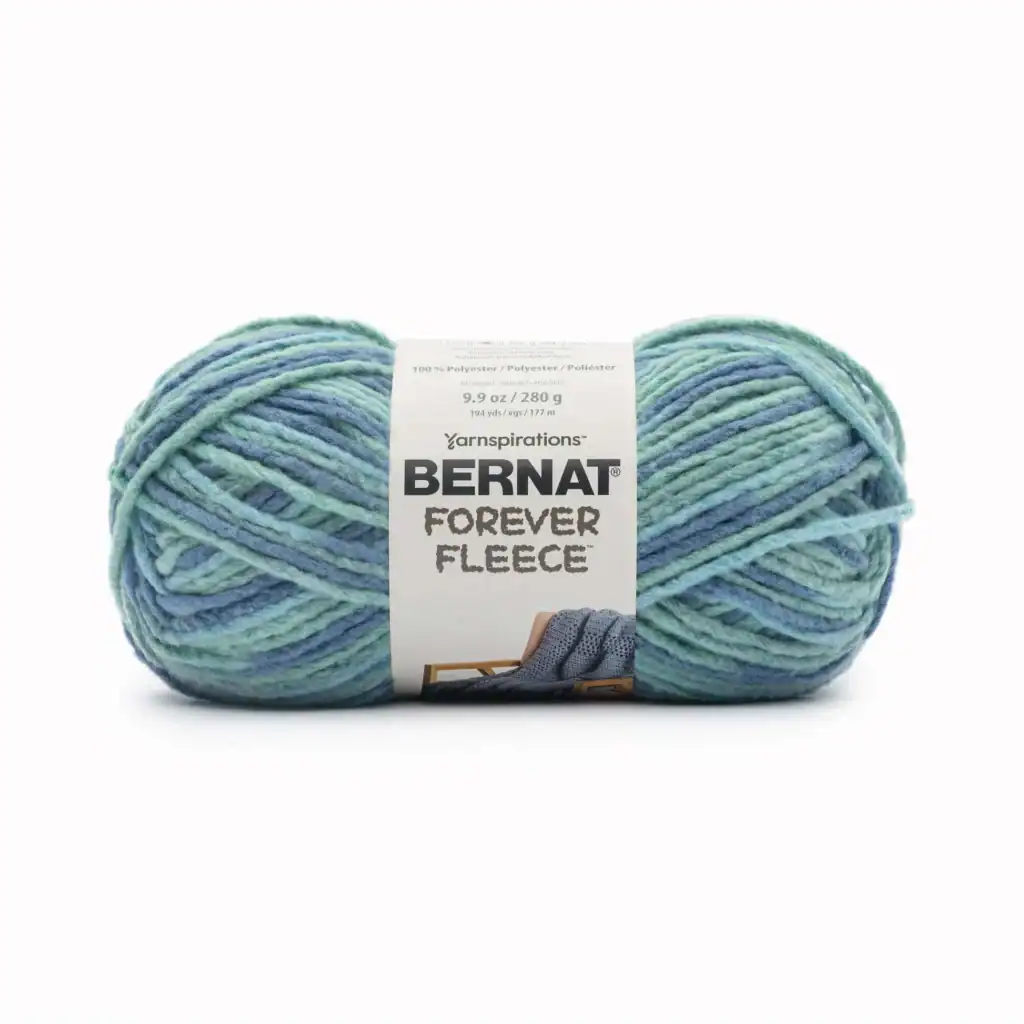
My two suggestions are Bernat Maker Splash, or Bernat Forever Fleece.
Bernat Maker Splash yarn is easy to work with, will give you a modern, well defined stitch without the blanket being to heavy. You could pair it with a solid color of Bernat Maker to achieve a similar look.
If you want more of a flannel feel type yarn, you could always try Bernat Forever Fleece. It is just as easy to work with as Maker Splash and also offers varigated and solid color to work with. It is super chunky so this stitch can work up quite fast.
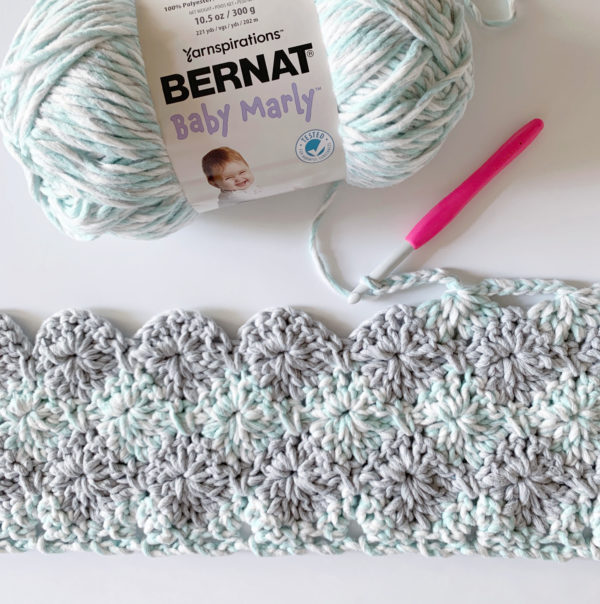
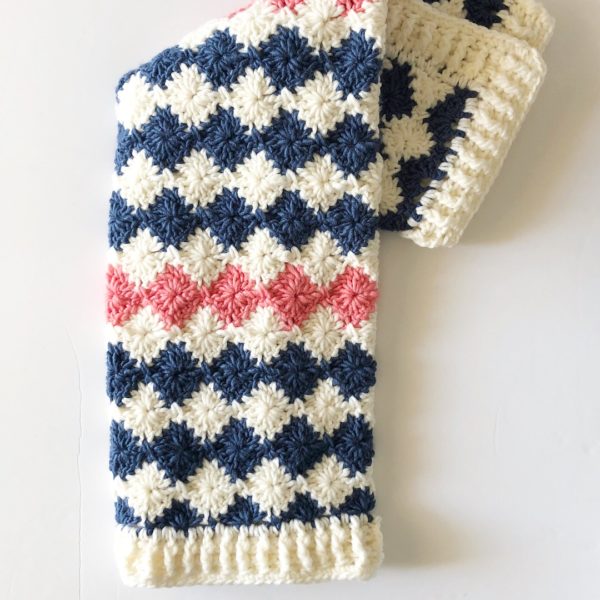
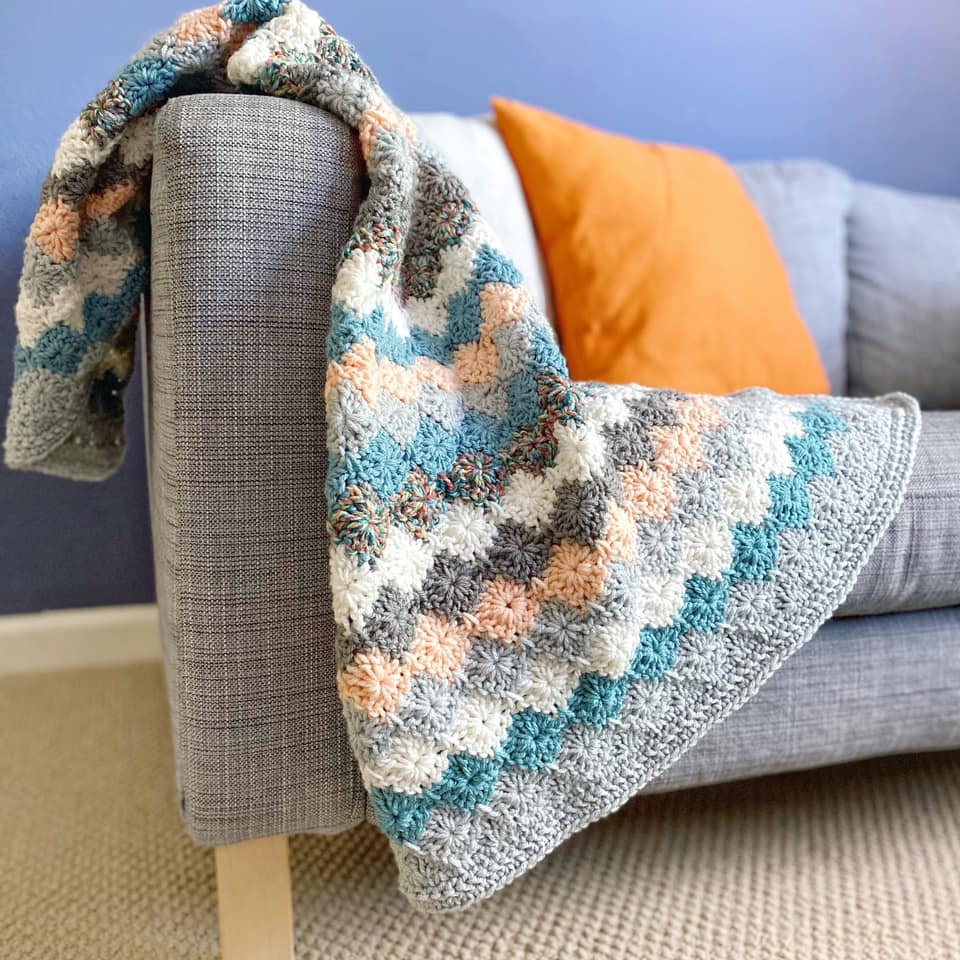
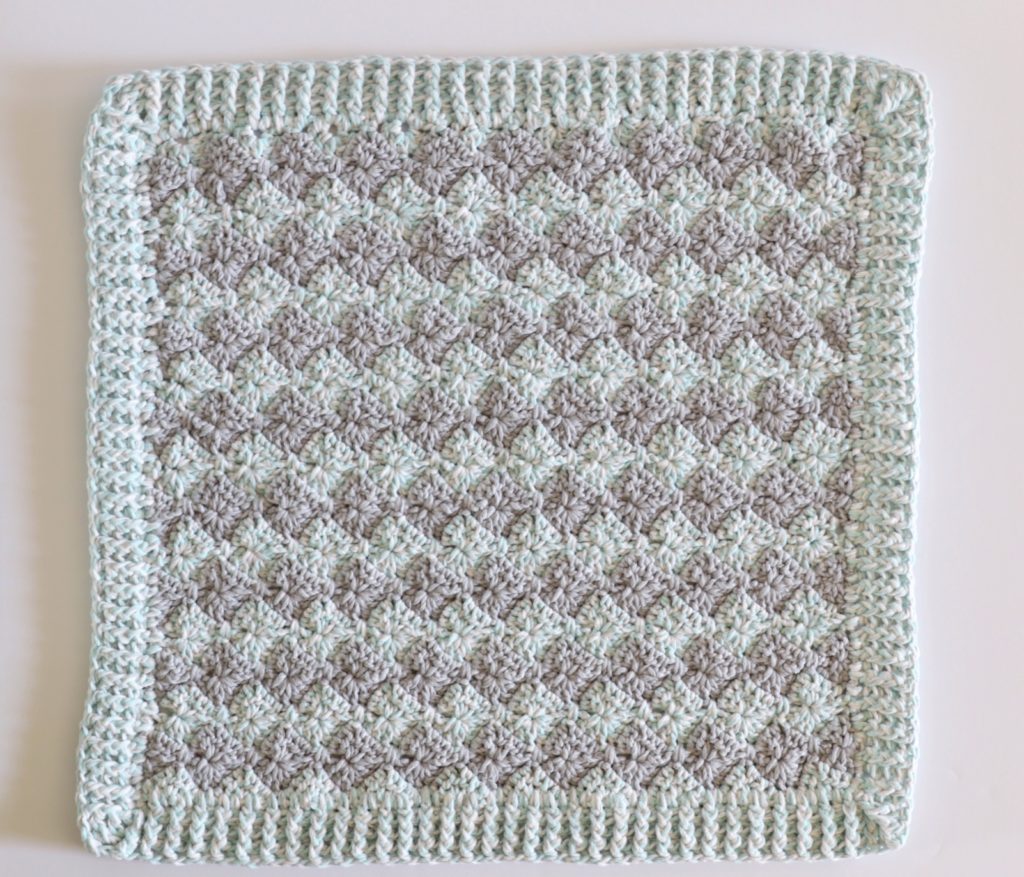
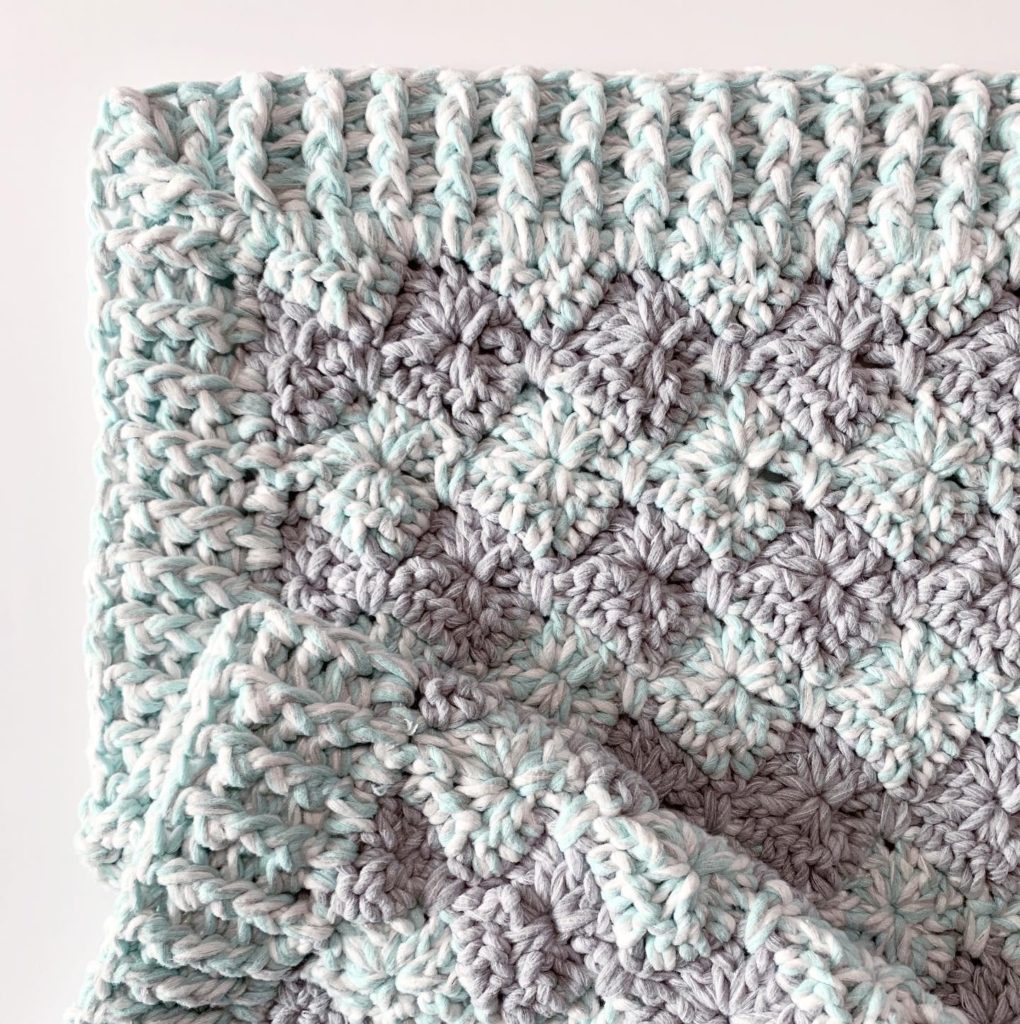
I’m using a classic Harlequin Stitch and a pattern I’ve made previously. The only thing I did differently was how I worked the border around the corners. (I’ll explain how in the pattern.)
Here is a video tutorial for the Harlequin Stitch – if you’ve never used this stitch, working this as a swatch would be a great place to start before you begin the blanket.
Also, if you’d like more ideas of color combos, be sure to check out a post we made several years ago titled Harlequin Blankets by Kelly Martinelli. She is a member of the Daisy Farm Crafters Group, who has shared many variations of this pattern that are stunning. She also uses a different yarn. This pattern is very versatile.
Be sure and scroll to the end of the post for the free printable pdf. (All patterns on Daisy Farm Crafts are free with a free printable at the end of the post.)
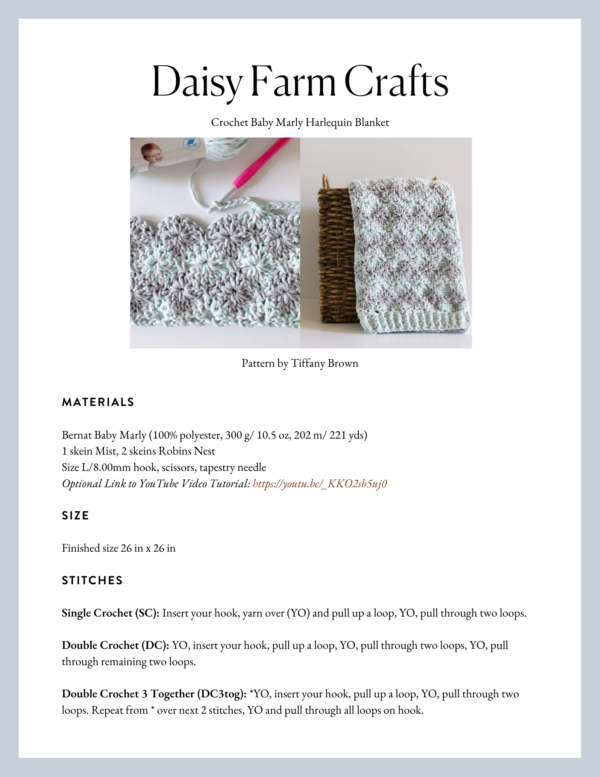
Materials
Bernat Baby Marly (100% polyester, 300 g/ 10.5 oz, 202 m/ 221 yds)
1 skein Mist, 2 skeins Robins Nest
Size L/8.00mm hook, scissors, tapestry needle
Size
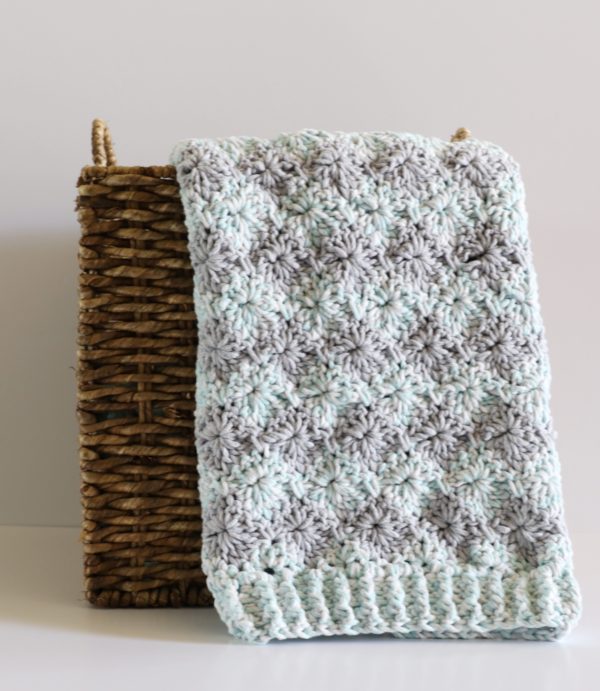
Finished size 26 in x 26 in
Stitches
Single Crochet (SC): Insert your hook, yarn over (YO) and pull up a loop, YO, pull through two loops.
Double Crochet (DC): YO, insert your hook, pull up a loop, YO, pull through two loops, YO, pull through remaining two loops.
Double Crochet 3 Together (DC3tog): *YO, insert your hook, pull up a loop, YO, pull through two loops. Repeat from * over next 2 stitches, YO and pull through all loops on hook.
Double Crochet 6 Together (DC6tog): *YO, insert your hook, pull up a loop, YO, pull through two loops. Repeat from * over next 5 stitches, YO and pull through all loops on hook.
Front and Back Post Double Crochet (FPDC & BPDC): A front post double crochet means you insert your hook from front to back around the post of the next DC and work a DC. A back post double crochet means you insert your hook from back to front around the post of the next DC and work a DC.
Pattern
(Pattern repeat is 8 plus 1. All you need to do is make a chain any multiple of the number 8 to the length you need, then add one more chain and begin the pattern.)
Chain 81 with Robins Nest.
Row 1: In the 5th chain from the hook, work [3 DC, 1 CH, 3 DC], skip 3 ch’s, 1 SC in the next ch, *skip 3 ch’s [3 DC, 1 CH, 3 DC] in next ch, skip 3 ch, 1 SC in next ch, repeat from * to the end of the row pulling through in the last stitch with mist.
Row 2: CH 3 and turn. Skip first SC, DC3tog over next 3 DC, *CH 7, skip 1 ch, DC6tog over next 6 DC (leaving the SC between unworked), repeat from * ending with DC3tog over last 3 DC, 1 DC in the top of the last ch.
Row 3: CH 3 and turn. 3 DC in the first space (hole that formed between the dc3tog and dc) from row below, *1 SC around the ch 1 space of the row below, (enclosing the 7 ch’s), [3 DC, 1 CH, 3 DC] in the center space of the dc6tog’s, repeat from * ending 3 DC in top of last DC3tog’s, 1 DC in top of the turning chain pulling through with Robins Nest. (Leave Mist color behind and don’t cut, you can carry it up the side of your work to save weaving in ends.)
Row 4: CH 4 and turn. Skip first DC, *6 DCtog over next 6 DC (leaving the SC between unworked), ch 7, skip 1 ch, repeat from * ending with ch 3, 1 SC in top of the turning chain.
Row 5: CH 1 and turn. Skip first SC and the ch 3’s, *[3 DC, 1 CH, 3 DC] in center of the 6 DCtog’s, SC in ch space one row below, (enclosing the 7 ch’s), repeat from * ending with 1 SC in the first of the 4 turning chains pulling new color through (Robins Nest.)
Repeat rows 2 – 5 until you have 8 sets of diamonds in Mist. Work one row of Robin Nest, (row 4) and when it is time to chain 7, chain 3 instead then SC around the stitch in the row below, then chain 3. (This will help when you work your row of DC around for the border.)
Tie off and weave in ends.
Border
ROUND 1: Pull up a loop in any corner. CH 3. Work 2 DC around each DC post and 1 DC into SC. DC 3 times in each corner. When returning to the starting corner, work 2 more DC, the starting CH 3 acts as a DC. Join with a slip stitch in the starting chain and chain 2.
ROUND 2: Continue in the same direction working alternating front post and back post DC around each post. When you get to the corners of this row, you will want to continue the pattern of alternating front and back post double crochet, but you will work three stitches around the corner post.
So, for example, if you get to the corner post and you are supposed to work a front post DC, then work a front post DC, a back post DC, and a front post DC all around that corner post. Then in the next stitch you would continue the alternating pattern, working the opposite of whichever stitch you just used (in this example, you would work a back post DC). Just remember that you are always alternating front and back post double crochet around the whole blanket, you just happen to be working three of those stitches around the same post when you are working the corners.
ROUNDS 3 – 5: Continue working in the same direction and working the posts in the same manner as the row below. This will create a ribbing look. If it is a FPDC in the row below, work a FPDC to keep the stitch popping on the same side of the blanket. Work the corners in the same manner as Round 2.
When the 5th round is complete, join with a slip stitch and weave in all ends.
Thank you for coming by our website.
Happy Crocheting!
Tiffany