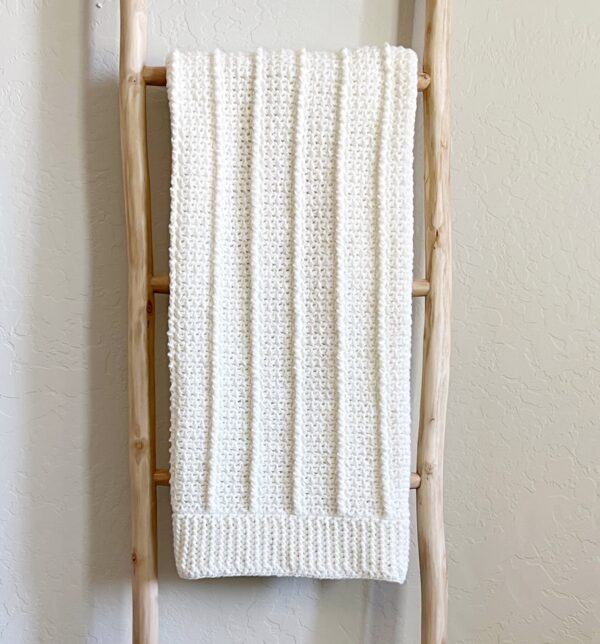
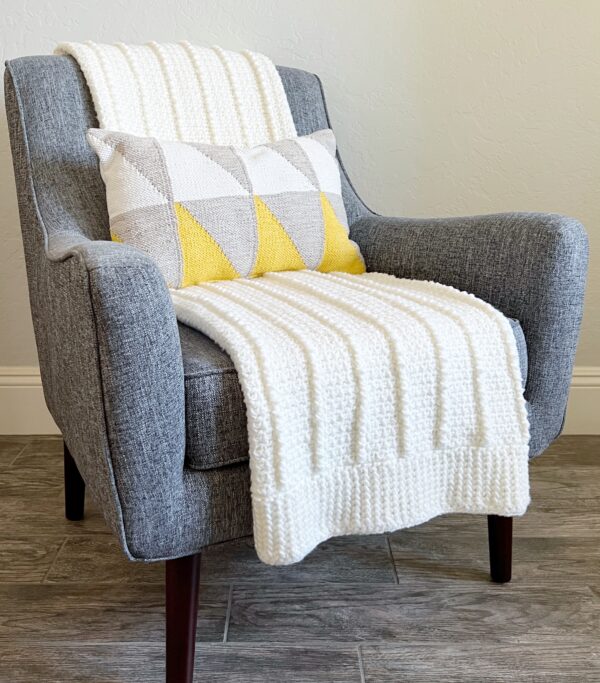
This is my first project with Bernat Forever Fleece Finer and I am a fan!
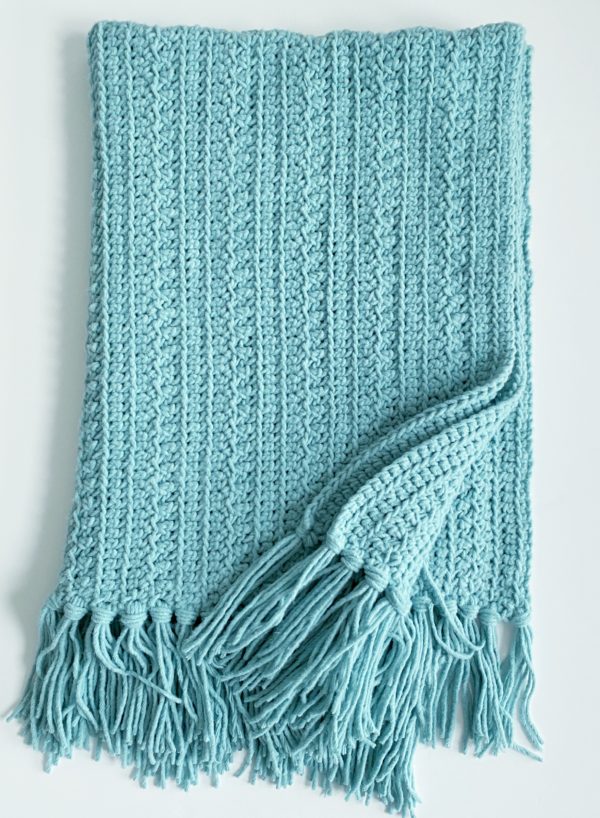
Previously we made blankets with Forever Fleece which is the same texture as this, just a lot thicker.
Here’s a photo of a throw I made with Bernat Forever Fleece as a refresher:
This finer version is a thinner yarn, but just as soft as the regular.
It feels like working with flannel, it is so nice on my hands, and it is lightweight.
Just an overall nice yarn to work with, and the results were stunning.
I designed this to be a really easy and relaxing throw to make.
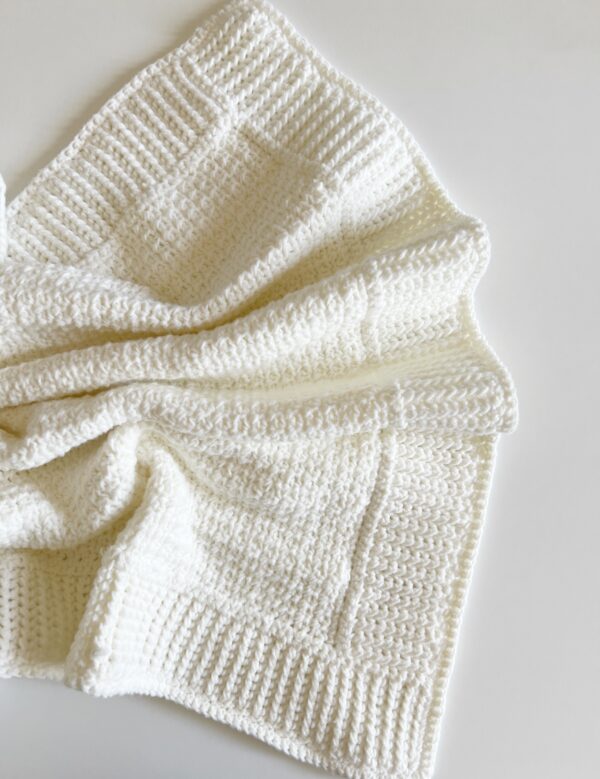
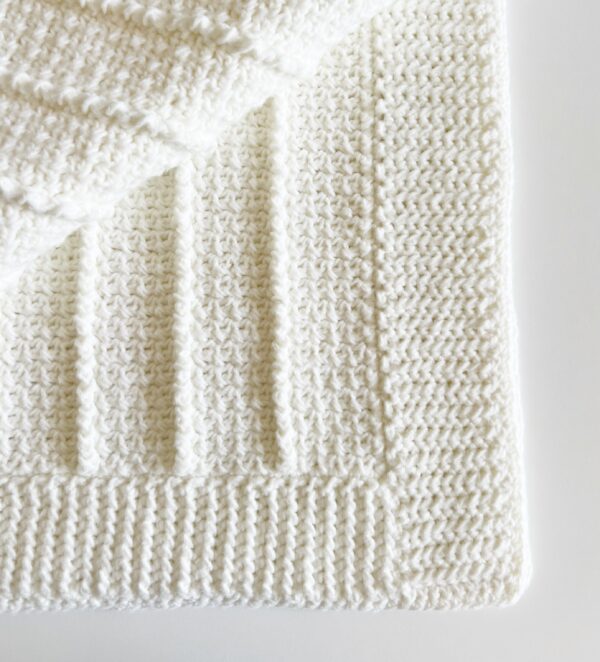
I kept all the “ribs” to one side of the blanket and the back is plain.
But my favorite part is the border.
I absolutely love how the yarn over slip stitch ribbing looks with this yarn.
It’s going to be perfect as a high school graduation gift for my niece.
If you need more ideas on throws to make for high school graduation gifts, be sure and visit the Throws section right here on our website.
Tap here to see all the Throws we have made
We are always adding more, so check back often.
Also, be sure and scroll to the end of the post for the free printable pdf that we offer at no charge.
Just, tap and print.
(All of our patterns here on our website have free printable pdf’s and no cost, so be sure and look around for something else you may be interested in.)
This pattern also has a YouTube tutorial linked at the end of the pattern section, this can help you if you need a refresher on how to make the stitches.
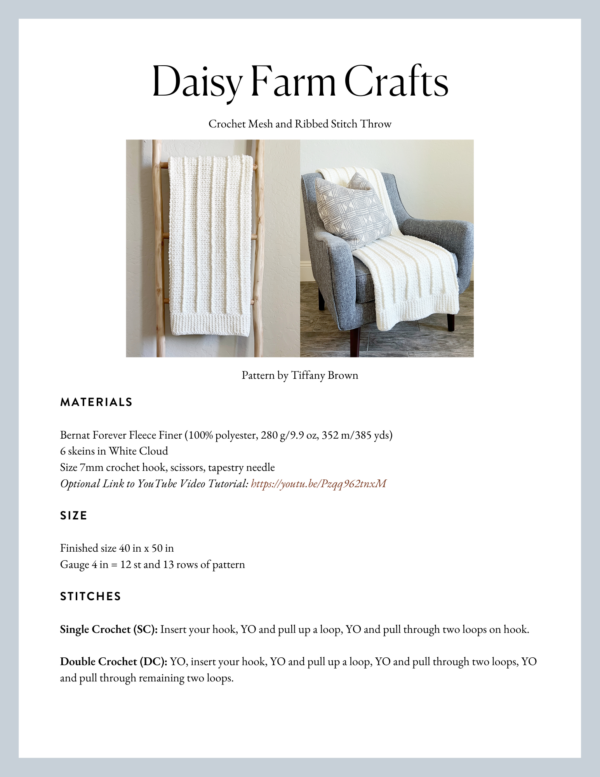
Materials
Bernat Forever Fleece Finer (100% polyester, 280 g/9.9 oz, 352 m/385 yds)
6 skeins in White Cloud
Size 7mm crochet hook, scissors, tapestry needle
Size
Finished size 40 in x 50 in
Gauge 4 in = 12 st and 13 rows of pattern
Stitches
Single Crochet (SC): Insert your hook, YO and pull up a loop, YO and pull through two loops on hook.
Double Crochet (DC): YO, insert your hook, YO and pull up a loop, YO and pull through two loops, YO and pull through remaining two loops.
Front and Back Post Double Crochet (FPDC & BPDC): A front post double crochet means you insert your hook from front to back around the post of the next DC and work a DC. A back post double crochet means you insert your hook from back to front around the post of the next DC and work a DC.
Half Double Slip Stitch (HDSS): YO, insert your hook, YO and pull up a loop and pull directly through 2 loops on hook.
Slip Stitch (SL ST): Insert your hook, YO and pull a loop back through and through loop on hook.
Pattern
Tip: The stitch pattern used is called Mesh Stitch. It is a pattern of SC, CH 1, skip the next st, SC.
Chain 120. (Pattern repeat is any number multiplied by 10.)
Row 1: Beginning in the second chain from the hook, work 1 SC. SC into each of the next 8 chains. *DC into the next ch. SC into each of the next 9 chs. Repeat from * across the row. CH 1 and turn. (119)
Row 2: Starting in the 1st stitch, SC into SC of the previous row. CH 1, skip the next SC, SC into the next SC. (This is the Mesh Stitch sequence) Mesh Stitch across the next across next 6 sts (your last SC will be just before the DC). *FPDC around the DC. Begin the Mesh stitch in the next SC and across the next 8 sts. Repeat from * to the end of the row. CH 1 and turn.
Tip: the Mesh stitch will be worked across 9 stitches beginning and ending with SC. You will omit the CH 1 on the 10th stitch and work the POST DC, always CH 1 and turn.
Row 3: *Work Mesh Stitch across first 9 stitches, BPDC around the next st. (Pop the post to the back of the work so the rib stays on the same side of the blanket.) Repeat from * across the row ending with the final 9 stitches being worked in the Mesh Stitch. Ch 1 and turn.
Repeat rows 2 and 3 until blanket measures approximately 46 inches or to however long you’d like allowing for a 4 inch border.
Border
Round 1: Work 1 round of SC around the entire blanket working 3 SC into each corner. Don’t turn or join at the end of the round.
First Side: CH 10. Work 1 HDSS in second chain from hook and into each of the next 8 chains, working back towards the edge of the blanket. SL ST into the next stitch on the blanket edge and the next st. Turn the border toward you, work HDSS into each HDSS. CH 1 and turn. (9 HDSS) Continue working the HDSS perpendicular across the first edge of blanket until it is even with the second side. End before you ch 1 and turn.
Tip: If the border is ruffling, try slip stitching 3 times, if the blanket is pulling, try slip stitching only once. Also, for the HDSS, work under both loops of the little “v” not back loop only.
Second Side: Instead of CH 1 and turn, CH 10. Begin the border with HDSS into each of the next 9 chains. SL ST across the next 2 sts, turn and work HDSS into each HDSS. Work in the same manner as above.
Third and Fourth Side: Begin each side by chaining 10 and working in the same way as previous sides.
After the fourth side, work 2 more rounds of SC with 3 SC into each corner.
Join at the end of the round with a SL ST to the first SC, tie off and weave in all the ends.
Tip: Tie the ends into a tight square knot and then weave in the tails. Also when changing to a new skein, change on the sides of the blanket, not in the middle of a row.
Tap here for the video tutorial or tap on the YouTube play button below.
Click here or on the image below for a printable pattern
Thank you so much for stopping by!
As always, we love to see how your blanket turns out, so come share with us in our Daisy Farm Crafters Group on Facebook, or tag us @daisyfarmcrafts on your public posts on Instagram.
XO, Tiffany