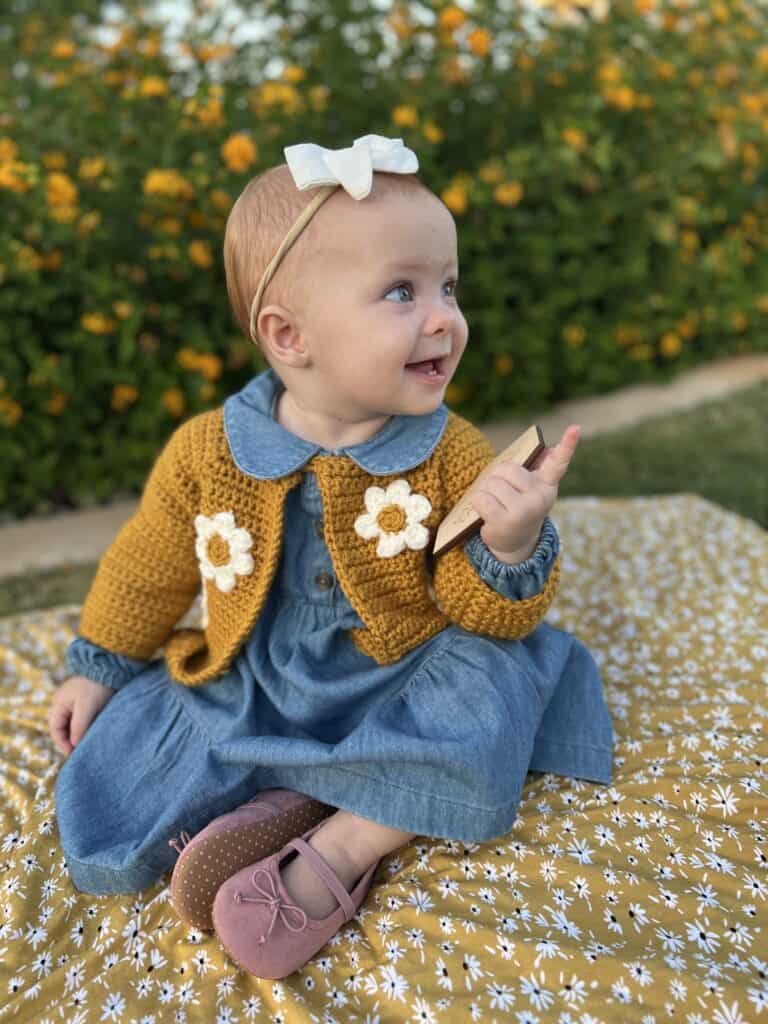
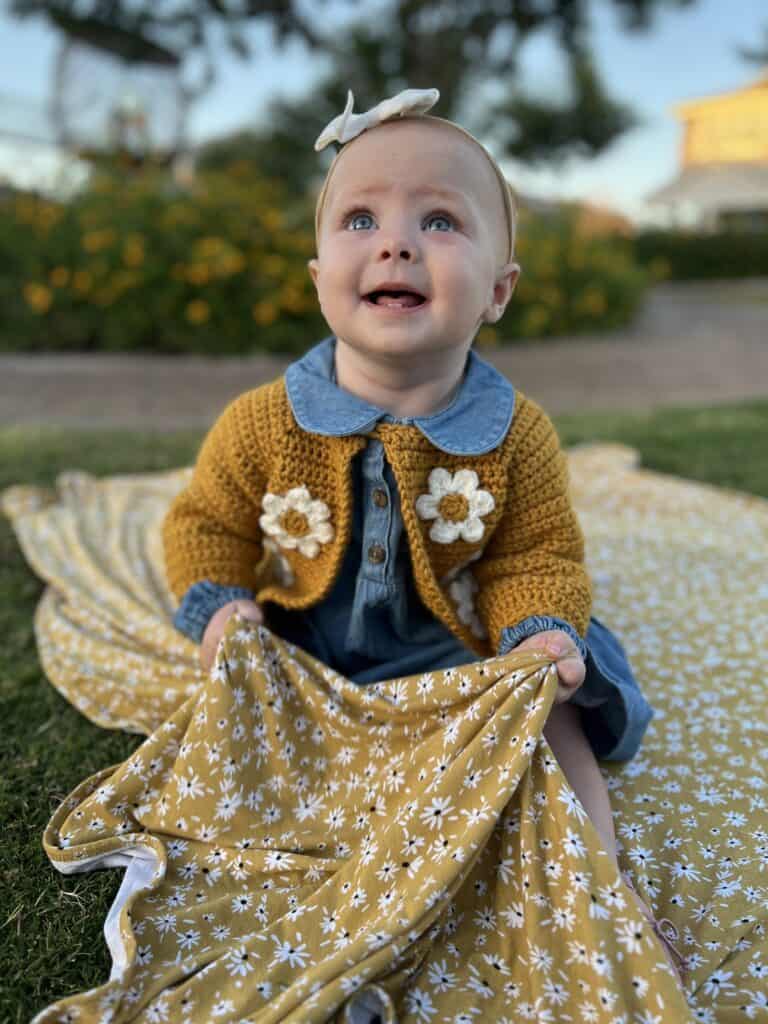
My grandbaby Kate Tiffany is already 11 months old! She is getting so big so fast. I feel so blessed to be able to crochet little sweaters for her. I have been taking a picture of her every month since she was born. And, I can’t believe we only have one month left.
For this month, I made her a version of our very popular and easy Pink Single Crochet Baby Sweater pattern.
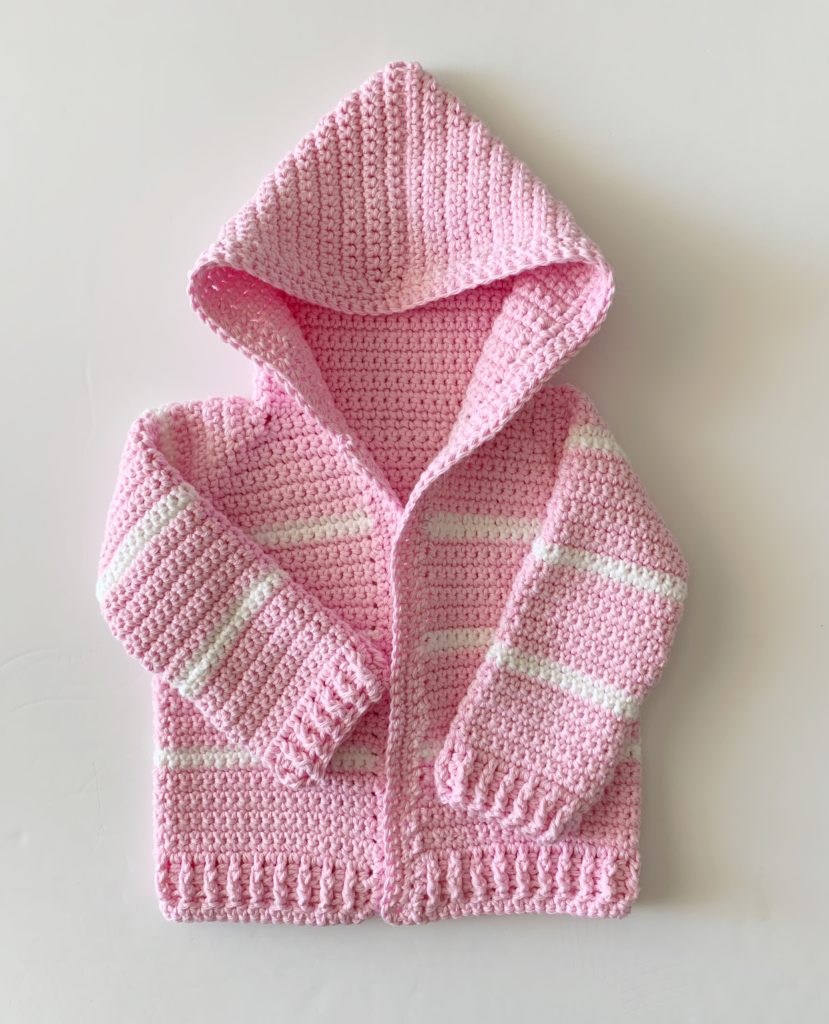
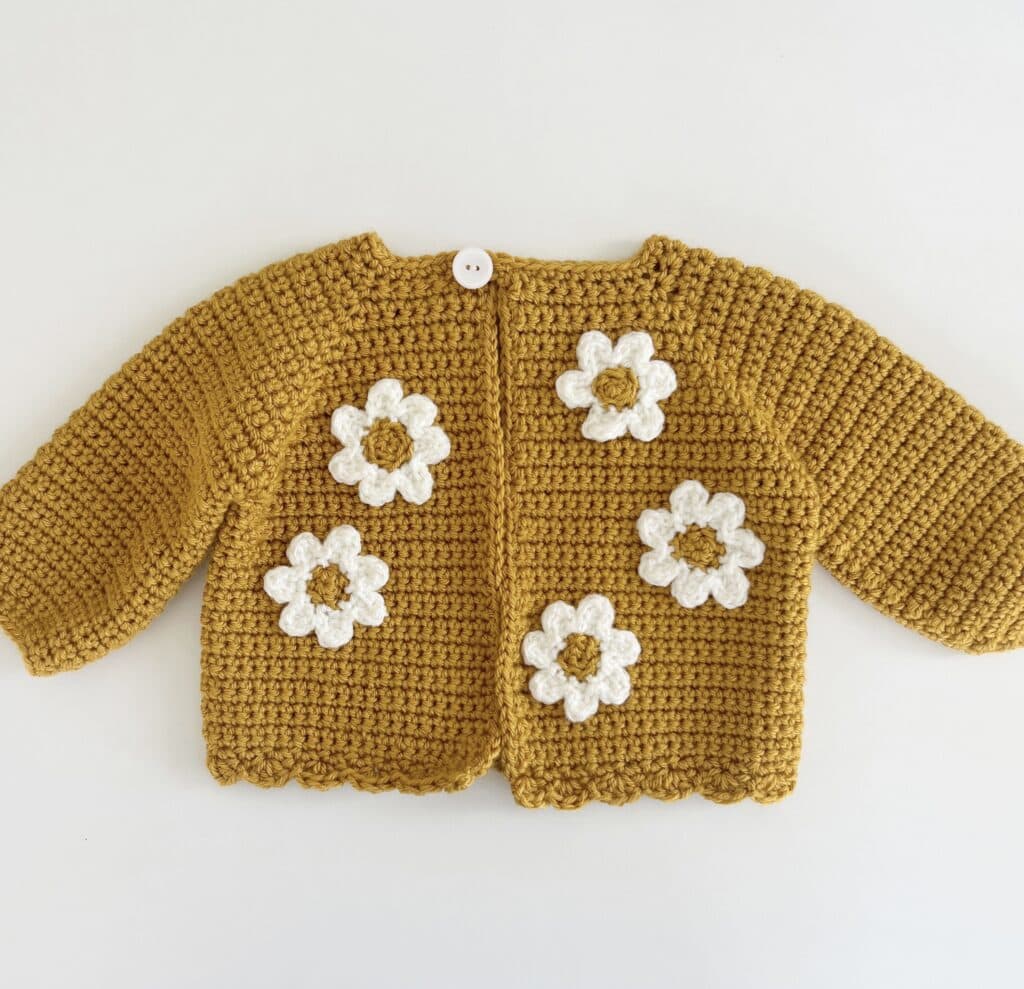
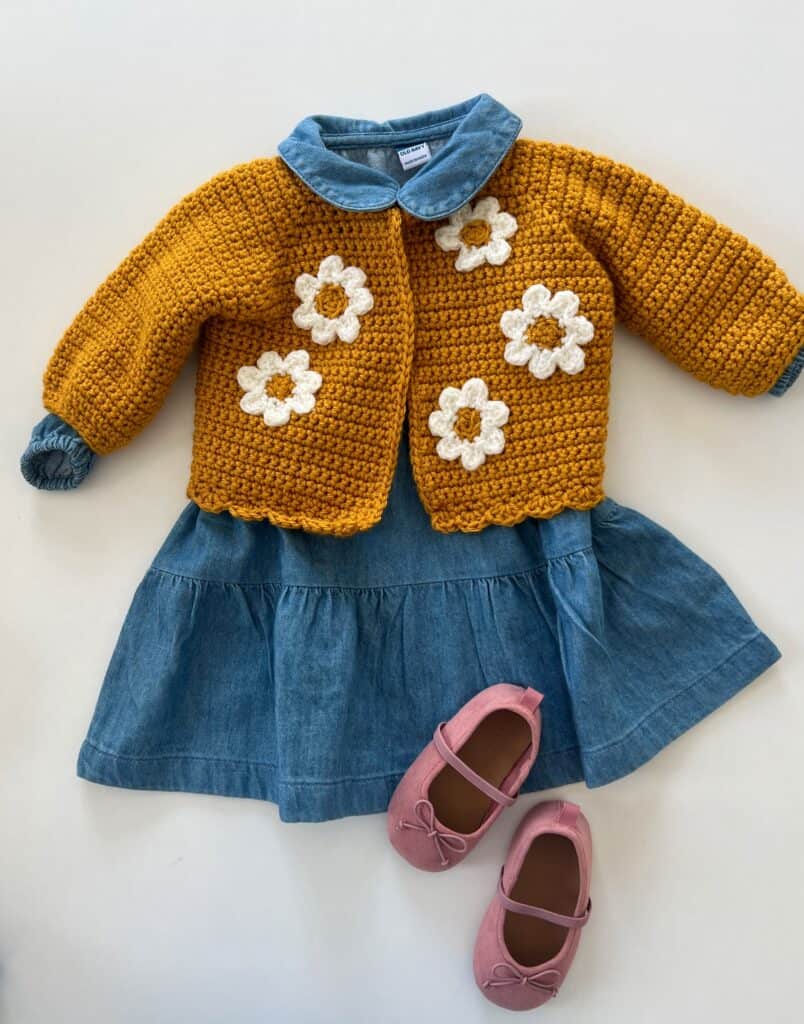
I omitted the hood and the ribbing on the cuffs and bottom edge. Instead, I finished with a simple round of single crochet and made a loop at the neck so I could attach a button to close the sweater.
In place of the ribbing at the bottom edge, I opted to make a simple shell stitch border. I think it made it look so dainty and cute!
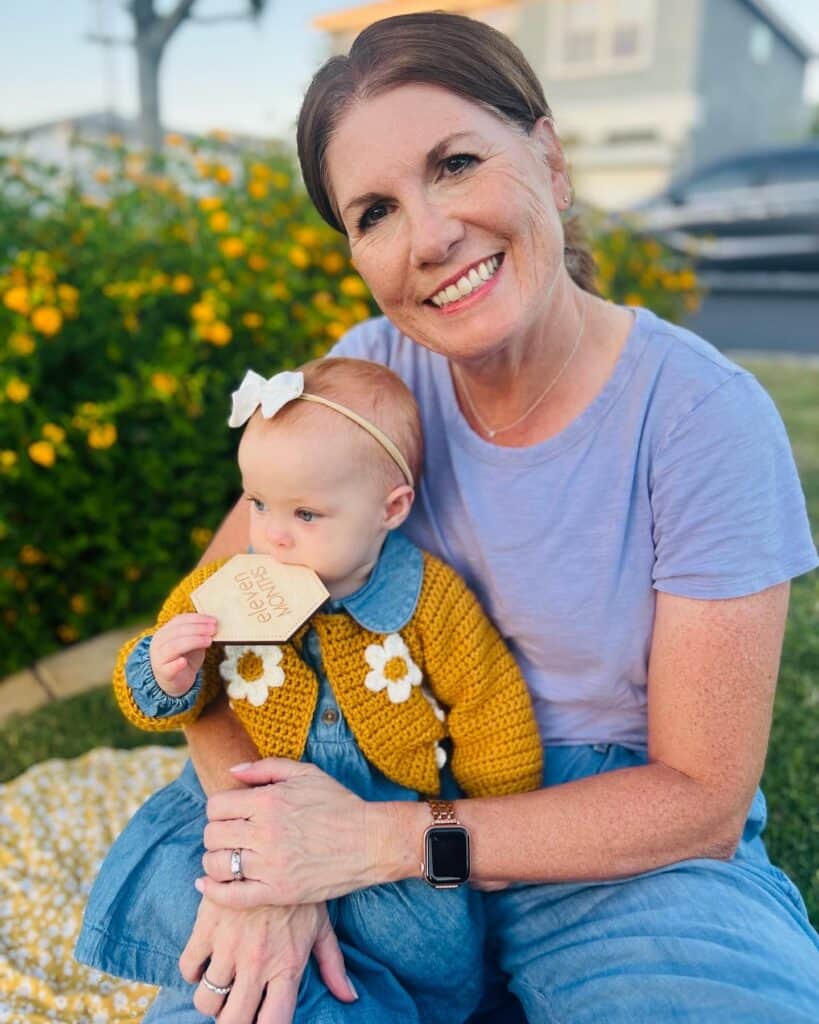
She is just a little doll and was so patient as we took her to the park to take her picture. What a little angel.
The flowers are a version of the flowers I made for our gift bag pattern we recently published if they look a little familiar. I crochet them, and then hand sew them onto the sweater. It took a little extra time, but not bad.
It took me more time to decide where they needed to be placed, and how many to add. Overall, I am so pleased with how this turned out.
I’m not going to have time to make a separate video for this sweater, but the Pink Single Crochet Baby Sweater pattern does have a video, so if you need help please consult that pattern.
I believe an advanced beginner can make this, the only part I think is challenging is joining and turning for the sleeves. That first round can be complicated if you have never made sleeves before.
I am making a few tweaks in this pattern, so it’s not exactly the same, but very similar.
The most common question I receive when I make cute sweaters for my grandbabies is if it will come in a different size. The best answer and hint I can give you is an estimation. I also can give you some really good tips.
My first tip is to have a sweater on hand for the size you want to make. That is the very easiest way to match up for size.
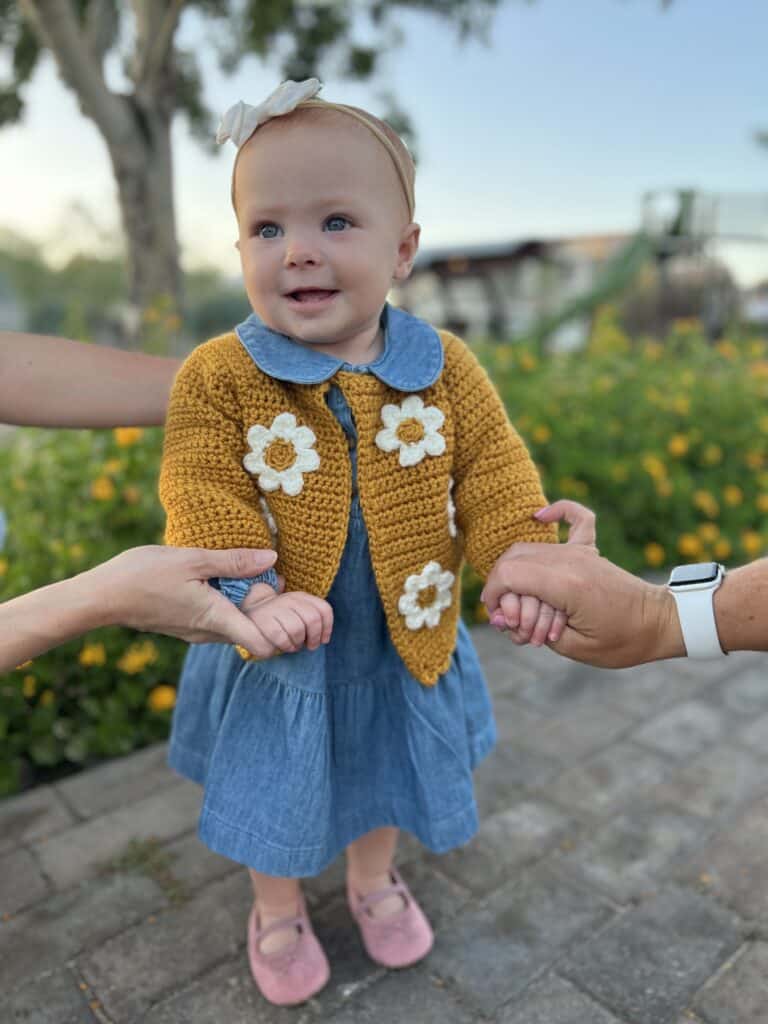
Kate is wearing a size 9 to 12 months currently. The original pattern was written for a size 3 to 6 months. I used different yarn and I needed to make it larger. So that meant I kept increasing the rounds until I had enough room through the shoulders, then I joined for the armholes. I could have kept increasing the rounds a few more times and I would have enough room to make this about 24 months size.
I have a sweater in her size and I just kept measuring it against that. It also helped when I made the sleeves and added length to the bodice. Once the sleeves matched the length of the sweater I had on hand, I finished them off.
However, here is a size chart you can consult if you do need a little guidelines;

The measurement I like to pay attention to the most is the Armhole Depth. That has been pretty accurate for me when increasing the rounds through the shoulders. Once I have the depth needed, then I join for the armholes.
I hope this can help you out a bit and I apologize that I’m not a professional designer. I’m a grandma crocheting for her grandbabies and just sharing what I’m making.
And shopping for what I make lol! Here’s the cute dress and shoes I found at Old Navy to match her sweater.
Stitches
SINGLE CROCHET (SC): Insert your hook, yarn over (YO) and pull up a loop, YO and pull through two loops on hook.
Half Double Crochet (HDC):YO, insert your hook, YO and pull up a loop, YO and pull through all three loops on hook
DOUBLE CROCHET (DC): YO, insert your hook, YO and pull up a loop, YO and pull through two loops, YO and pull through remaining two loops.
Materials
(tap name of yarn for specs)
2 balls Fool’s Gold
1 ball of Winter White (for middle of flowers)
Button
Size I 5.5 mm hook
scissors, tape measure, stitch markers, tapestry needle
Pattern
CHAIN 43.
ROW 1: Begin in the second chain from the hook with SC. SC into each stitch across the row, CH 1 and turn.
Mark 9th, 15th, 29th, and 36th chain spaces with stitch markers
ROW 2: Work 1 SC into each SC stitch, work [SC, CH 2, SC] into each marked st. (Move marker around the CH 2’s) CH 1 and turn.
ROW 3 until you have enough width through the shoulders: Repeat row 2. Always work [SC, CH 2, SC] around the CH 2’s of the previous round.
For size 9-12 months I joined on row 16 for the armholes.
ROW 16: Work 1 SC into each st to the CH 2’s. 1 SC around CH 2’s, skip over each stitch to the next CH 2’s. Work 1 SC around CH 2’s. 1 SC into each stitch across to the next CH 2’s, skip over each stitch to the next CH 2’s, work 1 SC around CH 2’s and each stitch to the end of the row. CH 1 and turn.
Bodice: Work 1 SC into each stitch. CH 1 and turn.
Work as many rows needed for length.
Trim:
Turn sweater to work up the side placket. Work 2 SC at the end of one row, skip a row. Continue working 1 SC around the neckline and continue down the other side placket as before. CH 1 and turn.
Work 1 SC into each stitch back toward the neckline, CH 5 or amount needed for a button loop, SL ST to the neckline corner st, continue working SC around the neckline and back down the other side.
(Tip: when looking at the front of the sweater, one side should overlap the other. Make the buttonloop on the overlapping side. You will sew the button on the shorter side. The above trim instructions might need to be modified as to when you are working the loops for the button loop.)
Bottom Trim:
SL ST into the first st, *skip one stitch, 3 DC into the next st. Skip one st, SL ST into the next st. Repeat from * across the bottom of the sweater. Tie off. Weave in the end.
SLEEVES:
Pull up a loop in the base of the armhole, CH 1 and SC into that same space. SC into each stitch around, making sure you are working into the stitches as if you chained and turned. Look closely at the direction the v’s are facing. Join with a SL ST to the starting SC, CH 1 and turn.
Work rounds of SC always joining with a SL ST, CH 1 and turn each round until you have the length needed minus 2 rows.
Work *1 SC, then SC2tog across the next 2 SC, repeat from * in second to last round to decrease the amount of stitches. Join and turn.
Work 1 SC into each st around, join and tie off.
Flowers:
Make a magic circle and chain 1. Work 6 HDC into the magic circle. (*YO, insert hook into the middle of the circle, YO, pull up a loop, YO and pull through all loops on your hook.) Join with a SL ST to the ch 1, tie off.
With cream color, pull up a loop in the top of a cluster, *ch 4, work HDC in the 2nd chain from the hook. Work HDC in each of the remaining 2 chains. (petal made) SL ST into the top of the next cluster. Repeat from * around.
Make 7 petals total, after the last petal, SL ST to first join, then work SL ST into each st around each petal. Finish with one last SL ST, then tie off with long tails for sewing.
Position flowers and sew them onto the sweater with a tapestry needle and using the tails of the flower to sew.
Attach a button.
Thank you so much for stopping by to see what we’ve been making! We love sharing our crochet with you. Be sure and check out all the other sweaters I’ve made by looking through our menu heading clothing.
XO, Tiffany
Click here or image below for free pdf of pattern.
![]()