Thank you loyal Daisy Farm Crafters for being so patient with me as it took me three years to update this Single Crochet Baby Sweater pattern!
To those of you who braved the very vaguely written original pattern, you are my heroes.
I’ve seen some very cute sweaters made by you!
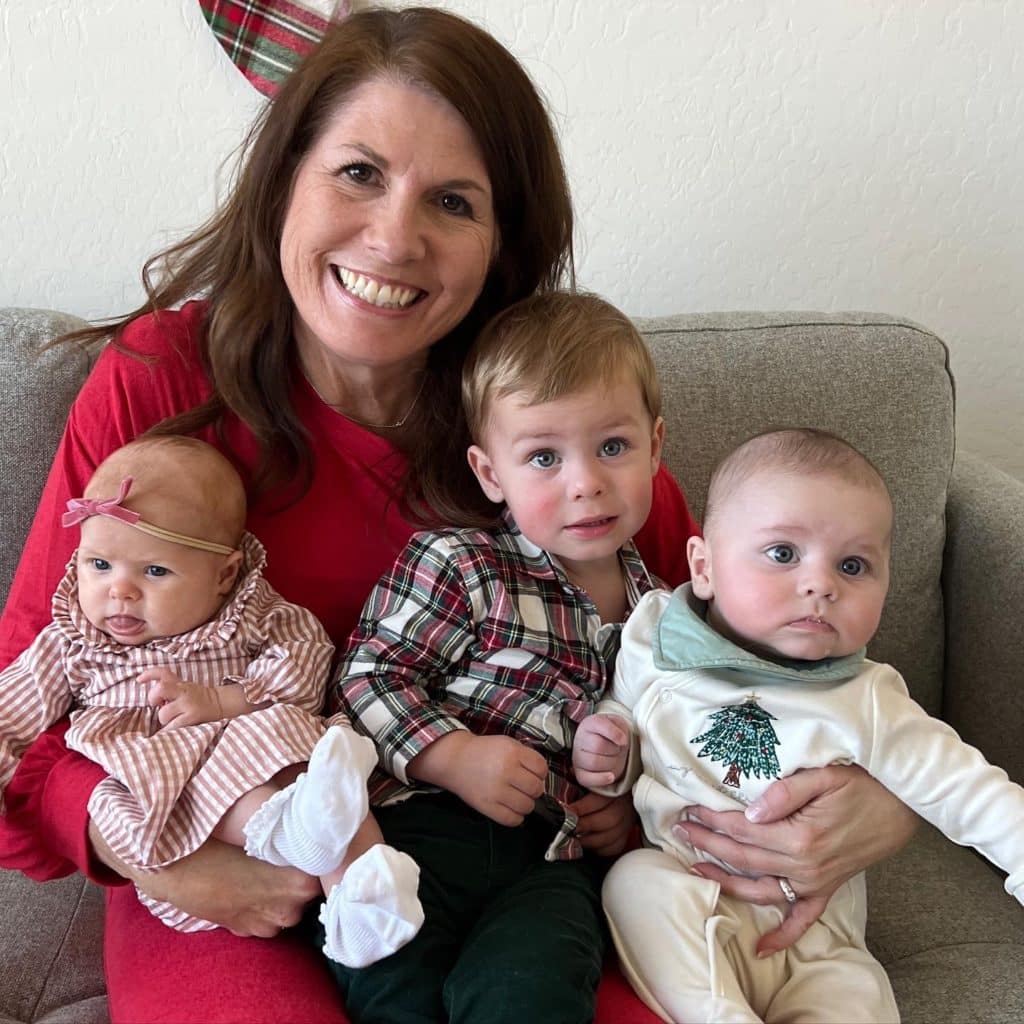
If you’ve been with us for a few years, you’ll know I’m crocheting in hopes to be a grandma and my intention of writing down what I was making was simply as a journal.
(POST UPDATE: I am a grandma now! That day finally came!)
I still have the original daisyfarmcrafts.blogspot.com website up! All the patterns have been moved here but that’s where I started.
So along the way, I have improved my pattern writing skills, and also have learned how to record videos.
I still like to keep my patterns conversational and descriptive instead of symbols but I have learned how to include more details that make understanding the patterns easier.
There is a video for this sweater now!
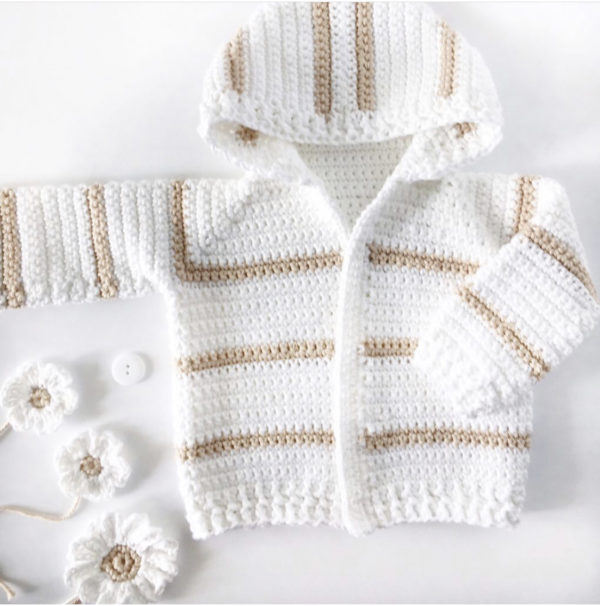
Here’s the original sweater you may have seen:
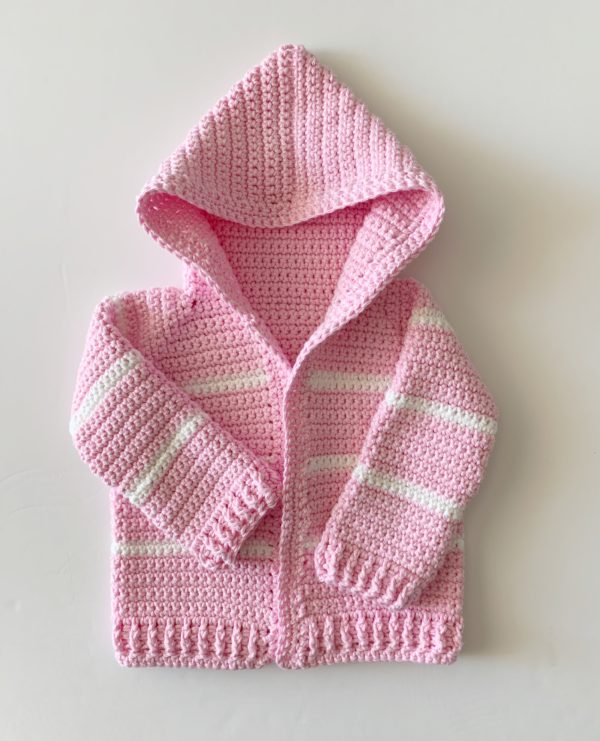
I’ve tweaked a few things pertaining to the design.
I took the stripes out of the hood, changed the ribbing to double crochet and changed a few stitches around the neck.
I still love the simple design and I do think it’s a great beginner sweater to start with if you want to up your skills to the next level.
I wouldn’t call it a beginner project, but a beginner sweater when you are comfortable with changing colors, and familiar with crochet.
Materials
I Love This Cotton Yarn (100% cotton, 3.5 oz/100g, 180 yds/65 m 4 weight)
(You may use any 4 weight yarn)
3 skeins Pink, 1 skein White
Size H/5.00mm hook, tapestry needle, scissors
Stitch markers
Button(s) (your choice and optional)
Size
Finished baby sweater is size 3 – 6 months
Stitches
Single Crochet (SC): Insert your hook, yarn over (YO) and pull up a loop, YO and pull through two loops on hook.Single Crochet (SC): Insert your hook, YO and pull up a loop, YO and pull through two loops on hook.
Double Crochet (DC): YO, insert your hook, YO and pull up a loop, YO and pull through two loops, YO and pull through remaining two loops.
Front and Back Post Double Crochet (FPDC & BPDC): A front post DC means you insert your hook from front to back around the post of the next DC and work your DC. A back post DC means you insert your hook around the post from the back to the front and work a DC.
Pattern
Chain 43.
Mark 9th, 15th, 30th, and 36th chain spaces with stitch markers
Row 1: Start in the second chain from the hook. Work one SC into each chain. Work 3 SC in the marked spaces. Continue across the whole row. When you get to the end, Ch 1 and turn.
SC in first space from hook and in each space to the corner. (Corner means the middle stitch of the 3 SC in the row below) Work 3 SC in each of the corner spaces. Continue working one SC into the tops of the SC and working 3 SC into the corner spaces across the row. Ch 1 and turn.
Continue working in this manner for 9 rows.
Rows 10 and 11: On the last step of the single crochet stitch in row 9, pull through with white, chain 1 and turn. Continue working as before. Do not cut the pink.
Row 12: Change back to the pink in the last step of the stitch in row 11. Work one SC into each stitch up to and including the corner stitch. Ch 3. Skip over all the stitches to the next corner stitch. Work one SC into the corner and into each stitch across to the next corner. CH 3, skip over all the stitches to find the next corner stitch. Work one SC into that corner and into each stitch to the end. CH 1 and turn. (Arm holes made.)
Row 13: SC into each stitch across, including working 3 SC around the chains that are under the arms. (your choice as to work into the chains or around them, just make sure you put three.) CH 1 and turn.
Continue adding rows of SC making color changes after 9 rows. (Change to white 2 times.)
Ribbing for the bottom of the sweater
Chain 2 and turn. Starting in the second SC, work one DC into the top of each SC across the row. CH 2 and turn.
Alternate working Front Post and Back Post Double crochet, starting with the second DC post, ending with a regular DC around the turning chain. Ch 2 and turn.
Work one more row alternating Front Post and Back Post Double crochet keeping the posts popping out in the same direction to create a ribbing look. Tie off and cut.
Making the hood
Starting in the space of the tail end of the starting chain, pull up a loop and work one SC. SC into each space around the neck. Ch 1 and turn.
Work approximately 35 rows of all SC, in all pink. (Feel free to switch to white after 9 rows if you’d like the stripes to be in the hood.)
Fold the hood in half in a way so when you turn it the seam will be on the underside of the hood and slip stitch the sides together. Tie off and weave in the end.

Making the sleeves
With pink, pull up a loop in the bottom of the armhole and SC in that space. (You are working around the chain 3, separate the stitches, 2 on one side and 1 on the other.) SC3tog starting around the chain, the next space and the next, ending in the first SC worked in white. SC into each stitch around the arm. On the last SC space worked in white, start your SC3tog in that stitch and the next two spaces around the chains. Slip Stitch into the starting SC. Ch 1 and turn.
Take the time to count your stitches on this round. Make the same amount going forward on each round and remember the number for the other sleeve. (Should be 28-30 stitches)
Work as many rounds as needed, changing colors after 9 rows to make 2 rows of white. Finish when you have the same amount of rows as the body of the sweater.
Work the ribbing around the wrist in the same manner as the ribbing on the bottom of the sweater except joining the rounds with a slip stitch, chain 2 and turn.
Placket
Before starting, decide if you want buttons on the sweater. If so, place markers on the right hand side of the sweater as it faces you, when you get to those space, work a CH 1, (or however you need for the size button you are using) instead of a SC.
Starting in the bottom right of sweater as it faces you, pull up a loop and SC into that space and SC up the side as evenly as possible, generally one SC per row. Work one SC around the hood and back down the other side. Ch 1 and turn. SC in each stitch up and around again. Ch 1 and turn. Work one more row up and around and then Ch 1 and turn, and work one more row up to the neck, stop, CH 1 and turn, work back down the left side, and then around the bottom of the sweater and slip stitch into the corner on the right side of the sweater as it faces you and tie off.
(Stopping at the neck and then going back down the left side will give you an extra space to place a button or buttons.)
Please watch the video for more help and the full tutorial:
Here is a link to the video on YouTube in case you are having trouble watching it on my website. I forgot to mention about the button holes in the very last part of the video so please refer to the paragraph above for instructions.
Also, adding buttons is optional.
If you are a worrier like me, I don’t want to take the risk of a button falling off and the baby choking.
You also could crochet and attach strings on either side of the neck to tie together.
One final tip on if you’d like to change the size of the sweater.
I think it would be a size bigger if you used a size I hook.
I also think it will be bigger if you use a different yarn, either up or down.
I also think that you could add more rows before you join for the armholes.
It’s helpful to have the child’s measurements and you can customize the size to them.
Thank you for hanging with me and I really hope you find success with this pattern.
I’d love to see! You can always share your finished projects with us and we will share on our facebook page or in Instagram stories.
It is so inspiring to see all the projects and the different color combos you come up with!
I’m glad I have you all along as I keep crocheting along in hopes one day one of these future grandchildren will decide to make an appearance into this world!
xo, Tiffany
Click here or on image below for printable pattern
