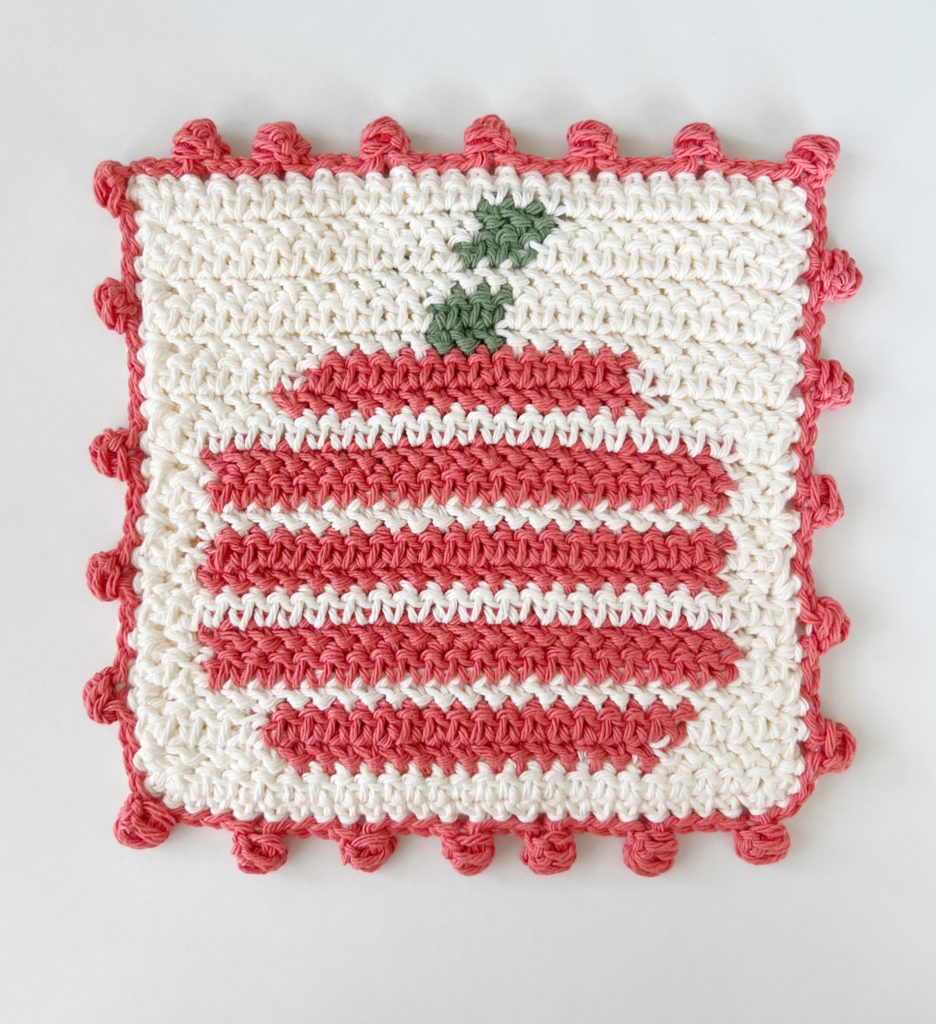
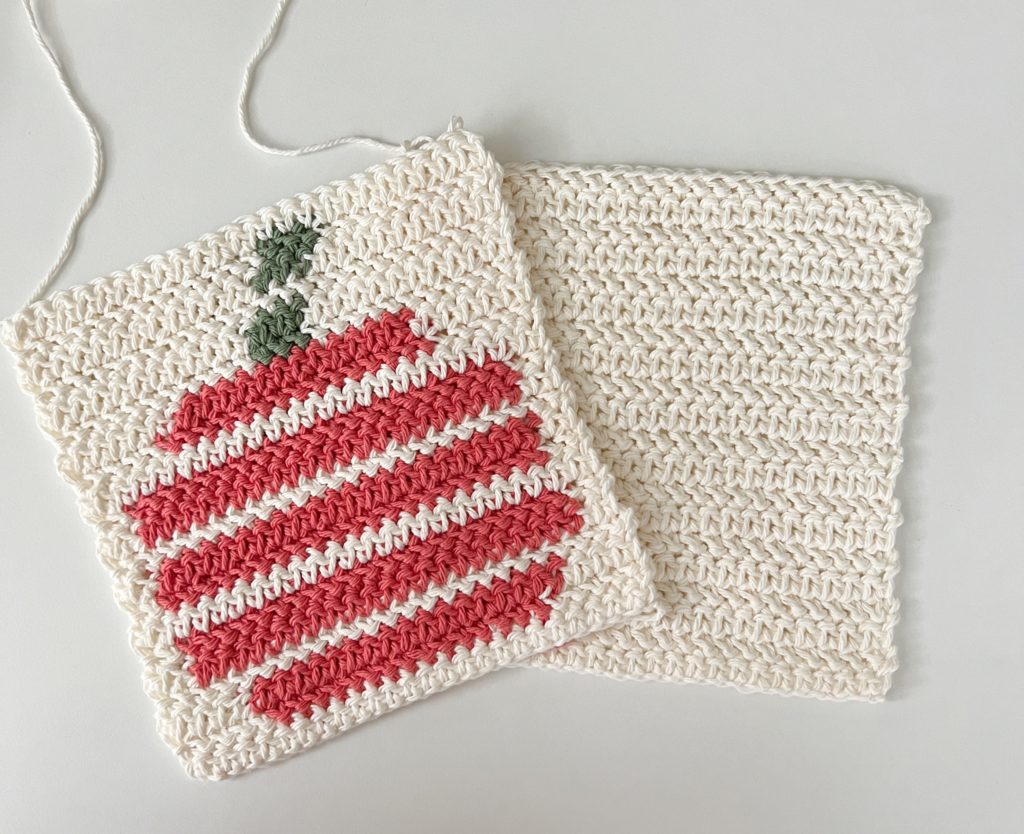
Several weeks ago I saw a comment on our Facebook page asking if I’d do a striped pumpkin design to accompany our striped heart, striped tree, and striped candy cane hot pads.
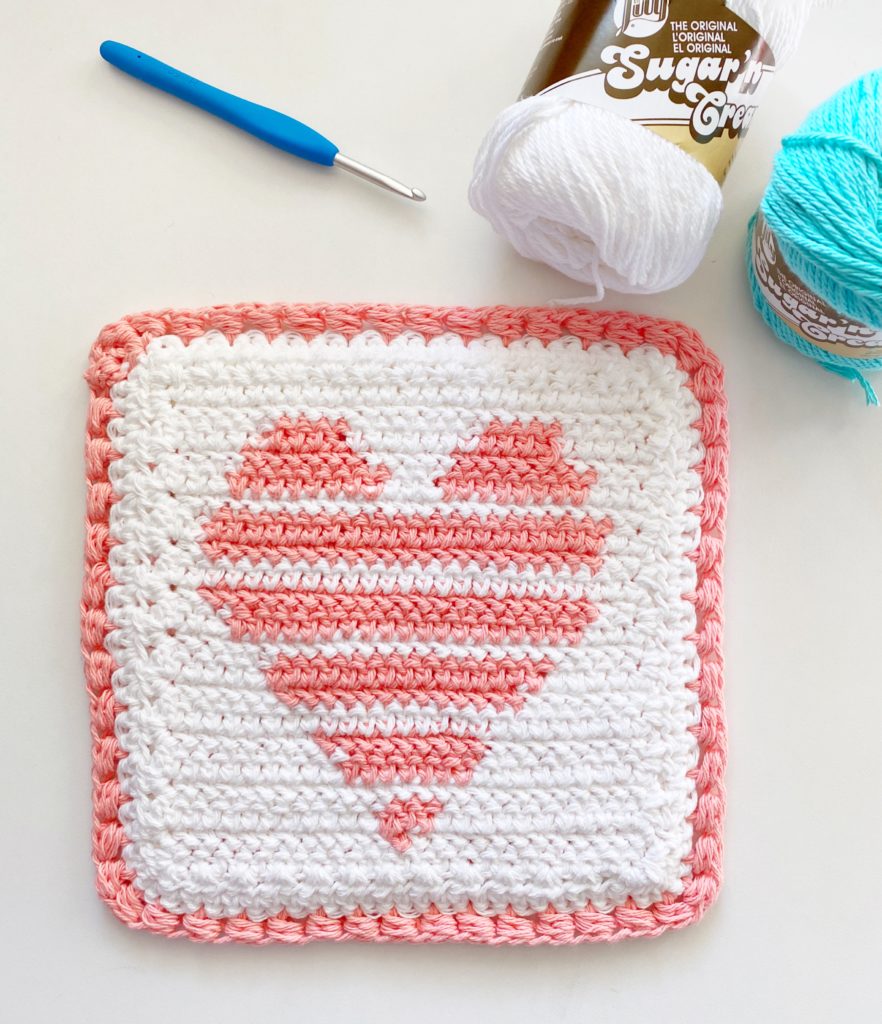
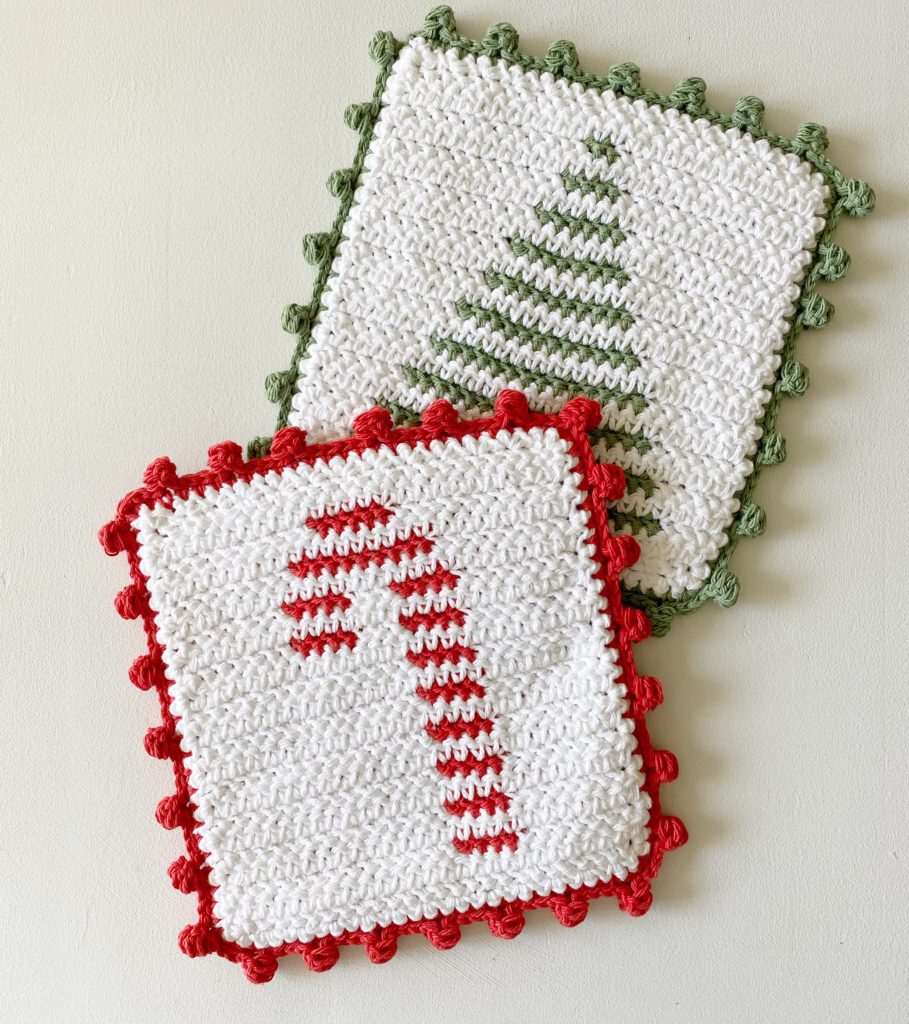
And, yes! I would love to! These hot pads have been a little fun project for me to do for the seasons. I’m thinking I need to do a striped shamrock and maybe make our bunny striped?
You can find all the hot pads we have made under the menu heading crochet patterns/hot pads.
Materials
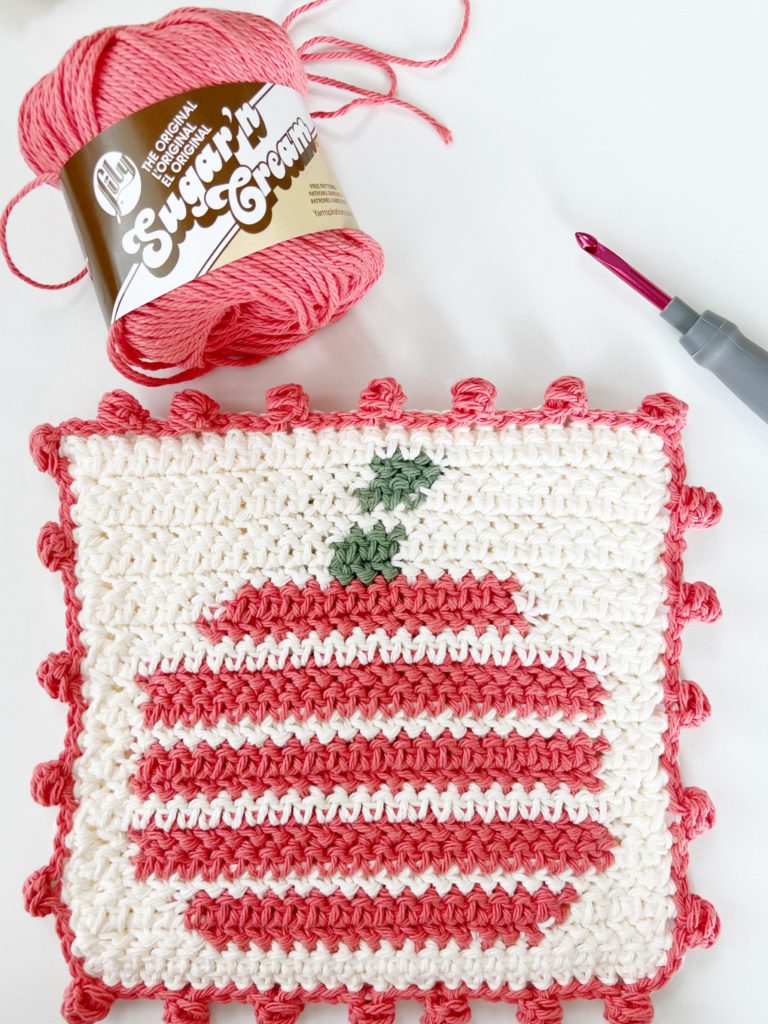
Lily Sugar n Cream (100% cotton, 71g / 2.5 oz, 109 meters / 120 yards, 4 worsted medium weight)
1 ball Ecru, 1 ball Tangerine, 1 ball sage
Size I/5.5 mm hook, scissors, tapestry needle, printed graph
Click here or image below to print the pumpkin graph.![]()
Size
Finished Size: 8 inches x 8 inches
Gauge: 13 sts and 12 rows = 4 inches (taken from project)
Stitches
Herringbone Half Double Crochet (HHDC): YO, insert your hook, YO, pull up a loop and pull directly through first loop on hook, YO and pull through remaining two loops. (Click HERE for video help)
Puff Stitch:*YO, insert your hook and pull up a loop. Repeat from * 3 more times, inserting your hook into the same space, YO and pull through all loops. (Click HERE for video help)
Pattern
Print Graph
(ODD numbered rows follow graph right to left, EVEN numbered rows follow graph left to right)
Chain 26 with Ecru.
ROW 1: Reading the graph right to left, begin working HHDC in the second chain from the hook. Work 1 HHDC in each chain across the row. (25)
(Tip: each box on the graph is equal to one Herringbone HDC stitch.)
ROW 2: Reading the graph from left to right, work the first 5 sts in Ecru, pull Tangerine through on the last step of the stitch, drop Ecru, HHDC the next 15 sts in Tangerine, drop Tangerine, pull through with Ecru and work remaining 5 sts. Ch 1 and turn.
Tip: This is what the back of your hot pad will look like. Keep all the ends to one side of your work so they are hidden on the inside of your hot pad.
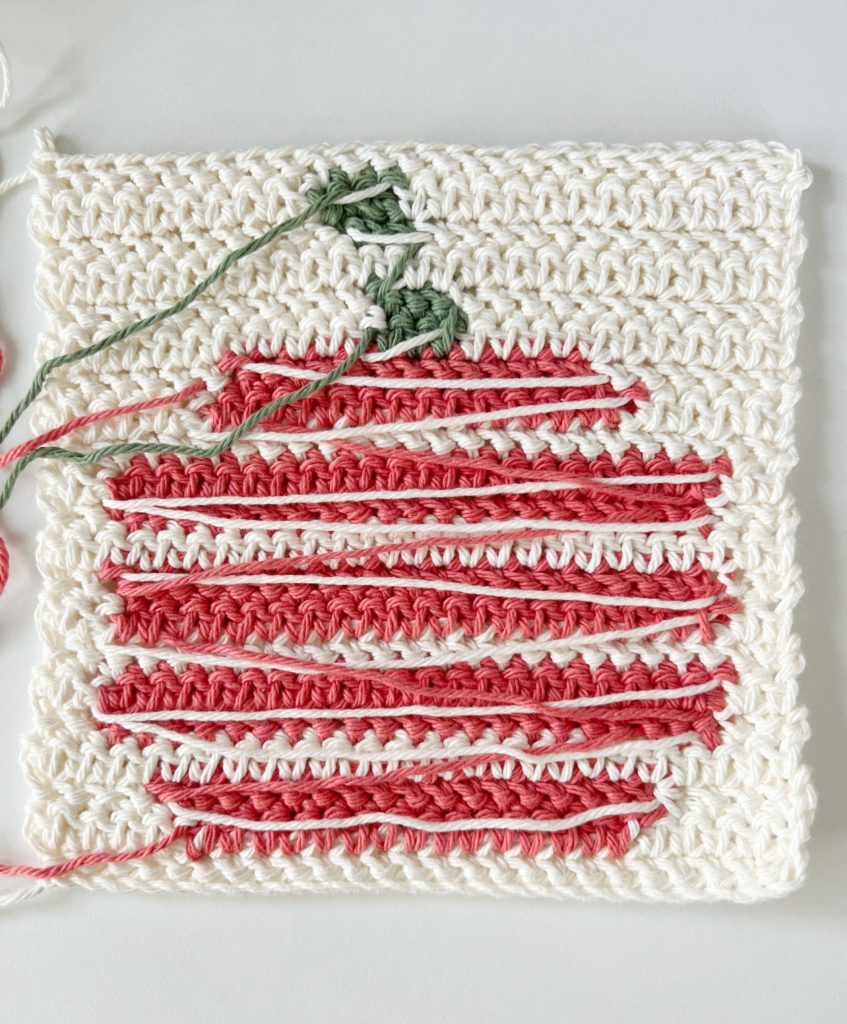
ROWS 3-21: Continue following the graph changing colors when indicated, always CH 1 and turn at the end of each row. Tie off. (I didn’t weave in any ends, just tucked them to the back of the hot pad.)
Make a second side with ECRU.
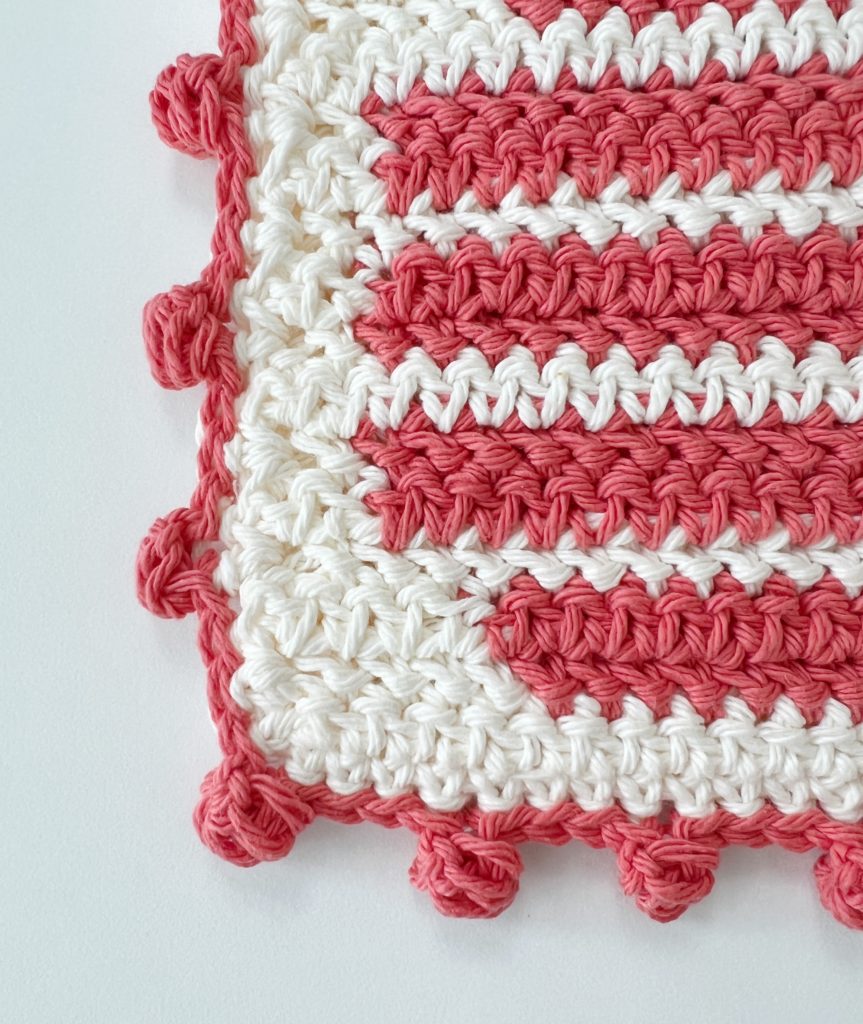
JOIN the two sides together by pulling up a loop in any corner CH 1 and SC into same sp. Work 1 SC into each stitch of both sides, 3 SC into each corner and 1 SC per end of each row on the sides. Make sure the ends are tucked into the middle of the hot pad. at the end of the round, pull through with Tangerine.
(Tip: You essentially are sewing the two panels together with SC.)
Border: With Tangerine, CH 2.
In the first chain, make a cluster by *yarning over and inserting your hook, yarn over and pull up a loop. Repeat from * 3 more times. Yarn over and pull through all loops on your hook. Slip stitch into the stitch just below the chain 2 to secure the puff. Slip stitch into each of the next 4 sts.
Repeat from ** around. Join with a slip stitch to the first st, tie off and weave in all ends.
Thank you so much for stopping by! I hope you enjoy making a few hot pads for friends and family for the holidays! I like bringing these with me as a nice hostess gift, maybe paired with a few new kitchen baking essentials.
XO, Tiffany
Click here or image below for pattern.
![]()