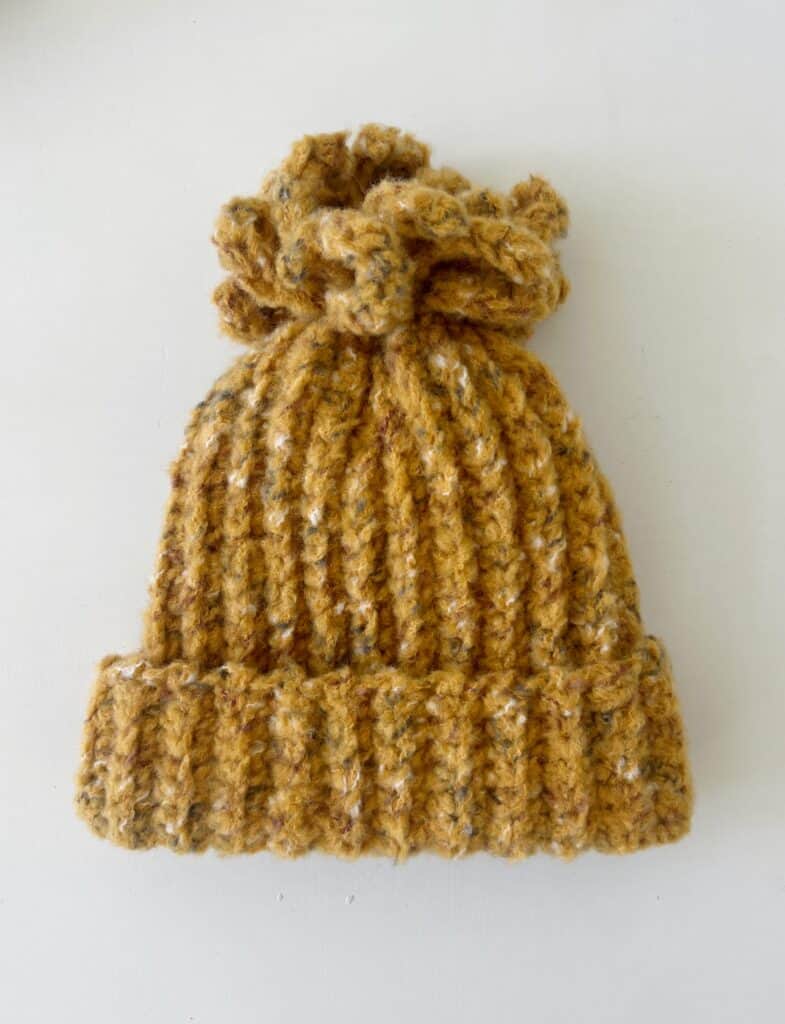
This Extra Fun Fringe Hat is sporting a full, thicker, “extra” pom at the top of the hat. I absolutely love finishing a hat off all in one go. The fringe is made at the same time as the hat.
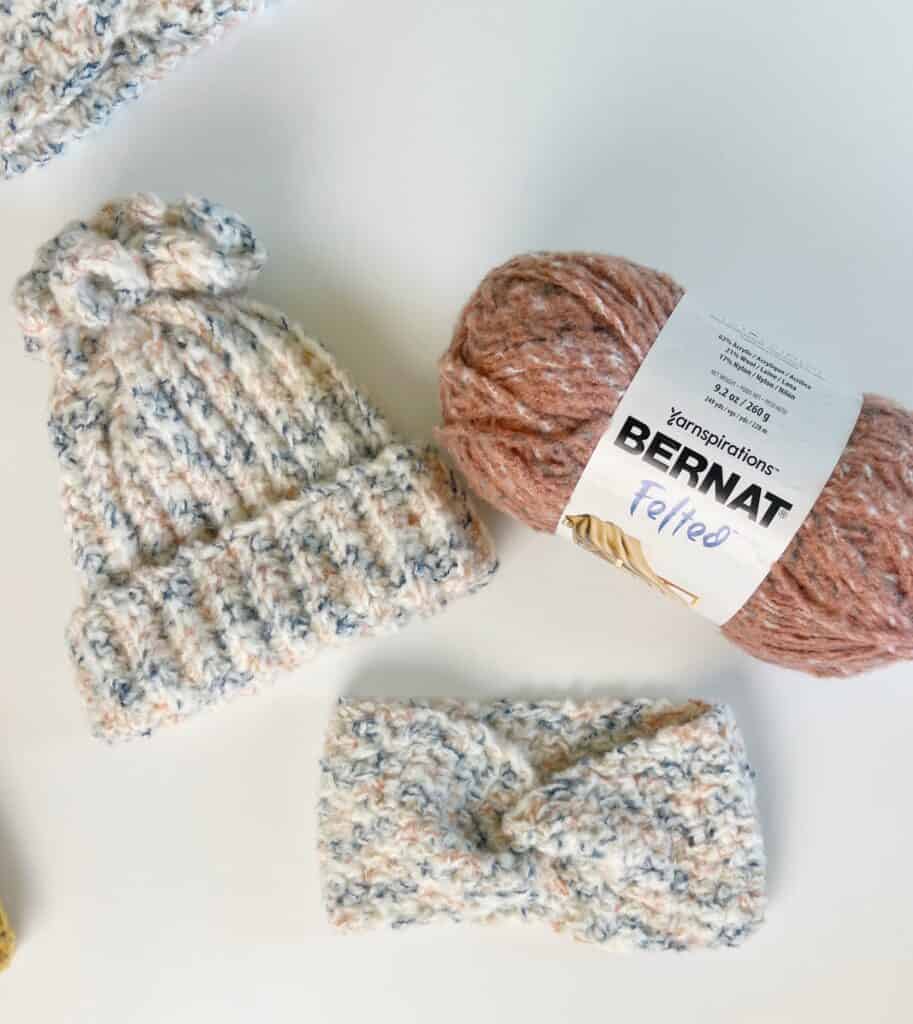
And, this Bernat Felted yarn is so great to work with-especially for hats. It’s stretchy, it’s fuzzy, it’s soft, and best of all, the stitches are easily undone when you need to undo. I’ve worked with some fuzzy yarn and when I need to frog back a bit, the stitches snag and the yarn won’t pull through.
Bernat Felted is a Wool/Acrylic/Nylon blend and a 6-weight chunky yarn. Besides the shades with flecks of color, they also have beautiful solid shades of color.
Tap here to see all the shades on Yarnspirations.com or currently, it is available at Michaels Craft Stores in the United States.
A few days ago we shared the Bernat Felted Easy Twist Headband pattern. In one skein of Bernat Felted, I was able to make one hat and two headbands. The skeins are quite large and I would guess that you could make two Extra Fun Fringe Hats with one skein.
The stitches used in this hat are beginner-friendly. The main portion of the hat is worked with back loop single crochet and the fun fringe portion is made with yarn over slip stitch, or sometimes called half double slip stitch. I have a full video tutorial available if you need more help or would like to follow along.
If you are a beginner crocheter however, I suggest that you start with the solid color yarn instead of the one with flecks as it can be a little tricky to see your stitches.
I also recommend that you use stitch markers to help you mark the last single crochet stitch you make of each row, as well as the last single crochet stitch you make before you start making the fun fringe. That will help you so much when you are transitioning from the last yarn over slip stitch and the back loop single crochet.
A stitch marker can be as simple as a safety pin. I prefer the plastic safety pins that you buy in the crochet section of your local craft store.
I’m going to include a size chart so you can make this any size that you’d like. I start with 30 chains and when I stretch the chain out, not too tightly, it measures 12 inches. 12 inches allows for a nice 3-inch brim and a snug fit. This would be for an adult medium size head.
The best would be to measure from the top of your eyebrows to the crown of your head and add 3 inches. That will give you the height measurement and the length of your starting chain. If you want a slouchier had add more inches to the starting chain.
For the width, an adult medium size head is 22 inches in circumference. With this yarn, I crocheted until I had 17 inches in width, 5 inches less than the head circumference measurement. That is how much stretch there is with Bernat Felted. If you are using different yarn, you might have different results.
Materials
Bernat Felted (62% Acrylic, 21% Wool, 17% Nylon, 260g / 9.2 oz, 228 meters / 249 yards, 6 weight bulky)
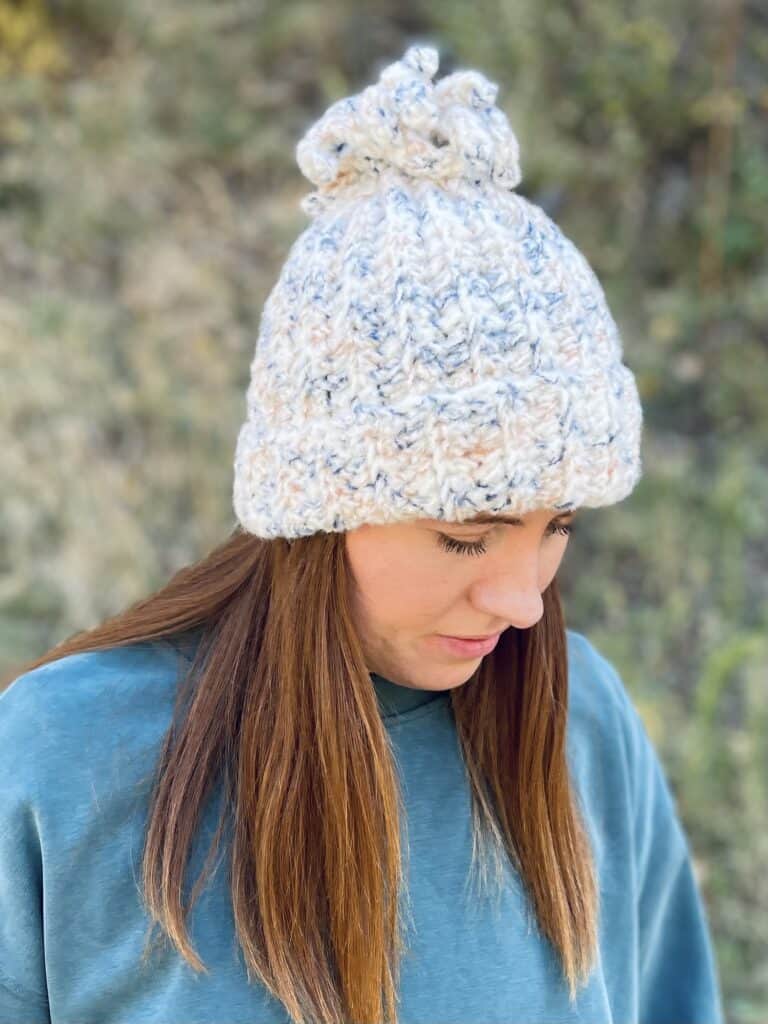
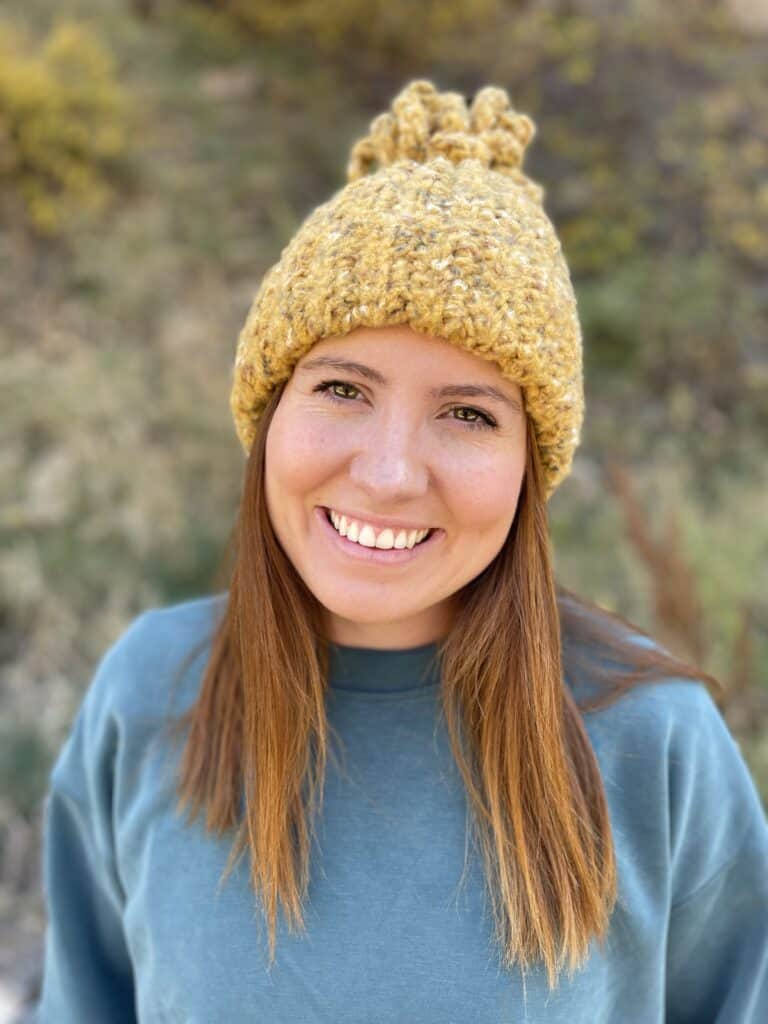
1 skein Amber Fleck (golden color) The other hat shown is in Ecru Fleck
8mm hook, tapestry needle, scissors, stitch markers
Stitches
Single Crochet (SC): Insert your hook, YO and pull up a loop, YO and pull through two loops on hook
Back Loop Single Crochet (BLSC): Insert your hook into back loop only, YO and pull up a loop, YO and pull through two loops on hook
Half Double Slip Stitch (HDSLST): (also called Yarn Over Slip Stitch) YO, insert your hook, YO, pull up a loop and pull directly through two loops on hook
Pattern
Chain 30 (or any number to the length needed according to the size chart above)
ROW 1: Begin in the second chain from the hook with SC. SC into each chain across the row. CH 9 and turn.
(Tip: mark the last SC before chaining 9)
ROW 2: Begin in the second chain from the hook with HDSLST. HDSLST into each chain, (8 chs), BLSC into the next st, (if you marked this st, remove marker, make the back loop sc, replace marker into the new st made.) BLSC into each st across the row. In the last st, work SC. (work under both loops on the last st.) CH 1 and turn.
ROW 3: SC into the first st. BLSC into each SC. (If you are using st markers, the last SC you work should be marked, replace marker after making new BLSC. CH 9 and turn.
Repeat row 2 and 3 instructions until the hat measures the width you need. For an Adult Medium that is about 64 rows.
Make your last row finish at the bottom or brim of the hat, tie off with a long tail for sewing the sides of the hat together and gathering in the top of the hat.
Use your tapestry needle to sew the sides of the hat together, catching both loops of the bottom of the starting chain, and the back loop of the SC, When you reach the fringe, move the needle in and out along the base of the fringe cinching it in tight. Work around the fringe gathering it in several rounds until it is tight. Weave in the ends.
Roll up the brim and you’re done!
Please watch the video tutorial below if you have any questions at all.
Be sure and check out our other fun fringe hat patterns as well as many other hat patterns we have for free here on our site.
If you look under the menu heading “Crochet Patterns,” “Hats and Headbands” you can scroll through our entire collections.
Or tap here to see all the “Hats and Headband” patterns we have on our site.
Thanks so much for stopping by!
Click here or image below for free printable pdf.
![]()