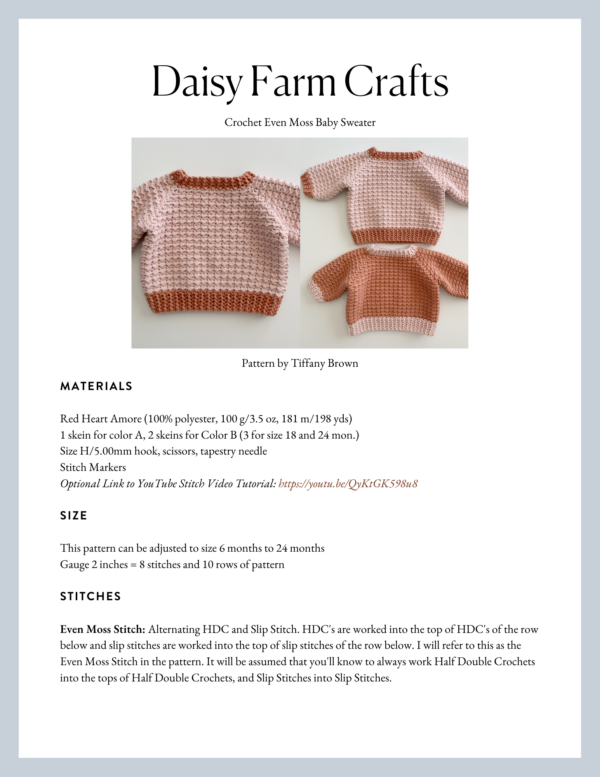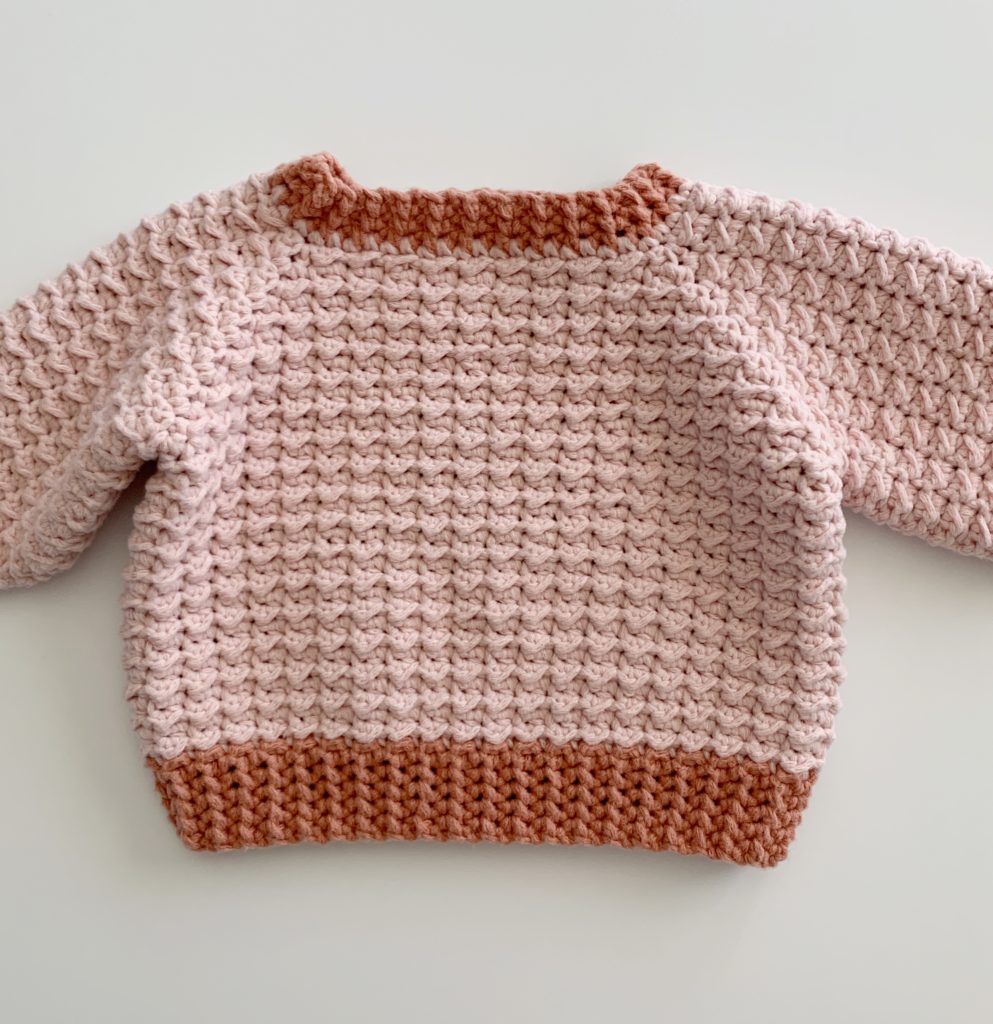
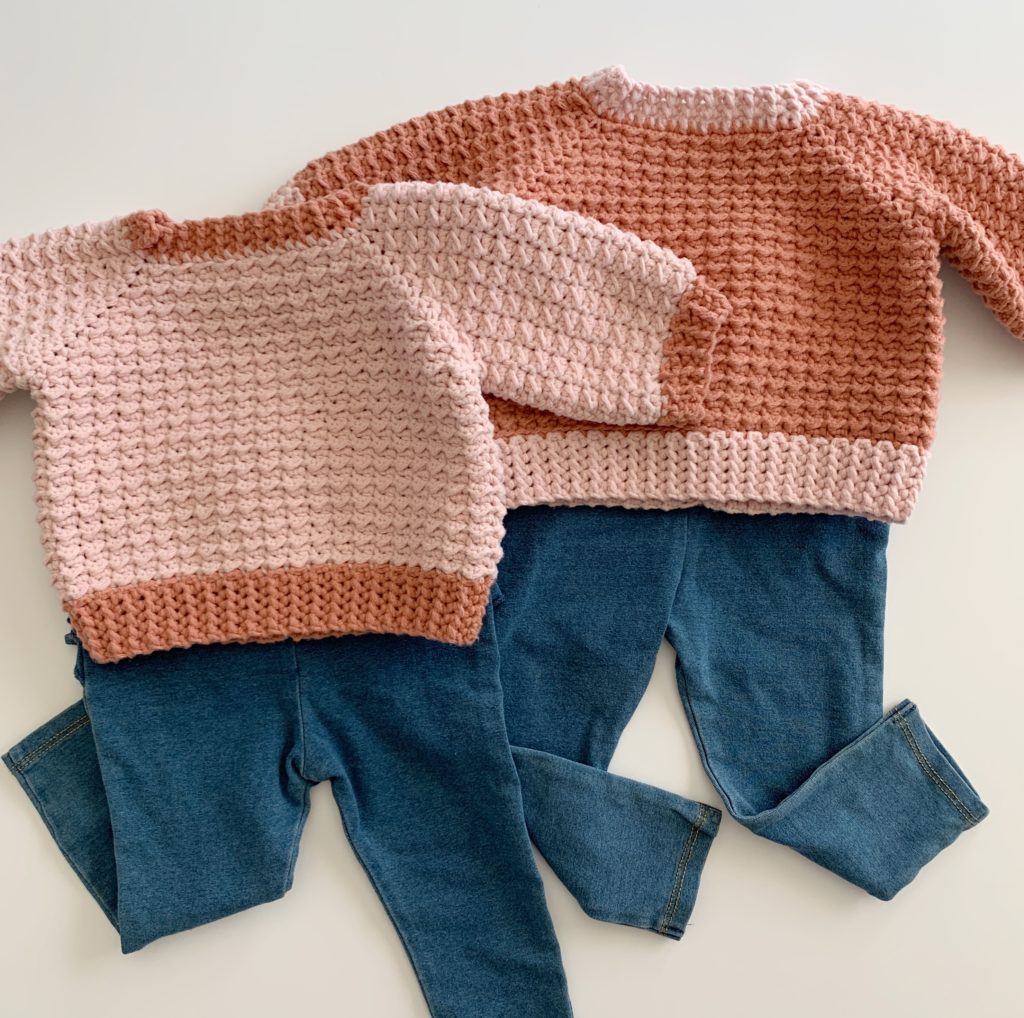
I loved this sweater pattern I made up so much I made it in three different colors just so I could see the different looks. (And who am I kidding, it took me three times to get the pattern just right:)
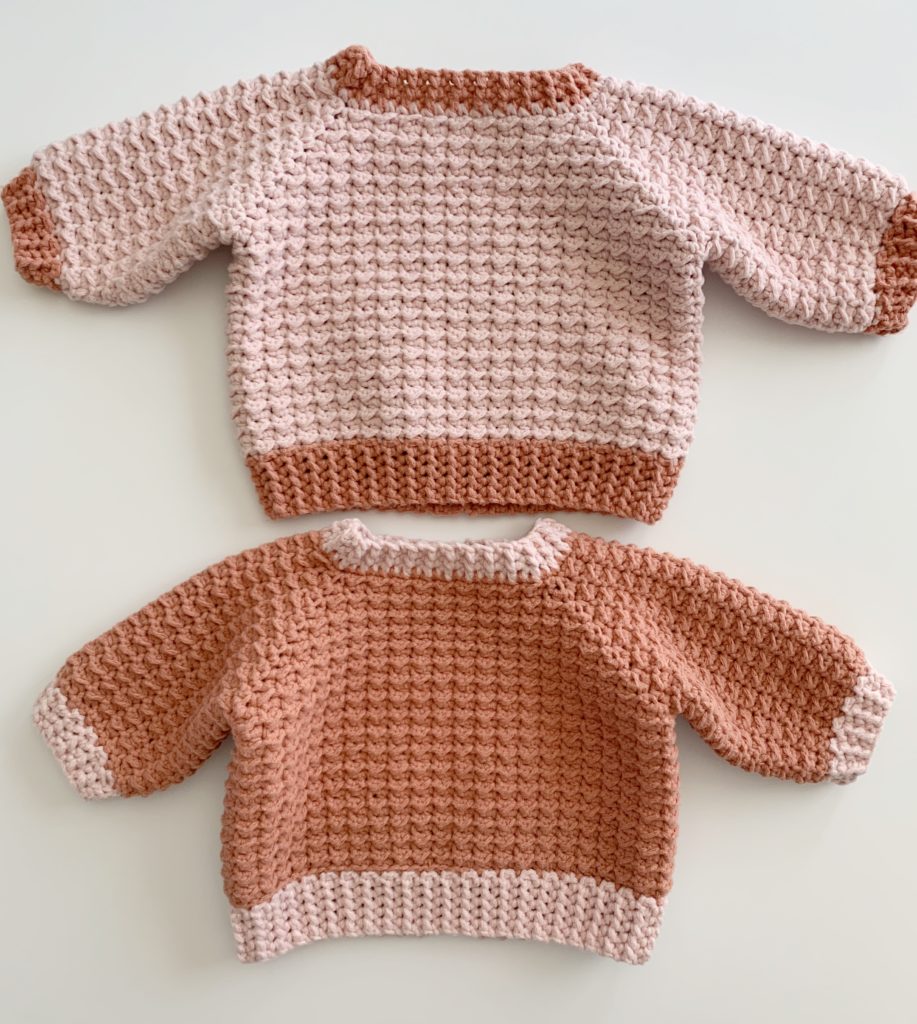
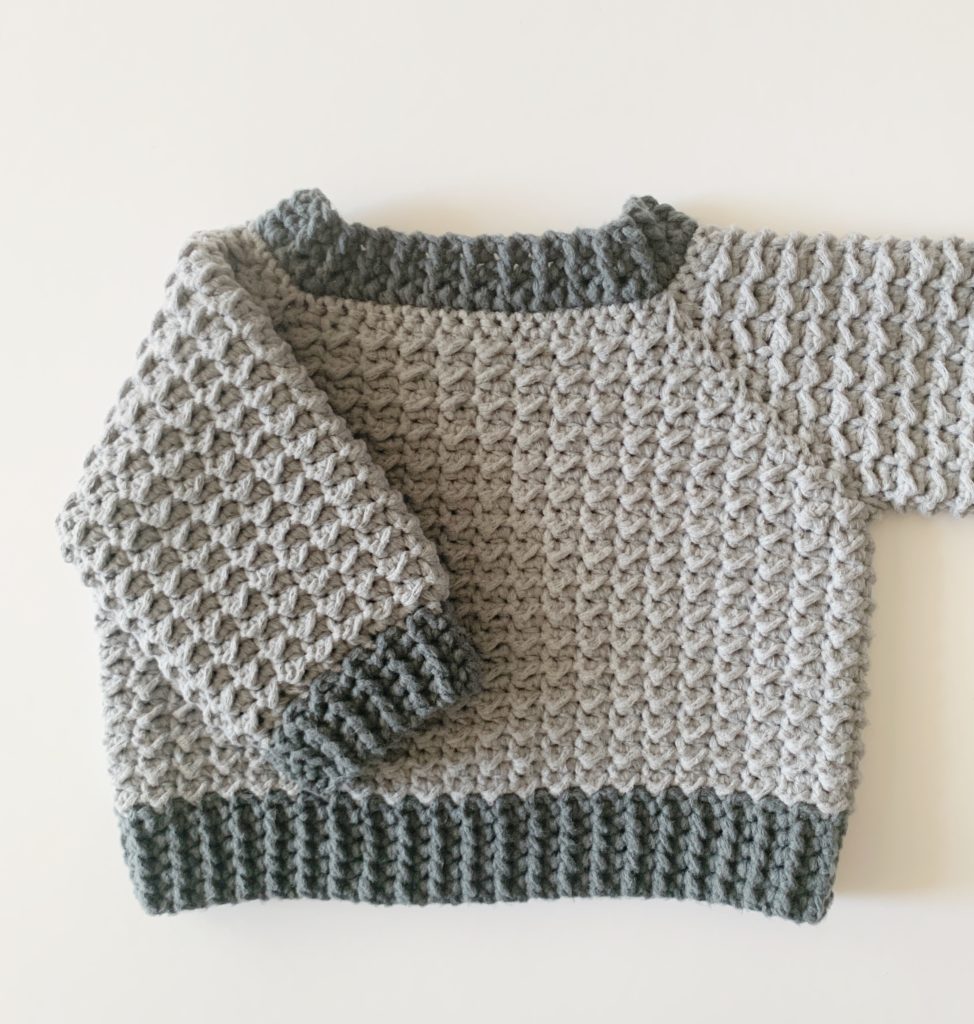
Plus, I wanted to test out a few size options for you. Here it is in two tone gray:
This project is advanced beginner to intermediate. You need to know how to comfortably join rounds, and increase through the shoulders.
Also helps to know how to join under the arms to make the arm holes and how to work ribbing. I wrote this pattern with an advanced crocheter in mind.
I created a video tutorial to help you with this pattern.
If you really love this sweater though, I’d love for you to start with an easier pattern that is the same general construction technique and has a video tutorial.
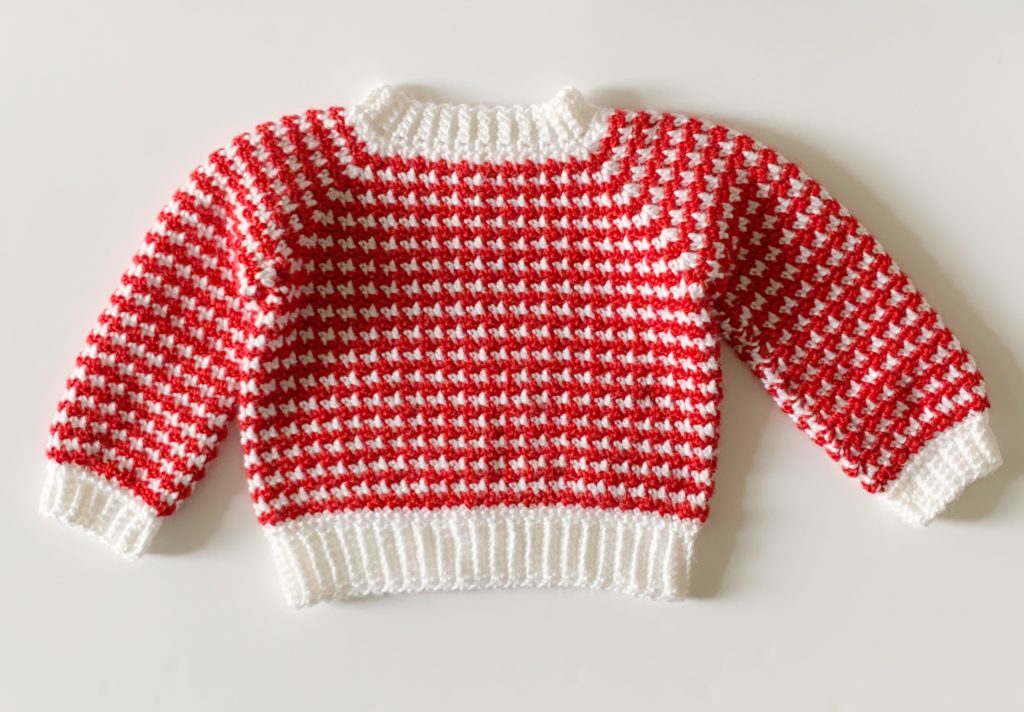
It is called the Crochet Houndstooth Baby Sweater and I’ve made it several times with different yarn and it turns out so cute every time.
If you are able to make that sweater, then come and try this one and you will have a lot fewer problems. The red sweater below is the easier version.
Click here or the the photo for the pattern.
Materials
Red Heart Amore (100% polyester, 100 g/3.5 oz, 181 m/198 yds)
1 skein for color A, 2 skeins for Color B (3 for size 18 and 24 mon.)
Size H/5.00mm hook, scissors, tapestry needle
Stitch Markers
Size
This pattern can be adjusted to size 6 months to 24 months
Gauge 2 inches = 8 stitches and 10 rows of pattern
Stitches
Even Moss Stitch: Alternating HDC and Slip Stitch. HDC’s are worked into the top of HDC’s of the row below and slip stitches are worked into the top of slip stitches of the row below. I will refer to this as the Even Moss Stitch in the pattern. It will be assumed that you’ll know to always work Half Double Crochets into the tops of Half Double Crochets, and Slip Stitches into Slip Stitches.
Half Double Slip Stitch (HDSS): (sometimes known as yarn over slip stitch) Yarn over, insert hook, yarn over and pull through all loops on the hook. Stitch complete.
Corner Stitch: In a marked space that will make the corners of the sweater work “SC, CH 2, SC” all into the same stitch. I will call this the “Corner Stitch” in the pattern.
Pattern
Start by making the ribbing for the neck.
Chain 4 with Color A.
ROW 1: Half Double Slip Stitch (HDSS) into each chain. (3)
ROWS 2 – 56: CH 1 and turn. HDSS into each stitch. (3)
With a tapestry needle, use the starting tail to sew the two ends together to form a circle. Cut color A and pull up a loop with Color B. SC around the circle working one SC into each space at the end of a row. Join with a slip stitch to the first SC of the round, chain 1 and turn. (56)
Place stitch markers. Count from the first SC of the round (the stitch you slip stitched into is stitch #1) and mark stitch #10, #19, #38, #47. You will have 18 stitches in between two markers for the front and back, and 8 stitches in between 2 markers for over the shoulders.
ROUND 1: (Start the first HDC in stitch #2 of the round. The turning chain and join counts as #1.) Work *one HDC, then slip stitch into the next stitch. Repeat from * (alternating HDC and SL ST (Even Moss stitch) to the first marker. (Your last stitch in #9 should be a SL ST.) In the marked stitch, work “SC, CH 2, SC”.
Continue the Even Moss Stitch to the next marker, starting in the first stitch after the corner with HDC. (Consider the corner stitch as a break in the pattern and continue with the Even Moss stitch, meaning, your last stitch before the corner was SL ST, begin with HDC in the space after the corner.)
Continue working the Even Moss Stitch to the next marked stitch, work the corner stitch, then continue on to the next. Work the last 8 stitches of the round with the Even Moss, then join with a slip stitch to the starting stitch. (Your last stitch before the join should be a slip stitch.)
ROUND 2: CH 1 and turn. Work Even Moss stitch starting by working into the first slip stitch of the row below with a SL ST and work Even Moss up to and including into the SC before the CH 2’s of the corner. Work the Corner Stitch underneath and around the CH 2 space. Continue the Even Moss Stitch in the SC from the row below. Continue in this manner working the round. Your last stitch of the round should be HDC. Join with a slip stitch to the first stitch, ch 1 and turn.
ROUND 3: Begin the Even Moss with HDC in top of HDC from row below. *Work Even Moss to the corner. Corner stitch around ch 2 space. Repeat from * around. Join with a SL ST to the first stitch. (Tip: the last stitch of this round will be SL ST.)
ROUND 4: Repeat round 2.
ROUND 5: Repeat round 3.
ROUNDS 6 – 9: Repeat rounds 4 and 5.
Tip: You will notice that the ODD number rounds begin the even moss pattern with HDC and the EVEN number rounds begin with SL ST. Be very careful not to start an Even Round with HDC. (It’s easy to not see the slip stitch, but if you realize you ended the round with a slip stitch, you need to begin with a slip stitch.)
Size Adjustments: Join for the armholes on round 10 for size 6 -9months, join for the armholes on round 11 for size 9-12 months, for 12-18 months, join on round 12, for size 24 months, join on round 13. (These are estimations and assuming you have the same tension as I did using a H/5mm hook and the same yarn. Please have a tape measure handy and refer to the size measurements of chart below.)
How to join for the armholes: Begin the round as usual with the Even Moss stitch to the first corner. *Instead of working the corner stitch into the ch 2 space, continue with even moss stitch in the ch 2 space. (Work the next stitch in the pattern sequence into the ch 2 space.) Pull the next corner space toward your hook and skip working over all the stitches and work the next stitch in the even moss stitch (it should be a HDC) into the next chain 2 space. Continue the Even Moss stitch to the next corner and repeat from *. Work the Even Moss to the end of the round, slip stitch to the beginning stitch, ch 1 and turn.
Work the Even Moss stitch, always joining at the end of the round and turning until your sweater measures from the back of the neck to the waist: 6 month size: 7 inches, 9-12 month 7.5 inches, 12-18 months 8 inches, 24 months 9 inches.

BOTTOM RIBBING:
When main body of the sweater reaches desired length, on final join, pull through with new color.
Chain 6. Work Half Double Slip Stitch in each chain back toward the bottom of the sweater. Slip Stitch into next stitch. *Turn work and work HDSS under both loops to the outer edge. CH 1 and turn. Work the HDSS back toward the bottom of the sweater again, this time slip stitching into the next two stitches. Continue repeating from * and on final row, remove hook, use a tapestry needle to sew the two ends together, weave in all ends.
SLEEVES:
Pull up a loop in the base of the armpit, making sure the little v’s of the stitches are facing away from you and going in a direction as if you just chained and turned.
Round 1: Chain 1 and SC into the same place as you pulled up a loop. Then work the Even Moss Stitch into the very first stitch of the round and every stitch around the armhole. Join with a slip stitch to the starting stitch.
Round 2: Chain 1 and turn. Work the stitch needed to continue the even moss pattern around the armhole. Join with a slip stitch at the end of the round. (This is very similar to joining the rounds when you increased for the neck. If a round ends on a SL ST make sure you start with a sl st, and vice versa.)
Repeat Round 2 until sleeve measures:
When sleeve is to desired length, work one last row of *SC, SC, SC2tog repeat from * around to decrease the width of the sleeve.
Pull through with Color B on slip stitch.
Chain 4. Work the ribbing around the sleeve in the same manner as the neck. Use a tapestry needle to sew the two ends together when finished with the round.
Tie off and weave in all ends.
Tip: When working the ribbing around the wrist, make sure the slip stitches going around the wrist match and are in the same direction of the bottom of the waist.
See video below for help:
Thanks for stopping by! Let us know how your sweater turns out! We’d love to see. Come and share on Instagram with #daisyfarmcrafts. Or, share to our Facebook page Daisy Farm Crafts.
xoxo, Tiffany
Oh, P.S.
I made my sweaters as baby gift. My niece had twins! So I bought some jeggings to go with:
And the grey sweater was for a baby shower gift for my friend’s new grandson:

P.P.S. The twins were born and look so cute in their sweaters! 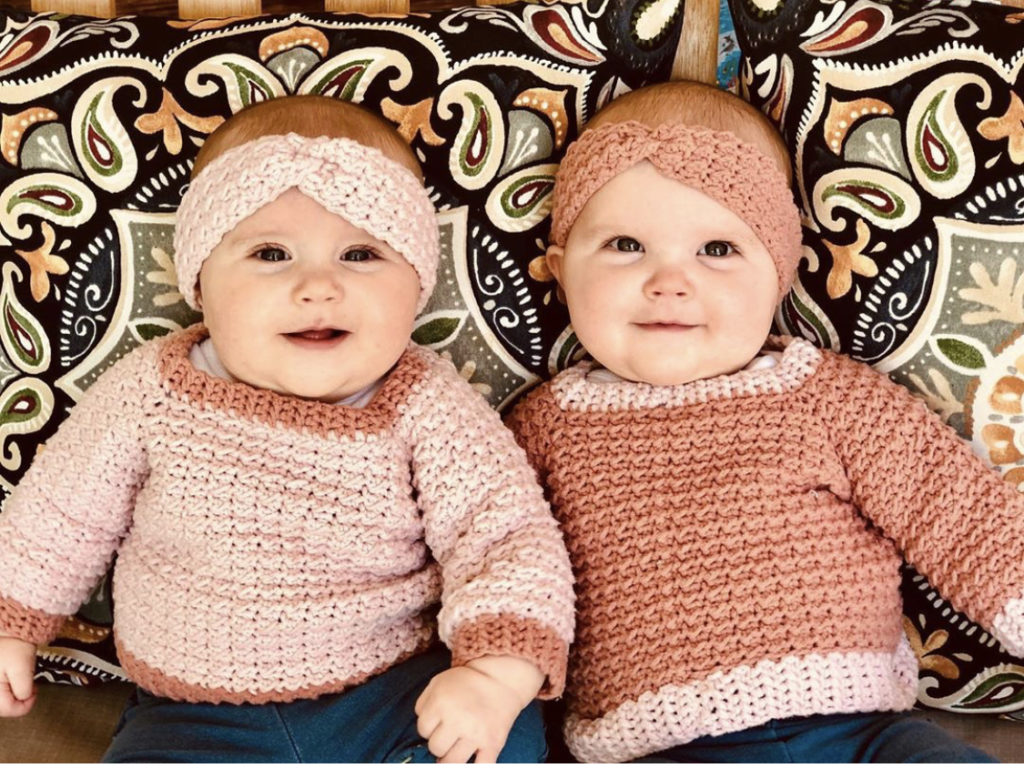
Click here or on image below for printable pattern