While I shopped at Baby Gap the other day, I saw the cutest striped baby sweater and knew right away I wanted to re-create it in crochet.
Thank heavens for Caron Simply Soft and the many colors I have in my stash! It took 7 different colors to make this work. When I showed progress shots on my Instagram account, someone noted that it looked like Lego Blocks. I agree! And I love it.
This sweater is made from the top down. I start with the neck, increase and section off for the armholes. Finish the bodice, work back and forth around the neck to make the hood. Work around the armholes to make the sleeves. Then finish as the last step the front placket that goes up and around the hood and back down the other side.

The stitch I’m using is called the herringbone half double crochet (HHDC). It’s a variation of the double crochet that I like because it lays flatter and is less “holey” than regular DC. It’s one small change from a DC.
You will yarn over, insert your hook into the designated stitch, yarn over and pull back through AND continue pulling through ONE loop on the hook. Then yarn over and pull through the two loops left on the hook.
Here’s a quick video demonstration:
You also will need to know how to make the ribbing stitch. This is best described as alternating front and back post double crochet. The post of a stitch is the vertical bar that forms when the stitch is complete. If you are unfamiliar with that stitch, you can watch this short video illustrating how it is worked:
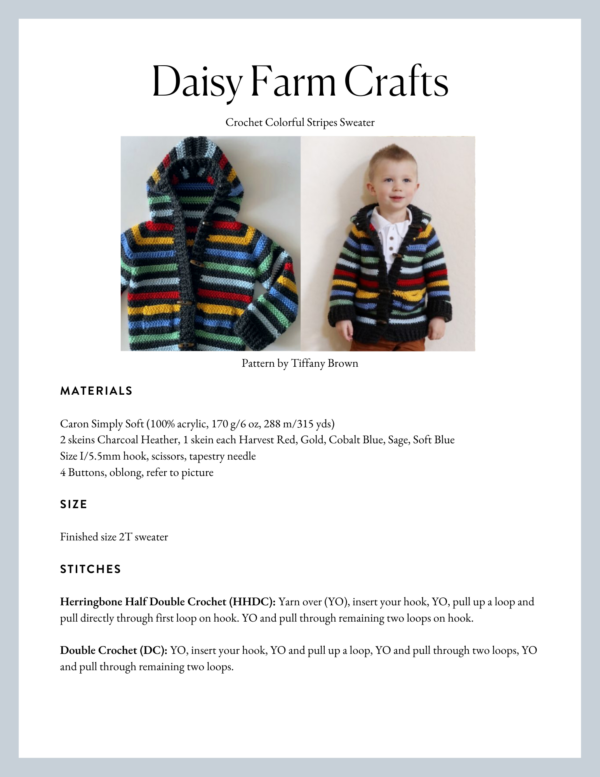
Materials
Caron Simply Soft (100% acrylic, 170 g/6 oz, 288 m/315 yds)
2 skeins Charcoal Heather, 1 skein each Harvest Red, Gold, Cobalt Blue, Sage, Soft Blue
Size I/5.5mm hook, scissors, tapestry needle
4 Buttons, oblong, refer to picture
Size
Finished size 2T sweater
Stitches
Herringbone Half Double Crochet (HHDC): Yarn over (YO), insert your hook, YO, pull up a loop and pull directly through first loop on hook. YO and pull through remaining two loops on hook.
Double Crochet (DC): YO, insert your hook, YO and pull up a loop, YO and pull through two loops, YO and pull through remaining two loops.
Front and Back Post Double Crochet (FPDC & BPDC): A front post DC means you insert your hook from front to back around the post of the next DC and work your DC. A back post DC means you insert your hook around the post from the back to the front and work a DC.
Pattern
Chain 44 with Charcoal Heather.
Row 1: In the third chain from the hook, HHDC, and into each chain across. Change color by pulling through on last stitch with Harvest Red. Chain 2 and turn. Stop here and we are going to put stitch markers into the 8th stitch from the hook, (count the stitch sitting at the bottom of the chain 2 as your first stitch,) 13th, 29th, and 34th.
(No need to cut off Charcoal Heather, we will carry it up the side.)
Row 2: In the second stitch from the hook, (the chain 2 counts as the first HHDC,) HHDC. Work a HHDC in each space until you reach a marker. In each of these marked places, you will be working 3 HHDC into that stitch. (This forms the shape for the neck.) Continue working HHDC in each stitch and 3 HHDC into the mark stitches and remove the stitch markers when you are finished. Make sure you are working the last stitch into the very first chain two. So there should be 9 HHDC worked after that last corner.
Row 3: Chain 2 and turn, (This will always act as your first HHDC, so make sure you are working into the next stitch.) HHDC in each stitch across, working 3 into the middle stitch of the three you worked for the corners. Remember your last stitch will be in the turning chain. Pull through with Charcoal Heather chain 2 and turn. Cut red, leaving a long tail. (Cut off all the color changes except Charcoal)
Rows 4 and 5: Repeat row 3. (Don’t forget to work the 3 HHDC into the middle stitch of the row below. If you are having problems finding it, take the time to just use your stitch markers if you need and mark them ahead of time.)
Rows 6 – 13: Repeat row 3 instructions, making color changes after every 2 rows. (Rows 6 and 7 in gold, 8 and 9 in Charcoal Heather, 10 and 11 in Colbalt Blue, 12 and 13 in Charcoal Heather.) Change to Sage for the next row.
Row 14: (The armhole making row) With Sage, work your HHDC in each stitch to the first corner (the 3 HHDC’s that are in one stitch.) Work only ONE HHDC into the middle stitch and then skip over all the stitches to the next HHDC corner and work only ONE HHDC into the middle stitch, work your HHDC in each stitch across to the next corner and only work ONE HHDC into the middle stitch, skip over all the stitches to the next HHDC corner, work ONE HHDC into that corner and then work the remaining stitches to the end. You just made armholes!
Row 15: Chain 2 and turn, work HHDC into each stitch around the sweater just working the bodice. Continue working your HHDC’s to the end, chain 2 and turn. Change back to Charcoal Heather.
Rows 16 and 17: HHDC in each stitch, CH 2 and turn.
Rows 18 – 42: Work as rows 16 and 17, changing colors after every two rows according to the picture.
Row 43: With Charcoal Heather, Work one Double Crochet in each stitch around the bottom of the sweater. Chain 2 and turn.
Rows 44 – 47: Work alternating front post and back post double crochet across the row. CH 2 and turn.
Tie off.
Hood
Starting with Charcoal Heather and in the front right corner on neck as it faces you. Work 1 HHDC in each stitch on the bottom side of the chain to the first corner. Work 2 HHDC into the corner, 1 HHDC into each stitch to the next corner, 2 HHDC into the corner. Work *1 HHDC into the next 2 stitches, 2 HHDC in the next stitch. Repeat from * to the next corner and then work as the start of the round putting 2 HHDC into the corners. Change color to soft blue. Chain 2 and turn.
Work one HHDC in each stitch across the row, chaining 2 and turning and working the color stripe pattern for 25 rows.
Match right sides together, fold hood in half, slip stitch together. Tie off and weave in all ends created so far.
Arms
With Sage, pull up a loop in the armhole, chain 2 and work one HHDC in that same space. Work one HHDC in each stitch around, work one more in the armpit and slip stitch to the chain 2. CH 2 and turn. Take time to count how many stitches around you have and make the same amount in each round. Also remember this number so you’ll be sure and do the same for the other side.
Work 27 rows making the color changes as before.
Work one round of all DC for row 28 in Charcoal Grey to start the rows of ribbing. Slip stitch at the end of row to beginning chain, chain 2 and turn.
Work alternating front and back post double crochet for 4 rows to create ribbing about the wrist. Tie off and weave in the end.
Front Placket
Starting in the bottom right hand corner of the sweater, pull up a loop and chain 2. Work a DC in the same space. Work 2 DC per row across the ribbing, then 1 DC per row up the side of the sweater, (or add one or two if pulling, goal is to make as even as possible) work around the hood and back down the other side. Chain 2 and turn.
Work front and back post DC for four more rows creating ribbing for the placket. Tie off and weave in ends.
POCKETS: (make 2)
With Charcoal Grey, chain 15. In the 3rd chain from the hook, work one HHDC in each stitch across. Ch 2 and turn.
Work 2 rows of each color (cobalt blue, grey, gold, grey,) leave long tails for sewing the pocket onto the sweater.
Attach buttons.
Tips for making this sweater one size larger: Use a Size J hook.
Other tips to make it larger but I don’t know what size you’d end up, you’d have to get the measurements of the child you are making it for, but adding two extra rows before you joined for the armholes would increase the shoulder width, then you could add more length for arms and bodice.
You also could join the armholes two rows sooner if you need the sweater smaller. I would guess it would make it a 9 month size.
Now this is who my sweater was for:

It’s our darling Reed! He is the very first Daisy Farm miracle baby! Almost three years ago I shared with my friend Andrea, Reed’s mommy, my crazy idea of crocheting blankets in hopes to become a grandma and in hopes that Hannah would have a baby. At the time, Andrea was praying for her own miracle. She’d been trying for many years. We both agreed that it wouldn’t hurt! But it turns out, that first Daisy Farm blanket was for her and we welcomed baby Reed into the world. He will always have a special place in our hearts. He is the symbol of hope for us!

Isn’t he so cute? He sure has grown a lot. He’s two and a half now! Here he is with his original baby blanket:
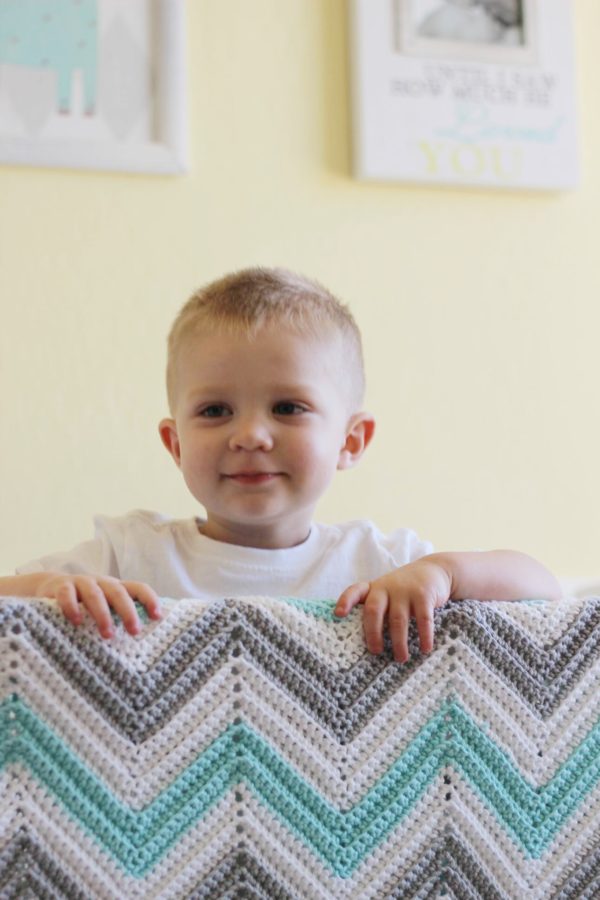
He really does increase my faith and motivates me to just keep crocheting and creating so someday my grandma dream will come true.
Thank you all so much for stopping by. I’m so glad crochet is a hobby that can be shared. I can’t think of anything better for a craft. But that is why it is so meaningful for both Hannah and I that you would come and choose to make a Daisy Farm project. I think it adds to the prayers sent heavenward on our behalf. So thank you!
Plus, you all are so talented and make our patterns look amazing! To share just tag your Instagram posts with #daisyfarmcrafts or share them to our Facebook page.
Happy Crocheting!
xo, Tiffany
Click here or on image below for printable pattern