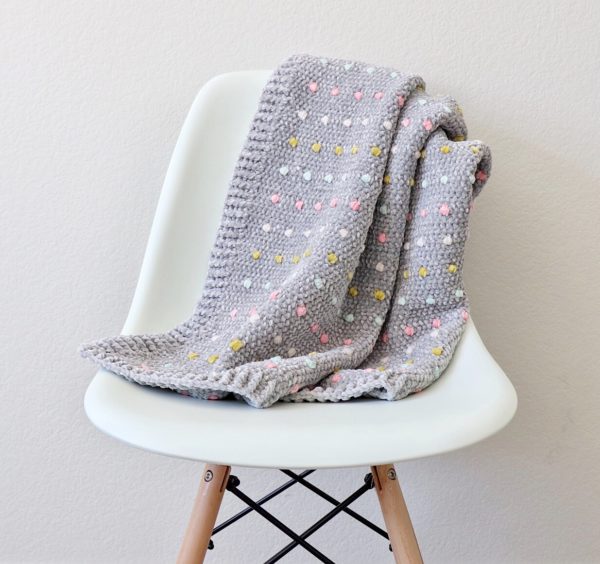
Hello friends! We’ve reached into our archives today to share one of our favorite blanket patterns- the Candy Dots Blanket! Hannah made this almost five years ago, which is still a classic pattern.
Feel free to substitute any yarn you’d like for velvet. We give the pattern repeat and you can make it any size. This is such a cute look for spring.
Enjoy! (oh, and be sure and scroll to the end of the post for the free pdf printable version of the pattern.)
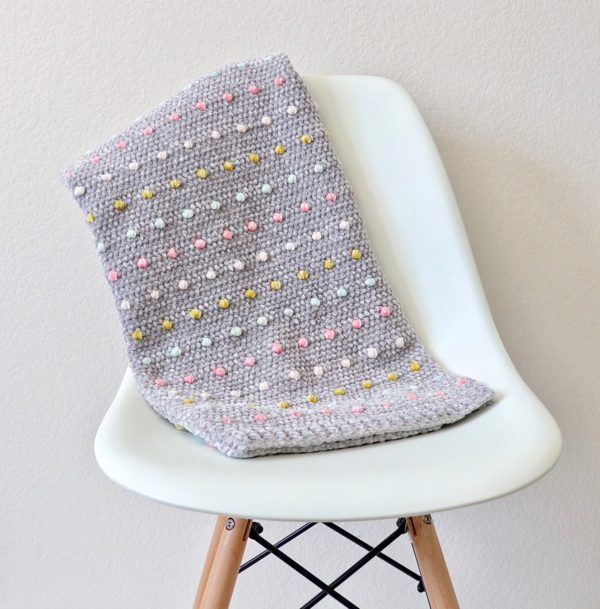
Hi there, it’s Hannah, I’m excited to share the pattern for this crochet blanket because I love how it turned out! When I first shared a work in progress picture of this blanket one of our Facebook crochet friends said it looked like those candy dots that come in lines on sheets of paper and I totally agree!
For this blanket I used Bernat Baby Velvet yarn which is soooo soft and luscious but is not without it’s challenges. We are still experimenting with which stitches and designs work best with this yarn, but here are a few definite rules we’ve gathered so far:
-Don’t pull from the middle! For whatever reason, every time we’ve tried pulling yarn from the middle of the skein while we are crocheting it always ends up getting tangled; things go much better when we pull the yarn from the outside of the skein. My younger sisters have even gone so far as to roll the whole skein into a ball before they even start crocheting, but for this blanket I just pulled from the outside and I was fine :).
-Choose a tight stitch! After making a few velvet blankets, so far we really like using half double crochet worked in between each post and under all three loops the HDC makes. It is hard to see where to insert your hook into the tops of stitches with velvet. We also like the front post or back post DC. Any stitch basically that eliminates working into the top of a stitch is turning out to be our favorite with velvet. This blanket uses both of those stitches, which I will explain below!
-Keep your tension tight! I tend to be a loose crocheter in general, so I have to really pay attention with this yarn to make sure my tension stays tight the whole time to avoid any loose loops coming up! When it comes to velvet, the tighter the stitches the better.
If you follow those three rules, I think you’ll have much better luck with your velvet project. For this blanket I used a puff stitch to make the dots, which is fun because they show up on both sides. The puff stitches are pretty subtle in terms of texture, so if you’re wanting more of a bobble look, you could replace the puffs with a double crochet cluster stitch or a berry stitch.
The full written pattern for this blanket is below, but my awesome mom also did a video tutorial of the stitches used if you want to watch before you get started! This pattern uses the technique of carrying yarn, so if you’ve never seen that done before you may want to watch the video to see how this is done.
Materials
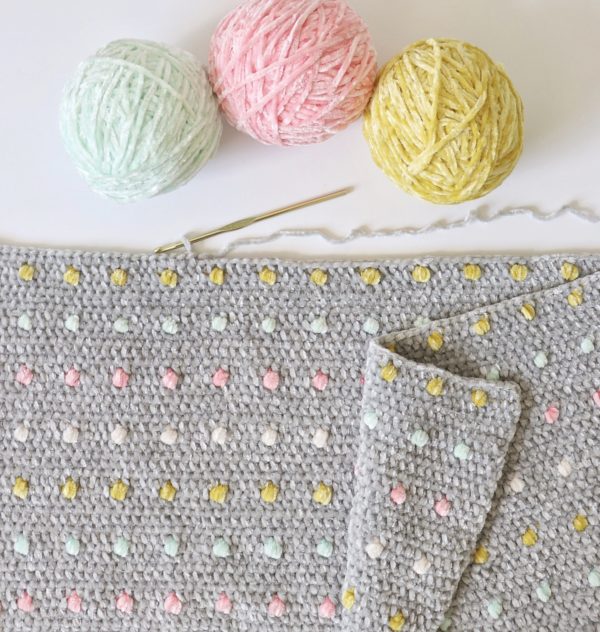
Bernat Baby Velvet (100% polyester, 300 g/10.5 oz, 450 m/492 yds)
4 skeins Misty Gray, 1 skein each Ever After Pink, Seafoam, Joyful Gold, Cuddly Cloud
Size H/5.00mm hook, tapestry needle, scissors
Size
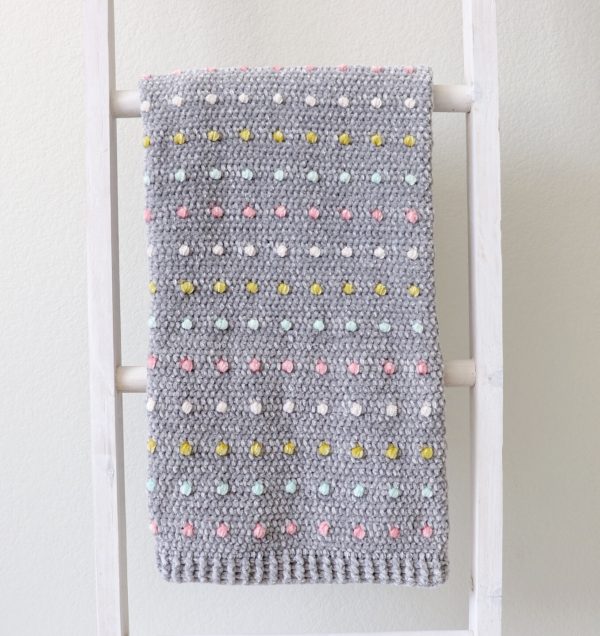
Finished size 36 in x 36 in
Stitches
Half Double Crochet (HDC): Yarn over (YO), insert your hook, YO and pull up a loop, YO and pull through three loops.
Wide Half Double Crochet (WHDC): YO, insert your hook between stitch posts, YO and pull up a loop, YO and pull through three loops.
Puff Stitch: *YO, insert your hook, pull up a loop. Repeat from * 3 more times (inserting your hook into the same space). Then YO and pull through all the loops on your hook.
Pattern
Chain 121 with Gray. (To make your blanket bigger or smaller, chain any multiple of 5, then add 1.)
Row 1: Starting in the 3rd chain from the hook, work 1 HDC. Work 1 HDC in each chain across the row. CH 2 and turn.
Rows 2 – 5: Work 1 WHDC in each space across the row. CH 2 and turn.
(From now on you will always be inserting your hook in between the posts, even on the puff stitches.)
Row 6: Work 1 WHDC in each of the first 4 spaces with Gray. On the 4th stitch, pull through with Pink. Work 1 puff stitch with Pink, carrying the Gray along your work and crocheting over it. Right before you finish the puff stitch, pull through with Gray. *Work 1 WHDC in the next 4 spaces with Gray, carrying the Pink yarn along your work and crocheting over it as you go. On the next stitch, work 1 puff stitch with Pink, carrying the Gray along your work and crocheting over it. Right before you finish the puff stitch, pull through with Gray. Repeat from * to the end of the row. CH 2 and turn. Cut the Pink, leaving a tail long enough to weave into the blanket later.
Tip: As I was working this row I found the best way to keep my yarn from twisting as I carried it across the row was to make sure that I always kept the Gray to the front and the Pink to the back of my work each time I switched colors.
Row 7: With Gray, work 1 WHDC in each space across the row, inserting your hook in between the stitches and also underneath the yarn that you carried through on the row below. (Sometimes it can be a little tricky to see, but this helps to make sure that the yarn doesn’t show through on either side.) When you get to the puffs, make sure and work 1 stitch on either side of them. CH 2 and turn.
Rows 8 – 11: Work 1 WHDC in each space across the row in Gray. CH 2 and turn. (4 rows of Gray.)
Repeat rows 6 to 11 for the remainder of the blanket, changing colors each time you repeat row 6. In other words, you are working *5 rows of Gray, 1 row with Pink puffs, 5 rows Gray, 1 row with Seafoam puffs, 5 rows Gray, 1 row with Gold puffs, 5 rows Gray, 1 row with White puffs, 5 rows Gray. Repeat from * until you reach your desired length.
I decided to end with 1 row of Pink puffs before my last 5 rows of Gray to match the first Pink puff row on the other end of the blanket. So in total, I had 21 puff rows when I was finished.
Border
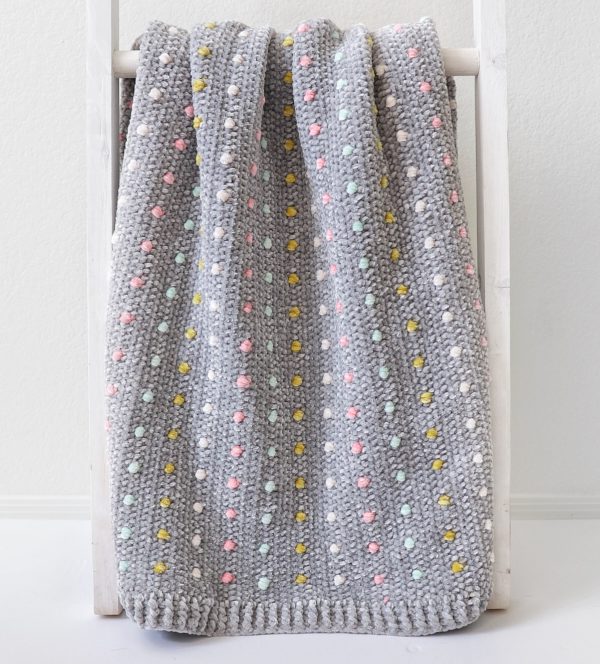
After I finished my blanket, I added a front and back post double crochet ribbing border.
Round 1: Pull up a loop in any corner and chain 3. DC around the entire blanket, working 5 DCs into each corner stitch.
Round 2: When you reach the corner you started with, work 5 DCs into the corner, then go around the blanket again, this time alternating front and back post double crochet. When you get to the corners of this row, you will want to continue the pattern of alternating front and back post double crochet, but you will work three stitches around the corner post.
So, for example, if you get to the corner post and you are supposed to work a front post DC, then work a front post DC, a back post DC, and a front post DC all around that corner post. Then in the next stitch you would continue the alternating pattern, working the opposite of whichever stitch you just used (in this example, you would work a back post DC). Just remember that you are always alternating front and back post double crochet around the whole blanket, you just happen to be working three of those stitches around the same post when you are working the corners.
Rounds 3 – 4: Repeat round 2, making sure your post DCs are popping out in the same direction as previous row. When you’re finished, slip stitch into the corner and tie off.
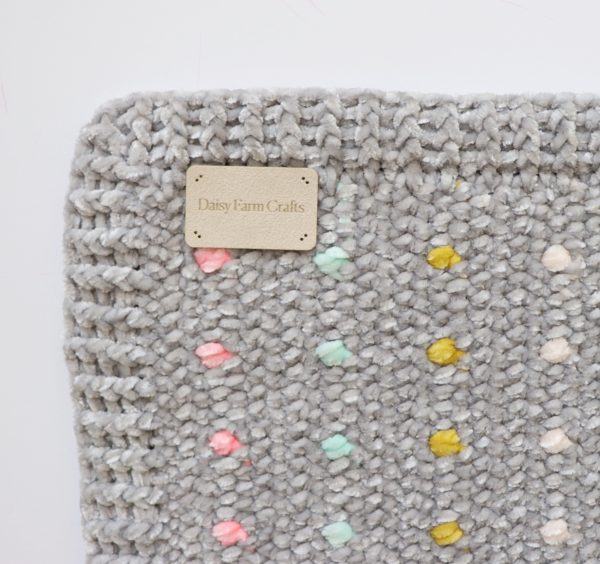
The last thing I need to do is sew on this label! Our friends from Angie + Britt sent us some to try out and we love how cute they are! If you’re looking for some custom labels for your finished products, check out angieandbritt.com, they have lots of cool options!
Thanks so much for coming to read this pattern and best of luck with your blanket! When you’ve finished please come share a picture with us on Facebook or Instagram using #daisyfarmcrafts, we’d love to see!
xo, Hannah
Click here or on image below for printable pattern
![]()