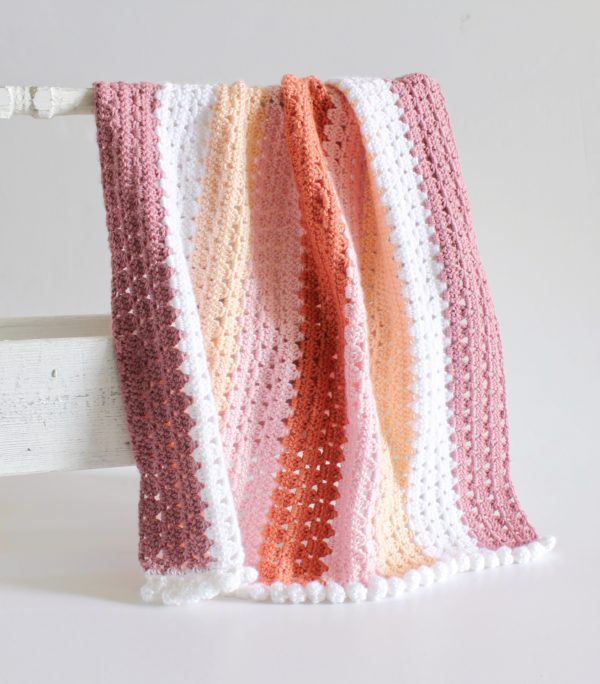
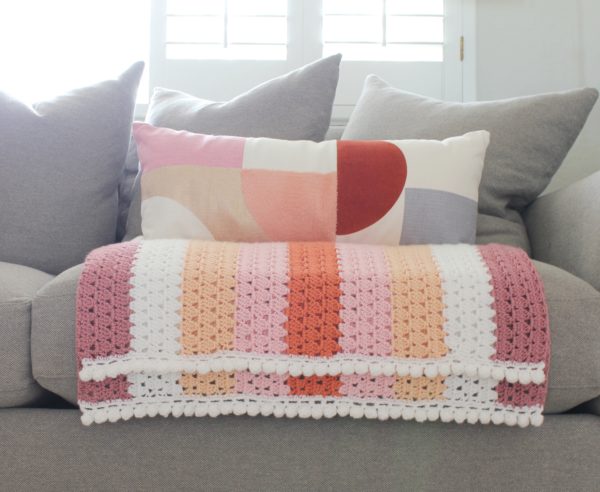
This Crochet Modern Boho Granny Blanket started with me spotting a pillow at my local Target and buying it.
I loved the color of burnt orange with the touch of pink and peach.
However, I was unsure if I could find the colors in yarn, but always thankful for Caron Simply Soft colors.
I was able to come up with a surprisingly perfect color combination.
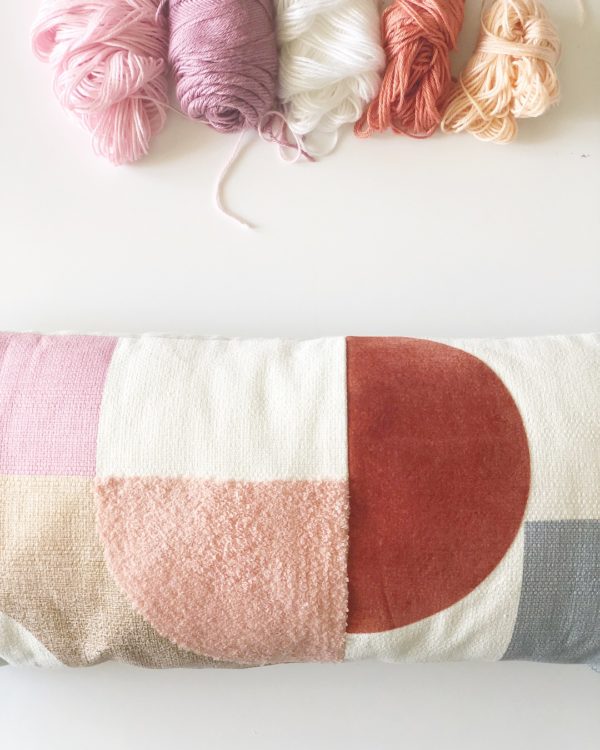
The colors worked so well together.
Even though, I really was unsure after every color change if it was going to turn out.
However, I kept the dark colors spread apart from each other to create more of an accent.
And, I like how the soft pink surrounds the pumpkin on each side. It seemed to help it not be too bold.
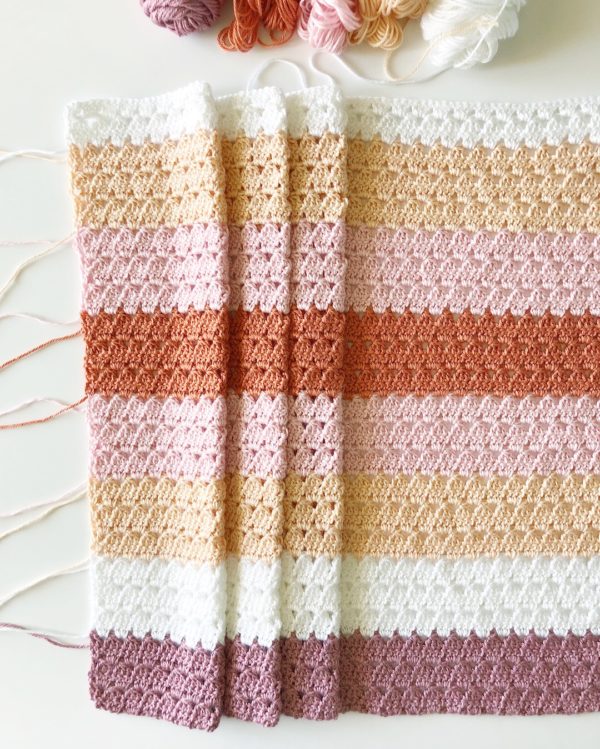
This is my third Modern Granny Blanket I’ve made.
There is a bit of a learning curve to it though. I want to beg and plead, like always, that you please work a practice swatch to get the turning at the end of each row memorized.
The little diamonds are worked the same but each row ends with four different combinations of stitches.
You will be repeating rows 3 through 6 to the end of the blanket and each of those 4 rows end differently.
For you to have 100% success making this blanket, paying attention to these 4 ways and practicing them ahead of time, will help you have a blanket where the sides are straight.
For this particular Modern Boho Granny, and the reason that I am naming it that is because I added a pom-pom stitch for the border!
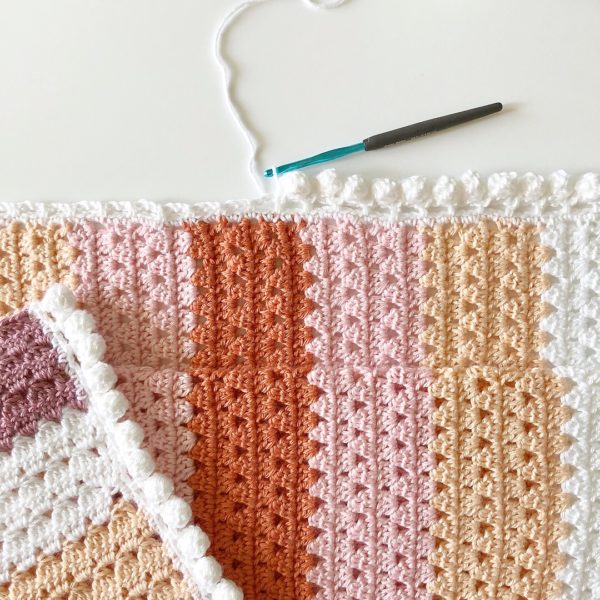
Don’t be scared to try this! I have a video tutorial at the end of this post to help you out and to explain everything.
I am just adding the border on each end.
I wanted this to be a crib blanket type/throw, instead of a squared up blanket. So, the stripes run vertical and it’s longer than it is wide.
Okay, that’s enough chatter from me! Let’s get to the pattern.
Oh but first, can I just insert a huge thank you to all of you who follow me on Instagram, Facebook, Youtube, found me on Pinterest, or subscribe to my newsletter.
I am deeply grateful for all your likes and comments, re-pins and shares. I never in a million years thought that sharing my patterns would become a worldwide thing.
Among the reasons I started this blog, one was to document the patterns so in case my girls ever took up crochet, and maybe I had become a grandma and they liked the grandchild’s blanket, and say it got lost or something, they could have the pattern to re-create it.
And maybe that stems from my wish that I had patterns from my great-grandmother of her dainty hot pads and beautifully crocheted pillowcase edgings.
Can you imagine if we could access all that? What I would give to watch her on a YouTube channel explaining how she made something.
I guess my real hope is that my future grandchildren or greats will see me and know of my love for this craft and know a little bit about who they are.
(The internet will live on forever right? I hope so!)
Be sure and scroll to the end of this post for a free printable pdf of this pattern.
Here’s the pattern:
Materials
Caron Simply Soft (100% acrylic, 170 g/6 oz, 288 m/315 yds)
1 skein each Plum Wine, White, Light Country Peach, Soft Pink, and Pumpkin
Size H/5.00mm hook, scissors, tapestry needle
Size
Finished size 36 in x 30 in
Stitches
Single Crochet (SC): Insert your hook, yarn over (YO) and pull up a loop, YO, pull through two loops.
Double Crochet (DC): YO, insert your hook, pull up a loop, YO, pull through two loops, YO, pull through remaining two loops.
Double Crochet 3 Together (DC3TOG): *YO, insert your hook, YO, pull up a loop, YO, pull through two loops. Repeat from * over next 2 stitches, YO and pull through all loops on hook.
Double Crochet 5 Together (DC5TOG) Cluster: *YO, insert your hook, YO, pull up a loop, YO, pull through two loops. Repeat from * 4 more times, inserting hook into same space. YO and pull through all loops on hook.
Pattern
Chain 139 with plum wine. This is a multiple of 3, plus 1 (3+ 1 is the pattern repeat).
Row 1: 1 DC into 4th CH from hook, *SK next 2 CHs, 3 DC into next CH, repeat * ending with 2 DC into last CH, turn.
Row 2: CH 3, 1 DC into next DC, (CH 3 counts as first DC), *CH 2, DC3TOG, repeat from * ending with CH 2, DC into next DC, DC into top of turning chain, pulling through with new color just before you finish the DC.
Row 3: CH 3, 3 DC in the CH 2 space between the last DC3TOG and 2 DC of the previous row, *3 DC into next CH 2 space, repeat from * ending with 1 DC in top of the turning chain.
Row 4: CH 4, (counts as 1 DC and 1 CH), *DC3TOG in top of each 3 DC of previous row, CH 2, repeat from * across and end with CH 1, DC into top of CH 3 turning chain, pulling through with new color.
Row 5: CH 3, 1 DC into DC (the base of the ch 3, the top of the last DC you made), *3 DC in next CH 2 space, repeat from * across ending with 2 DC into the top of 3rd chain of the turning chain.
Row 6: CH 3, 1 DC into the next DC, *CH 2, DC3TOG, repeat from * ending with CH 2, DC into next DC, DC into 3rd of ch 3 pulling through with new color just before you finish the stitch.
Repeat rows 3 through 6 for the rest of the pattern.
Here are the color changes:
6 rows Plum Wine, 6 rows White, 6 rows Light Country Peach, 6 rows Soft Pink, 6 rows Pumpkin, 6 rows Soft Pink, 6 rows Light Country Peach, 6 rows White, 6 rows Plum Wine
Border
Before you start the border, please take the time to weave in all the ends. I do this by working them in and around the work with the tapestry needle for at least 6 inches of the tail. I like them to be secure. I do not crochet over the ends anymore as a way of saving time. They do not stay secure. Settle in with a good Netflix and weave them in. There shouldn’t be too many.
Round 1: With the white color, start in a bottom right-hand corner that will have you work up one side. Pull up a loop and SC in that space. (Around a DC post actually.) Work 2 SC around each DC post running up the side of the blanket. Try and do this as evenly as possible. CH 1 and turn.
Round 2: SC in the first chain space, *CH 3, SK two spaces, SC in the next. Repeat from * to the end of the row. (It’s totally okay that when you get to the end of the row you might only skip over one space or have an extra at the very last. I’m not a mathie and couldn’t bring myself to figure it out exactly.)
Round 3: CH 1 and turn. SL ST (slip stitch) into the CH 3 space. *CH 5, DC5TOG Cluster in the 4th chain from the hook, DC5TOG Cluster in the 5th chain from the hook. SL ST the posts together. SL ST into the same CH 3 space, SL ST into the next CH space. Repeat from * to the end of the row.
Tie off and weave in the ends.
Now, below is a complete video tutorial for a practice swatch and the pom pom border. Watch below or click here to watch on YouTube.
Thank you for stopping by! I invite you to become my crochet friend! Find me on Instagram or Facebook! I love sharing your completed pictures of your Daisy Farm blanket.
The best way is to post a picture to my Daisy Farm Crafts Facebook wall.
We have almost 344 thousand friends there and you can see other’s great color choices for new inspiration!
Also, I’ve heard a new feature for Pinterest is to share your picture to the Pin you used to find me.
So say you saw the Modern Granny Boho Blanket on Pinterest and saved that Pin, go back when you finish your blanket and add a picture of it.
More people can see how it turned out. So fun to keep sharing and hopefully get even more people interested in crocheting.
Enjoy!
Tiffany

