Hi there, Its Haley! I have been working hard this past month to perfect my crochet skills and I finally was able to crochet two beautiful scarves for college! For those new to Daisy Farm Crafts, I am Tiffany’s third daughter and I live in Montana. I love the break I get from the Arizona heat and I’m so excited to be able to wear winter clothes.
I would consider myself to be at the beginner level for crochet and the thing I love about these scarves are they are totally beginner friendly and super cute. I am so happy with how they turned out. It is the same stitch for both scarves: the mesh stitch. It took me a while to really master the mesh stitch. I had to do a lot of practice swatches to get it right. Practice swatches have helped me so much to learn crochet.

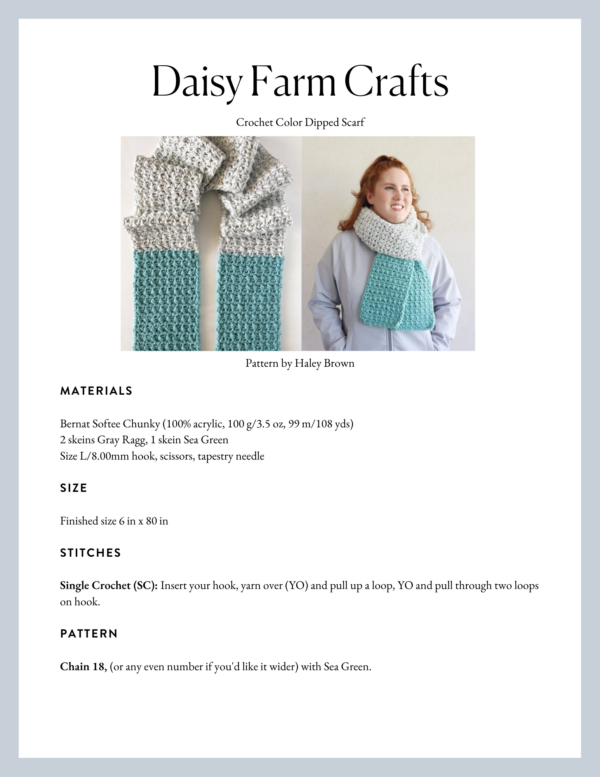
The yarn I used was Bernat Softee Chunky in colors white, grey ragg, and sea green. I love this yarn! The yarn is so soft and with the thickness of the yarn, it works up quick and easy to see the stitches. It also is easy to take out if you make a mistake, which, I do a lot of while I crochet.

For example, the first scarf I made, the white one shown in the picture above, I started out with too loose tension; however, towards the end of the scarf, I had a tighter tension than what I started with so one side is a little bit bigger than the other side. But, that’s how crochet goes for a beginner, It never is completely perfect the first time!
I wanted to redeem myself and I made another scarf but this time with the teal color.
To be honest, I had so much fun making the scarf that I just wanted to do it again. I have to say the sea green and grey scarf turned out perfect and even on both sides. It is a cute scarf that I can proudly wear around and say I made it! How cool is that to say? You made your own scarf and I bet no one would know because the scarf looks really professional.

I made both scarves wider to cover my face and nose in cold winter. But the great thing about this easy pattern is that you can totally change the base number to fit your needs and preferences for your scarf.
I wanted to make two scarves so you could see different combinations of colors you can have. The possibilities are endless!
Here’s a quick video showing how to make the Mesh Stitch:
Materials
Bernat Softee Chunky (100% acrylic, 100 g/3.5 oz, 99 m/108 yds)
2 skeins Gray Ragg, 1 skein Sea Green
Size L/8.00mm hook, scissors, tapestry needle
Size
Finished size 6 in x 80 in
Stitches
Single Crochet (SC): Insert your hook, yarn over (YO) and pull up a loop, YO and pull through two loops on hook.
Pattern
Chain 18, (or any even number if you’d like it wider) with Sea Green.
Row 1: SC in the 2nd chain from the hook and CH 1. Skip one chain, then SC, CH 1. Skip the next chain and continue the pattern of SC, CH 1, SK 1 all the way across. When you reach the end of the row and make the last SC, CH 1 and turn.
Row 2: SC into the SC you just made on the row below. CH 1, skip the chain space, SC into the SC. Repeat the sequence all the way across. Ending again with a SC in the last SC. CH 1 and turn.
Rows 3 – 24: Repeat row 2 with Sea Green. On the 24th row, on the last stitch, pull through on the last step of the SC with Gray Ragg
Rows 25 – 112: Repeat row 2. On the 112th row, on the last stitch, pull through on the last step of the SC with Sea Green.
Rows 113 – 136: Repeat row 2. Tie off and weave in all the ends with the tapestry needle. Thread the needle and work the yarn tail back and forth anywhere through the stitches. My mom told me that about 4 or 5 times is good enough. The yarn will be disguised when you do this. Just work in and out of any of the loops the stitches made. Clip the yarn close to the work and you’re finished.
Your scarf is ready to wear!
Thanks for stopping by Daisy Farm Crafts!
Have a nice day and I hope you enjoy the scarf pattern!
Love, Haley
Click here or on image below for printable pattern