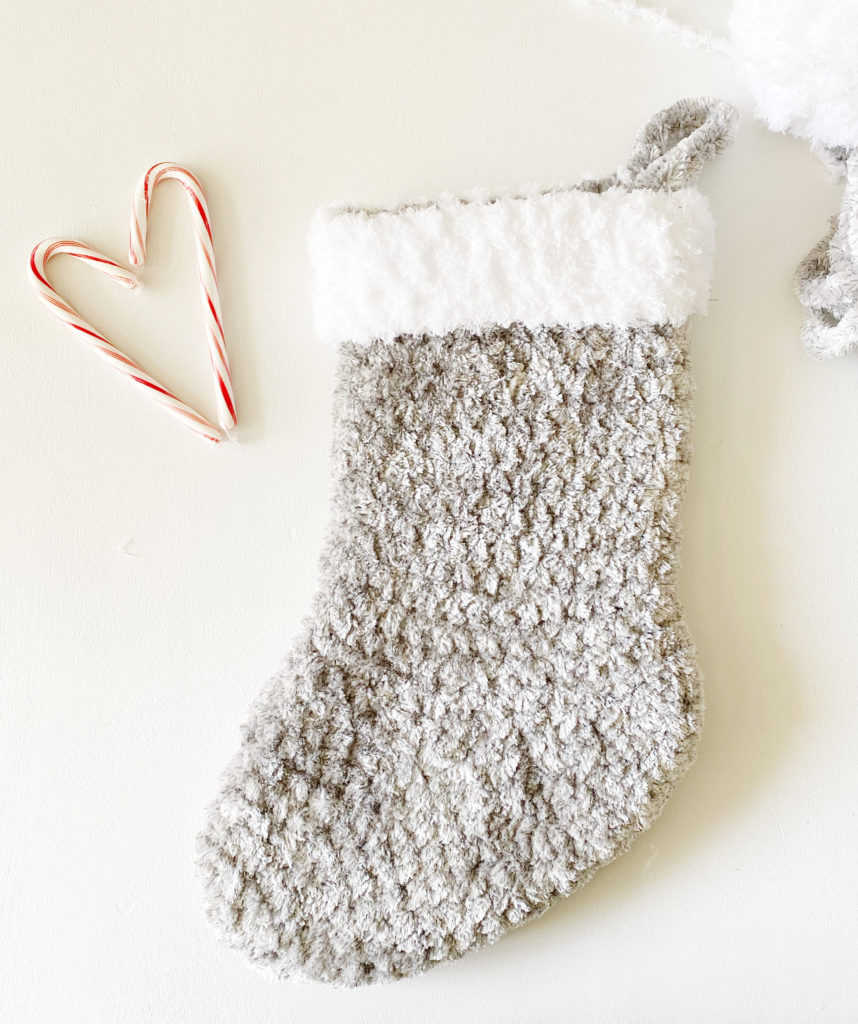
Materials
Bernat Velvet Plus (100% polyester 300 g/10.5 oz, 71 m/78 yds)
1 or 2 skeins Vapor Grey (I was able to make one with exactly 1 skein, but if you don’t like taking chances, or you want to make it longer.)
Bernat Pipsqueak (100% polyester, 100g / 3.5 oz, 92 m/101 yds)
1 skein White
Size M/N hook, scissors, tapestry needle
Stitch marker
Size
Finished size 16 in x 8 in
Stitches
Single Crochet (SC): Insert hook, yarn over and pull a loop back through. Yarn over and pull through 2 loops on hook.
Single Crochet 2 Together (SC2tog): Insert hook into designated st, yarn over and pull a loop through, insert hook into next designated st, yarn over and pull a loop through, yarn over and pull through all loops on the hook.
Pattern
Chain 27.
Join chain by working 1 SC into the first Chain of the round. Mark this stitch.
Round 1: Work 1 SC into each chain around. (27 SC)
Rounds 2 – 15: Work 1 SC into each SC around, Mark the first stitch of each round. (Also helps to keep a tally sheet and mark how many times around you go. Velvet is hard to see your stitches.)
Heel:
Continue in the same direction, also place the stitch marker into the first stitch of each row to help you find where the last stitch will be on the next row.
Row 1: Work 1 SC into each of the first 4 sts of the round. Ch 1 and turn.
Row 2: Work 1 SC into each of the next 4 sts, work 1 SC into the next stitch on the stocking. (Keep your tension tight when working into this stitch. Ch 1 and turn.
Row 3: Work 1 SC into each of the next 5 sts, 1 SC2tog with the first leg of the stitch into the side of the row below and the last leg into the stitch on the stocking. Ch 1 and turn.
Row 4: Work 1 SC into each of the next 6 sts, 1 SC2tog as explained in row 3. (As the heel height is growing, you’ll want to continue to work this last SC2tog across the side of the row below and the next stitch on the round. Keep your tension tighter, you are shaping the round part of the heel.) Ch 1 and turn.
Row 5: Work 1 SC into each of the next 7 sts, 1 SC2tog as explained in row 3. Ch 1 and turn.
Row 6: Work 1 SC into each of the next 8 sts, 1 SC2tog as row 3. Ch 1 and turn.
Row 7: Work 1 SC into each of the next 9 sts, 1 SC2tog as row 3. Ch 1 and turn.
Row 8: Work 1 SC into each of the next 10 sts, 1 SC2tog as row 3. Ch 1 and turn.
Row 9: Work 1 SC into each of the next 11 sts, 1 SC2tog as row 3. Ch 1 and turn.
Row 10: Work 1 SC into each of the next 12 sts, 1 SC2tog as row 3. Do not turn.
Round 1: Work 1 SC into the next stitch and mark. Work 1 SC around to the other side of the heel. When you reach the heel, work the last stitch as a SC2tog across the last stitch and the side of the rows. (This will match the other side.) Then continue working SC around to the stitch marker.
Rounds 2 through 4: Work 1 SC around into each stitch.
Toe:
Round 1: Work 1 SC into each of the next 3 sts, SC2tog across the next 2 sts. Repeat from * 4 times.
Round 2: Work 1 SC into each st around.
Round 3: *Work 1 SC into each of the next 3 sts, SC2tog across the next 2sts. Repeat from * 3 times.
Round 4: Work 1 SC into each st around.
Round 5 and until the toe is closed: Work SC2tog across 2 sts until the toe is closed. Tie off.
Hanging Loop:
Lay your stocking flat and find the natural crease in the back of the stocking lined up with the heel to make your stocking hangar. Pull up a loop with the velvet, secure with a SC in the same stitch. Chain 10 and slip stitch into the same space that you pulled up a loop. Tie off and knot to make secure.
White Pipsqueak yarn:
Using the M/N size hook pull up a loop anywhere along the top of the stocking. Work 1 SC into each stitch around the top, making sure when you crochet around the hanging loop to keep the loop to the inside of the stocking. Work 1 SC into each stitch as many rounds to achieve 1.5 to 2 inches of fluff. Tie off and weave in all the ends. Fold Pipsqueak down.
Knot and weave in the velvet ends and hide them on the inside of the stocking. I knotted mine several times to make secure.
Thanks for stopping by,
xo, Tiffany


