This is the pattern for the Crochet Sheep Hat to accompany the pattern for the Crochet Sheep Costume.
Tap here for the link to the Crochet Sheep Costume.
For the hat, I’m encouraging you to get the head circumference measurement and bottom of the ear, across the top of the head to the bottom of the other ear measurement, so you can have a better idea of how big to make this.
I will include a size chart that can help you make this bigger or smaller, the video tutorial and this pattern will be for a 16-18 inch circumference head.
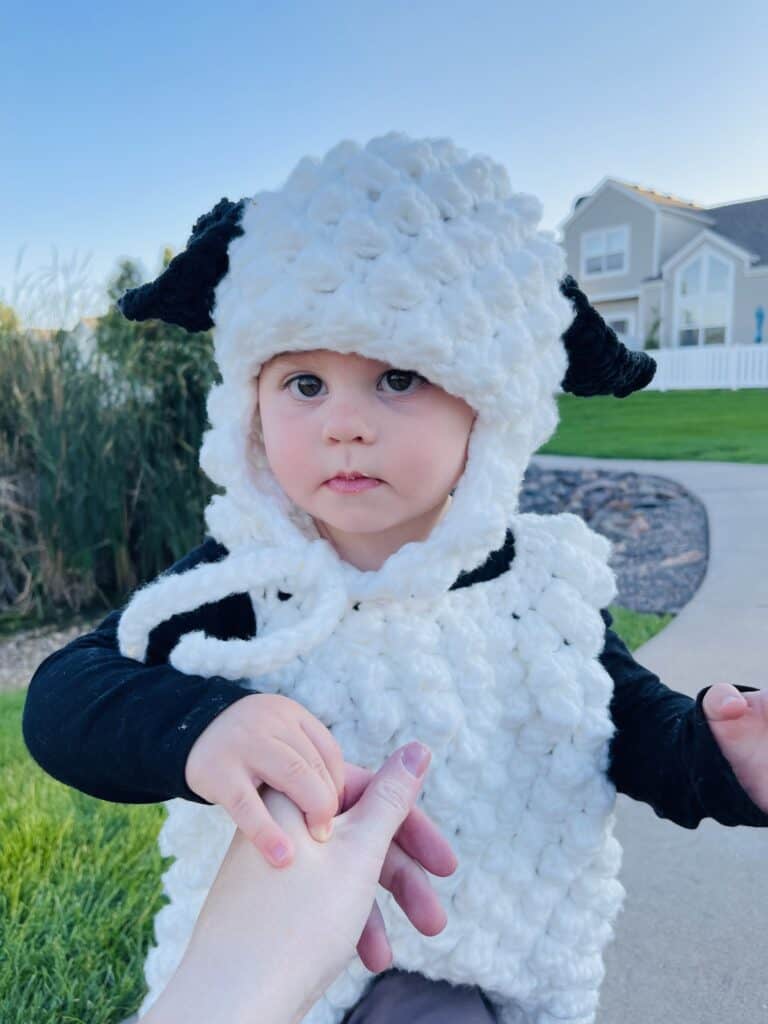
And as you can see on baby James, it turned out a little bit big. He is a 17 inch head. He is a one-year-old but wears size 2T clothes. He is a larger baby.
If I was making this smaller, I would eliminate the extra two rows of the ear flaps and I would stop increasing the rounds earlier.
I tried the hat on Jack, who is a 3T, and the hat fit him just fine, so keep that in mind for making the size you need. The best is to have a hat on hand that you know fits the little one you are making it for, and measure against that.
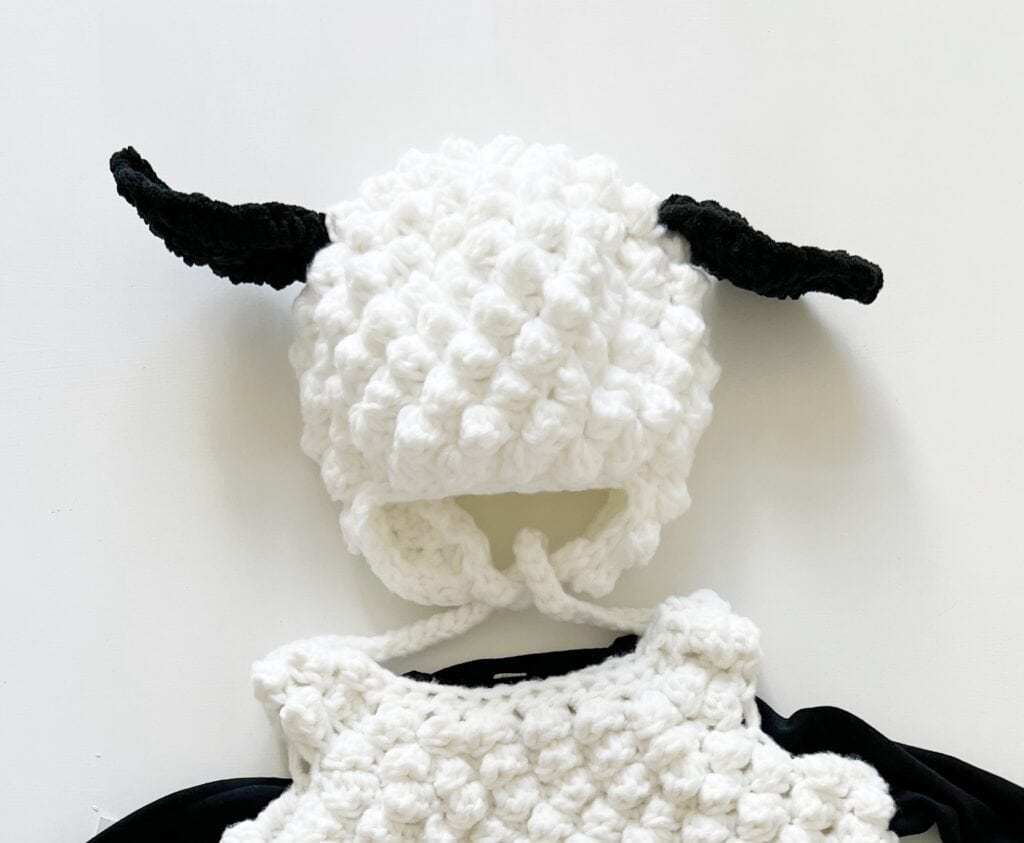
The ears are made with Bernat Blanket yarn and black pipe cleaners. The pipe cleaners are around the edge of each ear, (you crochet around them as you make the last round) and that helps the ears to be shaped and will help them poke out and look like little sheep.
Please watch the video tutorial linked at the end of the post if you need help. Also scroll to the end of the post for a free printable pattern. (All our patterns on Daisy Farm Crafts have a free printable version at the end of each post.)
Stitches
Double Crochet Bobble: *YO, insert hook, YO and pull up a loop, YO and pull through 2 loops. Repeat from * 3 more times, inserting hook into the same stitch each time. YO and pull through all loops on hook
Single Crochet (SC): Insert hook, YO and pull up a loop, YO and pull through 2 loops.
Materials
Bernat Forever Fleece: (100% polyester, 280 g/9.9 oz, 177 m/194 yds)
Please tap name of yarn for more specs and to purchase on Yarnspirations.com
1 ball in White Noise
Bernat Blanket Yarn
1 Ball Black
9 mm hook, tapestry needle, stitch markers, pipe cleaners

Pattern
Begin with a Magic Ring.
Round 1: Ch 1, then work 8 SC around the circle. Pull close. Mark the 8th st. SL ST to the first st, CH 1.
Round 2: Work 1 SC and 1 Bobble into the first st and each stitch around. Join with a SL ST to the first st, CH 1. (16)
(Tip: mark the first st and last stitch of each round)
Round 3: Work 1 SC into the first st, (same as join), *work Bobble and SC into the next. 1 Bobble into the next st, 1 SC and Bobble into the next. 1 SC into the next st, repeat from * around. Join with a SL ST to the first st, CH 1. (24)
(For smaller sizes, stop the increase and skip to round 5)
Round 4: 1 SC into the first st, *Bobble into the next st, SC and Bobble into the next st. SC into the next st, repeat from * around. Join with a SL ST to the first st, CH 1. (32)
Round 5: In this round and remaining rounds, work SC into the top of Bobbles, and Bobble into the top of SC. Begin in the second stitch with *SC into the top of the Bobble. Bobble into the next SC. Repeat from * around. Do not join, work one extra SC into the join of the previous round to maintain pattern. (33) Mark the last stitch so you’ll know when each round ends.
Rounds 6 to 7 inches in length for 2T: (about 5 rounds) Continue working SC into Bobble and Bobble into SC. end the last round
With back of hat facing you, place stitch markers on stitch 6, 10, 22, 25. Adjust as necessary. You want to mark 4 stitches evenly over the ears, and 12 or 13 stitches in between for the front and back.
Ear Flap #1
Work the alternating Bobble and SC pattern to the first marked stitch, and then 3 more to the next marked stitch (the first ear flap). CH 1 and turn. *Work 1 SC into each of the next 4 sts. CH 1 and turn. Bobble into the first st, SC into the next. Bobble, SC in remaining 2 sts. CH 1 and turn. Repeat from * one more time. Skip first st, 1 SC into each of the remaining 3 sts. CH 1 and turn. SC, Bobble SC into each st. CH 1 turn. CH 20. Turn. SL ST into each CH, and SL ST around to 2nd st marker.
Tip: When working SL ST, make sure the bobbles are facing you.
Begin the second ear flap by working Bobble and SC into the back loops of the SL STs. CH 1 and turn. Repeat from * in the pattern from ear flap #1.
Work SL STs after working the 20 chains, with the bobbles facing you, back to the other sides tie, and then work SL ST into the back loops of the previously made SL STs to the unworked side of the first flap. Work SL ST into the unworked side of flaps to the top of the tie. Tie off and weave in the ends.
Ears
Make 2.
With Bernat Blanket yarn, make a slip knot with a long tail, chain 6.
ROW 1: In the second chain from the hook, SC. SC into each remaining st. CH 1 and turn. (5)
ROW 2 – 4: SC into each st across the row. CH 1 and turn. (5)
ROW 5: Skip the first st. SC into each remaining st across the row. CH 1 and turn. (4)
ROW 6: Skip the first st. SC into each rem st across the row. CH 1 and turn. (3)
ROW 7: Skip the first st. SC into each rem st across the row. CH 1 and turn. (2)
ROW 8: Skip the first st. SC into rem st.
Add a pipe cleaner, work 1 SC over the pipe cleaner and work 1 SC at the end of each row, and at the bottom of each stitch across the starting chain. Before working last SC and joining the round, twist the pipe cleaner closed, work st. Tie off and weave in.
Evenly space each ear on the side of the hat and place stitch markers. Use the starting long tail (wide end) to attach with a tapestry needle to marked stitch.
Weave in the ends.
Please watch video below for help.
Thank you so much for stopping by! Good luck on your hat.
Click here or image below for free printable pdf.
![]()