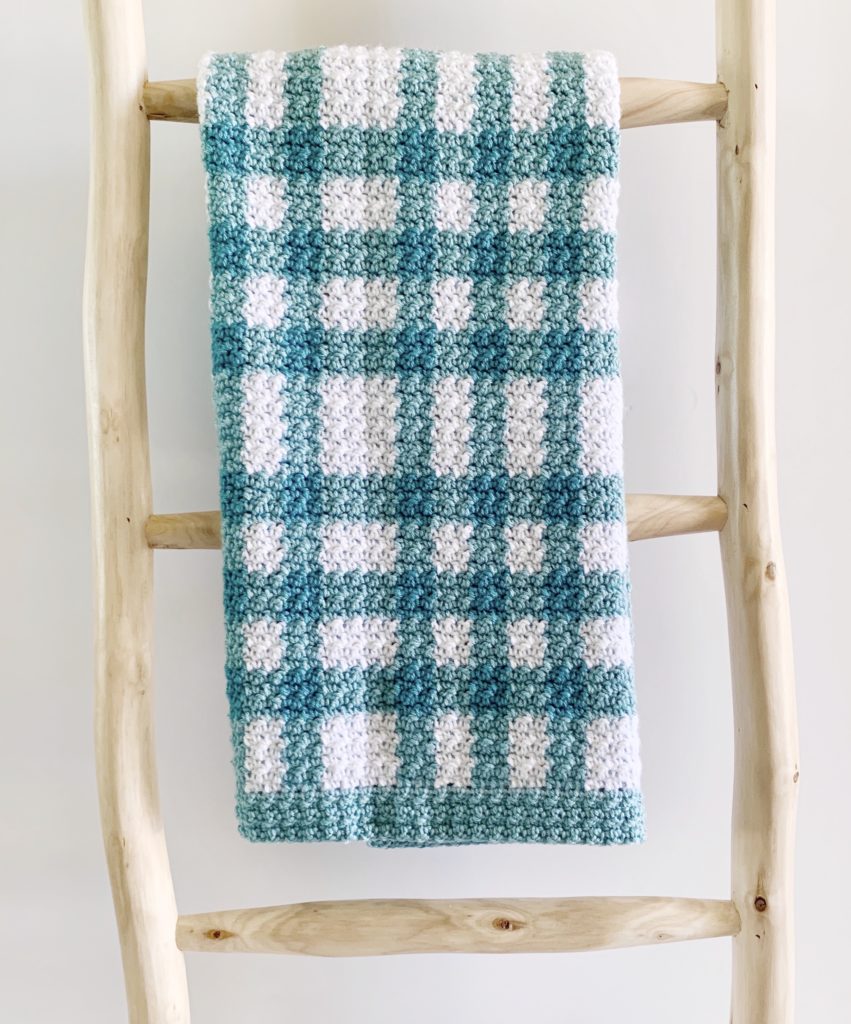
I finish a gingham blanket, and then immediately want to make another. That is what happened after I made the Nine Square Gingham blanket in pinks.
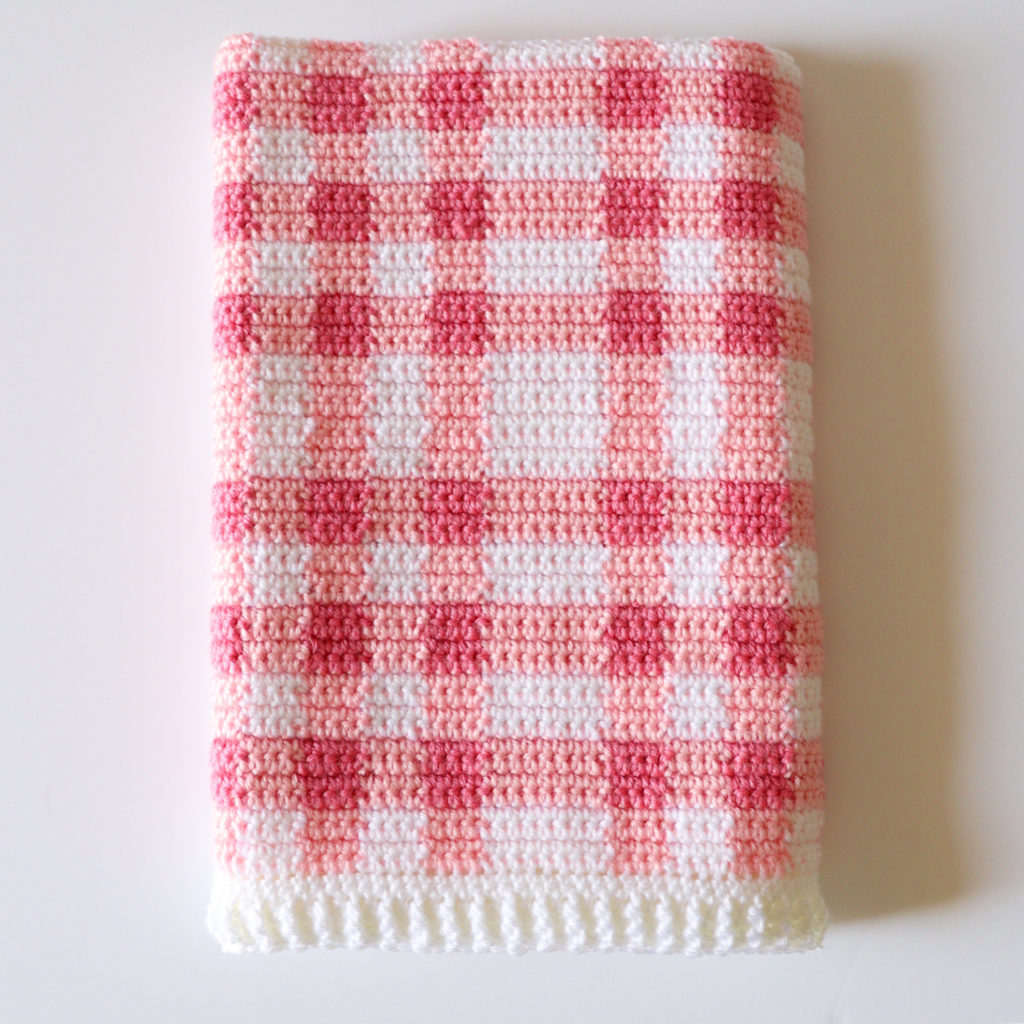
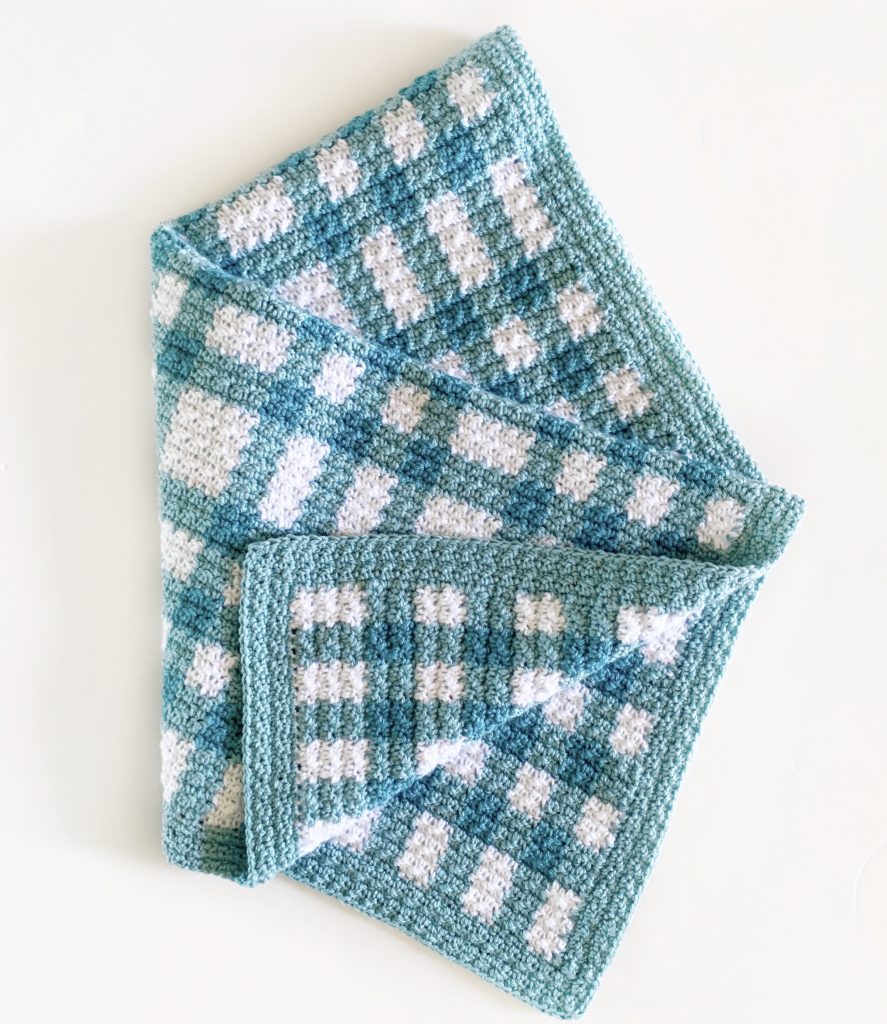
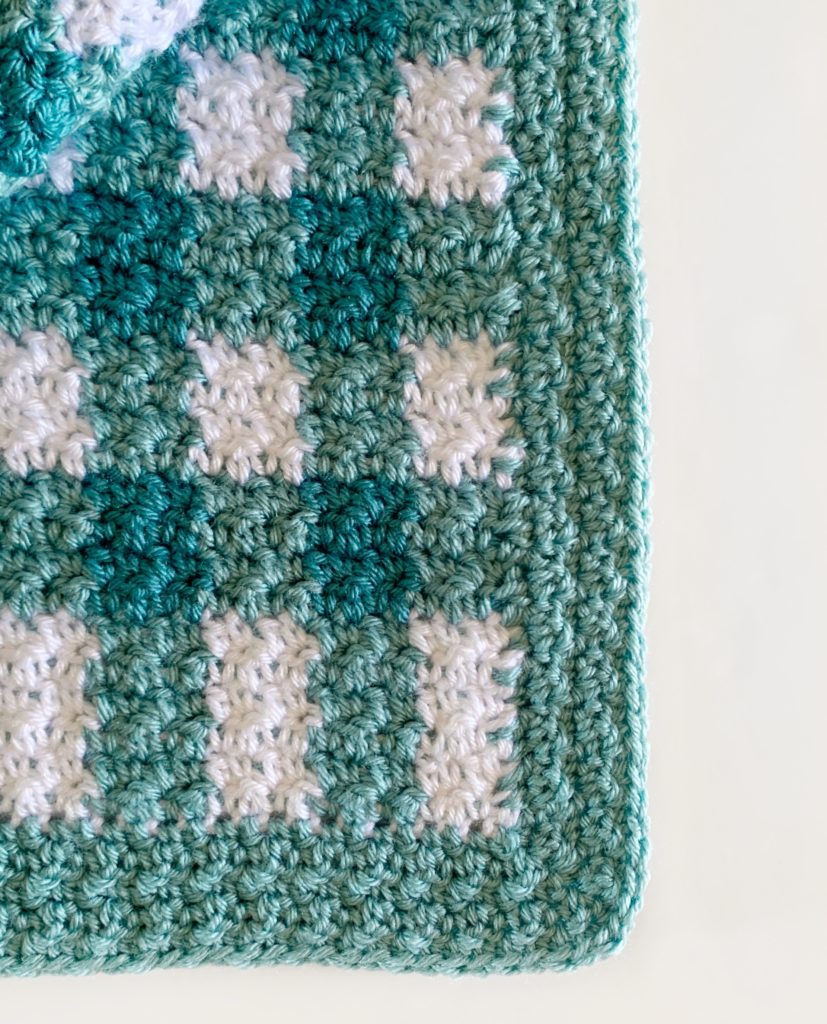
I used all single crochet in the pink one and as I was finishing the border, I realized I could easily convert the graph and chart to the griddle stitch. The number count was perfect. So I found two shades of teal and got to work.
I think finding the right shades of yarn is the hardest thing about a gingham blanket, but as I’ve shared the gingham patterns, I’ve heard from many of you that they look too hard to make. And then I hear from many of you who gave it a go, tell me that it wasn’t as hard as you thought. So, if you fall into the first category of “it looks too hard,” maybe give it a go and see what you think.
Plus, my first and very best suggestion is to always work a practice swatch before you even start the blanket. You’ll be glad you did.
I made a video tutorial to accompany this pattern and it will be linked at the end of the post, so let’s get to it.
Materials
Patons Canadiana (100% acrylic, 100 g/3.5 oz, 187 m/205 yds)
5 skeins Pale Teal, 2 skeins Medium Teal, 3 skeins White
Size H/5.00mm hook, scissors, tapestry needle
Size
Finished size 32 in x 34 in
Gauge 4 in = 16 st and 12 rows of pattern
Stitches
Single Crochet (SC): Insert your hook, yarn over (YO) and pull up a loop, YO and pull through two loops on hook.
Double Crochet (DC): YO, insert your hook, YO and pull up a loop, YO, pull through two loops, YO, pull through remaining two loops.
Alternating these two stitches is generally called the “Griddle Stitch” or also might be known as “Lemon Peel” stitch.
Pattern
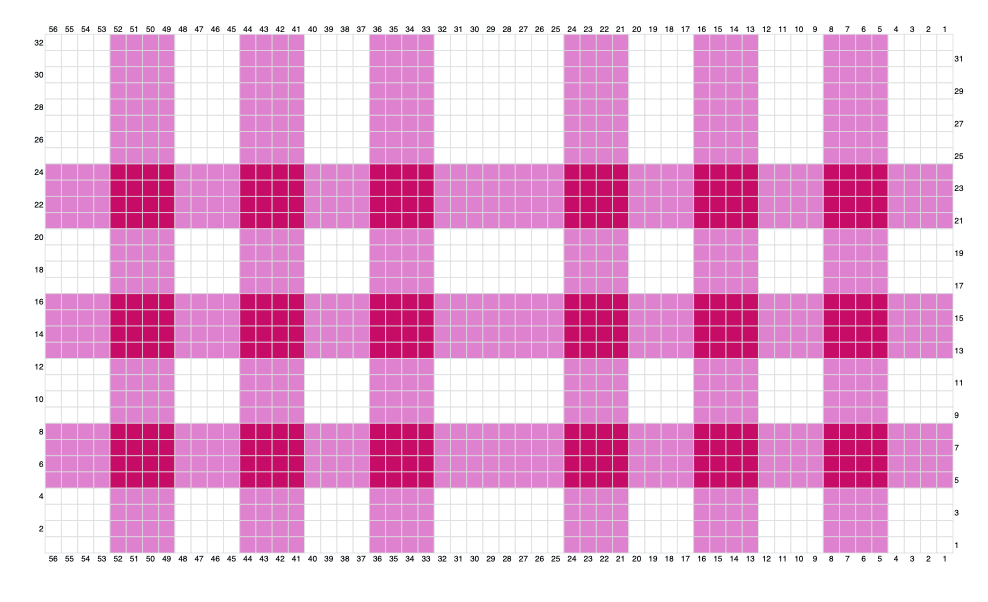
Click here or click the image below to print the graph:
 Chain 113 in White.
ROW 1: Work 1 SC into the second chain from the hook. DC into the next chain. SC into the next chain. DC into the next, pulling through with Pale Teal on the last step of the stitch. Work alternating SC and DC in each of the next 4 chains, crocheting over the white tail, bringing it along with you as you work and then pulling through with White on the fourth stitch.
Follow the graph, reading it right to left, alternating the SC and DC, making the necessary color changes. When you reach the end of the graph at stitch #56, repeat the graph from stitch #29 through #56 two more times. CH 1 and turn.
Tip: Each teal section is 4 stitches wide, and the white sections are 4 stitches wide, or 8 stitches in the wider sections. You will always end a stitch section with a DC and pull through with the new color. The last stitch of the row will be in White and will be a DC.
ROW 2: Bringing the Pale Teal color around the end of the work, work 1 SC into the top of the DC of the row below, working over the tail of Pale Teal. Follow the graph for color changes and reading the graph left to right. CH 1 and turn.
ROWS 3 and 4: Continue working in the same manner as previous rows, and according to the graph. Pull through with Pale Teal at the end of ROW 4 and leave the White behind. (You may choose to carry the White up the side of the blanket or cut and weave in the tail later.)
Alternate Pale Teal and Medium Teal according to the graph for Rows 5-8. At the end of Row 8, change back to White and leave Medium Teal off. (Again, you may choose to carry the Medium Teal up the side or cut and weave in later.)
Continue following the graph for 32 rows. Then Repeat rows 1 – 32 one time. End the blanket by repeating rows 1 – 28.
On the last stitch of your blanket, pull through with the Pale Teal and place a stitch marker, do not cut, (we will start the border from this stitch) but weave in all ends before starting the border.
 Border
ROUND 1: CH 1 and turn. Work alternating SC and DC in each stitch across the row with Pale Teal. When you reach the corner work 3 stitches into the corner space to continue the alternating SC, DC pattern. (Meaning: if you arrive at the corner and the stitch before is a DC, then “SC, DC, SC” into the corner space.)
Continue working alternating SC and DC down the side of the blanket working approximately 5 stitches per every 4 rows, and as evenly as possible. Repeat the instructions for the corner space and repeat the alternating SC and DC stitches across the bottom and other side of the blanket. Join with a slip stitch to the starting stitch of the round. CH 1 and turn.
ROUND 2: Work alternating SC and DC into each stitch around, making sure SC are worked into the tops of DC and DC are worked into SC, also working 3 stitches into each corner to maintain the pattern sequence. Join with the first stitch of the round with a slip stitch, CH 1 and turn.
ROUNDS 3 – 5: Repeat round 2 instructions.
Final Note: You may have noticed that in the picture of my blanket my starting and ending sections of the blanket have 6 rows instead of 4. I had worked the extra two rows at the first of the blanket without realizing it until I had worked the first set of nine squares and I didn’t have the bravery to undo it. So I decided to end the blanket with a final 6 rows to match. After photographing it, I wish my mistake would have been to work 8 rows so it matched the 8 rows that separate the “nine squares.” So it’s up to you if you want to do that or follow the graph as given.
Here is a video tutorial and I recommend making a practice swatch to make sure you have the proper hook size for your personal tension and yarn choice.
Thanks so much for coming to our website! I am Tiffany, and writing down my patterns and sharing what I’m making for friends and family. I love making baby blankets to have on hand for baby shower gifts.
If this is your first time seeing a crocheted gingham blanket, I have lots more patterns to look through! You can click the “Blanket” heading and scroll down to “gingham” to see them all. (Well, all that I have so far, I love them and I will always be making more versions.)
Come and join our Daisy Farm Crafters Group on Facebook if you make a gingham blanket and would love to share a picture! We have almost 18k people in the group and they share all sorts of versions of Daisy Farm blankets and it’s fun to see all the varieties.
Or, if you are on Instagram, use #daisyfarmcrafts on your post and we love to share them in our stories every Sunday.
Have a wonderful day!
xo, Tiffany
Click here or on image below for printable pattern
