I look at this precious little face! I can’t believe this day has come. I’d like to introduce you to Jack William, our first grandson, born to our son Tanner and his wife Elizabeth. He is every bit as peaceful and happy as this picture says.
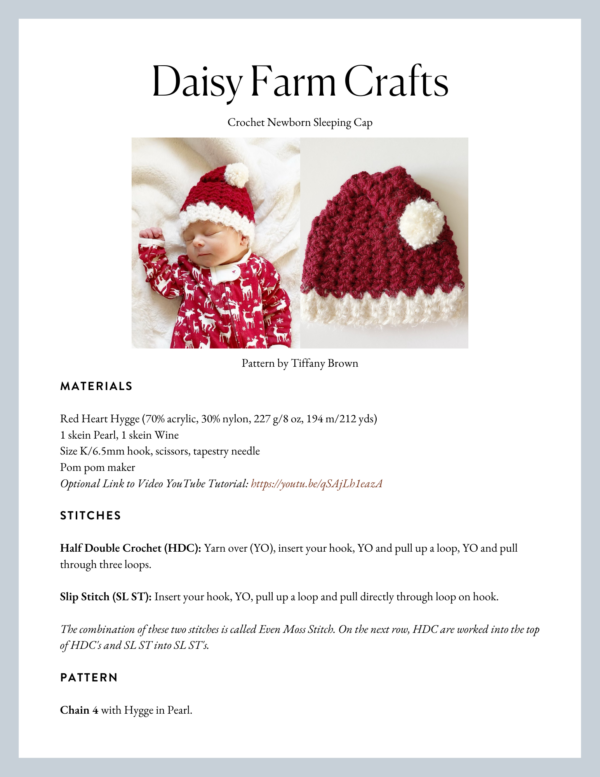
I also was so hoping I would be able to make him something for Christmas! I think this sleeping cap is just so precious and also makes a beautiful addition to his first newborn photoshoot.

Thank you to the many of you who have been crocheting right along with me on my journey to becoming a grandma! What fun we’ve had and the blankets we have shared. It’s been just an honor and a joy to have you along. I’m not stopping though, I feel like I should warn you that many, many, more newborn and baby projects are coming your way!
I finally have a Daisy Farm Baby to model everything I make! haha. xo, Tiffany
Materials
Red Heart Hygge (70% acrylic, 30% nylon, 227 g/8 oz, 194 m/212 yds)
1 skein Pearl, 1 skein Wine
Size K/6.5mm hook, scissors, tapestry needle
Pom pom maker
Size
Newborn baby hat
Stitches
Half Double Crochet (HDC): Yarn over (YO), insert your hook, YO and pull up a loop, YO and pull through three loops.
Slip Stitch (SL ST): Insert your hook, YO, pull up a loop and pull directly through loop on hook.
The combination of these two stitches is called Even Moss Stitch. On the next row, HDC are worked into the top of HDC’s and SL ST into SL ST’s.
Pattern
Chain 4 with Hygge in Pearl.
Row 1: SC into the second chain from the hook. SC into remaining 2 chains, CH 1 and turn.
Row 2: SC into the first stitch, SC into the back loop of the next st. SC into the last st, CH 1 and turn.
Repeat row 2 for a total of 36 rows. Cut a long tail.
Join ends to make a circle by sewing the underside of the starting chain to the 36th row together.
Round 1: Pull up a loop and CH 1 with Red Heart Soft at the end of a row, to the left of the sewed join and working around the outside of the hat facing you. Work 2 SC into the space at the end of this row. *Skip the next row, and work 2 SC into the end of the next row. Repeat from * around the outside of the brim. Join with a slip stitch to the first SC of the round, CH 1 and turn.
Round 2: Work 1 SL ST into the first SC of the round, *HDC into the next SC. SL ST into the next SC. Repeat from * around. Your last stitch of the round should be an HDC, then join with a SL ST to the first SL ST you started the round with. CH 1 and turn.
Tip: If the first stitch of the round is hard to find, place a stitch marker into it just after you make it so it’s easy to find when you return.
Round 3: Work 1 HDC into the first HDC of the round. *SL ST into the next SL ST. HDC into the next HDC. Repeat from * around. Your last stitch will be a SL ST, then join with a SL ST to the first HDC of the round. CH 1 and turn.
Repeat rounds 2 and 3, 3 more times. (or until your hat measures about 3 inches high, but make sure your last round follows round 3 instructions so you can start the decrease rounds with a slip stitch.)
Tip: going forward in the pattern, I’m going to call the alternating SL ST and HDC the “Even Moss” stitch to hopefully make the pattern easier to read.
Round 1: (Decrease) Work 1 SL ST into the first SL ST of the round, HDC into the next HDC. *Work Even Moss stitch across the next 16 stitches. Skip 2 stitches. Repeat from * one more time. Work Even Moss in last 2 stitches, join, CH 1 and turn.
Round 2: Work Even Moss stitch around, join with a SL ST to the first HDC of the round, CH 1 and turn.
Round 3: (Decrease) *Work Even Moss into 10 stitches, skip 2 stitches. Repeat from * around, join with SL ST to the first SL ST of the round. CH 1 and turn. (This round ends with 8 sts worked.)
Round 4: Work Even Moss stitch around, join with a SL ST to the first HDC of the round, CH 1 and turn.
Round 5: (Decrease) *Work Even Moss into 8 stitches, skip 2 stitches. Repeat from * around, join with SL ST to the first SL ST of the round. CH 1 and turn. (This round ends by skipping over the last two stitches and then joining with a sl st to the starting sl st.)
Round 6: Work Even Moss stitch around, join with a SL ST to the first HDC of the round, CH 1 and turn.
Round 7: (Decrease) *Work Even Moss into 8 stitches, skip 2 stitches. Repeat from * around. join with a SL ST to the first SL ST of the round.
Round 8: Work Even Moss stitch around, join with a SL ST to the first HDC of the round, CH 1 and turn.
Round 9: (Decrease) *Work Even Moss into 4 stitches, skip 2 stitches. Repeat from * around, join with a SL ST to the first SL ST of the round. CH 1 and turn.
Round 10: Work Even Moss stitch around, join with a SL ST to the first HDC of the round, CH 1 and turn.
Round 11: (Decrease) Repeat Round 9 decrease instructions.
Rounds 12 – 16: Work Even Moss stitch around, join with a SL ST to the first HDC of the round, ch 1 and turn.
Rounds 17 until closed: Single Crochet 2 together (SC2tog) across each pair of SL ST and HDC until the hat is closed. Tie off and leave a long tail.
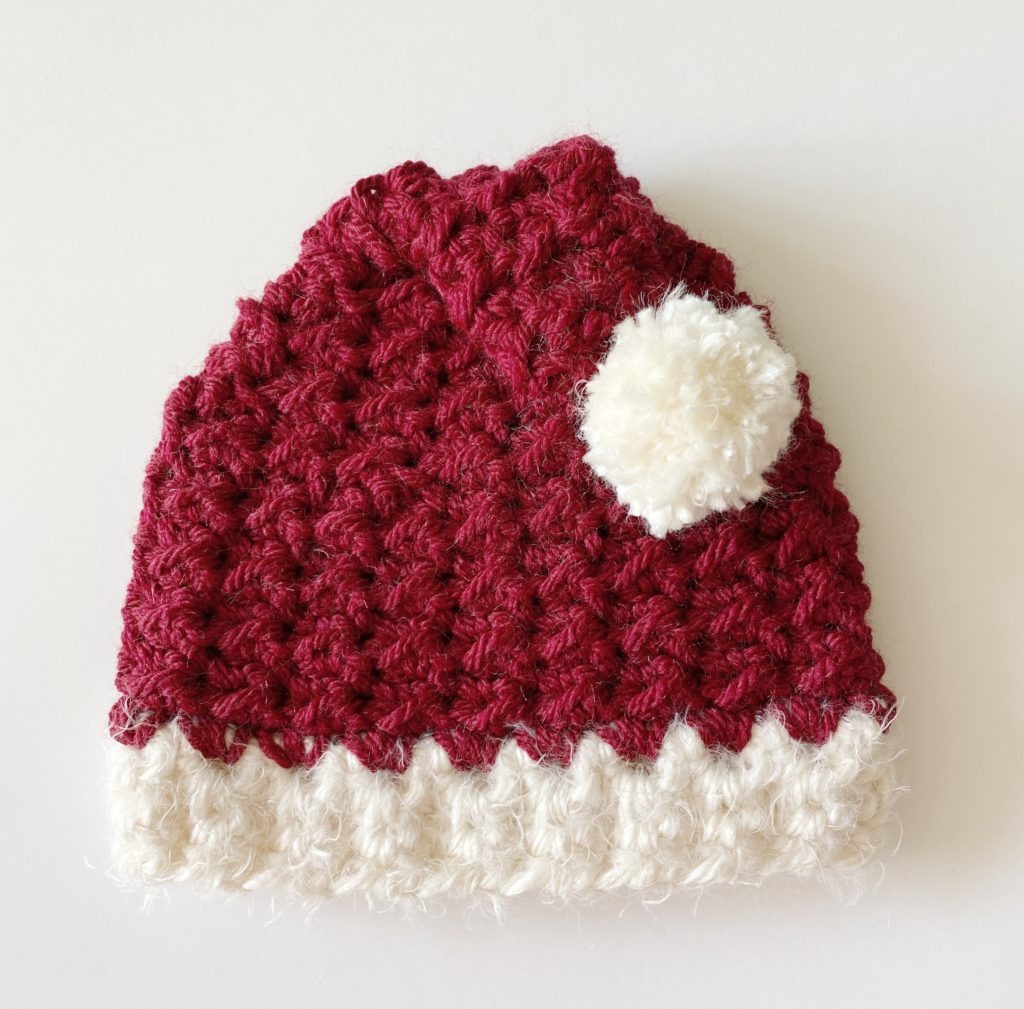
Fold tip of hat toward the front of the hat, (make sure the joins are the back of the hat) thread tapestry needle with the end, tack the top of the hat down by weaving the end to part of the hat, then weave end in and tie off.
Make a pom pom and tie the pom pom onto the tip of the hat.
Take a darling newborn photo!

Thank you all again for coming to our website. Please come and show us pictures of your newborn babies in their sleeping cap! Use #daisyfarmcrafts on Instagram posts.
Click here or on image below for printable pattern