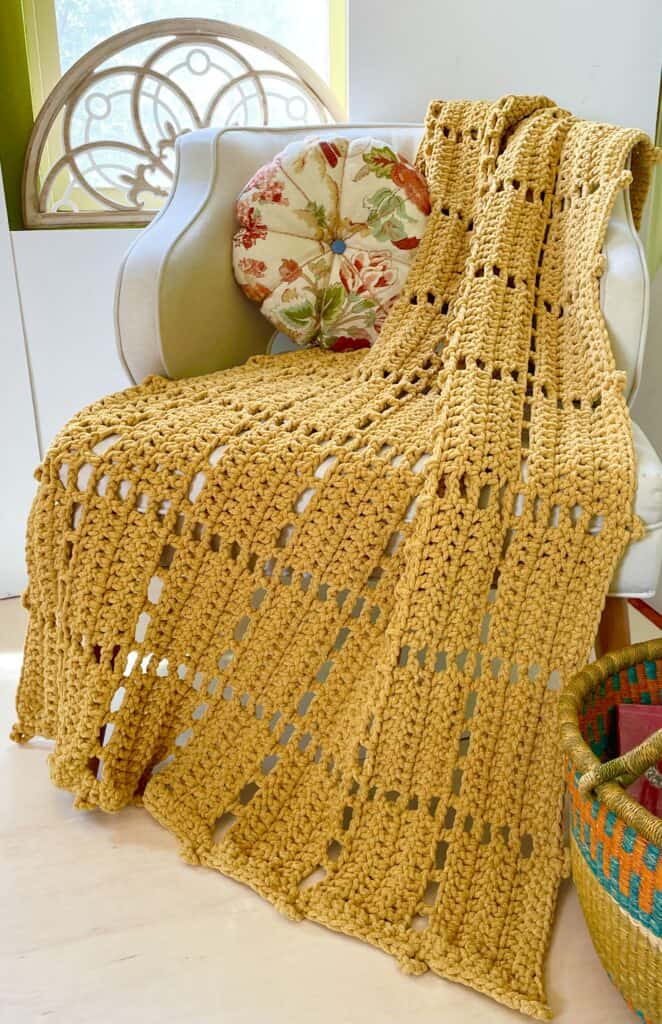
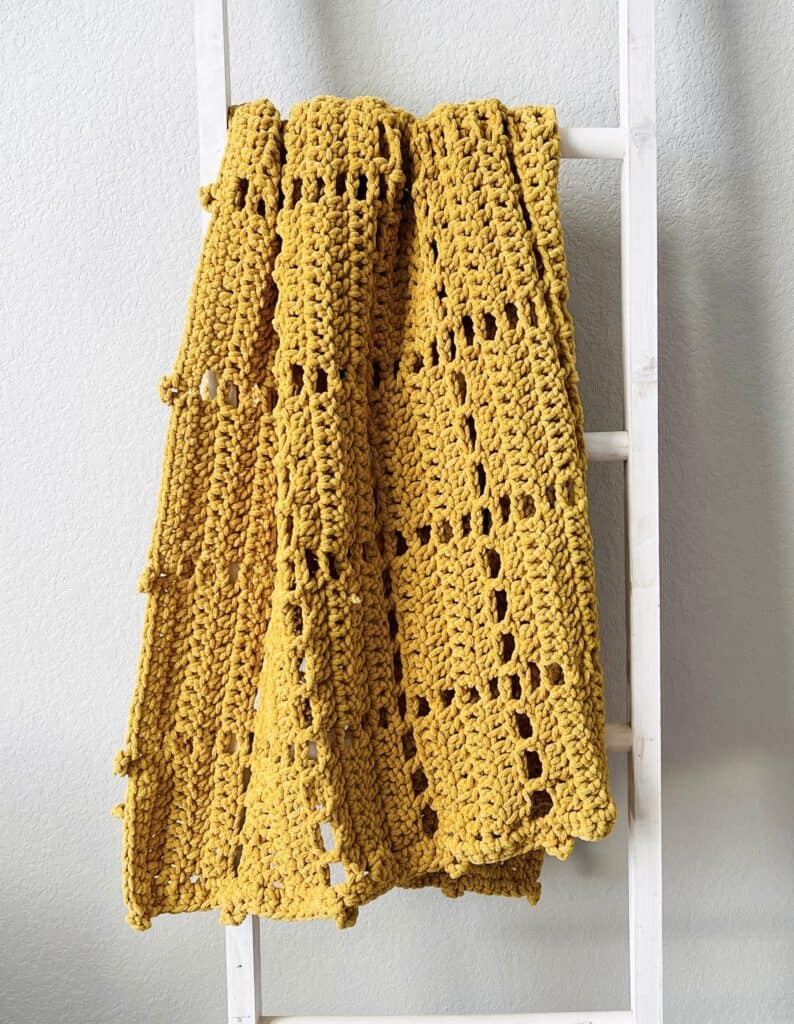
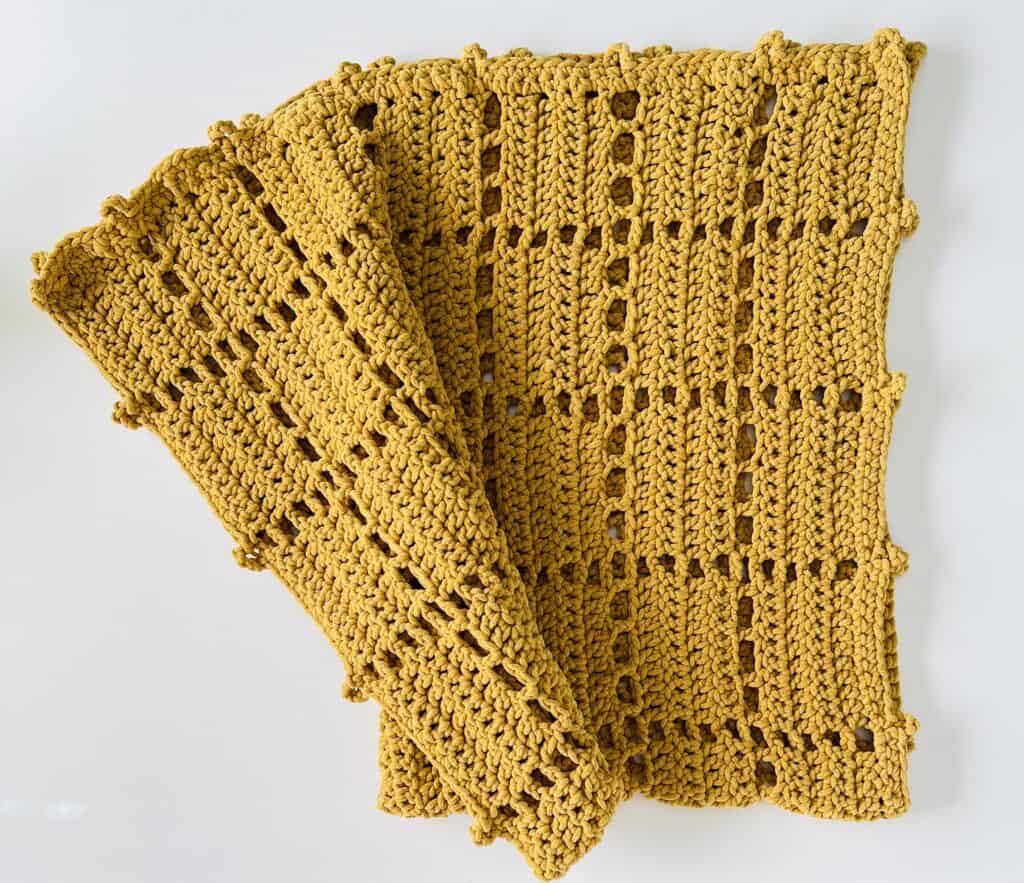
Thank you so much for checking in today to see this beautiful blanket we are calling the Crochet Maggie’s Windowpane Throw. This throw connected us to our great-grandmother Nicolina, who immigrated to the United States in the late 1800’s. While in America, she went by the name Maggie.
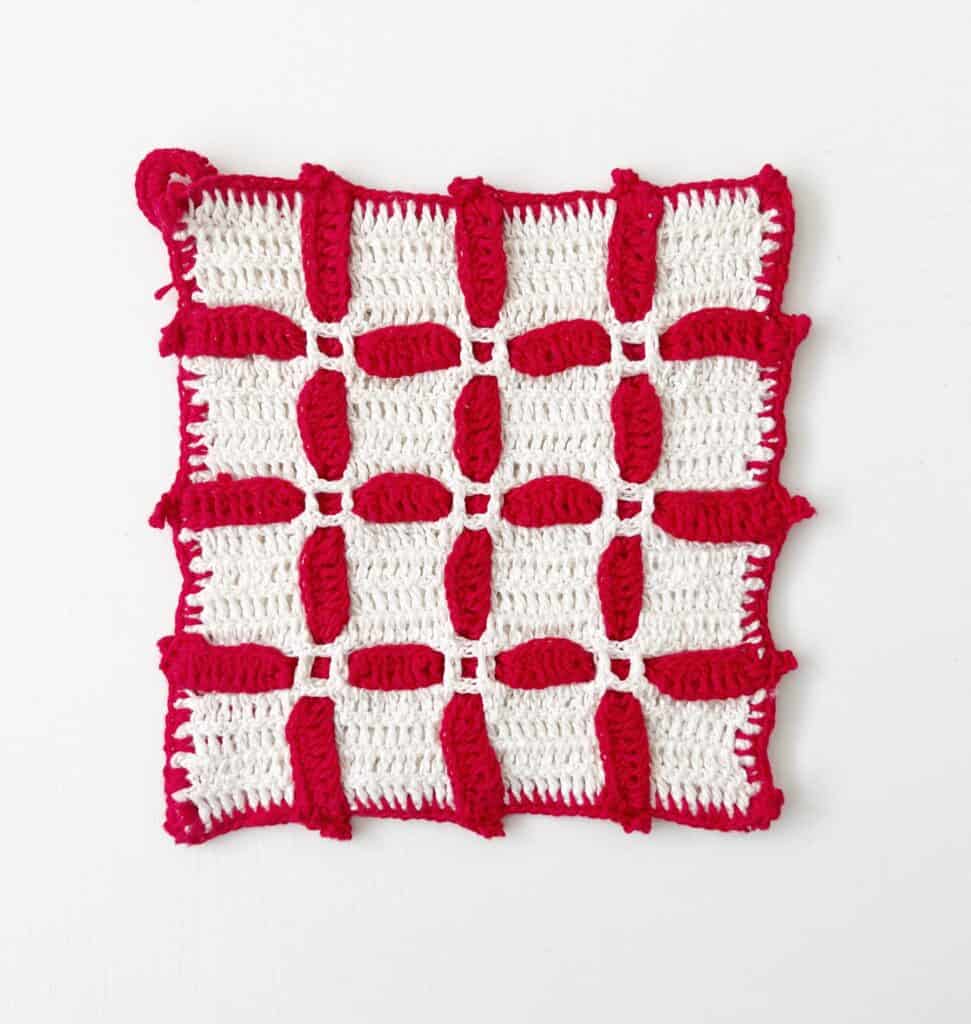
Christmas of last year, my younger sisters gifted me one of Nicolina’s “Maggie” hot pads she had made. I was able to re-create the hot pads and get the pattern written down.
My older sister Cyndi has been learning crochet this past year, and in our weekly Sister Chats we have on Youtube, she expressed an interest in using the vintage Nicolina Hot pad pattern, and turning it into a throw.
I also had sent Cyndi a few balls of Bernat Plush to try out and she fell in love immediately with the soft velvety texture, and especially this mustard color.
So the idea was born, Cyndi got to work, and this gorgeous throw now exists.
Cyndi made a tutorial for this pattern, and at the end of her video she added in a clip of our Sister Chat where we talk a little bit more about our Great Grandmother, the few memories we have of her, and the feelings of crocheting a pattern that she did over one hundred years ago.
That is my hope for my future generations, that maybe one day when I am long gone, they can feel a connection back to me from any of these patterns I have made and shared.
Let’s chat a bit more about this yarn though. Bernat Plush is new this year on the market from Yarnspirations.com. It is a chunky weight yarn, but with this soft velvety feel. It is so easy to work with, the stitches stay put, and the yarn glides through the hook.
We can’t wait to design even more projects with this yarn. Especially cowls, scarves and neck warmers. It’s quickly going to become a favorite.
This pattern is relaxing once you get the first row of “blocks” made. We are calling the 10 stitches and 4 rows of DC the “block” and then they are framed with open rows of DC. In the vintage hot pad, these open rows were where you wove in lengths of colorful DC ribbon. I will say those are fun hot pads to make.
The pattern repeat is any number times 12 so you can make this throw as wide as you’d like. Just chain a multiple of the number 12 and you’re good to go.
Be sure and scroll to the end of the post for the free printable pattern and the video tutorial. If you’d like to check out other throws that we have made, be sure and visit the menu heading-blanket patterns-throws for more ideas.
Tap here to visit menu heading Blanket Patterns/Throws.
Materials
Size: approximately 6 feet x 5 feet
Gauge: 4 inches = 8 DC and 4 rows
Tap name of yarn for specs on Yarnspirations.com
7 balls Mustard
10 mm crochet hook, scissors, tapestry needle
Stitches
SINGLE CROCHET (SC): Insert your hook, YO and pull up a loop, YO and pull through two loops on hook
DOUBLE CROCHET (DC): YO, insert your hook, YO and pull up a loop, YO and pull through two loops, YO and pull through remaining two loops
Picot: Slip stitch (SL ST), Chain 5, slip stitch to first SL ST.
Pattern
Chain 96 (for a different size, chain any number x 12)
ROW 1: Begin in the 4th chain from the hook with DC. DC into each of the next 8 chains. *CH 2. Skip 2 chains, DC into each of the next 10 chains. Repeat from * 2 more times ending with 10 DC. CH 3 and turn.
ROW 2: Turning chain counts as the first DC. Begin in the second stitch with DC. DC into each of the next 8 sts. *CH 2, skip 2 chains, DC into each of the next 10 DC. Repeat from * 2 more times. Work the final DC into the top of the turning chain. CH 3 and turn.
ROW 3 AND 4: Repeat row 2 instructions. At the end of row 4, chain 5 and turn.
ROW 5: Chain 5 counts as first DC and 2 chains. Begin in the 4th stitch with DC. *CH 2, skip 2 sts. DC into the next. Repeat from * across the row. Ch 3 and turn. (final DC is in the top of the turning chain.)
ROW 6 -9: Repeat row 2 instructions.
ROW 10: Repeat row 5 instructions.
ROW 11-14: Repeat row 2 instructions.
ROW 15: Repeat row 5 instructions.
ROW 16-19: Repeat row 2 instructions.
Continue the pattern until you have 8 blocks high or your preference.
BORDER:
Round 1: Work 2 SC around each post, work 3 SC into each corner, work SC in between the DC on the bottom and top of the throw. Join with a SL ST to the first SC, CH 1 and turn.
Round 2: Work 1 SC into each SC across the “blocks” of DC, work [SL ST, CH 5, SL ST back into the same SL ST] “picot” at each ch 2 between the blocks and in each corner. Join with a SL ST to the first SC, tie off and weave in the ends.
Click here or image below for free printable pdf.
![]()