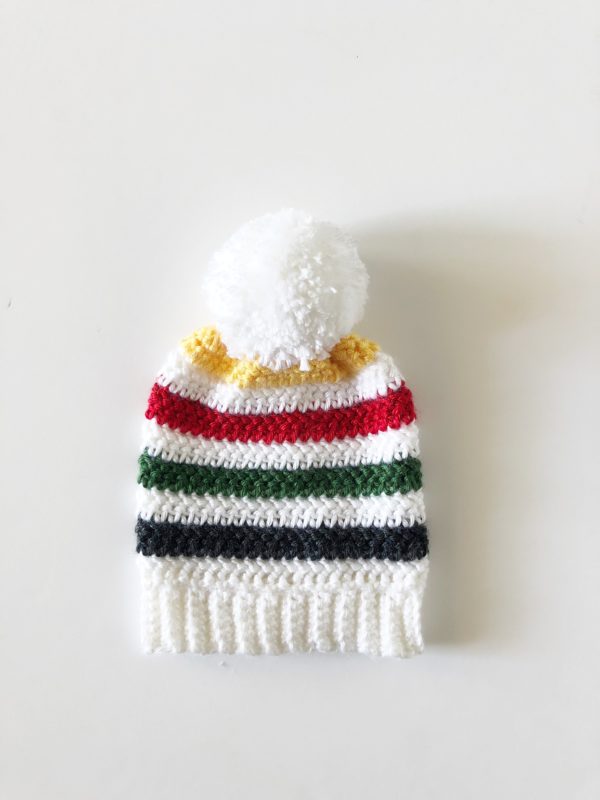
I’ve created a simple little hat that can be made to accompany and match the Camping Stripe Crochet Blanket. Isn’t it so cute!
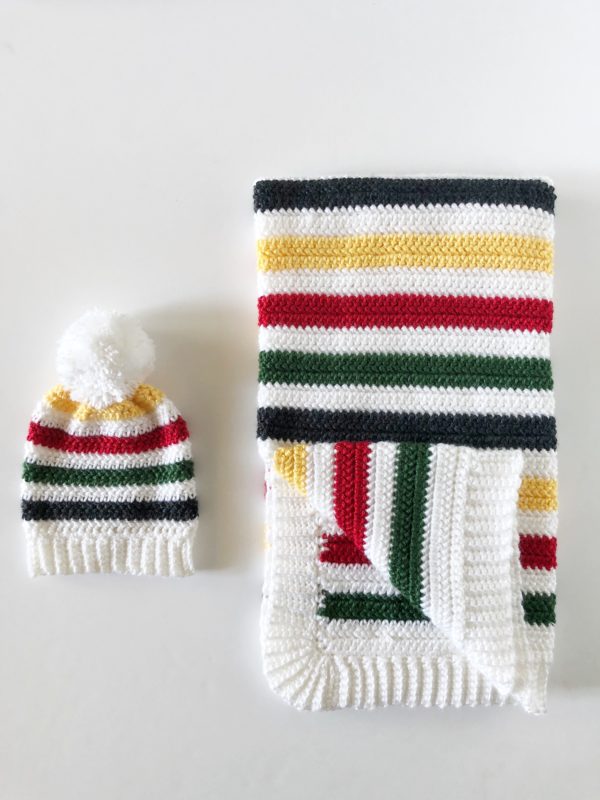
Here’s a picture of the blanket in case you haven’t seen it:
And because I like to keep things extremely simple and no fuss, you basically make the hat in the exact same way as the blanket. I’m not kidding. Here’s a picture of the hat just before I finished the edge and sewed the sides together and gathered the top:

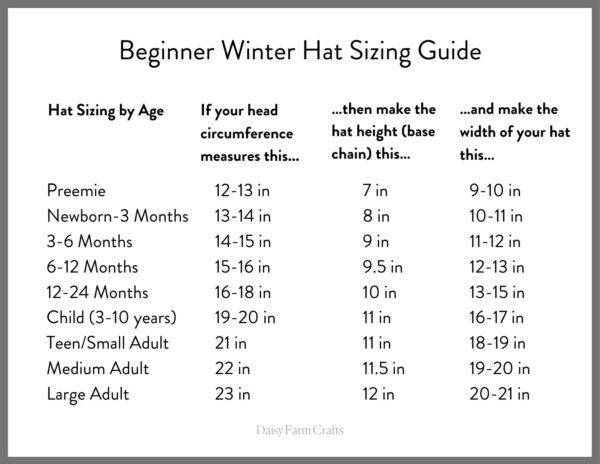
If you’ve made the blanket and know how to work the border, this is a piece of cake little hat to make! All you need is the measurements of the little head you are going to be making it for. Here’s a standard head size chart you can use:
And another reason this hat is sooo easy? As you sew in the ends, you sew the sides together. Each color matches and the seam is nearly invisible! If there is one thing I’ve struggled with as a crocheter is joining rounds with slip stitches, chaining however many the pattern calls for, and turning and starting the next row. My brain just has the hardest time wrapping around which exact stitch I should be slip stitching into.
And then, to me, sometimes those join stitches just don’t match well enough and stand out too much in the finished project. This way of making a hat sort of eliminates all that.
Now, one thing I did for this particular hat is I only made two rows of color, instead of three rows of each color in the blanket. If I would have done three, the hat might have been too tall for the baby size I wanted. So keep that in mind for small hats, you’ll at least want to get all the color into the hat.
Materials
Caron Simply Soft (100% acrylic, 170 g/6 oz, 288 m/315 yds)
1 skein each White, Autumn Red, Sunshine, Dark Sage, Gray Heather
Size H/5.00mm hook, scissors, tapestry needle, scissors
Pom pom maker – 4 inch size (optional)
Stitches
Single Crochet (SC): Insert your hook, yarn over (YO) and pull up a loop, YO and pull through two loops on hook.
Herringbone Half Double Crochet (HHDC): YO, insert your hook, YO, pull up a loop and pull directly through first loop on hook. YO and pull through two loops on hook.
Pattern
Chain with white to about an inch short of the length you need. (The chain grows after the first row.)
Row 1: In the third chain from the hook, work one HHDC (herringbone half double crochet) Work HHDC in each chain space to the end. CH 2 and turn.
Rows 2 -18: HHDC in each stitch across working the color changes in this order every two rows: grey heather, white, dark sage, white, autumn red, white, sunshine, white.
Cut and leave long ends for weaving after every color change, especially on the last row of white, so you will have a long tail to use gather the top of the hat together.
BRIM of hat:
Pull up a loop in the starting chain corner and chain 8.
SC in the second chain from the hook and the next 6 chains for a total of 7 SC. Slip Stitch into the next space and the next. Turn, work into the back loops of each of the 7 SC. CH 1 and turn. Work into the back loops of each of the 7 SC, slip stitch into the next two spaces. Continue working the brim in this manner to the end of the row, tie off.
With your tapestry needle, start at the bottom of the hat and join the two sides together using the tails to sew and weave the ends in together. At the top, use the long tail to gather the top of the hat together. Weave in all ends and cut.
Make and add pom pom if you desire.
This size of the hat pictured is a 11.5 inch circumference and my starting chain was 46.
Here is a video I made for the blanket which demonstrates the HHDC stitch and how to work the border. You might find it helpful if you’ve never made the back loop only single crochet ribbing.

In case you don’t want to add a pom pom, I still think the hat is pretty cute without one!
Thank you as always for stopping by our website! I am always so grateful for every one of you! You make this project of crocheting my way into grandma-hood so fun. I sure hope someday my own grandchildren will be pictured wearing some of these items!
Come and find Hannah and me over on Instagram! Just click any of those pictures at the bottom of your screen and it will take you straight there and you can follow along. I love to share as I go.
Share your finished project to my Facebook Page Wall, and I love to share it with the group! It’s a blast to see all the finished items in the many different colors you choose.
Have a wonderful crochet day!
xo, Tiffany
Click here or on image below for printable pattern
