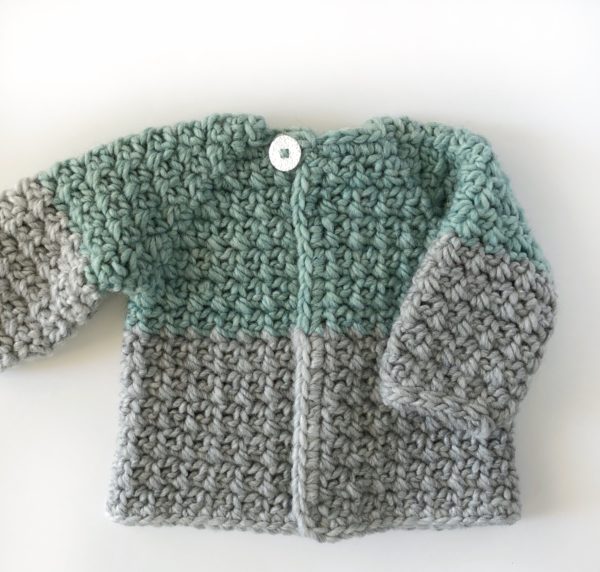
After making the mesh and berry stitch blanket I had extra yarn and wanted to try creating a sweater just using the mesh stitch.
I’m starting to really like the mesh stitch, not only because of the great texture, but because it really helps you to keep stitches lined up and even– a SC is always worked into a SC and a CH is always over a CH from the row below.
So if you have not made the mesh and berry stitch blanket, and don’t know the mesh stitch, you can click this for a quick explanation.
Now, let’s talk about the yarn I’ve used for this crochet mesh stitch baby sweater. It’s called Bernat Roving. It is 80% acrylic and 20% wool. It is rated a size 5 chunky yarn. I love working with this yarn! It has a nice matte finish and it feels like I’m working with puffy clouds. It also has a brushed appearance to it, instead of twisted like regular yarn. (I think that’s what roving means.)
Let’s get to it!
Materials
Bernat Roving (80% acrylic, 20% wool, 100 g/3.5 oz, 109 m/120 yds)
1 skein Putty, 1 skein Low Tide
Size L/8.00mm hook, scissors, tapestry needle
Button
Size
Size 0-3 month newborn
Pattern
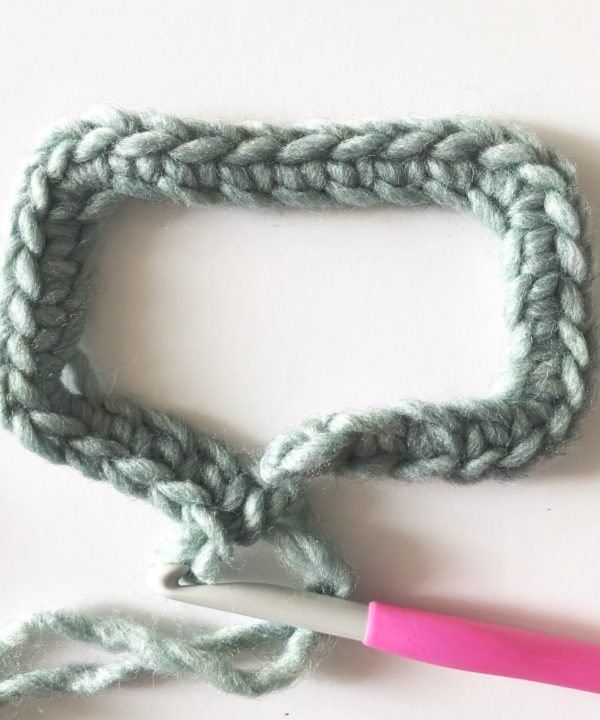
Chain 26.
Starting in the 2nd chain from the hook, SC next 4 spaces, 3 SC in next space, SC next 3 spaces, 3 SC in next space, SC next 7 spaces, 3 SC in the next space, SC next 3 spaces, 3 SC in next space, SC next 4 spaces to the end, CH 1 and turn.
(So in plain english, you are creating 4 corners that shape the neck. The corners are created by placing 3 SC into one stitch. Here is another way of writing what I just asked you to do, 4 SC, SC3 times, 3 SC, SC3 times, 7 SC, SC3 times, 3 SC, SC3 times, 4 SC.)
It should look like this:
Here is a video clip of the next part if you’d like to watch first and then read the pattern after:
Now we are going to start the mesh stitch, which is simply alternating a SC with a CH, but also always working a SC into a SC and chaining over a CH space. They stack on top of each other.
Row 2: SC in the first SC, CH 1, skip one ST, SC in next space. CH 1, Skip 1, SC in the next, 3 SC into the next space, (this should be the middle stitch of the 3 SC from the row below, you will always be working 3 SC into this space as we increase around the neck, if you have a hard time seeing it, mark the middle space with a stitch marker just after you make the stitch.)
SC in next space. CH 1, SK 1 sp, SC next, CH1, SK 1, SC next, 3 SC into the corner, SC, *CH 1, SK 1, SC next, repeat * 3 times. 3 SC into the corner space, SC next sp, CH 1, SK 1, SC next, CH 1, SK 1, SC next, 3 SC into the corner space. SC next sp, CH 1, SK 1, SC next, CH1, SK1, SC into the last space, CH 1 and turn.
(Notice how each corner for this round started with a SC, the 3 SC into the corner space, then worked a SC in the next space, so essentially you worked 5 SC around the corner, in the next row, the odd rows, it will be different. But the even rows will always increase like this.)
Row 3: SC in the first SC, CH 1, SK 1, SC next space, *CH 1, SK 1, SC next, repeat *once, 3 SC into the corner space, *CH 1, SK 1, SC next, repeat* to the next corner, work 3 SC into the corner space. Continue working the mesh stitch, working 3 SC into each corner to finish the round, CH 1 and turn.
(Did you notice in the odd round that the mesh stitch worked out that you just worked 3 SC into the corner, and on either side were CH 1. That is how you’ll know you are on an odd row.)
Row 4: Start with a SC and work the mesh stitch to the corner, work 3 SC into the corner space, SC the next space and continue with the mesh stitch to the next corner. Continue around in this manner, this time the corner stitches will start with a SC, work 3 SC into the corner, SC next space, continue with the mesh stitch. Chain 1 and turn when you get to the end of the row.
Row 5: mesh stitch to the corner, 3 SC in each corner. CH 1 and turn.
Row 6: Work in the same manner as other EVEN rows explained above. CH 1 and turn.
Row 7: Work in the same manner as other ODD rows. CH 1 and turn.
Rows 8 – 9: Work in the same manner as other EVEN and ODD rows. CH 1 and turn after each row.
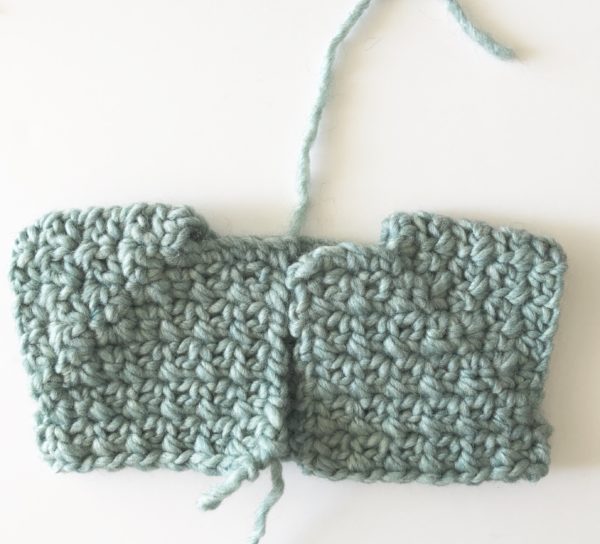
We will make the armholes next, if you’d like to watch how that is done first, here is a video clip:
Row 10: You are going to join under the arms this round and make armholes. Work the mesh stitch to the corner. Instead of working 3 SC into the corner, work 1 SC, CH 3, skip over all the stitches until the next corner space, and work 1 SC into that space. You are making an armhole. Bring the corner spaces close together so you can work the SC keeping your tension nice and even. Now start the Mesh Stitch with a SC into the next stitch and work across the back to the next corner space. Again, just only work 1 SC into the corner space, CH 3, and skip to the next corner space, SC into the space and start the mesh stitch in the next space with a SC.
Row 11: Work the mesh stitch across the whole row. Notice that when you get to the underarm area and the CH 3, you will be working into those chains with a SC, CH 1, skip one Chain, SC into the last chain, Ch 1, SK over the next space, SC into the next SC and the mesh stitch should work out. In the underarm area, you will be working the Chain over SC in order to get it to work out, the most important thing to do is stay with the mesh stitch alternating Chain and SC across the entire row.
Row 12: Work Mesh Stitch across the whole row, pull through final SC with new color.
Rows 13 – 22: Continue working the mesh stitch, chaining 1 and turning after every row.
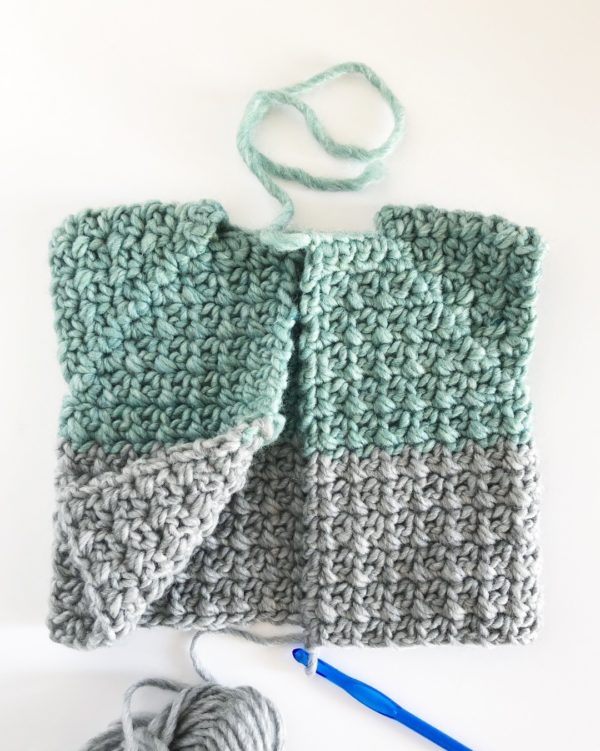
Sleeves
(You may need to turn the sweater inside out, to get the little V’s of the armhole to be in the correct direction. You want to crochet in the direction as if you had chained and turned your work.)
(I’d also like to apologize, but I don’t have a video clip for this part. I ran out of daylight, and then it was cloudy the next day and I need to move on to the next thing I’m making, but you got this! You can do it!)
Round 1: Pull up a loop in the middle of the chain 3 spaces you made when joining to make the armholes. CH 1. SC3tog, over the next 3 spaces with the last space being a SC before the chain space. CH 1, Sk the chain, SC into the next SC, (work the mesh stitch around the arm) When you get to the very last SC of the round, start the SC3tog in that stitch and over the next two spaces, it’s hard to really see where to pull up loops just make them evenly spaced, and end with a slip stitch into the first CH 1 you made. You should count your stitches, there should be 21 plus the slip stitch. CH 1 and turn, the CH 1 counts as your first stitch. (It helps to mark it, because you will slip stitch into it on the next round.
Round 2: SC into the next SC space and work the mesh stitch around. Slip stitch into the Chain 1 space, Chain 1 and turn. (21 stitches, plus one slip stitch).
Round 3: Repeat Round 2, except pull through with new color on the slip stitch join.
Rounds 4 – 10: continue making the sleeve. You are always starting and ending each round with a SC and joining with a slip stitch. Think of the slip stitch as a part of the mesh stitch as a chain 1 space and hopefully, that will help you keep the rounds even. It is incredibly tricky to find the chain 1 space to slip stitch into, so use a marker if you need.
Round 11: join the round but don’t turn, instead, continuing on in the same direction, slip stitch into each chain 1 space around, gathering the wrist in, and slip stitch in the final join and tie off, weave in the ends.
Finish
Pull up a loop in the bottom front corner of the sweater in the direction of heading up toward the neck. You want to work your way up to the neck, around the neck, back down the other side, and around the bottom to the corner where you started, using all SC with the exception of SL ST (slip stitch) around the neck. Also, pull through with the new color when needed, to keep the color consistent.
Weave in all the ends.
Measure the button you choose and decide how many chains you’ll need to make to wrap around it. I simply pulled up a loop, chained 6 for the button I chose, and then SL ST back into the starting space. Then I tied and wove in the ends.
Sew the button on,
Find a darling baby to wear this!
And you are finished.
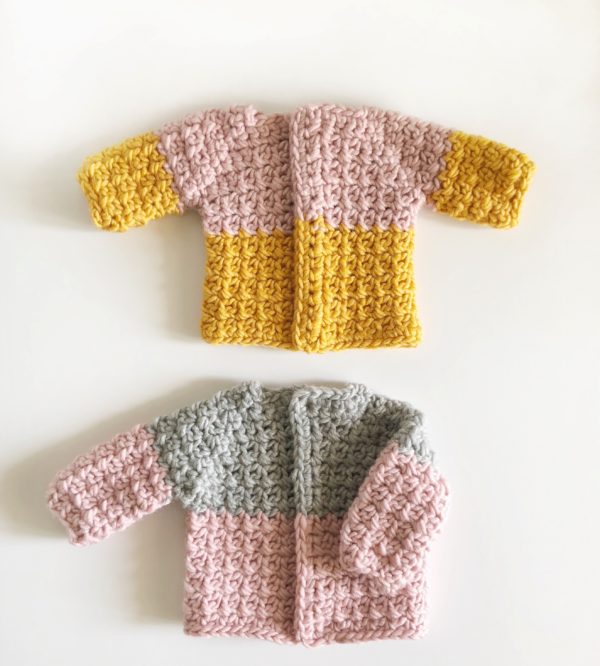
Thank you for stopping by and loving this crochet mesh stitch baby sweater! Here are a few more color combos I came up with as I made this sweater a few times to get the pattern worked out.
Also feel free to finish this sweater any way you wish. Maybe you’ll want to work up and down and create a bigger placket. Or make skinnier arms, or skinnier through the bodice.
My best suggestion to make it bigger would be to keep increasing to row 11, instead of joining and making armholes after row 9. If you want smaller, stop after row 7 and join the armholes.
Also, I think that once you get the gist of how easily this is made, you also could work a longer starting chain, just keep it an even number. Or measure a starting chain against sweater of the size you need, then still make sure your chain is an even number. Or, if you need the sweater smaller, use a K hook. These are just a few ideas to help you with sizing.
Good luck with your crochet mesh stitch baby sweater and thank you so much for stopping by! If you need some more ideas for baby sweaters, here are some more free patterns from my website you can look at!
xo, Tiffany
