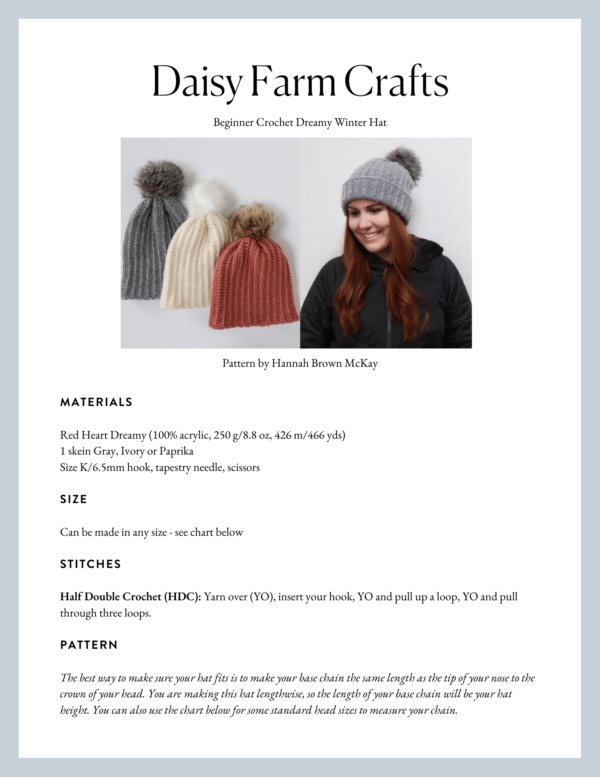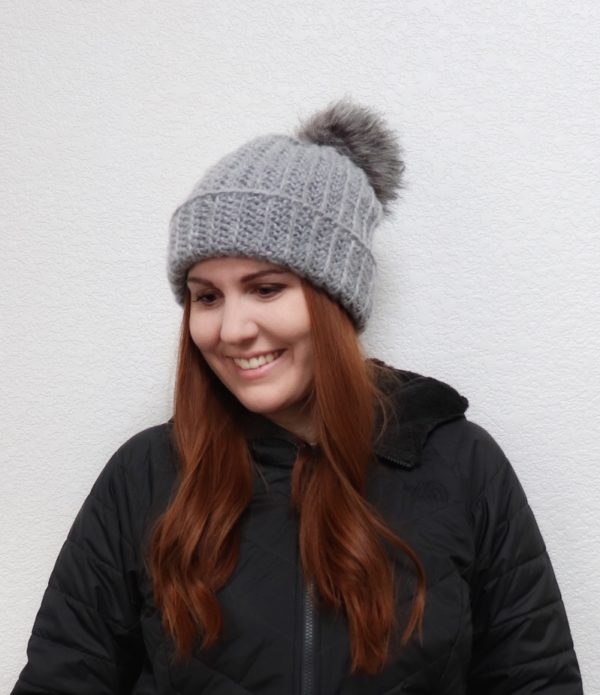
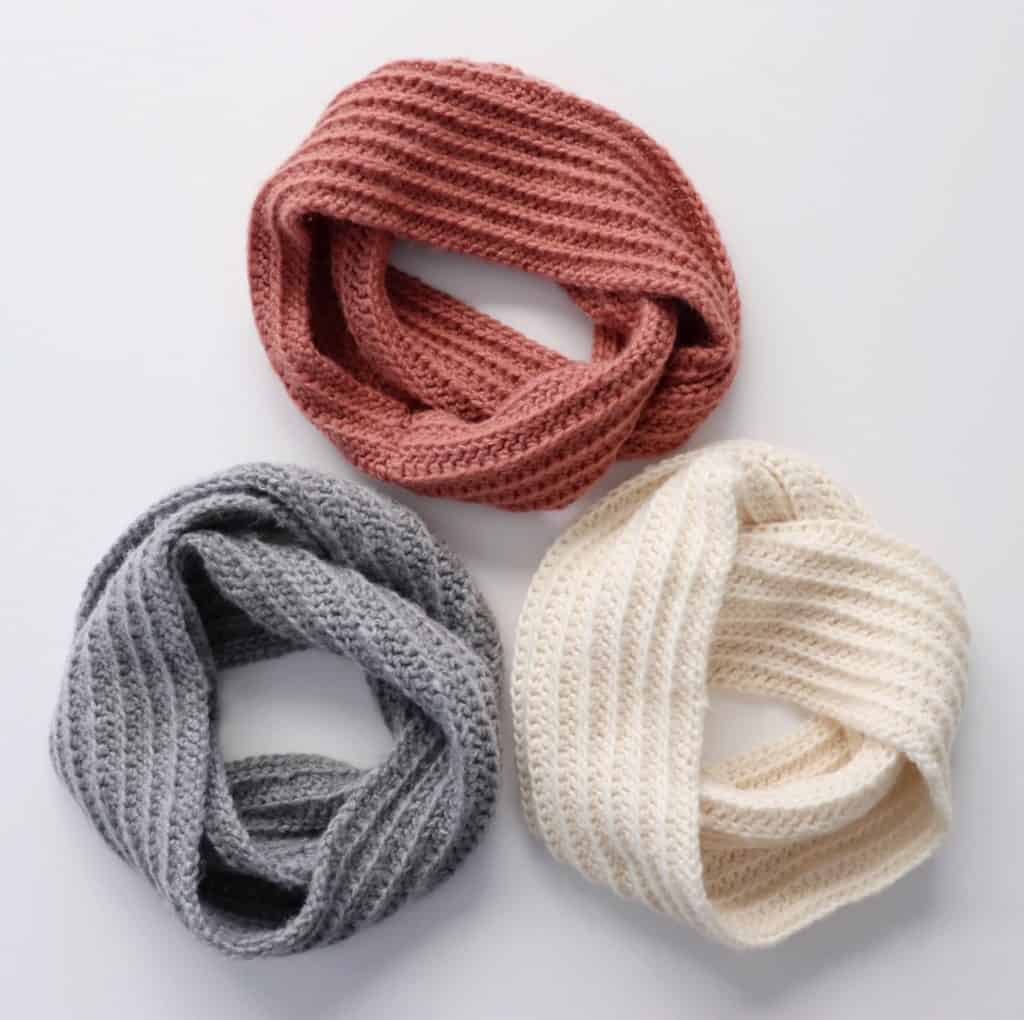
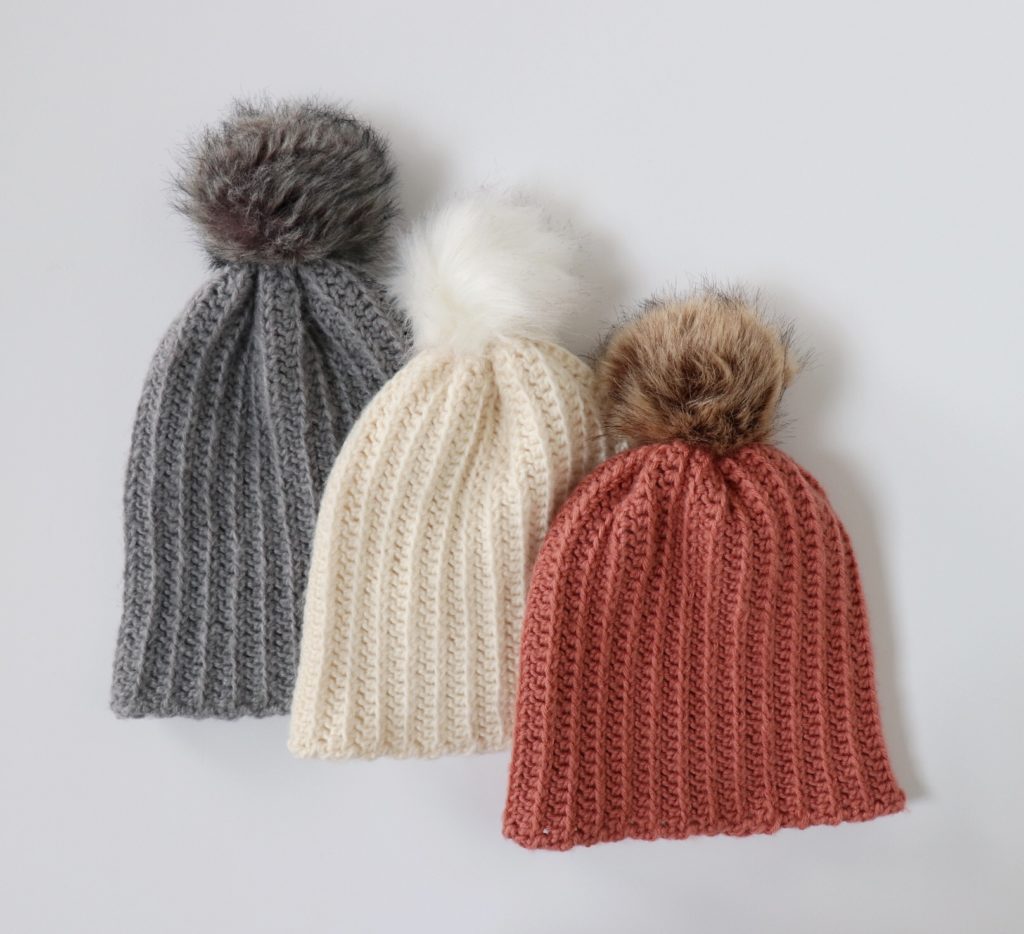
I made some winter hats to go with the Beginner Dreamy Infinity Scarves I made a few weeks ago! Since the Red Heart Dreamy yarn comes in big 8oz balls I had a lot leftover after making the scarves – there is definitely enough to make a hat and a scarf from one ball.
These hats use the same stitch as the scarves, which is a modified version of half double crochet. I wanted the lines that the stitch makes to run vertically instead of horizontally so I made my base chain to be the length (height) of the hat instead of the width.
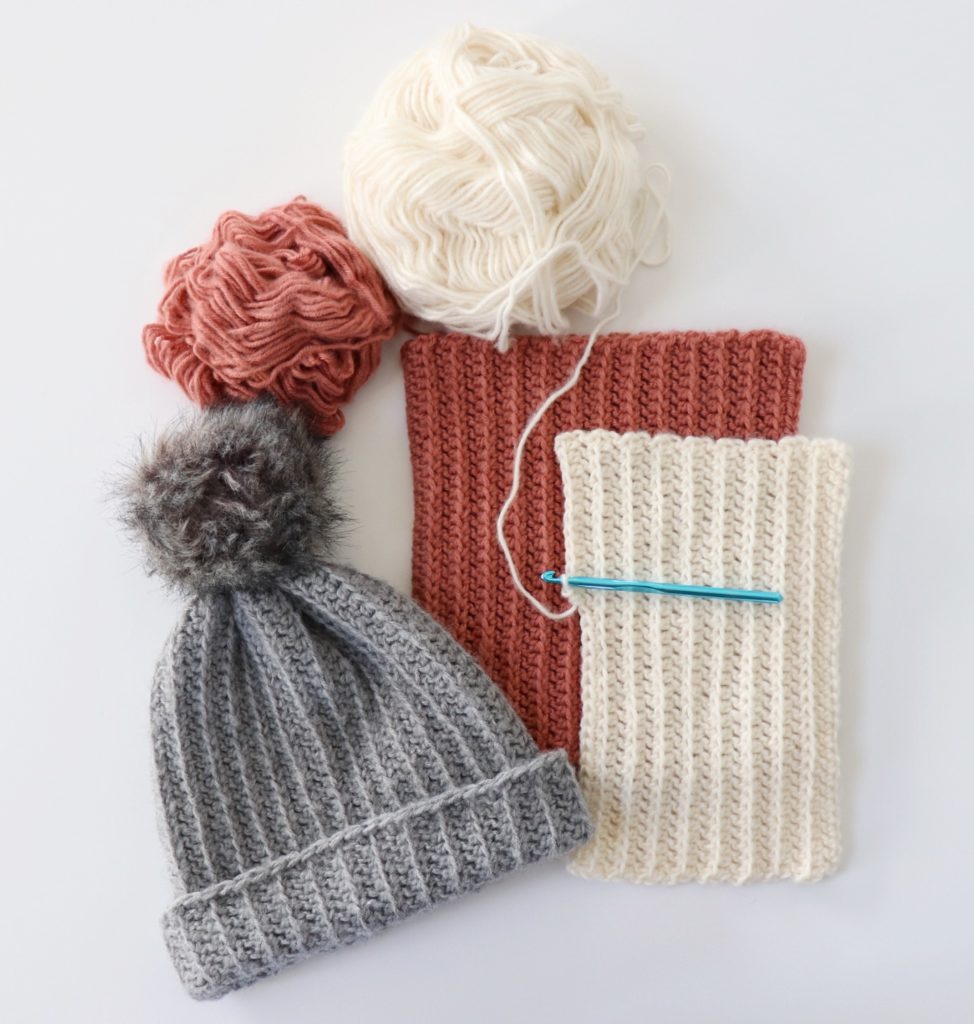
And instead of crocheting in the round, I crocheted a large rectangle and sewed together the sides then gathered it together at the top, which is a little bit more beginner friendly way to make a hat!
Materials
Red Heart Dreamy (100% acrylic, 250 g/8.8 oz, 426 m/466 yds)
1 skein Gray, Ivory or Paprika
Size K/6.5mm hook, tapestry needle, scissors
Stitches
Half Double Crochet (HDC): Yarn over (YO), insert your hook, YO and pull up a loop, YO and pull through three loops.
Pattern
HOW TO DETERMINE HAT SIZE:
The best way to make sure your hat fits is to make your base chain the same length as the tip of your nose to the crown of your head. You are making this hat lengthwise, so the length of your base chain will be your hat height. You can also use the chart below for some standard head sizes to measure your chain.
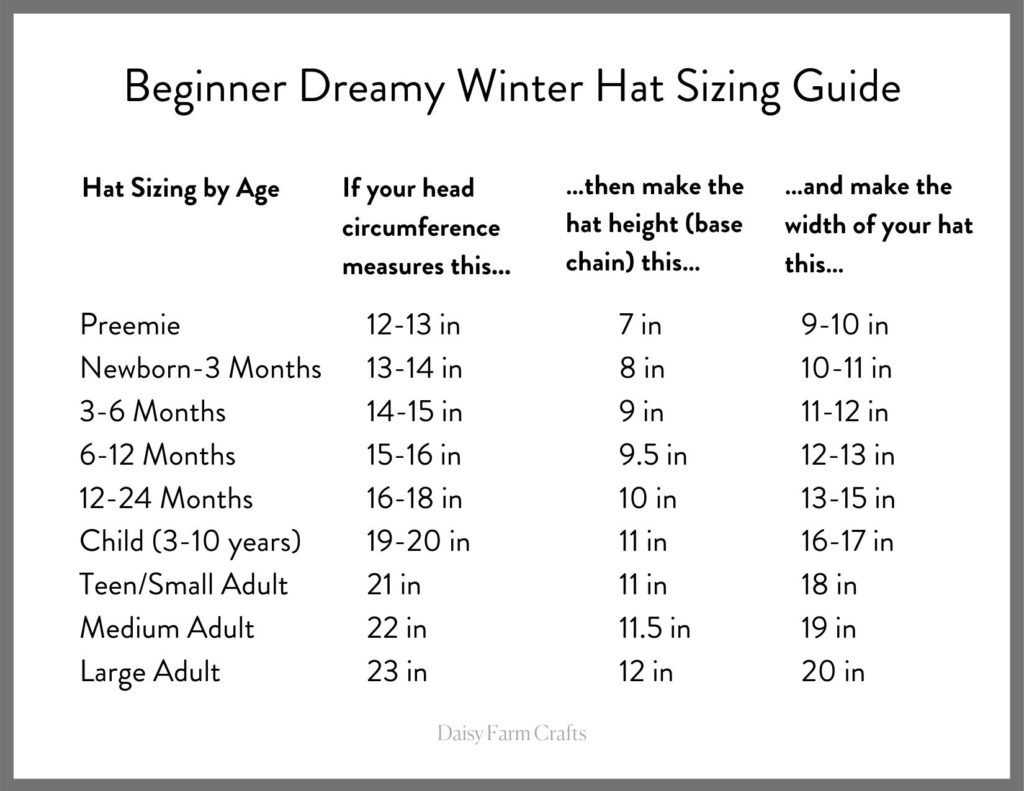
Make a base chain that measures the same length as your desired hat height. For adult size hat: Chain 35 (or 40 for a slouchier look.)
ROW 1: Starting in the 3rd chain from the hook, work 1 HDC in each chain. Chain 2 and turn.
ROW 2: HDC across the row, inserting your hook up through the front two loops only. (The turning chain does not count as a stitch, so your first stitch should be worked directly into the first front two loops of the row below.) Chain 2 and turn.
If you’re not sure what I mean by front two loops, see the video clip below:
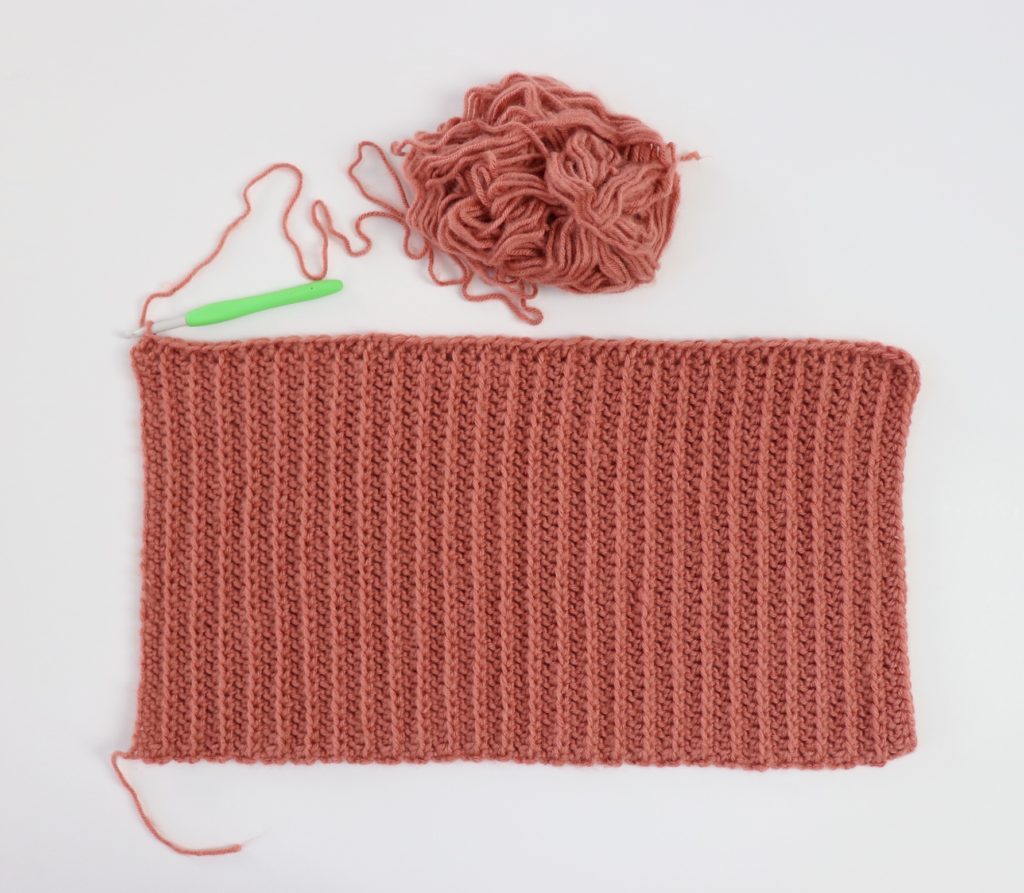
Repeat row 2 until your rectangle measures about 3 inches less than the diameter of your head. For example, I have a 22 inch diameter head and I made the width of my rectangle 19 inches, which ended up being 54 rows of the front two loop HDC.
After I worked my 54 rows, I chained 1 and turned along the side of my work. I worked a HDC slip stitch along the side so that the brim of my hat would be a little straighter when I folded it up. This is optional, but if you do want to add it, a HDC slip stitch means you YO, insert your hook, pull up a loop, then pull directly through the two loops on your hook.
After adding the border on the side, I tied off and left myself a really long tail (probably about 15 to 20 inches). I used the tail and a tapestry needle to sew the two sides of the rectangle together, making sure that the straight edge of the HDC slip stitch I just did was facing outward.
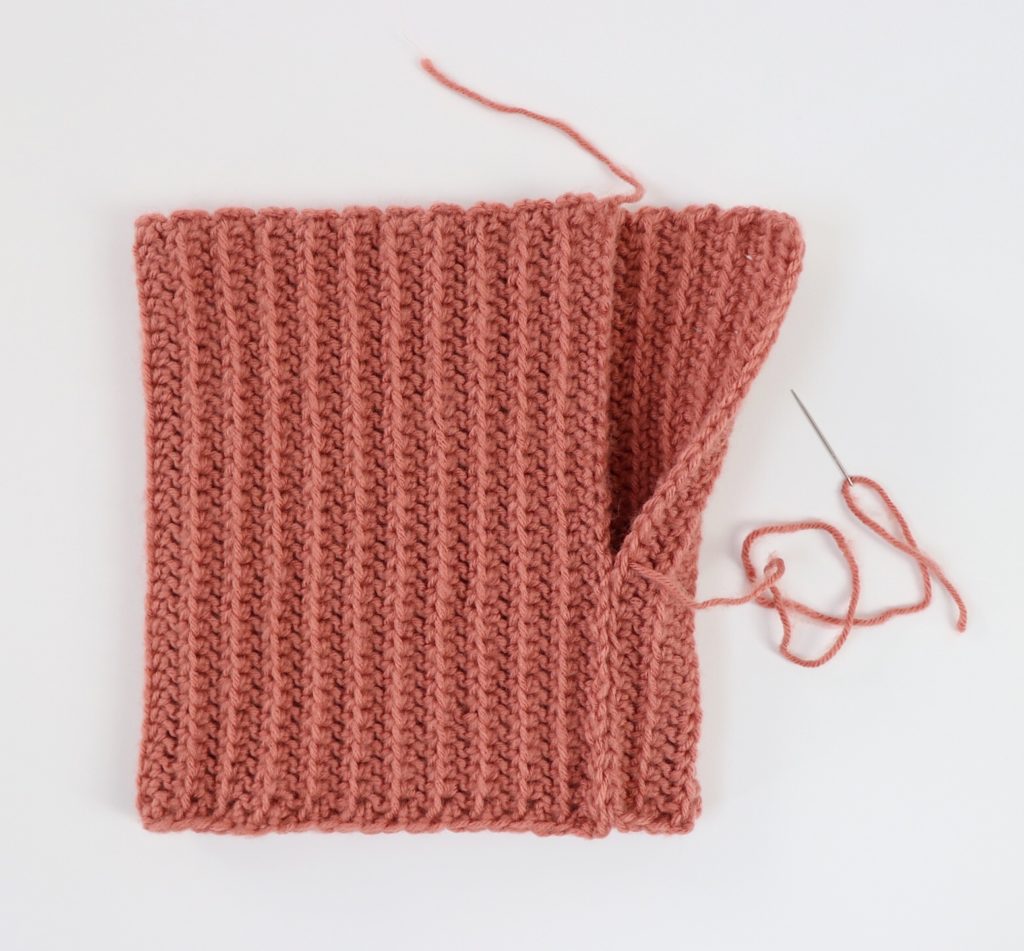
When I finished sewing the sides together, I used the rest of the tail and my tapestry needle to weave in and out around top of the hat, pulling it tight as I went to gather it together.
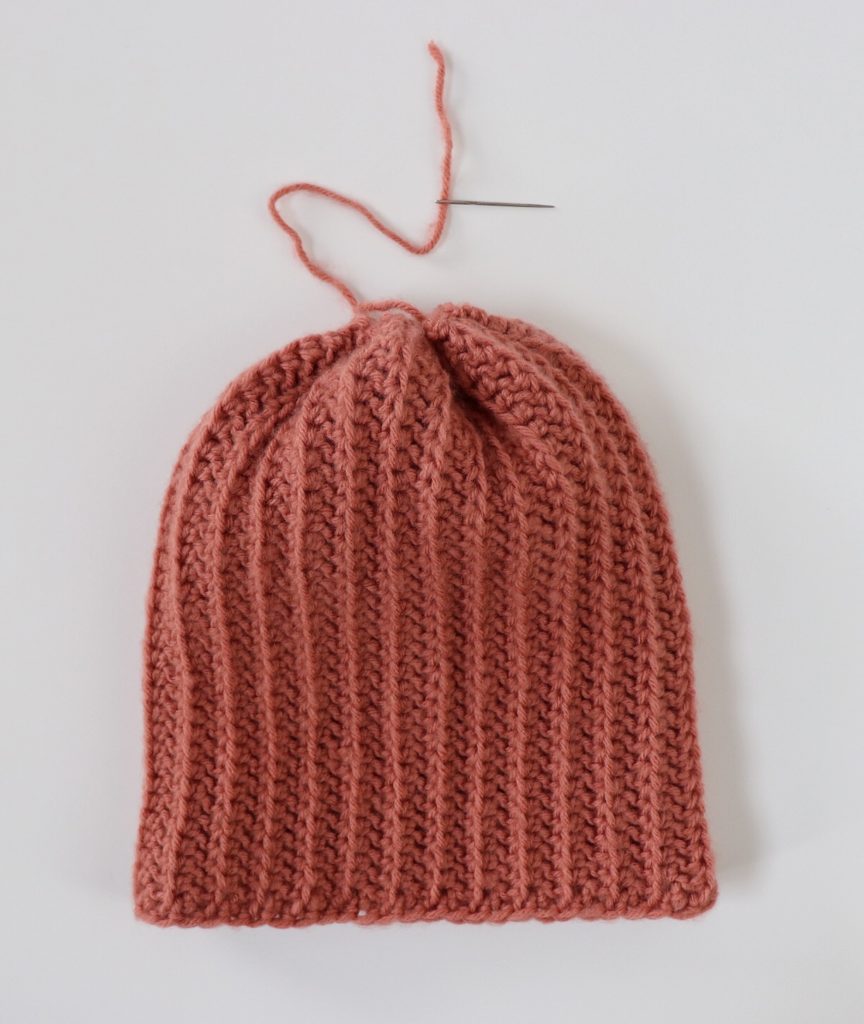
After gathering the hat I finished weaving in the tail and attached a faux fur pom pom that I purchased from my local craft store.

If the part about sewing up the sides and gathering the top doesn’t make sense, here is a video clip to show you what I mean!
Thank you so much for visiting Daisy Farm Crafts – I hope you enjoy making your hat! When you’re finished please come share a picture with us on Facebook or Instagram, we’d love to see!
xo, Hannah

Click here or on image below for printable pattern