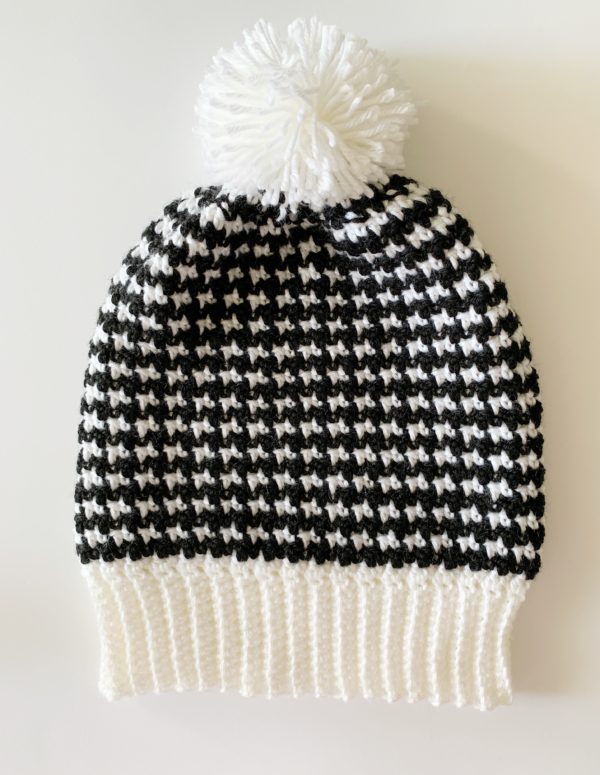
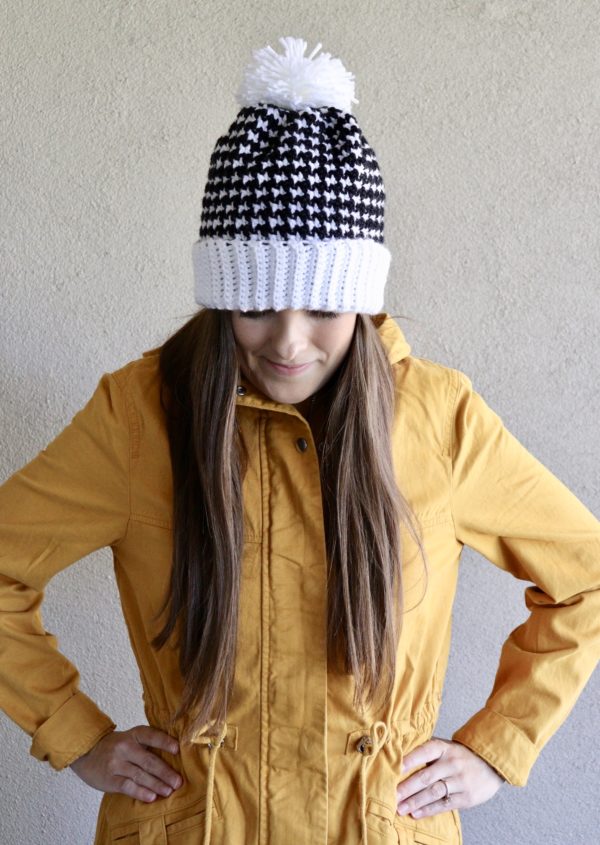
I still look at the black and white griddle stitch and am amazed that simply changing colors every row can produce such an amazing look!
I learned this trick from a follower of ours named BettyAnn Reed. She shared a blanket using this technique with us and I was instantly in love. I remade her blanket, with her permission, and shared the pattern with you all. We called it the BettyAnn Sweater blanket.
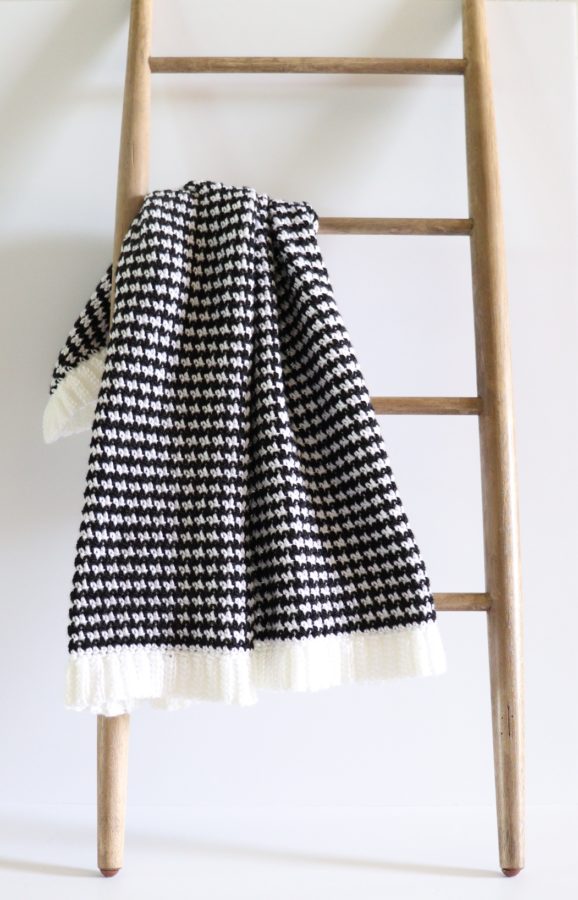
I knew after I made that I’d love to attempt to create more items. I also have learned from all your comments left on our various social channels that it’s also called a houndstooth pattern. I’ve since gone to Pinterest and found more variations of this houndstooth pattern. All of them so beautiful!
I like this version using the Griddle Stitch and using it in the round for the hat made it even easier because I didn’t need to carry any yarn through the row. (If you’ve made the blanket you’ll understand that reference.)
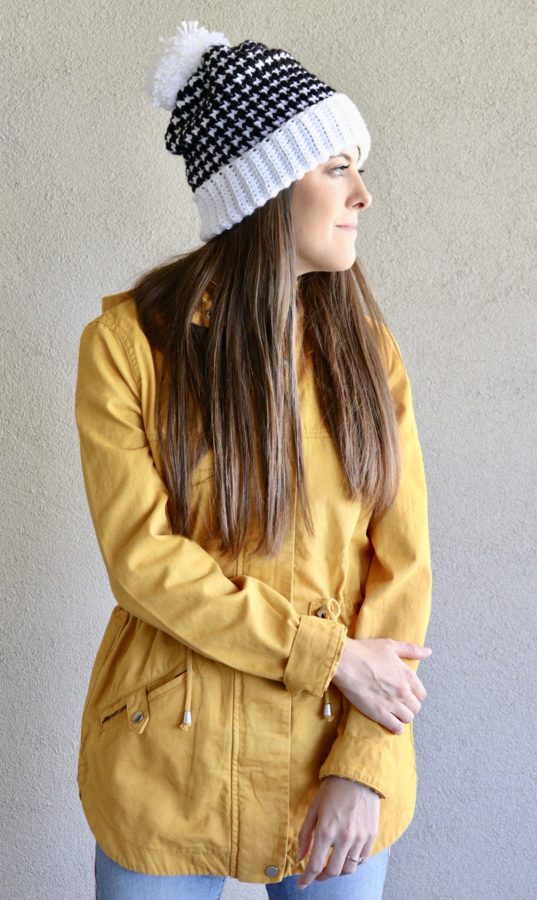
I am rating this hat advanced beginner to intermediate. You really need to be comfortable knowing how to join the rounds and easily switch yarn colors.
I did make a video tutorial, and again, I imagined I was talking through an advanced beginner as I explained the steps so I quickly glossed over a lot of beginner steps assuming a higher skill level.
(But I don’t ever want to discourage anyone from trying anything, give it a go if you want, you might surprise yourself! Or, just tell yourself it’s a practice hat.)
Here’s the video:
Materials
Red Heart Soft (100% acrylic, 141 g/5 oz, 234 m/256 yds)
1 skein Black, 1 skein White
Size I/5.5 mm hook, tapestry needle
Extra Large Pom Pom Maker
Size
Medium Women’s Size Hat
Stitches
Single Crochet (SC): Insert your hook, yarn over (YO) and pull up a loop, YO and pull through two loops.
Double Crochet (DC): YO, insert your hook, YO and pull up a loop, YO and pull through two loops, YO and pull through remaining two loops.
Double Crochet Two Together (DC2TOG): Yarn over, insert your hook into the first designated stitch, yarn over and pull a loop back through, yarn over and pull through first two loops on the hook. Yarn over, insert your hook into the next designated space, yarn over and pull a loop back through, yarn over and pull through first two loops on the hook, yarn over and pull through all remaining loops on the hook.
Pattern
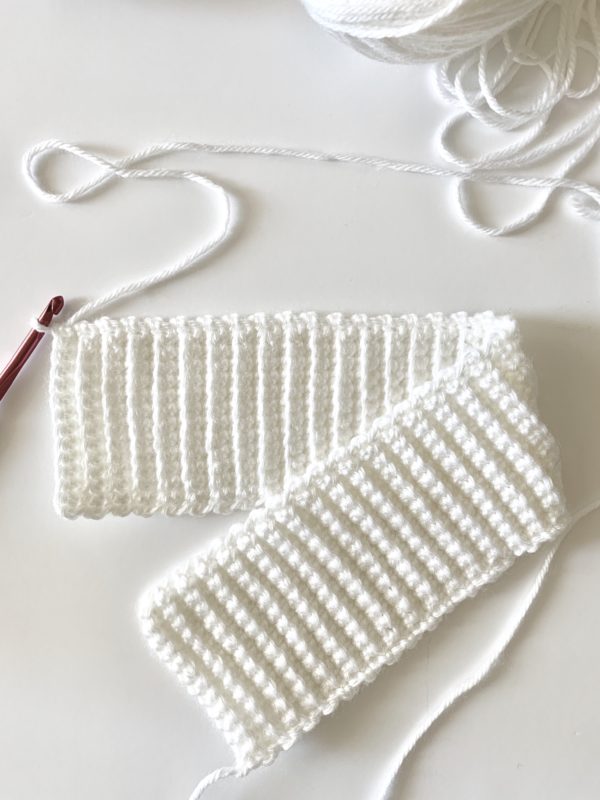
Band
With White, chain 15, leaving a long tail to use to sew the two ends together when finished with band.
Row 1: In second chain from hook work 1 SC. Work 1 SC into each of the remaining chains. (14 sts)
Row 2: CH 1 and turn. In first stitch from the hook work one SC under both loops. Work 1 SC into the back loop of each of the next 12 sts. Work 1 SC under both loops on the last stitch.
Rows 3 – 68: Repeat Row 2. (Or to the width you need. Just end on an even number of rows.)
Mark stitch while you join the rounds using a tapestry needle.
Return to stitch. Join with a slip stitch to the base row. You will now be working around sides of the band. CH 1. *Work 1 SC into the side of the next row. CH 1 and skip the next row, repeat from * around the sides and join with a sl st. (68)
Round 2: Ch 1 and turn. *DC into the top two loops of the SC, SC into the ch spaces. Repeat from * around. Join with a slip stitch, pulling through with Black. Leave White behind. (You’ll come back around after the round and pick it up.)
Round 3: Ch 1 and turn. *DC into the top two loops of the SC, SC into the top two loops of the DC. Repeat from * around. Join with a slip stitch, pulling through with White.
Rounds 4 – 22: Repeat Rounds 2 and 3.
Round 23: (Decreasing stitches) *DC2tog across the next 2 SC, skipping over the DC in the row below. SC into the next DC. Repeat from * around. Join with a slip stitch pulling through with Black.
Round 24: Repeat round 3, keeping in mind you are working the SC into the tops of the DC2tog’s.
Round 25: Repeat round 23, decreasing the rounds further. You will have one set of DC,SC at the end of the round, work those normally. Slip stitch and pull through with Black.
Round 26: Repeat round 22.
Before tying off and finishing the hat, turn it inside out and decide with side of the hat you like the best. One side has a darker black appearance, the other white. It is subtle but you’ll want to decide before you add the pom pom.
Tie off and with a tapestry needle, thread the yarn in and out of the stitches, cinching the top closed. Tie off and weave in the ends. Attach a pom pom.
Good luck with your hat! I think a scarf would be an easy addition to this hat that you could easily do now that you know how to make houndstooth! (You’ll just want to carry the yarn through on every row.)
Come and show us your work! We love to see and share. We have a Facebook Group where you can show off a Daisy Farm Crafts project that you have made or ask a question about a Daisy Farm pattern in case I didn’t explain something clearly enough.
Thank you all for being here! You are amazing. xo, Tiffany
Click here or on image below for printable pattern
![]()