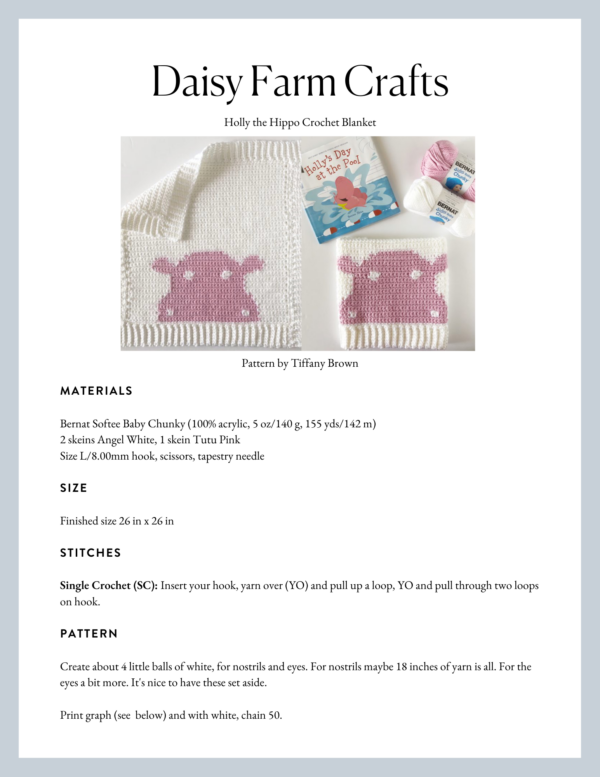
I’m so happy my Holly the Hippo crochet blanket turned out so cute! Ever since I made my bunny lovey a few months back, (you remember this simple little bunny I had my daughter Nicolina design for me?) I had this thought that these little blankets would be so fun to make to accompany a children’s book.
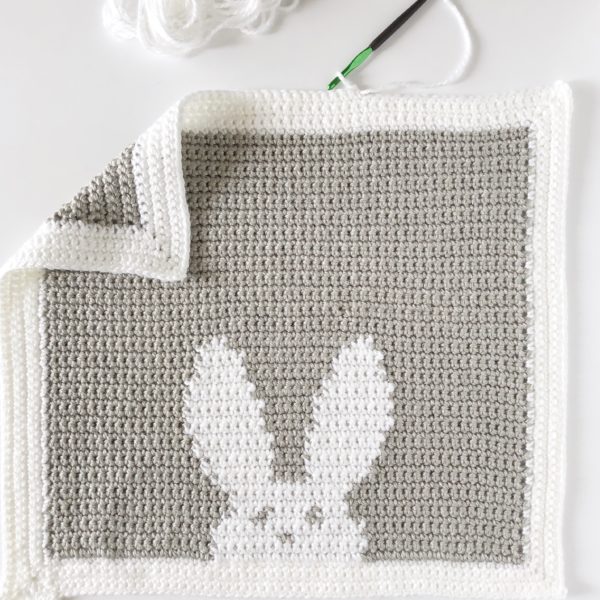
That bunny blanket reminded me of the classic story The Runaway Bunny by Margaret Wise Brown and I thought how fun would that be to make little blanket loveys to accompany some of my favorite books and then when future grandchildren finally appear, wouldn’t that be so fun to be able to read the books and snuggle together with the blankets?
You know me and my dreaming about becoming a grandma! But here’s what happened instead that is so cool and making my little idea come to life!
Every year Hannah and I travel over to Los Angeles to attend the Society of Children’s Book Writers and Illustrators conference. (SCBWI). (Hannah and I are both learning how to write fiction.) We have met the most amazing aspiring authors and illustrators.
Maybe one day we will get to join the ranks, but until then, we have such a good time listening to different authors share their journey to getting published. I have been collecting the picture books at each conference and have been able to have the authors sign their book and inscribe it to my future grandchildren.
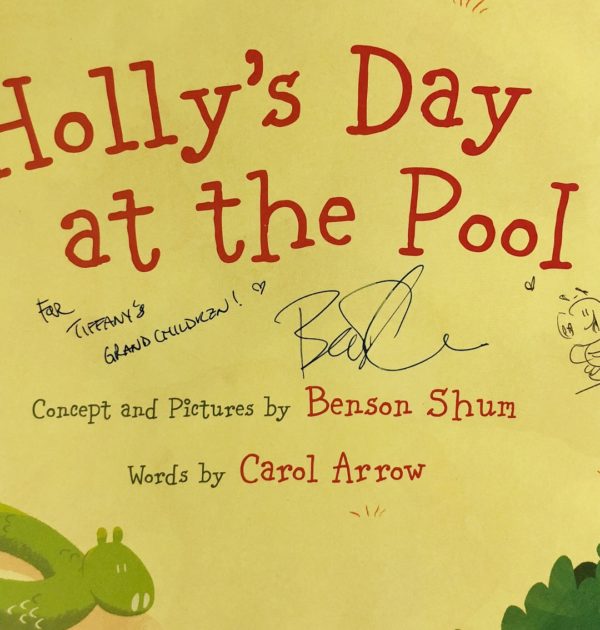
We also meet aspiring authors and illustrators and get so excited when a publishing deal comes through for them! This is my friend Benson and he was published! He is a Disney Illustrator and won the Disney Artist Showcase award and his children’s picture book, Holly’s Day at the Pool was published earlier this year! (Click to shop the book in our Amazon Store! Daisy Farm Crafts receives a small portion of the proceeds.)
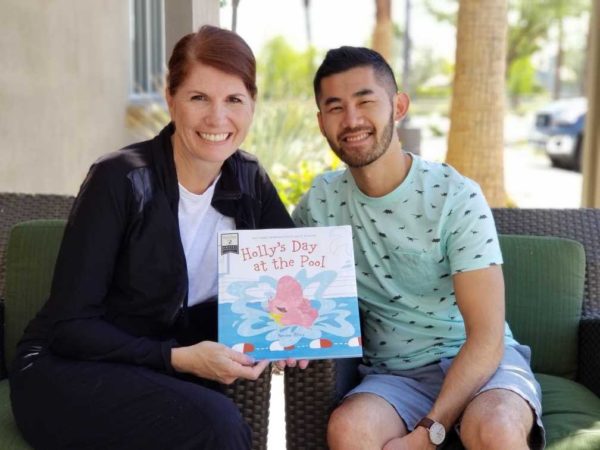
I wanted to do something to help him celebrate!
So I had Benson sign his book for me: (to my future grandchildren, of course.)
And then, I designed a hippo graph, and turned it into a blanket.

His little story is just so cute about Holly who has to find her courage to jump into a pool and save her sisters toy. I know! A hippo afraid of the water. So cute!
So let’s get to talking about this blanket!
The graph is designed by me on a website called stitch fiddle. I just had to figure it out, it wasn’t too hard. This is my first graph I’ve designed. Usually, my daughter Nicolina makes them for me.
If you just need the graph and don’t want to make your own here’s mine that you are free to use: Click the picture and it will take you to a new page that you can print.

The skills you need to have in order to make this blanket are knowing how to change yarn color in the correct place. Each little square on the graph counts as a single crochet. To change color, you’ll need to pull through with the new color as the last step of the SC. Other than that, this is a very simple graph to complete.
I did not carry yarn through any of the pink parts. I start the graph in the bottom right-hand corner with the white yarn, then switch to the pink color, then start a with a new ball of white yarn to finish the left-hand side of the graph. I drop the yarn and pick up with the new color. So for the little white nostrils, I simply made two separate little balls of yarn.
Around the ears, I did the same. I created little balls of the white for sections. I wanted to avoid carrying any yarn through. I did have ends to weave in when I was finished, but I strategically used my tapestry needle to work the ends so they further defined the eyes or nostrils.
But, good news! I made a video to show you how I made the ribbed border! (It’s at the end of the post.) So no worries there. Okay so let’s get to the details.
Materials
Bernat Softee Baby Chunky (100% acrylic, 5 oz/140 g, 155 yds/142 m)
2 skeins Angel White, 1 skein Tutu Pink
Size L/8.00mm hook, scissors, tapestry needle
Size
Finished size 26 in x 26 in
Stitches
Single Crochet (SC): Insert your hook, yarn over (YO) and pull up a loop, YO and pull through two loops on hook.
Pattern
Create about 4 little balls of white, for nostrils and eyes. For nostrils maybe 18 inches of yarn is all. For the eyes a bit more. It’s nice to have these set aside.
Print graph and with white, chain 50.
Starting in the bottom right corner of graph, work one SC per square, changing colors when needed. Use the second skein of white for the left hand side of the graph. CH 1 and turn.
Work the graph back and forth. Mark the rows you’ve done and in the direction you worked if you need to set the project aside for awhile.
When finished with the graph, weave in all ends before starting the border.
In any corner, pull up a loop and SC in that space. Work SC in each stitch across the tops, and working carefully down the sides, if you find the sides to be ruffling, skip a space here and there. Generally one SC is worked per row, but the tension is looser on the sides of blankets, so skipping a space every now and then helps to keep the sides even. Work 3 SC into each corner space.

Border
Work a final 2 SC in the starting corner and then chain 8. In the second chain from the hook, work your first SC. Work SC in each chain back toward the blanket edge. (7 SC). Slip stitch (SL ST) to the next SC on the edge of the blanket and the next SC. (2 SL ST). Turn the series of 7 SC you just made toward you and working in the back loops, SC in each stitch. CH 1 and turn. Work in the back loops 7 SC back toward the edge of the blanket. SL ST into the next SC and the next making sure they are SC’s that have not already been slip stitched into. You want the next 2 stitches.
When you get the end of the row, only work 1 SL ST into the corner, work BL-SC (back loop single crochet) to the end of the border and chain 8. Now work down the new side, using the same technique.
Here is a video showing you how to make the ribbed border:
(In case the video does not load for you, here is a link to it on YouTube.)
The last thing I do to make my blankets look better for gifting is to lay them out on either a towel or a foam mat and pin them straight. Then I use a spray bottle of water and dampen the blanket and further press the blanket into a nice shape. Then I let it air dry.

I hope you’ll have fun making this blanket! I probably will be creating more animals. Wouldn’t it be so cute to make a collection and then put them into a nine block afghan? We will see how many I can create!
So congratulations to my friend Benson and his book! I’m so excited to have another one to add to my collection!
Come and share your Daisy Farm blankets with me! Tag your posts on Instagram with #daisyfarmcrafts or post your picture to my wall on the Daisy Farm Crafts Facebook page. And for sure come and follow along on either place! I’d love to keep sharing my latest blankets and projects with you.
Have a beautiful day!
Tiffany
Click here or on image below for printable pattern