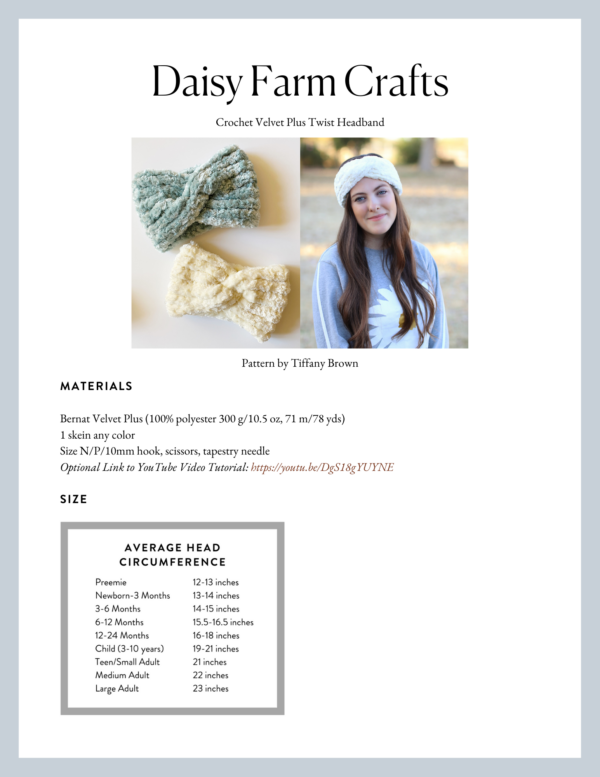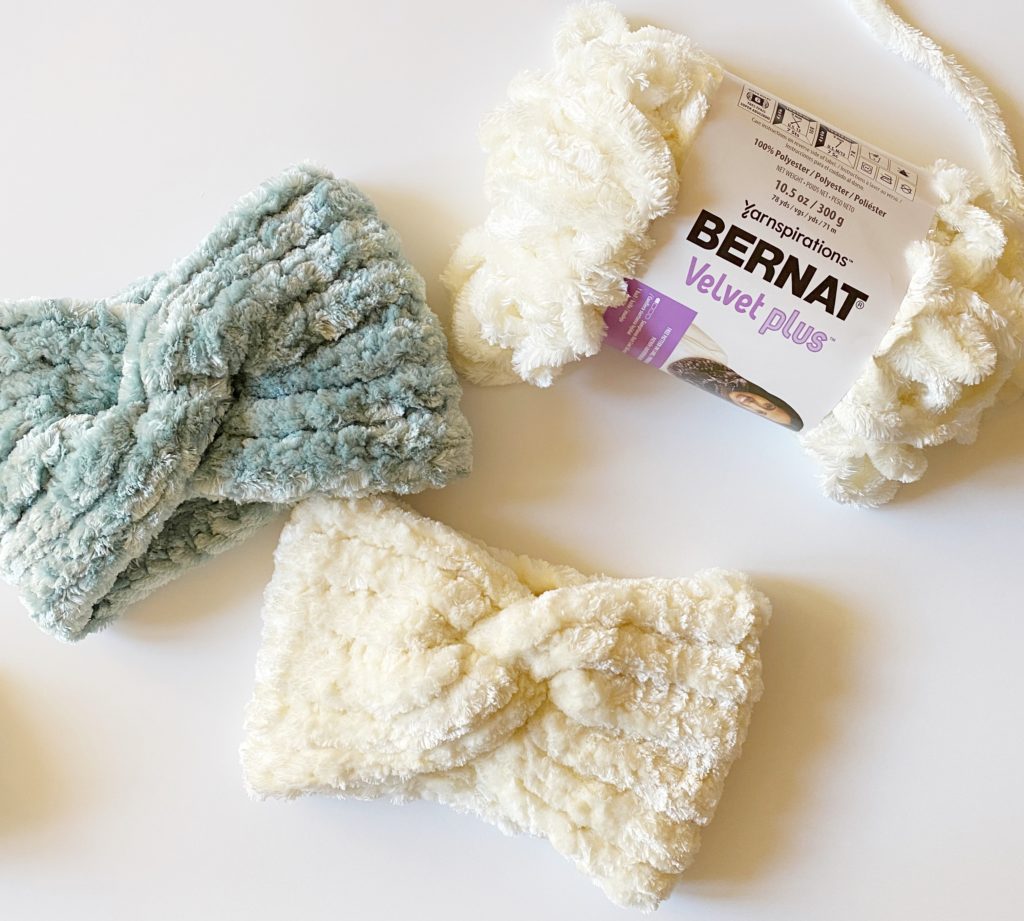
I’ve had so much fun playing and designing with the new Bernat Velvet Plus from Yarnspirations! (As Stitch Ambassadors for Yarnspirations, we are sent yarn, #sponsored.)
I knew I wanted to see if I could get it to work as a twist headband. We previously have made twist headbands out of Bernat Baby Velvet and Bernat Velvet, which we love.
The Bernat Plus didn’t disappoint. It turned out like a nice fur headband. Here’s a picture of my daughter in law Elizabeth modeling.
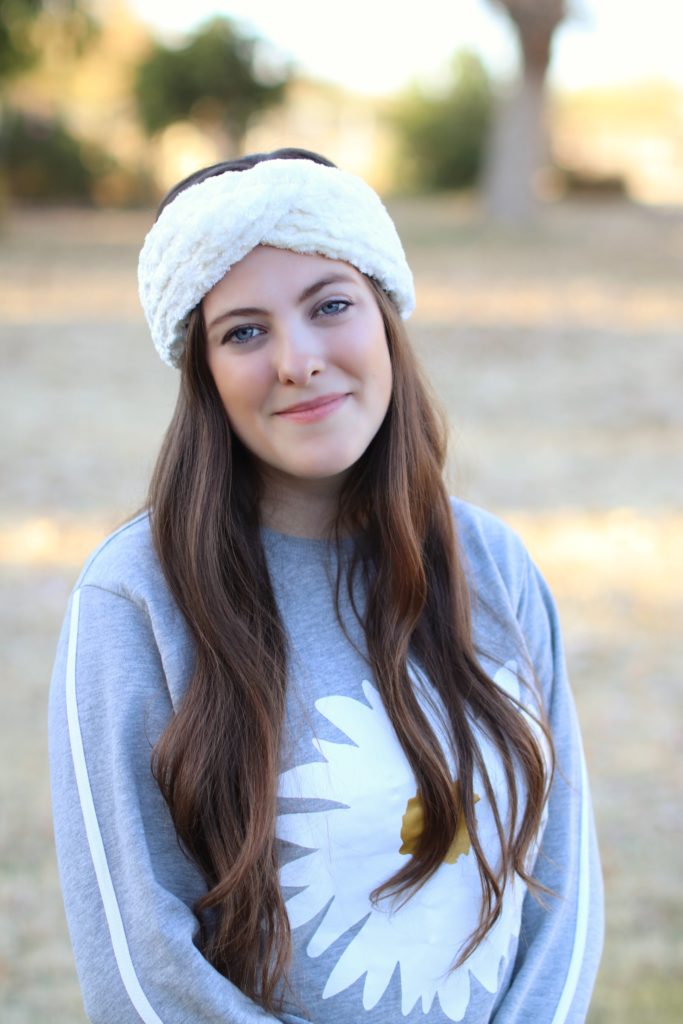
Isn’t she and the headband so gorgeous? The only thing that is a little tricky working with this yarn is seeing where to insert your hook. You have to feel your way down the chain, but once I got into a rhythm, it wasn’t as hard as I thought.
I used all slip stitches to create this look. Each one took me about 30 minutes to make.
Materials
Bernat Velvet Plus (100% polyester 300 g/10.5 oz, 71 m/78 yds)
1 skein any color
Size N/P/10mm hook, scissors, tapestry needle
Stitch
Slip Stitch (SL ST): Insert your hook, yarn over and pull a loop back through and continue pulling through the loop on your hook, stitch complete.
Pattern
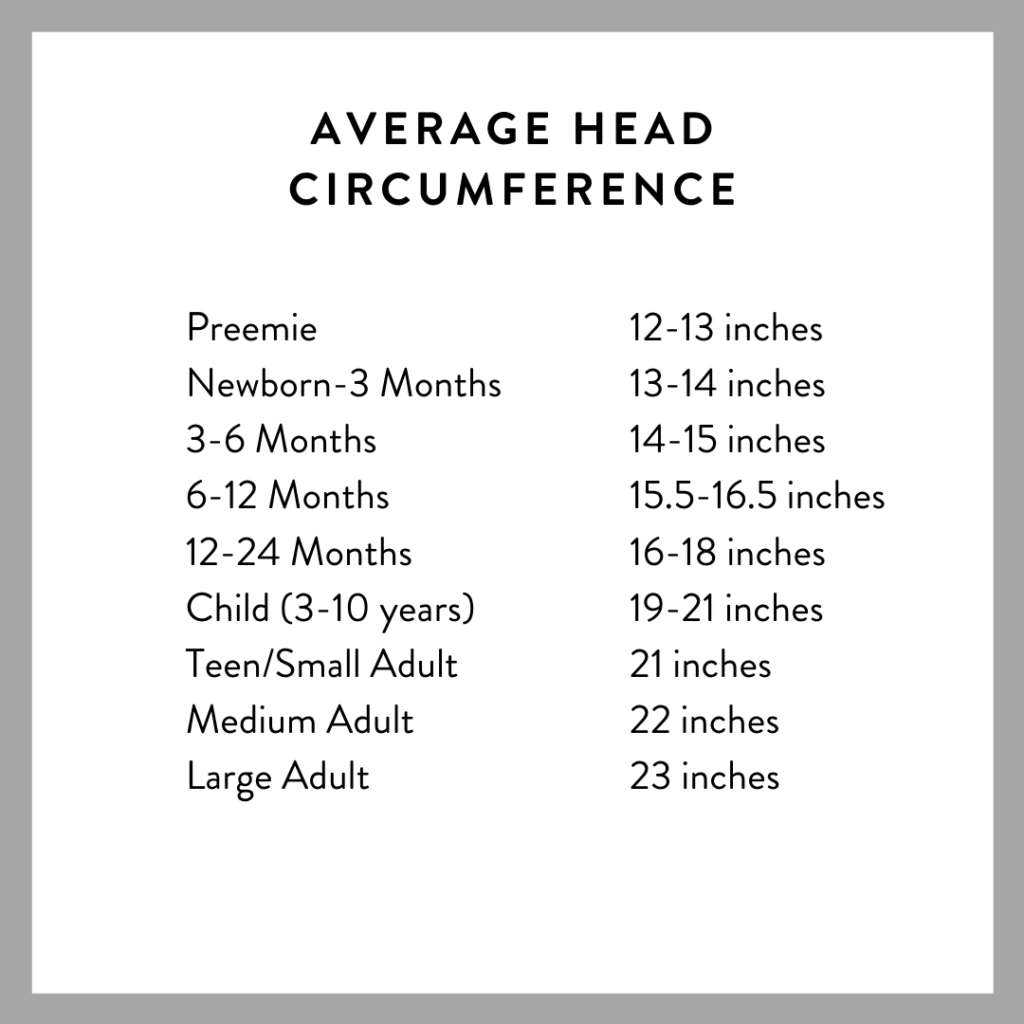
Chain 40 for an average 22-inch women’s circumference head. (Or chain to exactly the circumference of the head you are making it for, see chart.)
ROW 1: Insert your hook into the back loop of the second chain from the hook. Yarn over and pull a loop back through and through the first loop on your hook. Repeat from * across the row. Ch 1 and turn. (39 sl st)
ROWS 2 – 12: Work 1 SL ST into each of the back loops of each stitch across the row. CH 1 and turn.
Tip: If you lose track of how many rows you’ve made, work until the headband is approximately 5 inches wide.
Tie off and leave a long tail to sew the headband together.
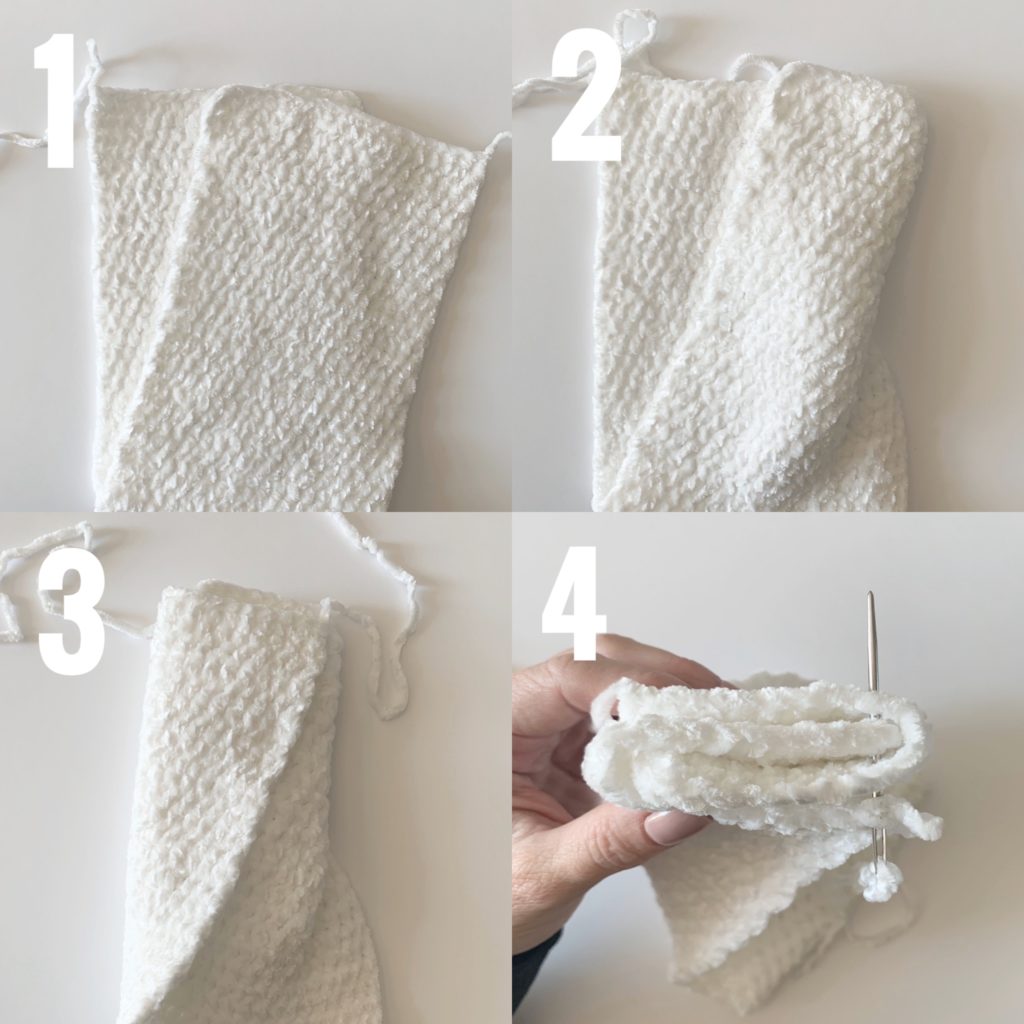
For the twist:
Step 1: Lay the band out and fold in half and slide one side of the band across so one end is matched up to the middle of the other.
Step 2: Fold the right hand side around the back.
Step 3: Fold the left hand side around the front, giving you four layers
Step 4: Sew with the tapestry needle through all four layers. Tie off and knot your ends together.
Turn the headband so the seam is on the inside of the headband and you have a twist.
Here is a full video tutorial on Youtube if you’d like more help or to see a visual:
Thank you so much for coming by our website! I hope you have fun with your Velvet Plus Headband! We’ve also made Velvet Plus Scrunchies if you want an extra project for the Velvet Plus yarn. They are super fast and easy and make great gifts!
xo, Tiffany
Click here or on image below for printable pattern