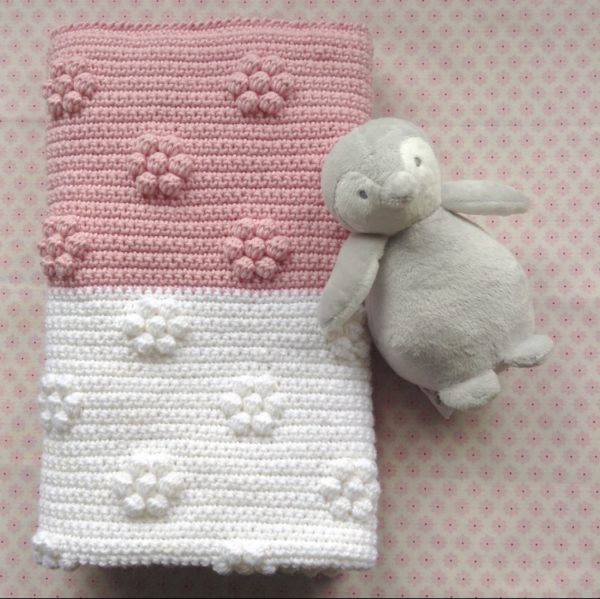
When I first started brainstorming ideas for this blanket, I was actually trying to make giant polka dots. I thought that by putting a bunch of clusters together in a circle they would kind of mesh together to make giant dots, but as soon as I did a practice swatch I realized that they ended up looking like flowers :).
I had originally planned to just space them out randomly and ‘freestyle crochet’ as my mom likes to call it, but it actually seemed like more work to randomly place them in a way that would look good in the end, so I got out my graph paper and drew them out evenly :).
But if you are a freestyle crocheter and want to space your flowers out randomly, I say go for it! I still think it would look cool. If you are more like me and need a pattern to follow, I tried my best to explain the counting in the pattern below and I also made a graph that I hope will be helpful.

This blanket was the second time that I used Bernat Velvet yarn and I still really love it. If you’ve never used it before, you may have heard a lot of arguments for or against it, and it is true that it does have some challenges, but to me the yarn is worth it for the beautiful and amazingly soft project it makes in the end.
The biggest complaint I’ve heard is that the yarn tends to get tangled easily as you are crocheting, and I did have trouble with that on my first velvet blanket, but I found that taking the yarn from the outside instead of pulling from the middle helped to avoid that problem most of the time for this blanket.
Another problem that can come up with the velvet is that if you crochet it too loose or use too loose of a stitch, then your stitches can start to come undone or have loops that stick out and get caught on things. For my last blanket I used the recommended size on the yarn label, which is K and I tried to keep my tension really tight, but I still had a few loops come up, so for this blanket I went down to a size J hook and the stitches turned out much tighter and secure.
Unless you are already a very tight crocheter, I definitely recommend going down a hook size when using this yarn.

Another thing to note is that this Bernat Velvet yarn is hand wash only. If you need to use yarn that is machine washable, I think that Bernat Blanket yarn or Bernat Softee Chunky would be good substitutes.
You can also check out this flower blanket pattern by our crochet Instagram friend flowerhouse_jane that uses single crochet and a lighter weight yarn. Click on the picture or click here to go to her pattern!
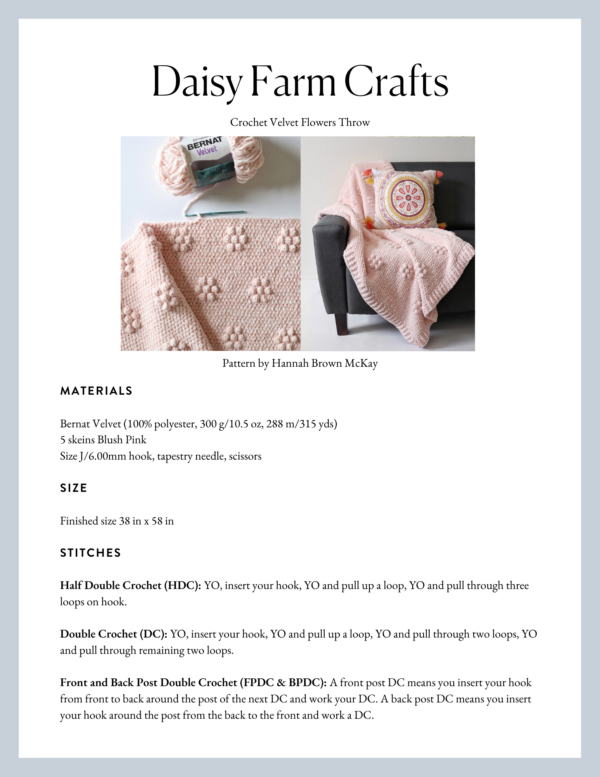
Materials
Bernat Velvet (100% polyester, 300 g/10.5 oz, 288 m/315 yds)
5 skeins Blush Pink
Size J/6.00mm hook, tapestry needle, scissors
Size
Finished size 38 in x 58 in
Stitches
Half Double Crochet (HDC): YO, insert your hook, YO and pull up a loop, YO and pull through three loops on hook.
Wide Half Double Crochet (WHDC): YO, insert your hook between stitch posts, YO and pull up a loop, YO and pull through three loops on hook.
Double Crochet 4 Together (DC4TOG) Bobble: YO, insert your hook, YO and pull up a loop, YO, pull through 2 loops. *YO, insert your hook into the same space, YO and pull up a loop, YO, pull through 2 loops. Repeat from * two more times. YO, and pull through all five loops on your hook.
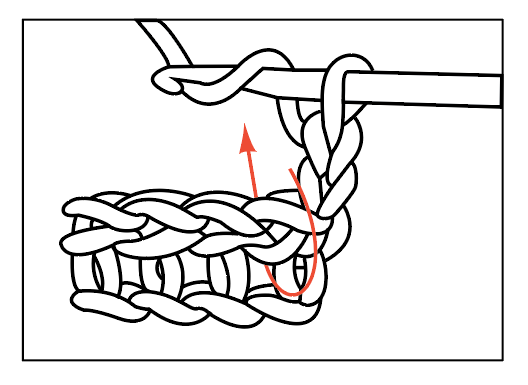
Double Crochet (DC): YO, insert your hook, YO and pull up a loop, YO and pull through two loops, YO and pull through remaining two loops.
Front and Back Post Double Crochet (FPDC & BPDC): A front post DC means you insert your hook from front to back around the post of the next DC and work your DC. A back post DC means you insert your hook around the post from the back to the front and work a DC.
Single Crochet (SC): Insert your hook, YO and pull up a loop, YO and pull through two loops on hook.
Pattern
Chain 96. (Pattern repeat is any multiple of 14, plus 12. In other words, multiply the number of flowers you want across the blanket by 14, then add 12).
Row 1: Starting in the second chain from the hook, work 1 HDC in each chain. When you reach the end, CH 1 and turn.
Rows 2 – 9: Work 8 rows of WHDC, inserting your hook in between the stitch posts (you will always be working in between the posts from now on). The turning chain does not count as a stitch. CH 1 and turn at the end of each row. (When working these rows make sure you don’t miss the last stitch, sometimes with the velvet it can be hard to see where to insert your hook at the end of the row – you want to make sure to insert your hook between the last post and the turning chain.)
Row 10: (BOBBLE ROW) *Work 11 WHDCs, then one DC4TOG bobble (still inserting your hook in between the posts), then one WHDC, then one DC4TOG bobble. Repeat from * 5 more times. (You should have 6 sets of bobbles across the row when you’re finished.) End the row with 11 WHDCs. CH 1 and turn.
Row 11: WHDC across the row. CH 1 and turn. (When working this row, just treat the bobbles as if they were regular WHDC posts and put stitches on either side of them.)
Row 12: (BOBBLE ROW) Work 10 WHDCs, then one DC4TOG bobble, then one WHDC, then one DC4TOG bobble, then one WHDC, then one DC4TOG bobble. (In other words, you are making three bobbles, with a WHDC in between each one.) Then *work 9 WHDCs, then DC4TOG bobble, then a WHDC, then DC4TOG bobble, then a WHDC, then a DC4TOG bobble. Repeat from * four more times. (You should have six sets of bobbles across the row when you’re finished.) End the row with 10 WHDCs. CH 1 and turn.
Row 13: Repeat row 11.
Row 14: (BOBBLE ROW) Repeat row 10.
Rows 15 – 23: Work 9 rows of WHDC working in between the posts. CH 1 and turn at the end of each row.
Row 24: (BOBBLE ROW) Work 18 WHDCs, then one DC4TOG bobble, then one WHDC, then one DC4TOG bobble. *Work 11 WHDCs, then one DC4TOG bobble, then one WHDC, then one DC4TOG bobble. Repeat from * three more times. Finish the row with 18 WHDCs. CH 1 and turn.
Row 25: Repeat row 11.
Row 26: (BOBBLE ROW) Work 17 WHDCs, then one DC4TOG bobble, then one WHDC, then on DC4TOG bobble, then one WHDC, then one DC4TOG bobble. Then *work 9 WHDCs, then one DC4TOG bobble, then one WHDC, then one DC4TOG bobble, then one WHDC, then one DC4TOG bobble. Repeat from * three more times. End with 17 WHDCs. CH 1 and turn.
Row 27: Repeat row 11.
Row 28: (BOBBLE ROW) Repeat row 24.
Rows 29 – 37: Work 9 rows of WHDC working in between the posts. CH 1 and turn at the end of each row.
Repeat rows 10 – 37 until you reach your desired length.
Here is a graph to help you see the counting pattern visually (the graph was way too small to show the whole blanket, so imagine this is one corner of the blanket zoomed in). You can click here to print it as a PDF. In the real blanket you will have six flowers across with five flowers centered in between them.

Border
After I finished the blanket I wove in all the ends with a tapestry needle and then added a ribbed border using front and back post double crochet (FPDC and BPDC). If you aren’t familiar with those stitches, you can watch the video below (or click here to watch on YouTube.)
Round 1: Pull up a loop in any corner and chain 3. DC around the entire blanket, work 3 DCs into each corner stitch.
Round 2: When you reach the corner you started with, work 3 DCs into that corner, then go around the blanket again, this time alternating front and back post double crochet. When you get to the corners of this row, you will want to continue the pattern of alternating front and back post double crochet, but you will work three stitches around the corner post.
So, for example, if you get to the corner post and you are supposed to work a front post DC, then work a front post DC, a back post DC, and a front post DC all around that corner post. Then in the next stitch you would continue the alternating pattern, working the opposite of whichever stitch you just used (in this example, you would work a back post DC).
Rounds 3 – 4: When you finish row 2, work 3 alternating front post/back post DCs into the corner you started with and repeat row 2 two more times around the blanket, making sure your post DCs are popping out in the same direction as the previous round, until you have four rows total. (Or you can go around as many times as you’d like to get your desired border height – I made it around four times before I started to run out of yarn.)
Round 5: After you finish the ribbing, you can finish off the edges with a row of SC around the whole blanket, working 3 SCs into the corners. When you reach the corner you started with, slip stitch into the corner and tie off.

Thank you so much for coming to read this pattern; I hope that you enjoy making this blanket. I made this throw for a friend who is going through a rough time right now and I hope the softness of it will bring her some comfort. Sometimes that’s all we can do to try to help someone.
I got an email a few weeks ago from someone telling me that last year she crocheted a blanket for her sister who had a miscarriage and this year she is crocheting a baby blanket for her sister’s new baby and I love that crochet can be used to both bring comfort or to celebrate something.
When you finish your blanket, please share a picture with us on Facebook or Instagram using #daisyfarmcrafts. We’d love to see and share your beautiful work :).
Happy crocheting,
Hannah

Click here or on image below for printable pattern