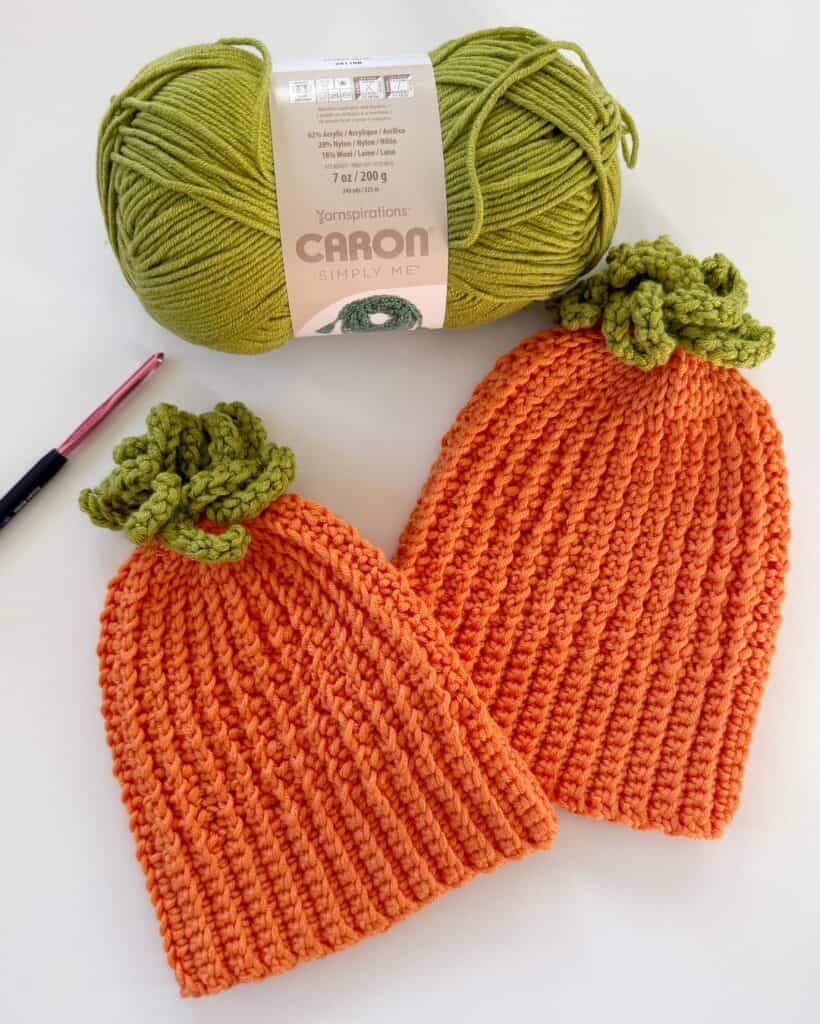
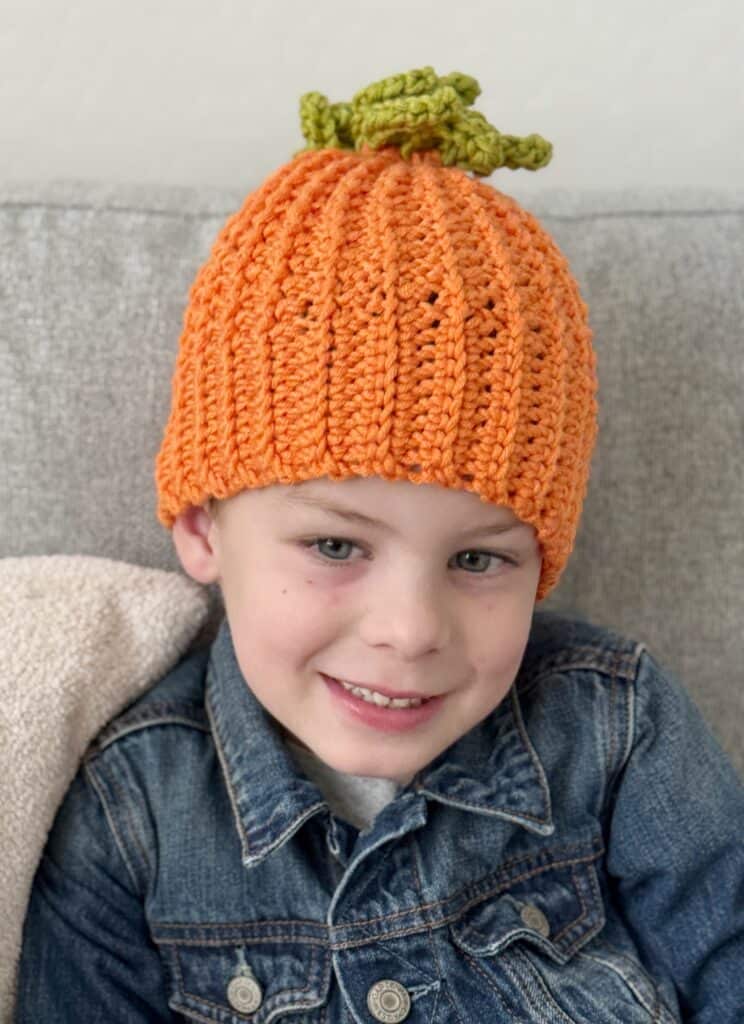
It’s that time of year when the grandkids are going to visit pumpkin patches and so I decided to make them little hats as a fun surprise!
I can’t recommend Caron Simply Me highly enough for hats, especially if you are in a colder climate. The yarn is a bulky 5-weight acrylic, nylon, and wool blend yarn. It gives just enough bounce to make the hats stretchy and retain their shape. I absolutely am loving it.
My grandkids have been taking these hats on and off and they are bouncing right back into shape. Plus I think it makes the little curly q’s naturally curly! So fun.
I’ve written out the pattern below, but I also have a YouTube tutorial if you’d prefer to follow along. I’m using the Mesh Stitch for the middle portion of the hat, and the curly q’s are made with a yarn over slip stitch; other than that, it’s back loop single crochet and slip stitches at the top of the hat to lessen the bulk.
These are hats that you make as a flat panel, fold together, sew up the side, and then gather in at the top. I am including a size chart if you want to make it for other sizes, but this child size fits my 3-year-old granddaughter and 5-year-old grandson. The stretch in the hat makes it easy to fit multiple sizes.
Materials
Caron Simply Me (62% Acrylic, 20% Nylon, 18% Wool, Ball Size: 160g / 5.64 oz, 180 meters / 197 yards, 5 Bulky)
1 skein Lively Mandarin, 1 skein Olive Quartz
(Makes 2 child size hats)
Tap name of yarn to shop Yarnspirations.com
Size I 5.5 mm hook, tapestry needle, scissors
Stitches
Single Crochet (SC): Insert your hook, YO and pull up a loop, YO and pull through two loops on hook.
Slip Stitch (SL ST): Insert your hook, YO and pull up a loop and through loop on hook.
Chain (CH): YO and pull through loop on hook.
Size
The pattern is for Child Size hat, you can adjust yourself with the size chart below:

Pattern
Chain 36
Row 1: In the second chain from the hook, work 1 SL ST, SL ST into each of the next 4 chains. *SC into the next ch, CH 1, skip next chain, SC into the next ch. Repeat from * across the next 18 chains. SC into the remaining 9 chains. CH 1 and turn.
Row 2: Working into the back loops now and throughout, SC into each of the next 10 SC. CH 1, *skip the ch 1 from the previous row, SC. Repeat from * across to the SL STs. Work back loop SL ST into each of the 5 SL STs. On the last SL ST, pull through with green. CH 10 and turn.
Tip: do not cut the green or orange yarn, you will carry it across the back of the hat and pull it up when needed.
Row 3: Begin in the second chain from the hook with YO SL ST, YO SL ST into each of the remaining 8 chains, on the final chain, pull through with orange. Work back loop SL ST into each of the next 5 SL STs, *SC, CH 1, skip one chain, repeat from * across. End with final 10 SC. CH 1 and turn.
Row 4: SC into each of the next 10 SC. CH 1, *skip the ch 1 from the previous row, SC. Repeat from * across to the SL STs. Work back loop SL ST into each of the 5 SL STs. CH 1 and turn.
Row 5: SL ST into each of the next 5 SL STs, *SC, CH 1, skip one chain, repeat from * across. End with final 10 SC. CH 1 and turn.
Repeat rows 2 through 5 until you have 13 curly q’s made. End on a row 5 instruction.
Tie off the green and weave in the ends.
Fold the hat in half, work a zig zag slip stitch or regular slip stitch to join the two sides together. When you reach the top, tie off with a long tail. Use a tapestry needle to sew the top of the hat together. Make several rounds with your needle to bring the top of the hat in tight. Tie off the orange and weave in the end.
See the video tutorial below for more help!
Thank you so much for stopping by! Have fun this fall!
XO, Tiffany
Click here or image below for free printable pdf.
![]()
Need more hat ideas? Be sure and look through our entire catalog of hat patterns here: Tap here for Hat and Headband patterns