I’ve been trying to use up a lot of my fall colored yarn before I start getting into winter mode, so I decided to use these jewel tone colors from Caron Simply Soft and try out a baby girl ripple blanket. Even though I’ve made several chevron blankets, I’d never done a ripple before so it took me a few practice swatches to figure out the counting, but once I got the hang of it, the blanket worked up pretty fast.

I started out the blanket just working the colored stripes in between three rows of white, but when I got to the end I decided I wanted there to be large swatches of white on each end, so I made my last patch of white longer and then went back and added some rows at the beginning before I added the tassels. I like the way it turned out with the longer white sections, so I wrote the pattern as if I’d done that from the beginning :).
Like I said before, this blanket works up fast, but if you’ve never done a crochet ripple blanket before, I’d highly recommend starting with a smaller chain to practice with just so you can make sure the counting makes sense. The pattern repeat is 12 + 3, so you can chain any multiple of 12, then add 3 and make a small practice swatch (39 is probably a good number to practice with). I did a practice swatch and it definitely helped me work out the kinks so I didn’t have to keep frogging once I was ready to start the real thing.

Materials
Caron Simply Soft (100% acrylic, 170 g/6 oz, 288 m/315 yds)
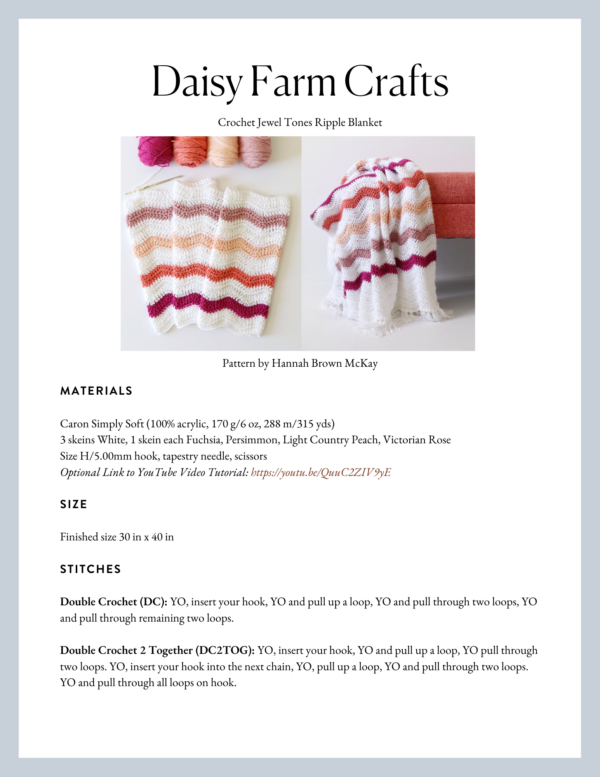
3 skeins White, 1 skein each Fuchsia, Persimmon, Light Country Peach, Victorian Rose
Size H/5.00mm hook, tapestry needle, scissors
Size
Finished size 30 in x 40 in
Stitches
Double Crochet (DC): YO, insert your hook, YO and pull up a loop, YO and pull through two loops, YO and pull through remaining two loops.
Double Crochet 2 Together (DC2TOG): YO, insert your hook, YO and pull up a loop, YO pull through two loops. YO, insert your hook into the next chain, YO, pull up a loop, YO and pull through two loops. YO and pull through all loops on hook.
Pattern
Chain 111. (Or chain any multiple of 12 and then add 3. If you’re trying to estimate the width, you can multiple the number of ripples you want by 12, and then add 3. For this blanket, I have 9 ripples (or peaks), so I multiplied 9 x 12 (108) and then added 3 (111).)
Row 1: DC in the 4th chain from hook. (The first three chains counts as a DC.) *Work 1 DC in each of the next 3 CH. In the next two chains, DC2TOG. DC2TOG again in the next two chains. Work 1 DC in each of the next 3 CH, then work 2 DC in next CH, and another 2 DC in the next chain. Repeat from * across to the last CH. 2 DC into that last CH. CH 3 and turn.
Row 2: DC in the next stitch (if you count down from the hook it will be the 4th CH). *Work 1 DC in each of the next 3 CH. In the next two chains, DC2TOG. Then DC2TOG again in the next two chains. Work 1 DC in each of the next 3 CH, then work 2 DC in next CH, and another 2 DC in the next chain. Repeat from * across to the last CH. Work 2 DC into the top of the CH 3 turning chain from the previous row. CH 3 and turn.
Repeat row 2 until blanket measures 40 inches or your desired length.
The ripple stitch is a fairly common pattern, I’ve seen it lots of other places and a good one to practice over and over to get comfortable finding the top of that dang turning chain! Keep it loose and try your best to go under both loops of that chain. It helps to make the sides straighter. Also, this ripple is pretty easy to keep track of your place if you remember that 3 DCs separate each peak and valley and there are 2 DC on each end. Just something to keep in mind as you go along!

Here is the color pattern I used: 9 rows White, *2 rows Fuchsia, 3 rows White, 2 rows Persimmon, 3 rows White, 2 rows Light Country Peach, 3 rows White, 2 rows Victorian Rose, 3 rows White. Repeat from * until you you reach your final set of white rows. Then add 6 rows of white so you have 9 rows of white to match the other end.
Whenever I switched to a new color, I pulled through with the new color on the very last DC of the row, pulling the new color through the last two loops before I finished the stitch. Then I would chain 3 and turn, and cut the old color, leaving a long enough tail that I could weave in later.

Border & Tassels
When I finished my blanket, I wove in all the ends with a tapestry needle and worked one round of single crochet (working 3 SCs into each corner) with white around the edges to give the sides a little bit more finished look. Then I added some simple white tassels:
For the tassels, I used the same simple method that I used in my Diamond Berry Stitch Blanket.
Supplies: A small notebook (the one I used is about 6 in. x 4in.), Scissors, Yarn

Wrap a piece of yarn around the notebook horizontally. Then cut the yarn in half.

Take three to four pieces of yarn (depending on how thick you want your tassels; for this blanket I used four) and fold them in half. Insert the folded end into the chain space above the last row. You can use your fingers or a large crochet hook to do this.

Pull the ends through the loop…

And pull tight to make a knot.

And that’s it! For this ripple blanket, I spaced the tassels out every other stitch, but you can space yours out however you desire. You can also make the tassels longer by using a bigger notebook, or trim them down if you want them to be shorter.

Thank you so much for coming to see this pattern, I hope you enjoy making this blanket! When you’re finished with your project please share a picture with us on the Daisy Farm Crafts Facebook wall or on Instagram using #daisyfarmcrafts! We’d love to see!
If you’re looking for more baby girl crochet blanket ideas, you can see some more projects we’ve made below!
Happy Crocheting!
xo, Hannah
Click here or on image below for printable pattern