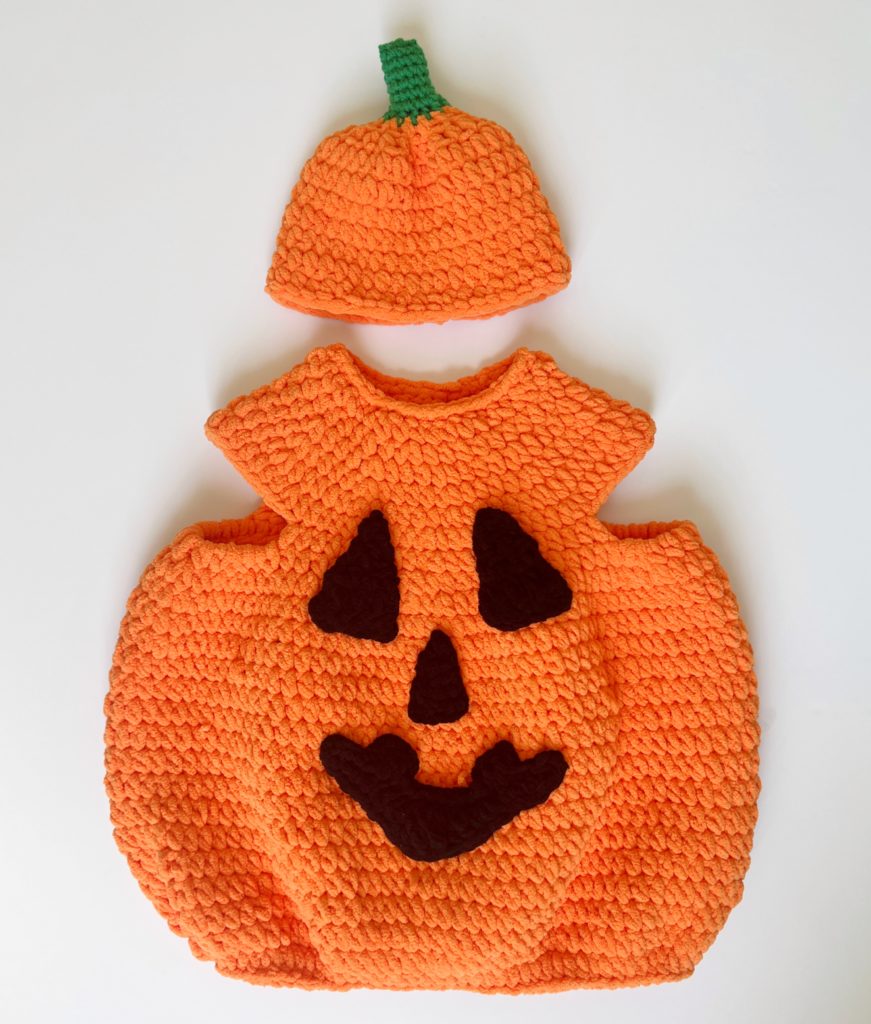
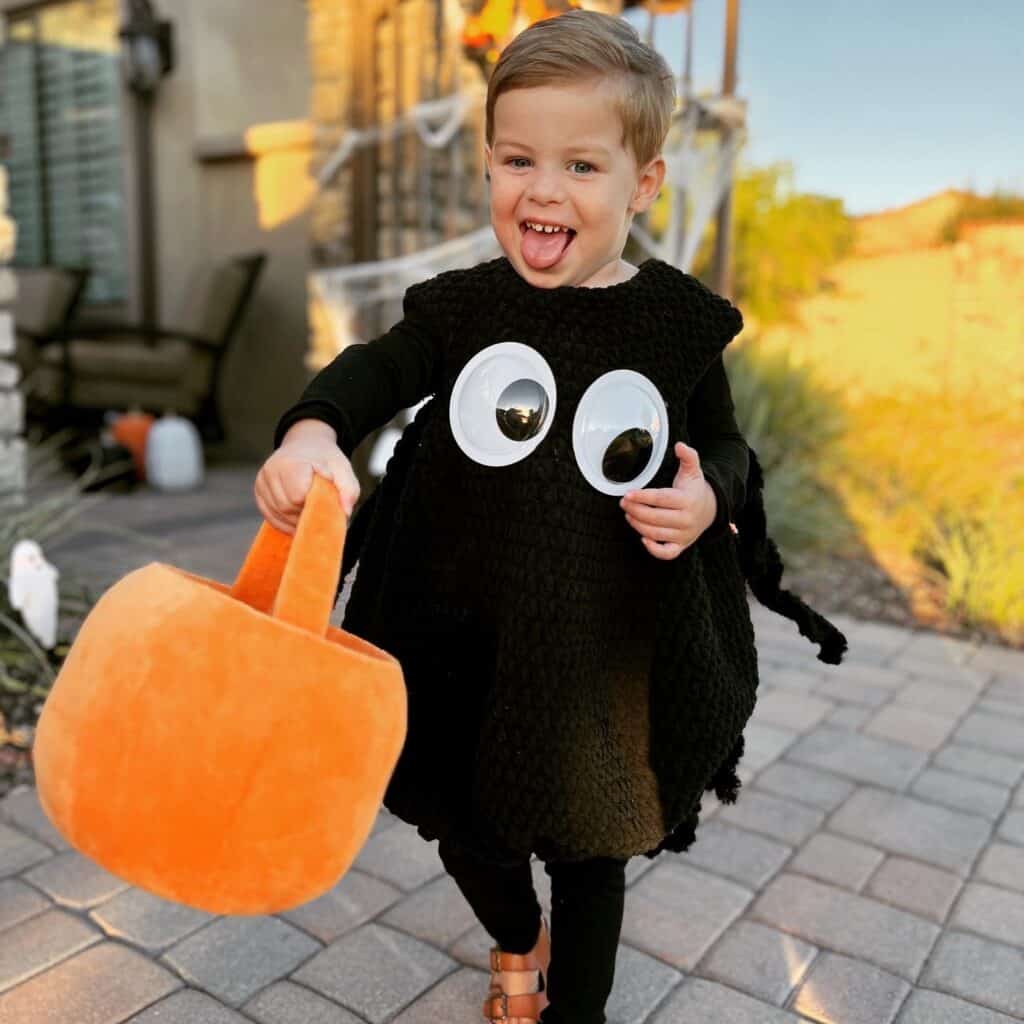
Baby Jack is going to be a “Jack”-o- lantern Pumpkin for Halloween this year!
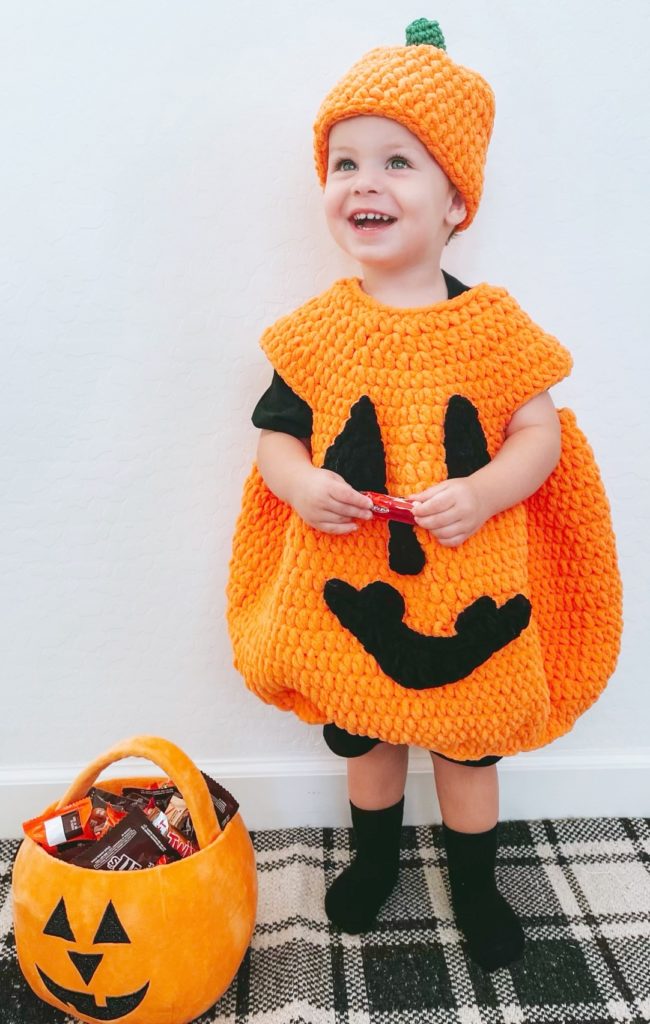
And the cutest one I might add as a completely biased Grandma.
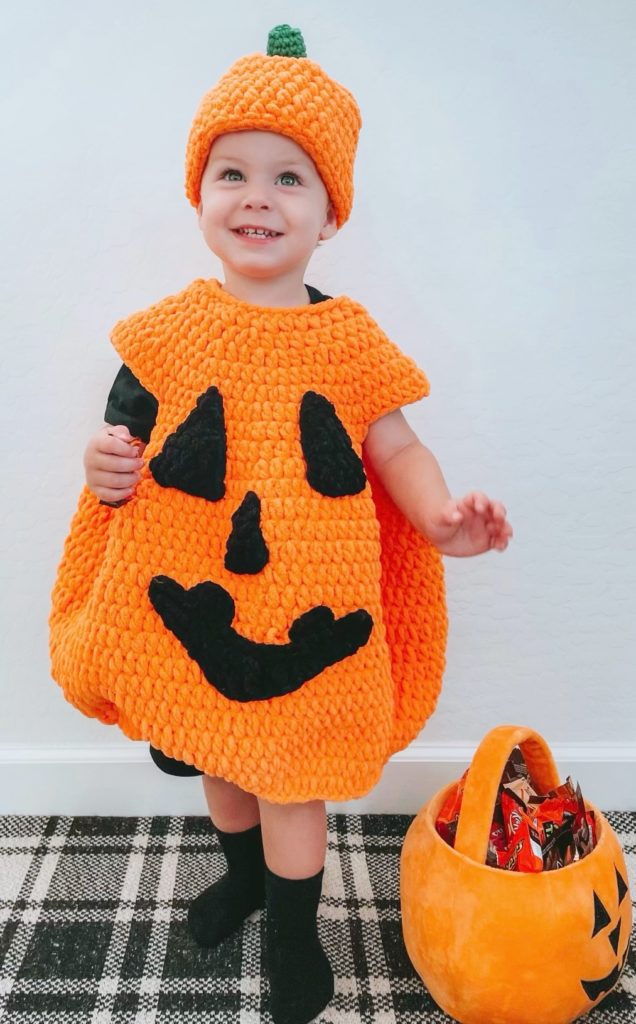
He just lit up the room when we tried his costume on him.
I’ve had so much fun designing this little costume for him and I’m so relieved it turned out so well!
First, I think the Bernat Blanket Bright yarn was the best choice for this.
It was the perfect color and since it is so bulky, it really worked up fast.
It did the work for me of “poof-ing” out the round part of the pumpkin without adding any stuffing as well.
This makes it so easy for Jack to run around in.
He actually kept it on and didn’t even mind wearing the hat.
Blanket yarn is so soft and cozy, it will be nice for Halloween eve.
I’m estimating that this will fit up to about a 4T. It’s pretty roomy.
You might need to add a row or two to make it longer. (Jack is wearing size 2T clothing underneath.)
If you need it a lot larger, I’ve adapted this pattern from a pattern on Yarnspirations.com.
You could always use the stitch counts for the next sizes up.
(I used the 3 month size stitch counts, the pattern I adapted was made with a size 3 weight yarn, and so using Bernat Blanket, it automatically made the project much larger.)
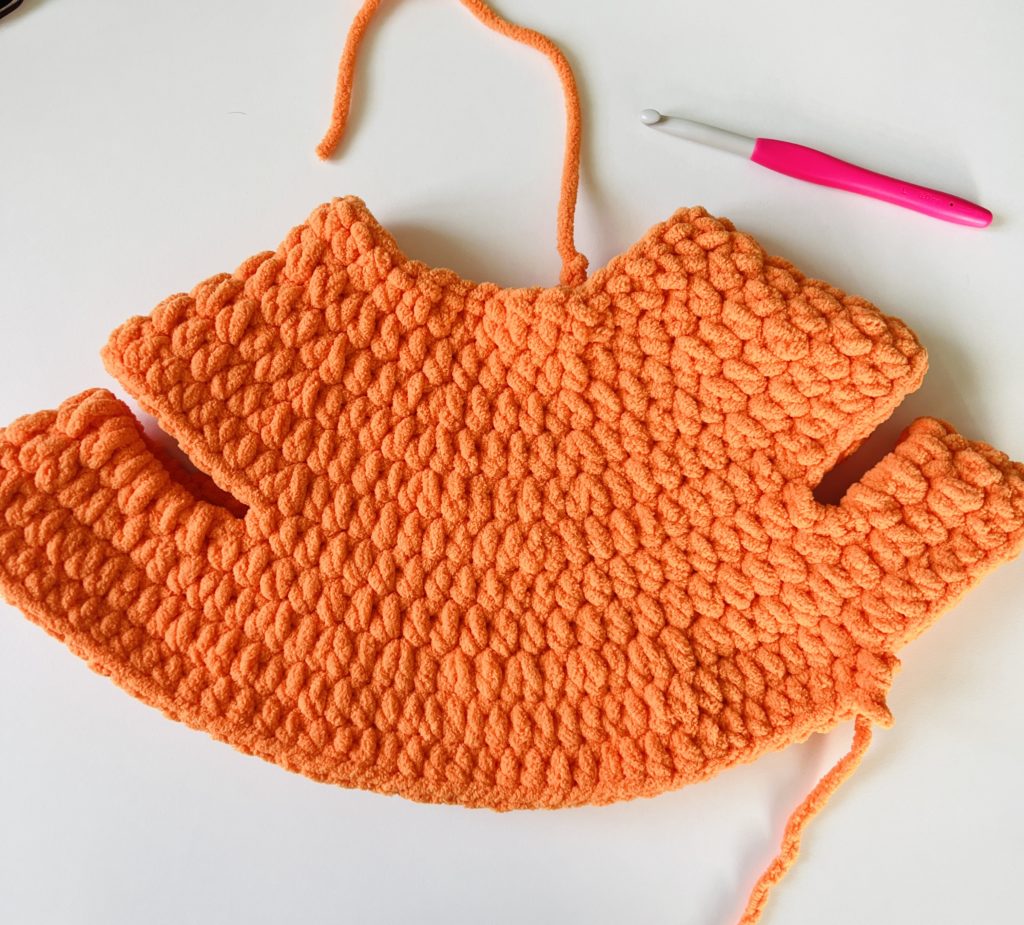
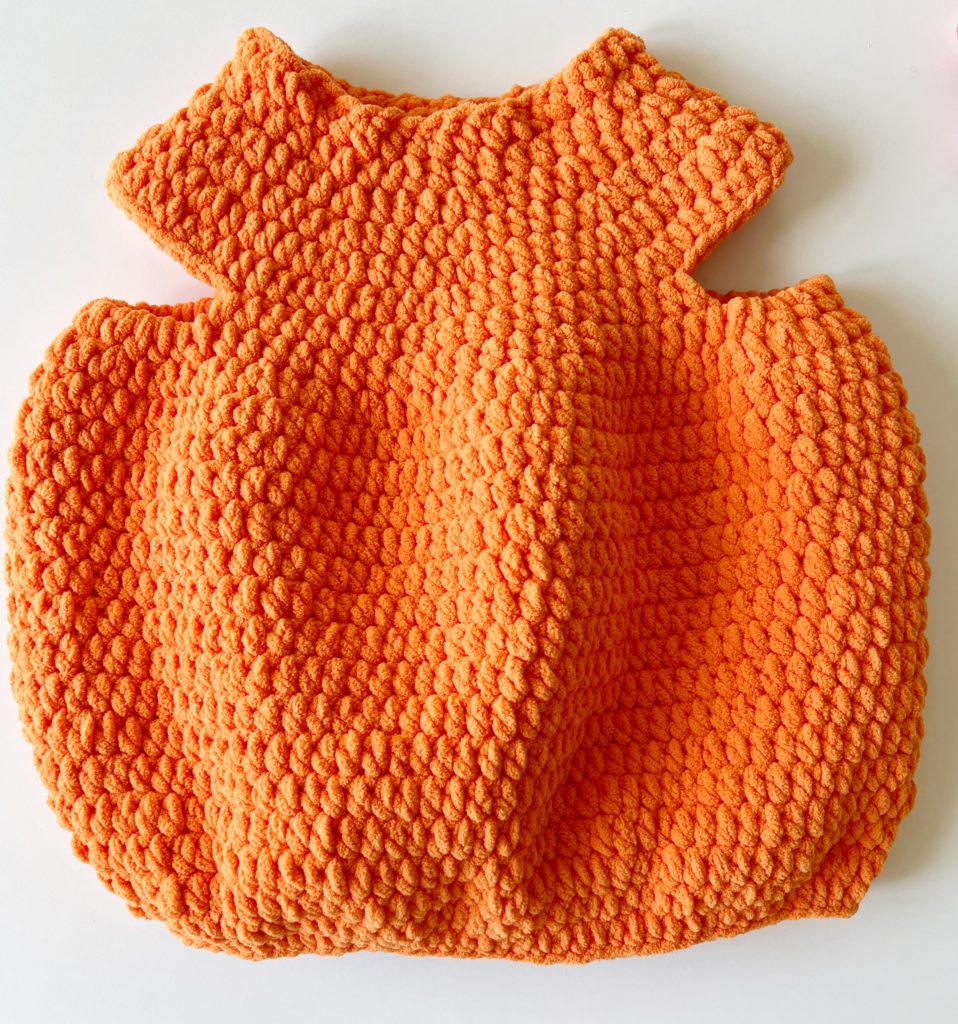
Joining for the armholes is where I departed from the original pattern.
I added 12 chains under each armhole to add to the width.
And then also added in one more row of increase after that and the pumpkin really began to take shape.
My suggestion for making this smaller, is to maybe join for the armholes a row earlier.
Or you could experiment with smaller weight yarn.
(Although I don’t know if you’d get the puffy look with acrylic.)
You’ll also need to know how to make a foundation half double crochet, but I did film a tutorial for you to help you out if you don’t know how or need a refresher.
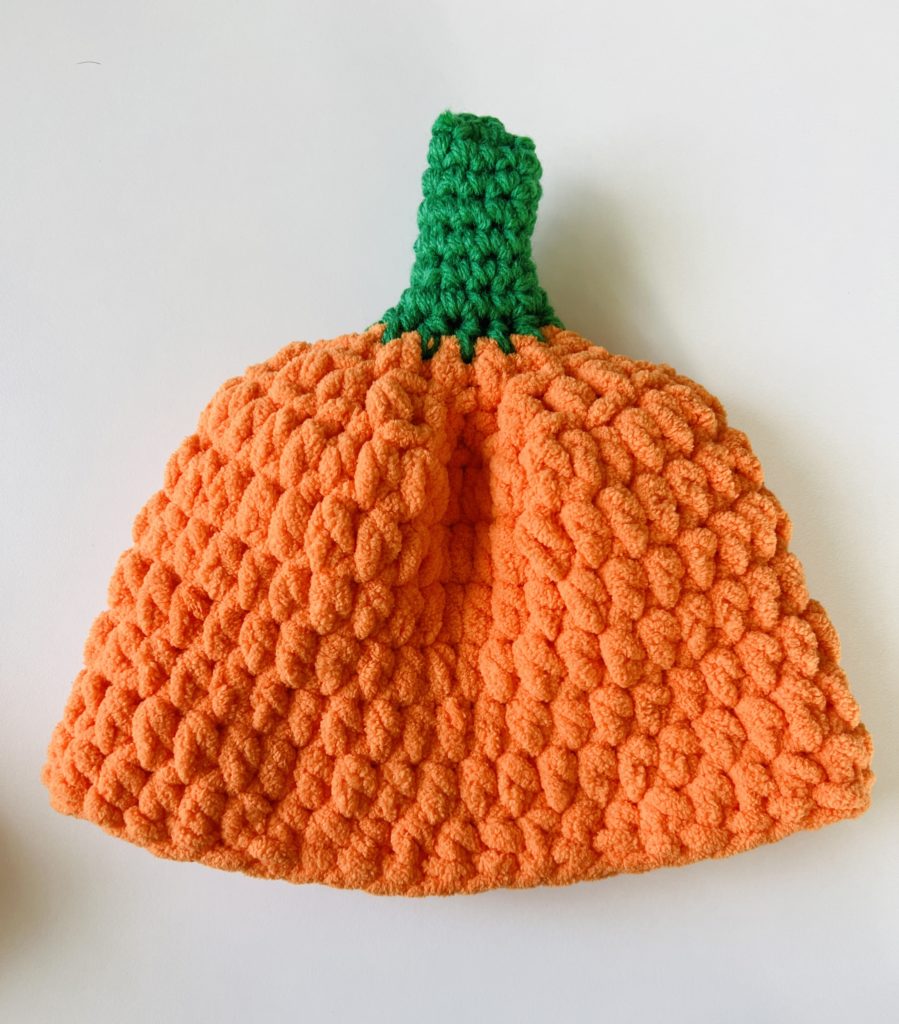
The hat is made with the same foundation HDC stitch to start, and then worked in rounds to build the height.
I used some left over Caron Little Crafties yarn in green holding two strands together to make the stem.
You really don’t use very much, but I wanted it to be bulky so that’s why I doubled stranded (worked with 2 strands at a time).
Be sure and scroll to the end of the post for the free printable version and good luck making your pumpkin costume!
XO, Tiffany
Materials
Bernat Blanket Bright (100% polyester, 10.5oz/300g, 220 yds / 201 m, 6 weight super bulky)
2 balls Carrot Orange
Bernat Blanket Yarn (100% polyester, 10.5oz/300g, 220 yds/ 201 m, 6 weight super bulky)
1 ball Coal
Caron Little Crafties (100% acrylic, 20 g/0.7 oz, 58 m/63 yds, 4 weight worsted)
1 ball of the green
(Or use a scrap amount of green yarn, about a fist-size ball is all you’d need.)
Size L/8mm crochet hook and size J/6mm hook
scissors, tapestry needle, sewing needle, black thread.
approximately 30 inches of 1/4 elastic
Size
2 toddler to about 4 toddler
With options to go smaller if you use a smaller weight yarn or join for the armholes one row sooner.
See the pattern for the neckline and armholes for different size options on Yarnspirations.com.
Stitches
Single Crochet (SC): Insert your hook, YO and pull up a loop, YO and pull through two loops on hook.
Half Double Crochet (HDC): YO, insert your hook, YO and pull up a loop, YO and pull through all three loops on hook.
Foundation Half Double Crochet (FHDC): Chain 3, yarn over, insert hook in 3rd chain from hook and pull up a loop, yarn over and pull through on loop on the hook (this becomes the “chain”), yarn over and draw through 3 loops (this is the HDC). *Yarn over, insert hook into the “chain”, yarn over and pull through one loop on the hook, yarn over and pull through all three loops on hook. Repeat from * for 35 foundation chains.
Double Crochet (DC): YO, insert your hook, YO and pull up a loop, YO and pull through two loops, YO and pull through remaining two loops
Treble Crochet (TC): YO twice, insert your hook, YO and pull up a loop, YO and pull through two loops, YO and pull through two loops again, YO and pull through remaining two loops
Pattern
Pattern notes: I modified the original pattern on the Yarnspirations website to join the rounds differently. This pattern is worked all in one direction, the joins will be in the back of the pumpkin while making the yolk and joining for the armholes. For the rest of the bodice, work in one continuous round, no joining. The bottom edge of the pumpkin is finished with an elastic that you work one round of SC to attach in order to gather in.
PUMPKIN
Round 1: Chain 35 with a FHDC. Join with a SL ST to the first FHDC to form a circle.
Round 2: CH 2. Continue on in same direction, work *HDC in each of the next 6 sts. 2 HDC in the next st. Repeat from * around. Join with a sl st to the first st. (Join in this manner for the rest of the pattern.) (40)
Round 3: CH 2. *HDC in each of the next 3 sts. 2 HDC into next st. Repeat from * around. Join. (50)
Round 4: CH 2. *HDC in each of the next 4 sts. 2 HDC into next st. Repeat from * around. Join. (60)
Round 5: CH 2. *HDC in each of the next 5 sts. 2 HDC into next st. Repeat from * around. Join. (70)
Round 6: CH 2. 2 HDC into next st. HDC in each of the next 8 sts. 2 HDC into next st. *HDC into each of the next 9 sts. 2 HDC into next st. Repeat from * around. Join. (78)
Round 7: (Armhole round) CH 2. HDC into each of the next 17 sts. CH 12. SKIP the next 17 sts. HDC into each of the next 22 sts. CH 12, SKIP the next 17 sts, HDC into each of the last 5 sts of the round. Join. (44 sts and 24 CH’s)
Round 8: CH 2. HDC into each of the next 17 sts, work 12 HDC around the ch 12. HDC into each of the next 22 sts, 12 HDC around the ch 12. HDC into each of the last 5 sts of the round. Join. (68)
Round 9: CH 2. *2 HDC into the next st, HDC into the next. Repeat from * around. Do not join, for the rest of the pattern continue working in the round without joining (102).
Round 10: Work 1 HDC into the next each st around until pumpkin measures 19 inches from the neck for the 2T size. Add one inch for each size larger.
Last round: tie elastic into a circle. Holding the elastic behind the row, work SC around the elastic and into each stitch to gather the bottom of the pumpkin slightly together. Adjust the stitches around the elastic to even it out.
Tie off, weave in the ends.
Eyes
Chain 7.
Row 1: Begin in the 3rd chain from the hook. Work HDC into each of the next 5 chains. CH 2 and turn. (5)
Row 2: Begin in the 2nd st from the hook. Work HDC into each of the next 4 sts. CH 2 and turn. (4)
Row 3: Begin in the 2nd st from the hook. Work HDC into each of the next 3 sts. CH 2 and turn. (3)
Row 4: Begin in the 2nd st from the hook. Work HDC into each of the next 2 sts. CH 2 and turn. (2)
Row 5: Work 1 HDC into the 2nd st from the hook. Tie off and weave in the ends.
With Bernat Blanket COAL make the Eyes, Nose and Mouth
Nose
Chain 5.
Row 1: Begin in the 3rd chain from the hook. Work HDC into each of the next 3 chains. CH 2 and turn. (3)
Row 2: Begin in the 2nd st from the hook. Work HDC into each of the next 2 sts. CH 2 and turn. (2)
Row 3: Work 1 HDC into the 2nd st from the hook. Tie off and weave in all the ends.
Finish the neck area by slip stitching around 1 sl st, per stitch. Tie off weave in the ends.
Mouth
Chain 21.
Row 1: Begin in the 2nd chain from the hook. Work 1 SL ST into each of the next 2 chains. SC into each of the next 3 chs. HDC into each of the next 2 chs. DC into each of the next 2 chs. TC into each of the next 2 chs. DC into each of the next 2 chs. HDC into each of the next 2 chs. SC into each of the next 3 chs. SL ST into each of the last 2 chs. CH 1 and turn.
Row 2: Beginning in the first st, SL ST into each of the next 3 sts. [CH 3, DC into same st as last SL ST, DC into next ch, CH 3, SL ST into same st as DC.] SL ST into each of the next 10 sts. Repeat [ ]. SL ST remaining 3 chs.
Sew eyes, nose and mouth onto the pumpkin with a needle and black thread.
Hat
Round 1: Make a foundation chain 18 inches long. (About 38 to 40 sts.) Take a measurement around babies head and subtract one inch to be more accurate.
Round 2 – 7: Work 1 HDC into each HDC, join at the end of each round with a sl st, CH 1 and continue in the round.
Round 8 – 10: Work 1 HDC in every other stitch until there are until 12 sts pull through double strands of GREEN yarn.
(Change to a smaller hook size. I worked with 2 strands together of the Caron Little Craftie to make it more bulky, if you are using a chunky yarn, use a hook size recommended for that yarn.)
Round 11: Work 1 HDC into each of the next 12 sts with green.
Round 12 – 18: Work 1 SC into each stitch around. On final round, work SC under loops of 2 sts to close the top, about 4 sts total. Tie off and weave in the end.
Tip for hat: you can add one more row after row 7, if needed to make larger, before decreasing.
Tap here, or on photo below for a free PDF version of this pattern.
Happy Crocheting
XOXO, Tiffany
![]()
Post Update:
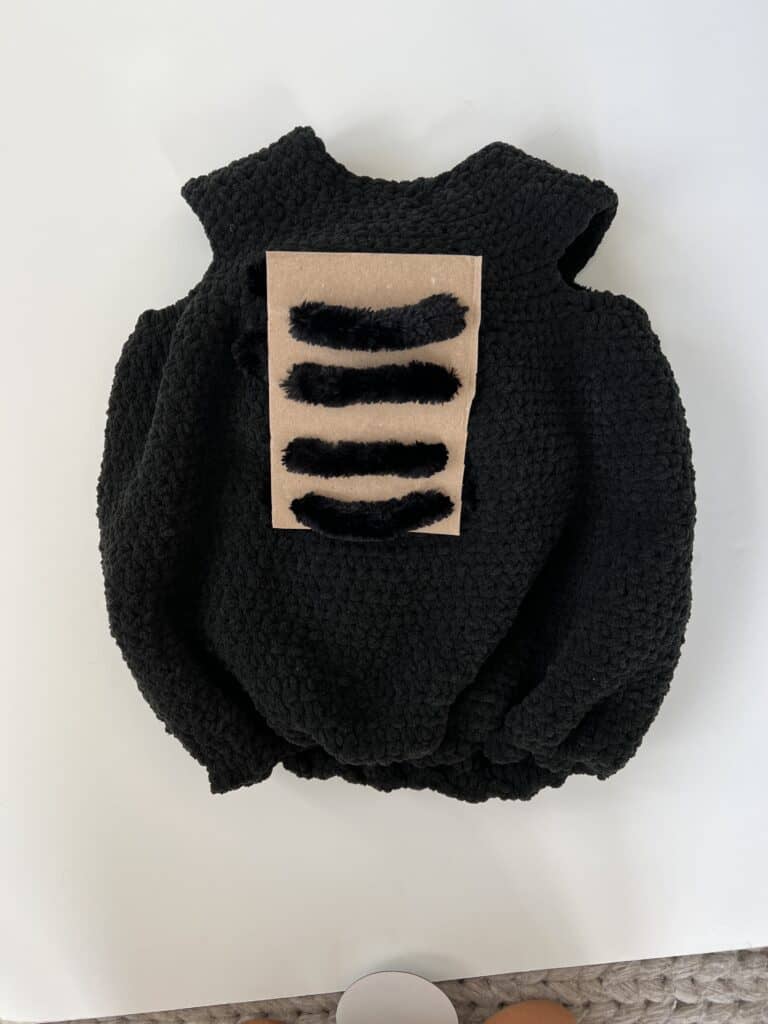
I used the same pattern except in Black and made Jack a spider costume! Add pipe cleaners (the bigger fluffier ones) for the legs and hot glue big googly eyes onto the front.
Here is what the spider looks like on the inside and how I weaved the pipe cleaner legs through a piece of cardboard to stabilize the legs:
And here is a clearer picture of the spider:
![]()
I also made the same pattern for baby Kate. She was a ladybug.

I joined for the armholes two rows earlier and then adjusted the length. I decided to not put elastic into the hem and instead decrease for two rows just to bring in the bottom a bit.
The circles I cut out of felt and hot glued onto the outfit. I found a red headband and was able to hot glue pipe cleaners with pom poms onto the ends.
For both kids we found black leggings and long sleeve shirts to go underneath the outfits.