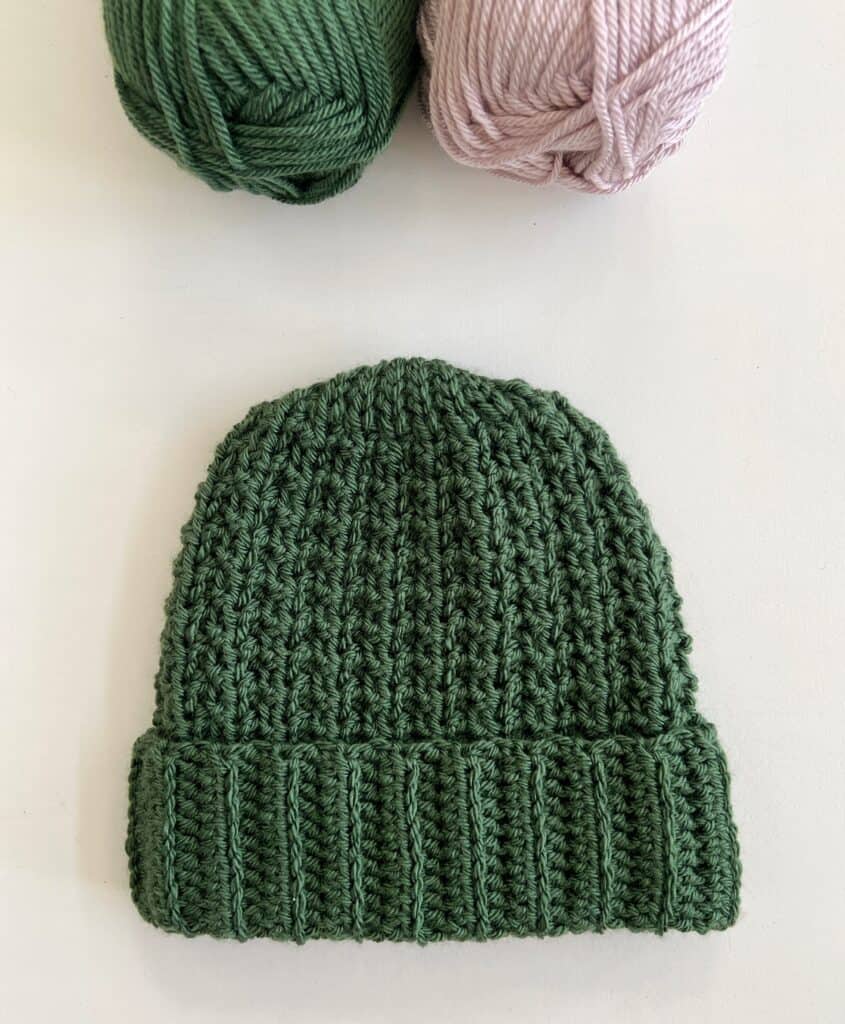
Hello and thank you for stopping by for the pattern to this Even Mixed Loop Hat! This is a Half Double Crochet variation of the Baby Maude Hat we published a few weeks ago. The Baby Maude Hat was all single crochet.
The texture comes about by alternating working HDC into the front loop and then the back loop. In this variation, an even number of stitches are worked, hence the name, even mixed loop.
The brim is all back loop half double crochet, the top of the hat is cinched in to reduce bulk with slip stitches.
However, since publishing the Baby Maude Hat, we’ve heard that working the slip stitches at the top can be tricky for some. Our tip is to keep them loose and use a Susan Bates Hook. If those suggestions don’t work for you, try changing the stitch to a back loop single crochet.

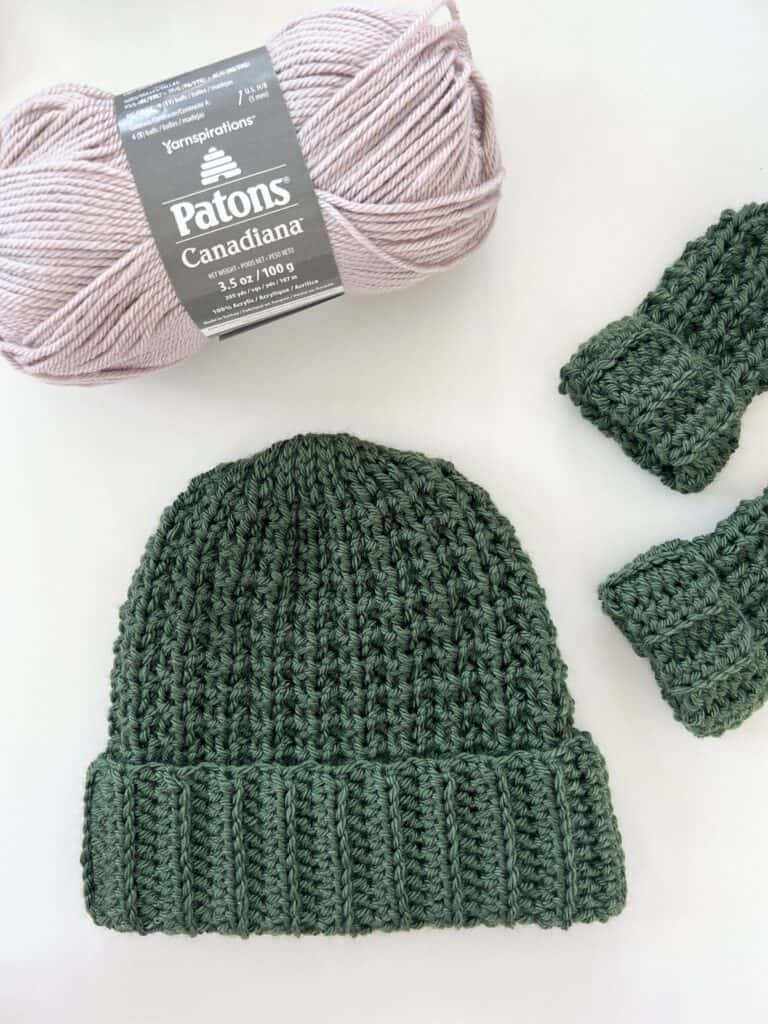
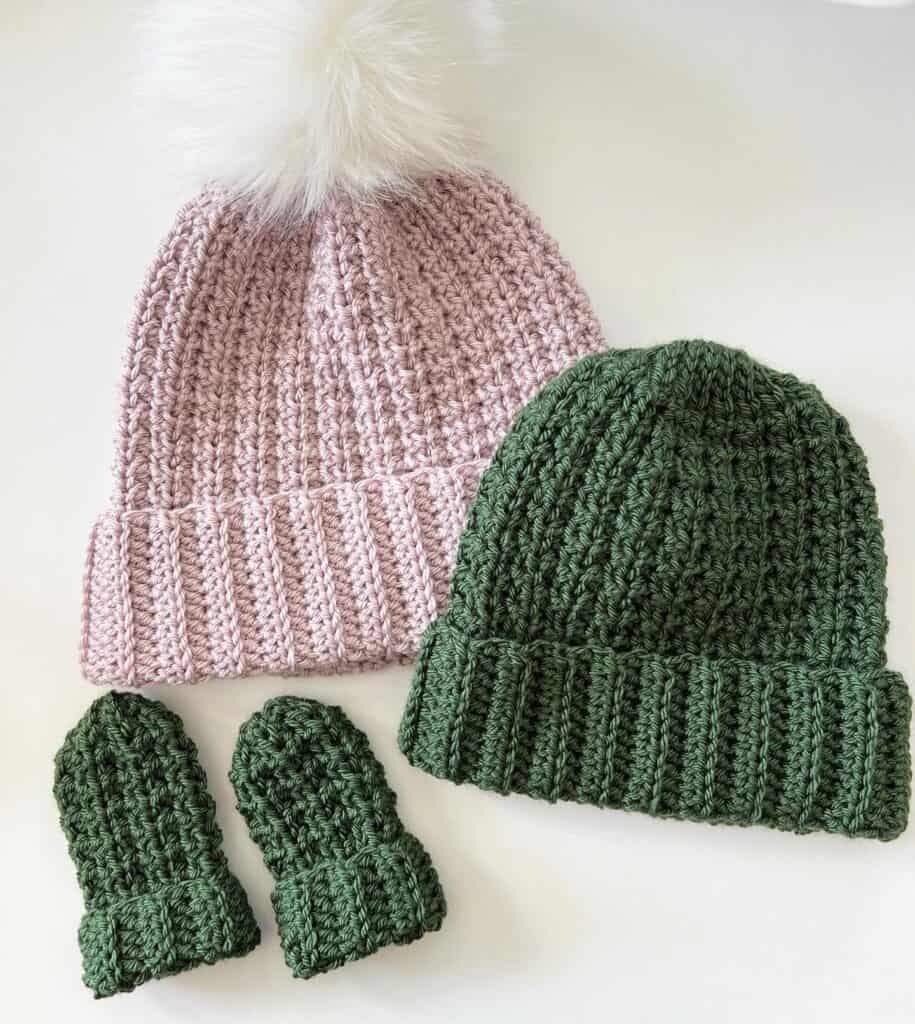
Also included in this post is a pattern for the little mitts. Essentially they are mini versions of the hat for babies that don’t need thumbs.
When Hannah takes James out for his daily walk, his little hands are cold so a little matching pair of mitts he can use to cover his hands are perfect for him.
I am using my very favorite Patons Canadiana from Yarnspirations and am making a second hat in a new color called Pink Dust.
I’m making a matching hat for Hannah in that color and hope to get the cutest picture of her and James when I visit. Fingers crossed!
Be sure and scroll to the end of the post for a free printable pattern and also the video tutorial.
If you’d like to see other hats we have made, be sure and visit our menu heading Crochet Patterns/Hats and Headbands for more ideas.
Tap here for the menu heading Hats and Headbands
Materials
Patons Canadiana (100% acrylic, 100 g / 3.5 oz, 187 m / 205 yds)
1 skein for children’s sizes, 2 skeins for adults
Size H 5 mm hook, tapestry needle, stitch markers, scissors, tape measure, size chart
*Optional Snap On Faux Fur Pom Pom (Tap to shop Amazon)
Stitches
Slip Stitch (SL ST): Insert hook, YO, pull back through and through loop on hook.
Half Double Crochet (HDC): YO, insert hook, YO, pull loop through, YO, pull through all loops on hook.
Pattern
Gauge: 4 inches = 15 sts and 12 rows of back loop HDC taken from the brim
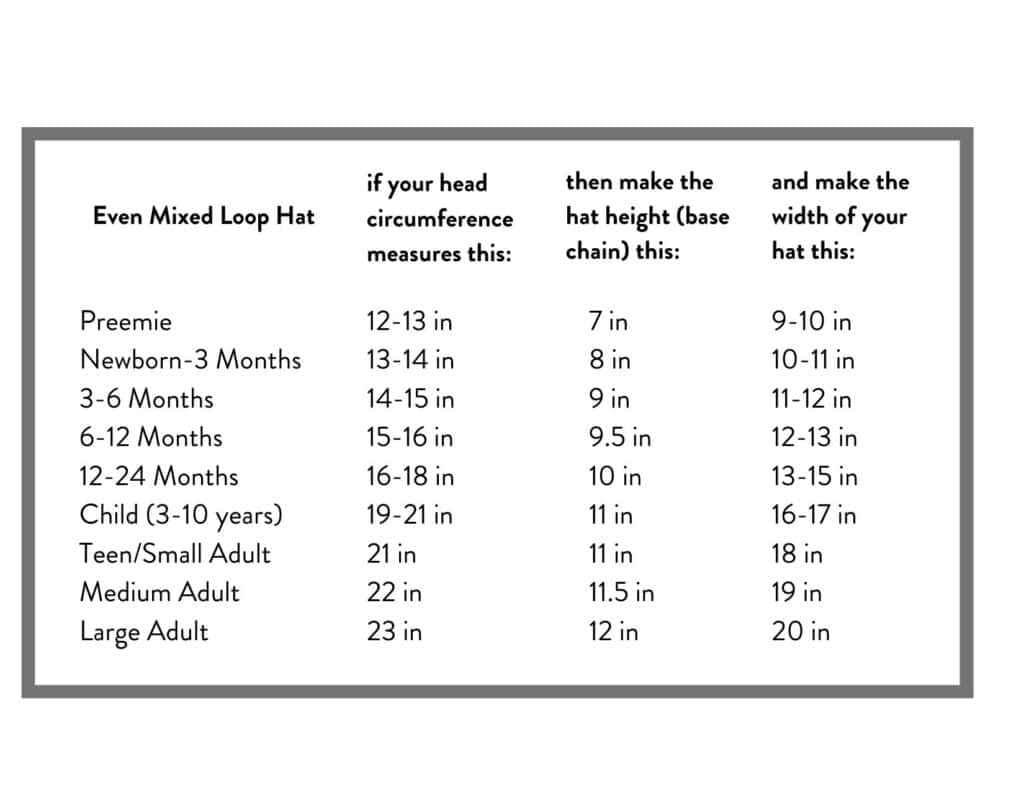
Chain 45 for the child size height 10 inches. (or chain to the length you need in the chart)
ROW 1: SL ST into the second chain from the hook and into each of the next 4 chains. HDC into each remaining chain. CH 1 and turn.
ROW 2: HDC into the first st. Back Loop HDC into each of the next 14 sts. (mark the 15th st) *Work 1 Front Loop HDC into the next st, 1 Back Loop HDC into the next st. Repeat from * in each HDC. Work Back Loop SL ST into each of the remaining 5 sts. CH 1 and turn.
TIP: Mark the last Back Loop HDC (15th st) to help distinguish between the brim and the mixed loop section.
ROW 3: Back Loop SL ST into each of the first 5 sts. *Work 1 Front Loop HDC into the next st, 1 Back Loop HDC into the next st. Repeat from * to the marked st. Back Loop HDC into each of the remaining sts. CH 1 and turn.
Repeat rows 2 and 3 until you have 41 rows or 3 inches less than the head circumference needed for size.
Last row will be at the brim end. Tie off with a long tail to use for sewing. Fold hat matching starting chain row with final row. Work tapestry needle by going under loops of HDC and loops of starting chain. When you reach the top, work the needle into the very top loops of the slip stitches. Continue working the needle around the top of the hat several times to cinch it in. Weave in the ends. Fold up the brim.
When adjusting to other sizes, the brim is 4 inches and there are an even number of stitches between the brim and the 5 slip stitches. For smaller than 6 months, adjust the slip stitches to 3 and the brim to 3 inches.
See the video tutorial for more help:
Bonus Mitts Pattern (for up to 18 months)
Size height 5 inches
Chain 25.
ROW 1: SL ST into the second chain from the hook and into each of the next 2 chains. HDC into each remaining chain. CH 1 and turn.
ROW 2: HDC into the first st. Back Loop HDC into each of the next 8 sts. (mark the 8th st) *Work 1 Front Loop HDC into the next st, 1 Back Loop HDC into the next st. Repeat from * in each HDC. Work Back Loop SL ST into each of the remaining 3 sts. CH 1 and turn.
TIP: Mark the last Back Loop HDC (9th st) to help distinguish between the brim and the mixed loop section.
ROW 3: Back Loop SL ST into each of the first 3 sts. *Work 1 Front Loop HDC into the next st, 1 Back Loop HDC into the next st. Repeat from * to the marked st. Back Loop HDC into each of the remaining sts. CH 1 and turn.
Repeat rows 2 and 3 for 13 rows.
Sew the mitts together as Hat explained above.
Thanks for stopping by!
Click here or image below for free printable pdf.
![]()
*as an Amazon Associate we may earn from qualifying purchases