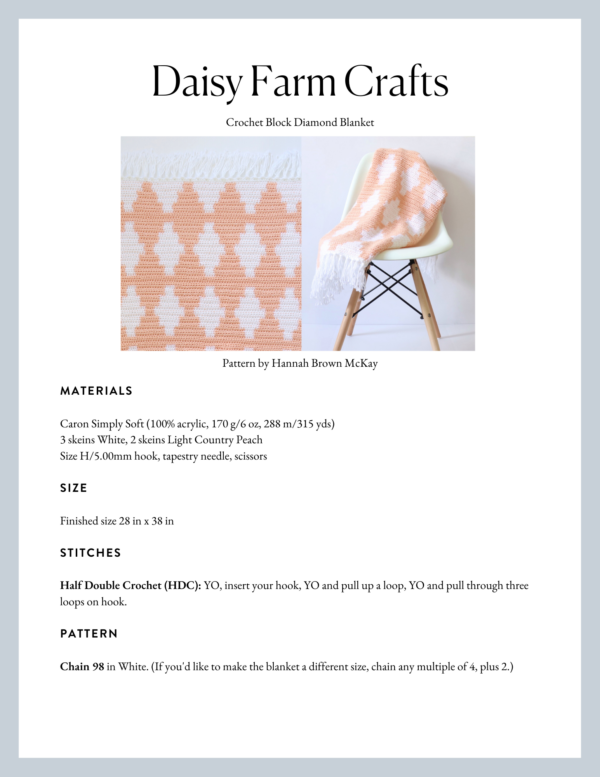
Summer Reshare! Enjoy this pattern from Hannah. It is such a classic and so very beautiful!
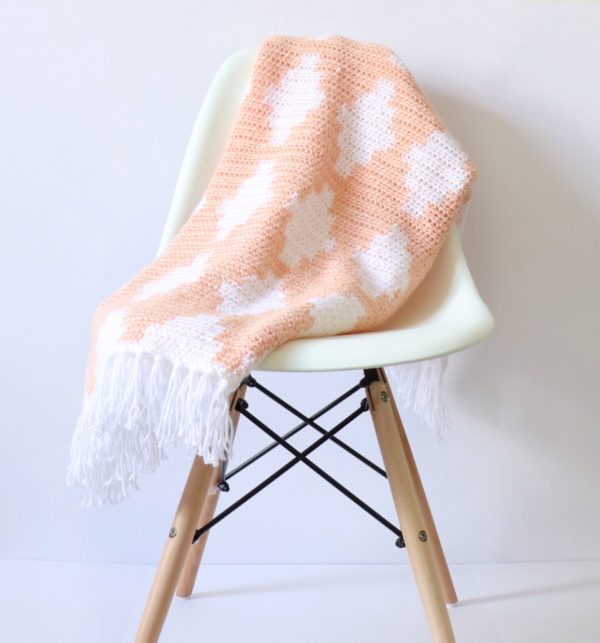
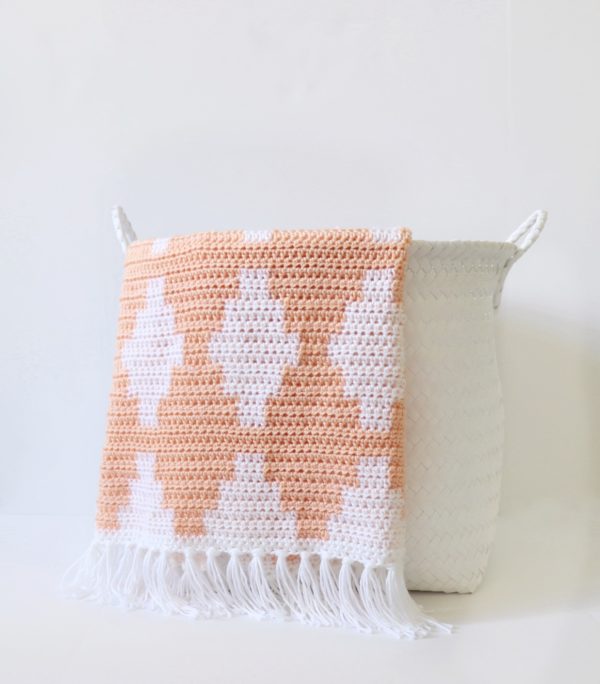
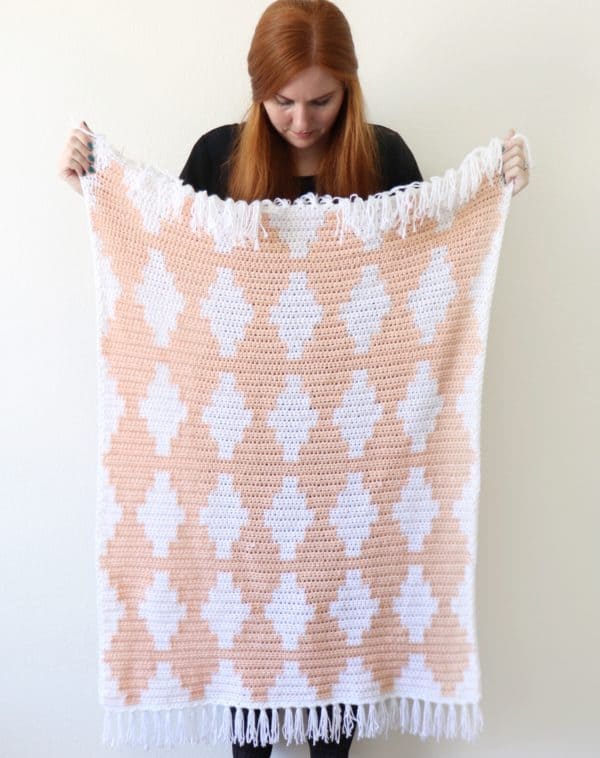
I’ve had the idea for this crochet block diamond blanket in my head for awhile, and a few weeks ago I finally forced myself to sit down and work out the math.
It took me several sheets of graph paper to finally get the pattern to work, but once I figured out the counting, it actually wasn’t too complicated. I used half double crochet for the whole blanket and to create the diamonds I used the same technique my mom uses in her gingham blankets of carrying the yarn through so I didn’t have to constantly cut yarn and weave in ends. (I’ll explain this more below).
Basically, I just made color blocked squares on each row like she does in the gingham but different sizes to make the blocky diamonds.
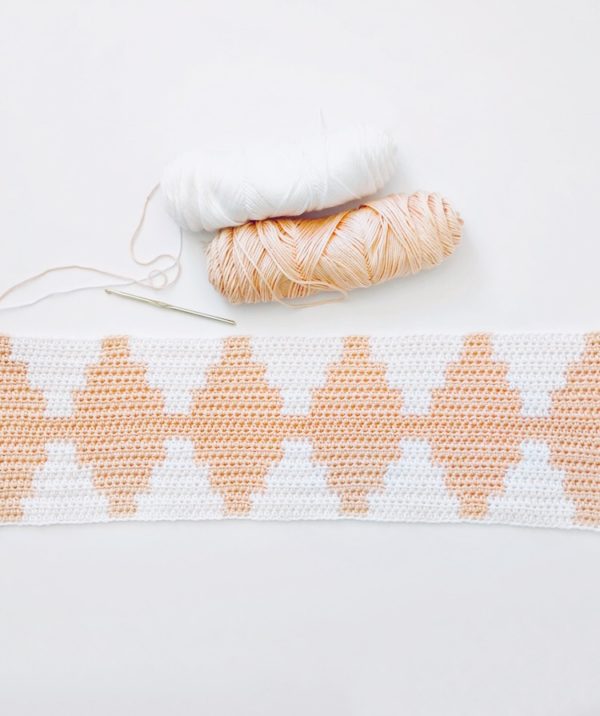
Carrying the yarn through (or tapestry crochet) does make the process go a little slower than normal, so it did require a little bit of stamina for me to finish this blanket, but I think it’s worth it to not have to weave in so many ends and to be able to create smooth color transitions. This blanket was really fun to make and I think it would look really cool as a crib throw or a fun blanket for a little girl’s room!
Before you get started, you’ll want to make sure you are familiar with tapestry crochet. In tapestry crochet, you work over the yarn not in use, and it runs along the top of the stitches and through the work. Both sides of this blanket look exactly the same. The yarn is being hidden.
How to do this is by placing the yarn behind the stitch you are working, and as you insert the hook into the stitch, you also place the yarn being carried over the hook as well. In case that doesn’t make sense, here is a video that demonstrates this technique and shows you how to keep your yarn from twisting when carrying it through:
(If you have trouble loading the video, you can also click here to watch the video on YouTube.)
Before you get started on your actual blanket, I would strongly encourage you to make a practice swatch to really learn the technique of carrying the yarn. A small practice chain would be plenty for you to work out tension, hook size, technique, pattern, and learning how to switch yarn colors.
Materials
Caron Simply Soft (100% acrylic, 170 g/6 oz, 288 m/315 yds)
3 skeins White, 2 skeins Light Country Peach
Size H/5.00mm hook, tapestry needle, scissors
Size
Finished size 28 in x 38 in
Stitches
Half Double Crochet (HDC): YO, insert your hook, YO and pull up a loop, YO and pull through three loops on hook.
Pattern
Chain 98 in White. (If you’d like to make the blanket a different size, chain any multiple of 4, plus 2.)
Row 1: Starting in the third chain from the hook, work 1 HDC in the first six stitches. On the 6th stitch, pull through with Peach before you finish the stitch. HDC with Peach in the next four stitches, carrying the White yarn as you work, and pulling through with White on the fourth stitch.
*Now work HDC in next 12 stitches with White, carrying the Peach yarn as you work, and pull through with Peach on the 12th stitch. Then HDC with Peach in the next 4 stitches, carrying the White yarn as you work, and pulling through with White on the fourth stitch. Repeat from * to the end of the row, until you end with 6 white HDC’s. Chain 2 and turn.
Row 2: Making sure you are still carrying the Peach yarn, work 6 HDC’s in White, and pull through with Peach on the 6th stitch. HDC in the next four stitches, carrying the White yarn as you work, and pulling through with White on the fourth stitch. *Now work 12 HDC in White, carrying the Peach yarn as you work, and pull through with Peach on the 12th stitch. Then HDC with Peach in the next four stitches, carrying the White yarn as you work, and pulling through with white on the fourth stitch. Repeat from * to the end of the row, until you end with 6 white HDC’s. Chain 2 and turn.
Row 3: Repeat Row 2.
(From now on, I won’t be telling you to carry your yarn – just know that whatever color you aren’t using you should be carrying through as you work.)
Row 4: HDC with White in the first 4 stitches and pull through with Peach on the 4th stitch. *HDC with Peach in the next 8 stitches. Pull through with White on the 8th stitch. HDC with White in the next 8 stitches, and pull through with Peach on the 8th stitch. Repeat from* to end of row until you end with 4 HDCs in White. Chain 2 and turn.
Rows 5 and 6: Repeat Row 4.
Row 7: HDC with White in the first 2 stitches and pull through with Peach on the 2nd stitch. *HDC with Peach in the next 12 stitches. Pull through with White on the 12th stitch. HDC with White in the next 4 stitches, and pull through with Peach on the 4th stitch. Repeat from * to end of row until you end with 2 HDCs in White. Chain 2 and turn.
Rows 8 and 9: Repeat Row 7. On the last stitch of Row 9, pull through with Peach before you chain 2 and turn.
Rows 10, 11, and 12: Work 3 rows of HDC in Peach. (Since there are no color transitions on these rows, I chose to not carry the White behind, so I cut the White at the end of Row 9.) On the last stitch of Row 12, pull through with White before you chain 2 and turn.
Rows 13, 14 and 15: Repeat Row 7.
Rows 16, 17, and 18: Repeat Row 4.
Rows 19, 20, and 21: Repeat Row 2.
At this point, you should have your first set of diamonds complete. The last block of your diamond doubles as the first block of your next diamond, so now you will repeat Rows 4 – 21 until you reach your desired length. I stopped when I had five completed diamond rows and I finished with one row of HDC in White to match the White starting chain on the other end.
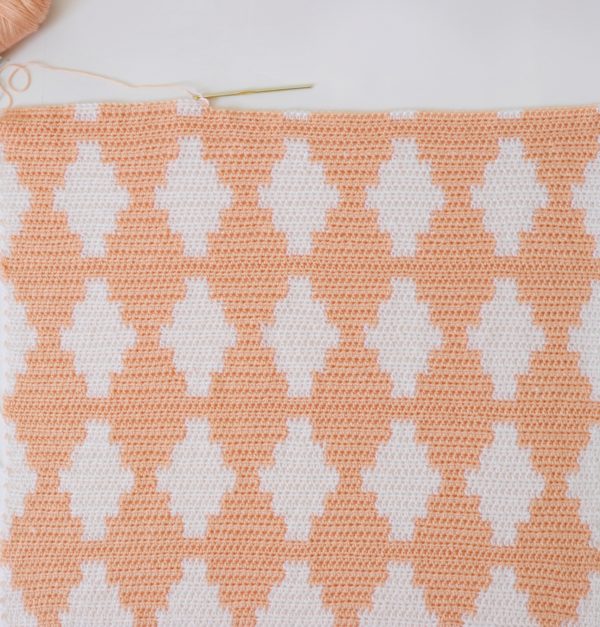
And that’s it! I know that the counting can seem daunting on paper, but once you complete your first set of diamonds, you will simply be repeating the increasing and decreasing rows to form the diamonds.
In case you are more of a visual learner, here is a graph to show you the counting pattern. Click here or click the picture for the printable PDF):
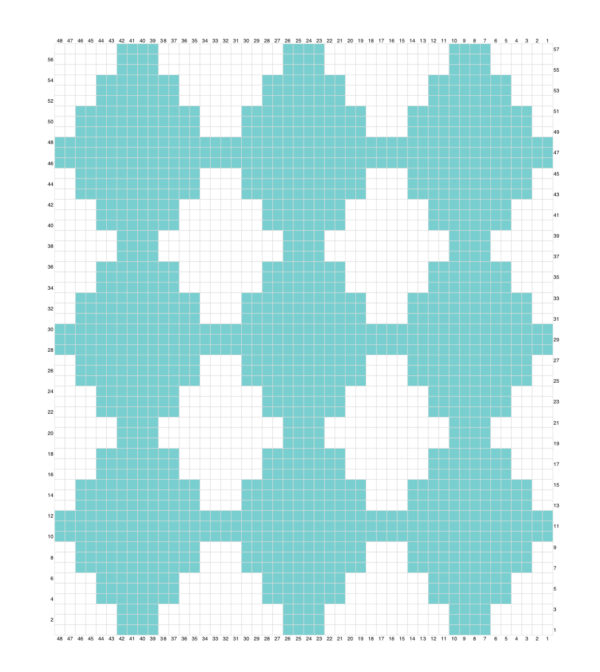 Something that also helped me was to remember that every time you are increasing or decreasing a color block, you are either increasing by four or decreasing by four, so you will have either two less or two more stitches on each side.
After I finished the blanket, I wove in my ends with a tapestry needle. Then I worked one round of half double crochet around the edge to give the sides a more finished look, working HDC, Chain 1, HDC into each corner.
Tassels
For the tassels, I used the same simple method that I used in my Diamond Berry Stitch Blanket.
Supplies: A small notebook (the one I used is about 6 in. x 4in.), Scissors, Yarn
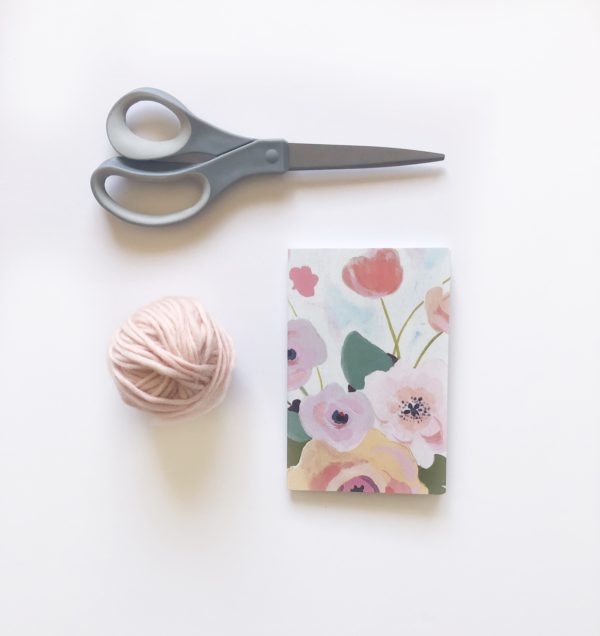
Wrap a piece of yarn around the notebook horizontally. Then cut the yarn in half.
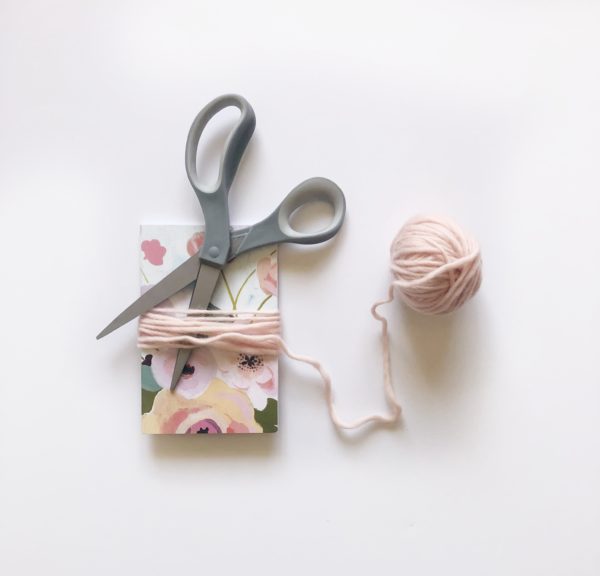
Take three to four pieces of yarn (depending on how thick you want your tassels; for this blanket I used four) and fold them in half. Insert the folded end into the chain space above the last row of single crochet. You can use your fingers or a large crochet hook to do this.
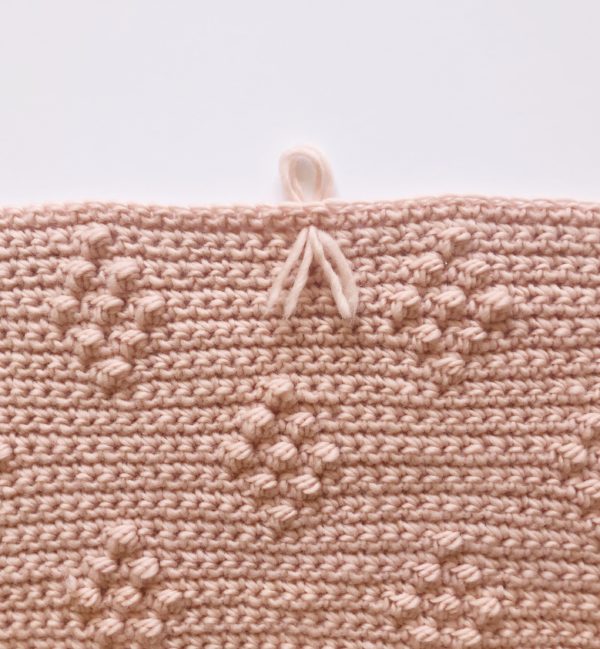
Pull the ends through the loop…
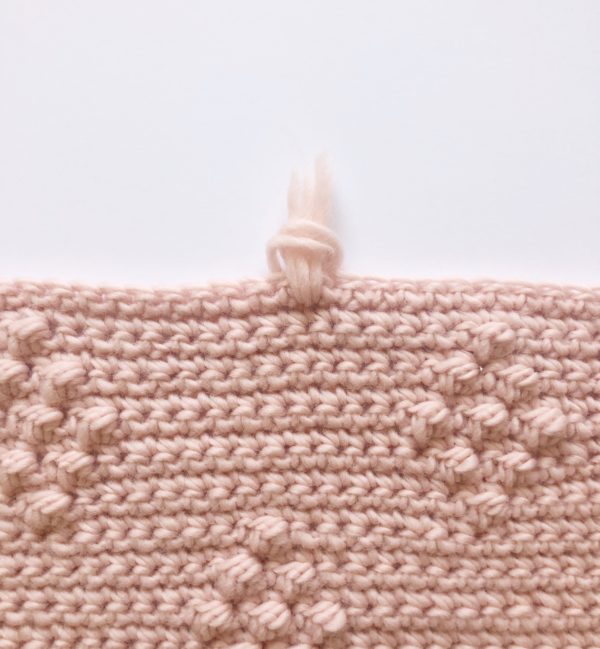
And pull tight to make a knot.
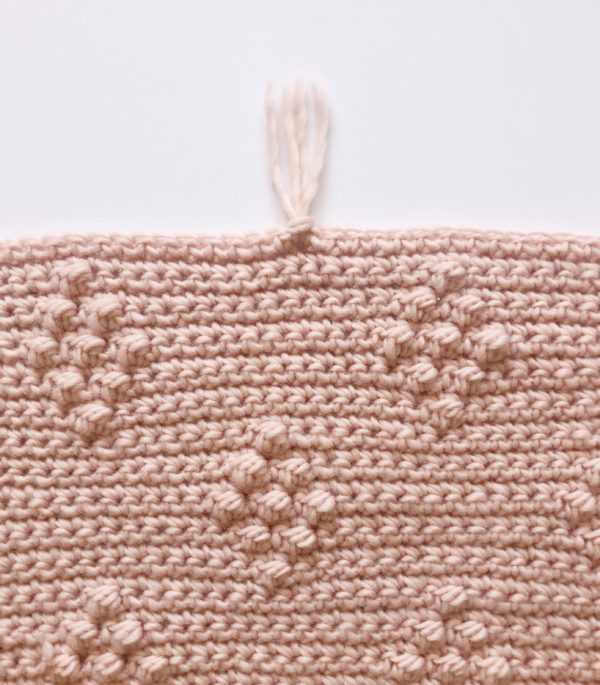
And that’s it! For the block diamond blanket, I spaced the tassels out every three stitches, but you can space yours out however you desire. You can also make the tassels longer by using a bigger notebook, or trim them down if you want them to be shorter.
Thank you so much for coming to see this pattern, I hope you enjoy making this blanket! When you’re finished with your project please share a picture with us on the Daisy Farm Crafts Facebook wall or on Instagram using #daisyfarmcrafts! We’d love to see your creativity!
Happy Crocheting!
Hannah
Click here or on image below for printable pattern

