I am in love again with another crochet gingham blanket! I used a different technique to achieve this crochet red gingham blanket since I’ve had a hard time finding two shades of red that I liked.
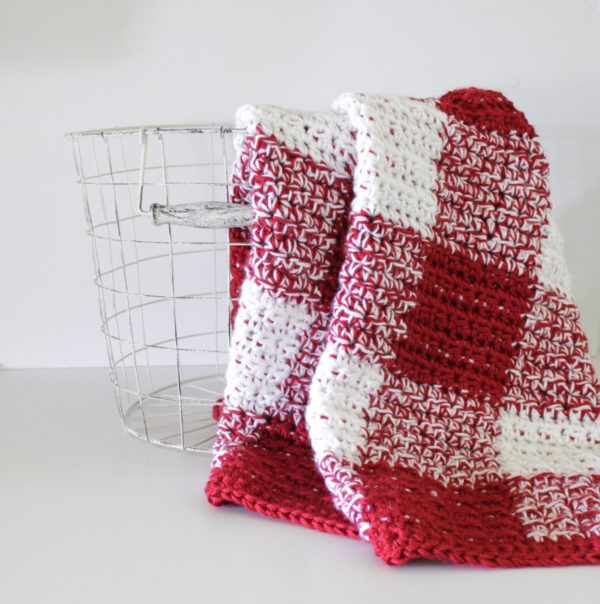
Instead of using two shades, I simply combined the red and white together to make my own striped yarn. I came up with that idea after I made the grey crochet gingham blanket. I liked how the shading worked out so I took a chance and just went for it.
And I think it’s another win for crochet gingham! Now, there is one item that might bother some of you, and it did me at first, but now that I am finished, I think it adds to the gingham look. It is that the dark red bits of yarn do show through as you are carrying the yarn along. So if this is something you won’t like, you might want to stick with light colored yarn. I can see this working really well with yellow, light peach, pale blues, etc.
Look closely at this picture to see what I mean:
(Update: we also have a member in our Daisy Farm Crafters Group who made this full size. It’s so beautiful! She also substituted a different stitch if you’d like to change pattern to the griddle stitch, but use this technique of combining the yarn.)
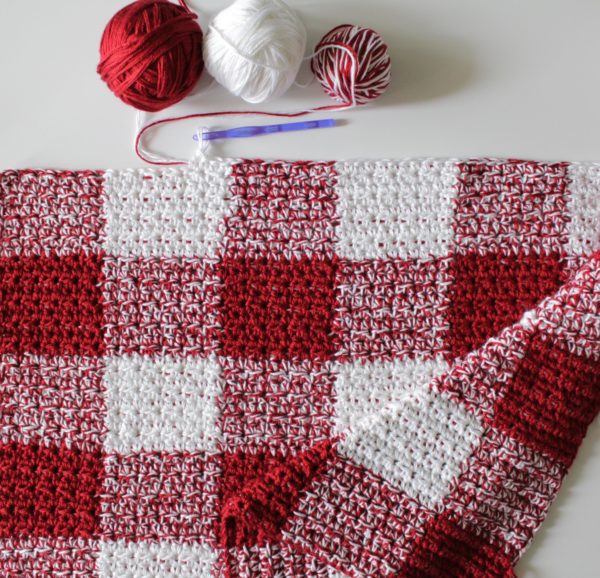
So let’s get to the pattern!
Materials
Caron Simply Soft (100% acrylic, 170 g/6 oz, 288 m/315 yds)
3 skeins Autumn Red, 3 skeins White
Size M/9.00mm hook, tapestry needle, scissors
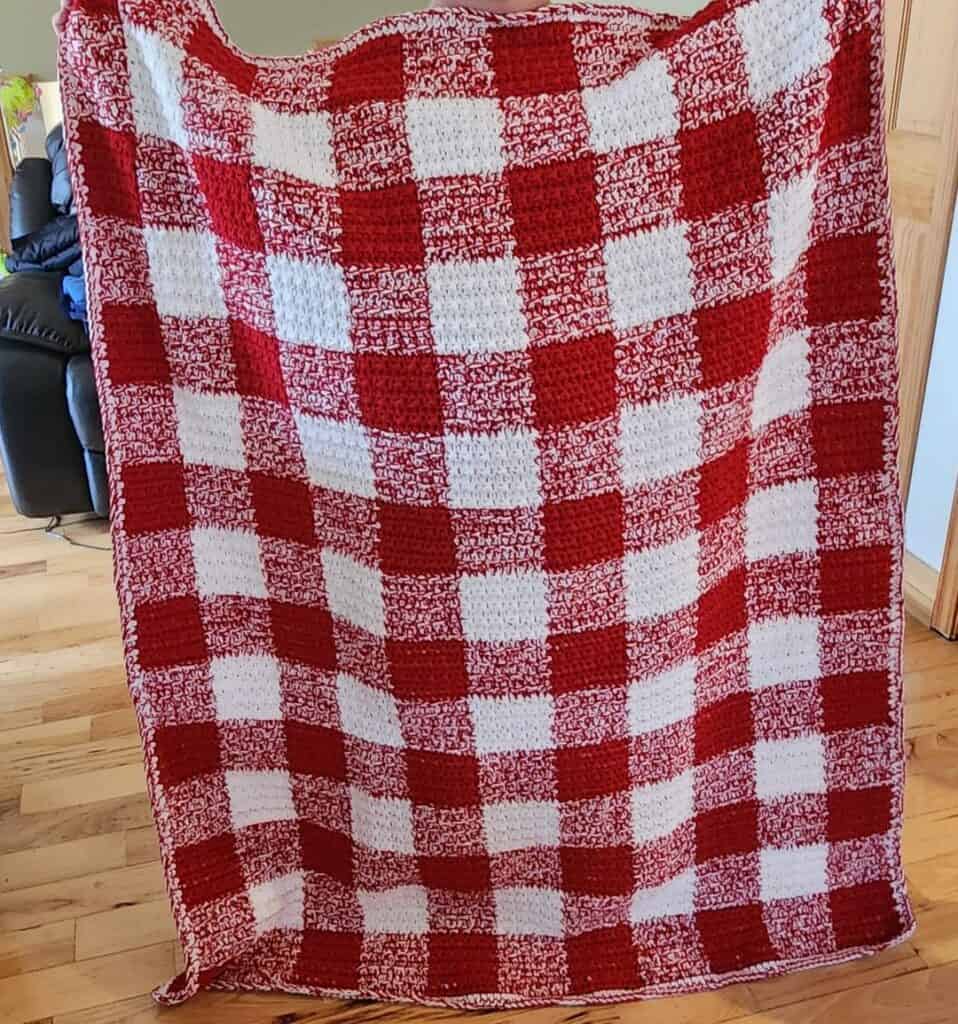
Size
Finished size 40 in x 40 in
Stitches
Single Crochet (SC): Insert your hook, yarn over (YO) and pull up a loop, YO, pull through two loops on hook.
Half Double Crochet (HDC): YO, insert your hook, YO and pull up a loop, YO and pull through all 3 loops on hook.
Pattern
Before you start, take two of the red skeins, find the end that comes out of the middle, hold both strands together and wind into a ball. Put the ball into a bowl to use throughout the project and you will have less of a headache when the yarn starts to twist after every row. Trust me. Just do it. This is one other obstacle for this blanket, but it’s small compared to the task of weaving in a lot of ends if you were to cut off between color changes. Combine two whites together and combine a white and a red to make one striped. Start with the red and the stripe balls first.
Chain 78 in red. (Pattern repeat is 11 + 1 if you’d like to make your own size, just remember to buy more yarn)
Row 1: In the second chain from the hook, SC. In the next space, HDC. Alternate SC and HDC for the next 9 chains. Insert your hook into the 11th chain space, yarn over and pull up a loop but then stop, and change colors. Pull through and finish the SC with the striped red. HDC into the next stitch with the new color, and crochet OVER the red. You are bringing it along with you – through your work. Continue the alternating SC and HDC and continue changing colors every 11 stitches.
Row 2: Chain one and turn. You should have ended the row with a SC in red. Bring the stripe around the end of your work and continue crocheting over this strand. Work your first SC into the SC you just made of the row below. Then, work a HDC into the HDC. continue across to the end of the row. Chain one and turn.
Rows 3 – 9: Continue switching colors every 11th stitch. Pull through the last stitch with the stripe chain one and turn. (You are now ready to start the next blocks of alternating strip and white.) (Another note: look at your tension, did 9 rows high make your blocks square? Do you need another row? Or could you have stopped at 8. This is adjustable. You want the blocks square and it doesn’t matter how many rows you make, just make them square.)
Row 10: Cut off the red leaving a long end to weave in later, about nine inches. Work your alternating SC and HDC into the next 11 spaces. However, at the 11th stitch, pull through with white. Now work the pattern across alternating white and stripe. Continue for 9 more rows.
I have made a short video showing you how I am changing colors so if you need a visual watch this clip:
Repeat this pattern for the rest of the blanket. Make it 7 blocks wide by 7 blocks high, or however you’d like to make it. This crochet gingham blanket is a large baby blanket size. I’d buy one more set of colors if you want to make it longer and wider. And if you go wider, chain 100 so you start and end with the same color.
If you need one more visual, here is another video to help you understand how to carry yarn and how to keep your yarn from twisting when working the gingham!
Border
For the border, first I wove in all the ends with the tapestry needle. Then, I simply inserted my hook in any stitch on the side of the blanket and worked a row of SC all the way around, working 3 SC into each corner. I joined at the end of the round, chained one and did one more round of SC into each SC, working 3 SC into each corner again. Then joined, cut the yarn and wove in the last end.
To get your red crochet gingham blanket primo looking, lay it out on a beach towel, grab a spray bottle and gently wet the blanket and smooth it out and shape it into a square with your fingers. I had one corner that kept curling on me and I sprayed that with a bit more water, pressed with the towel, and it flattened right out. Then, let it dry. I did not have that problem with this blanket however. It’s personal preference and completely up to you.
Thank you so much for stopping by! I’m glad you love this pretty look as much as me! I would love the world to be filled with these gorgeous makes, but I only have two hands-dang it! So the more the merrier!
If you have any questions about this gingham crochet blanket, please see my Crochet Gingham Blanket Frequently Asked Questions post. And when you finish your project, please share and tag me on Instagram or Facebook! I’d love to see!
Tiffany
Click here or on image below for printable pattern
![]()