This pattern is also available as a free PDF download from Yarnspirations.com!

Hello, Hannah here, I had a lot of leftover colors from my colorful velvet twist headbands, so I decided to make a fun colorful baby blanket! When I first posted a work in progress shot of this blanket on Instagram someone said it reminded them of a chandelier and we couldn’t think of a better name for it, so that’s what we’re calling it!
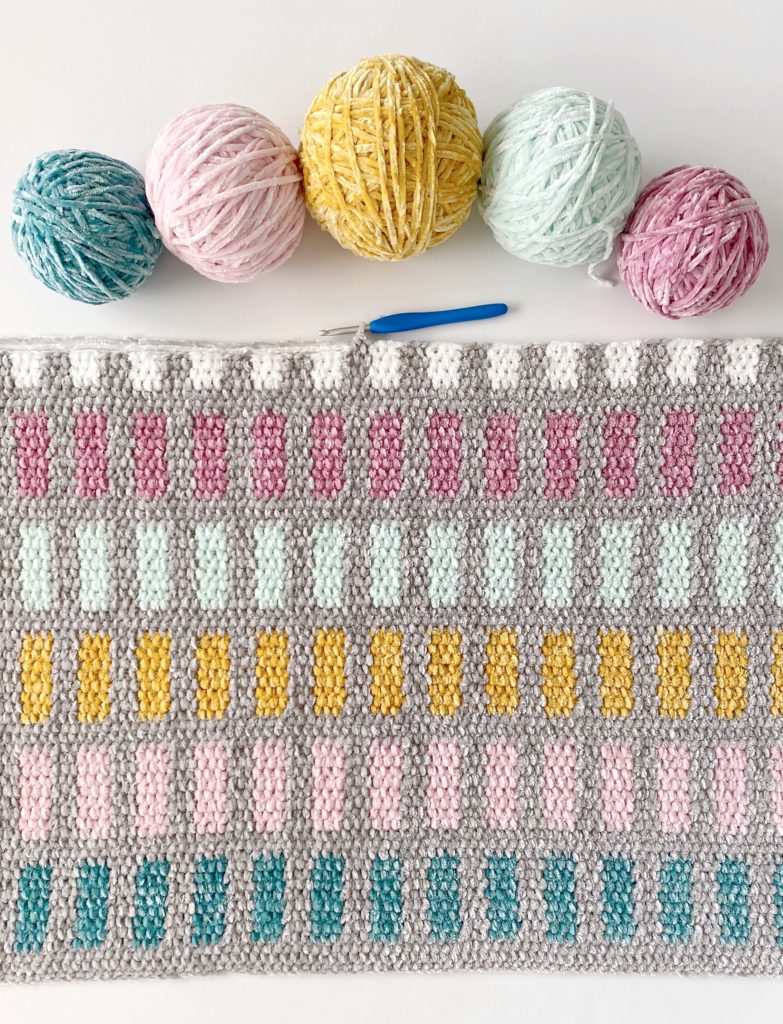
This blanket is made with Bernat Baby Velvet yarn, which is super soft and cuddly. If this is your first time using this yarn you may want to work up a small practice swatch first and practice keeping your tension tight – if you find that your yarn keeps slipping and loops keep coming out you may want to try going down a hook size.
To make the vertical lines in this blanket I used the technique of carrying yarn so that I could easily switch back and forth between colors without having to weave in a million ends. If you’ve never carried yarn before, don’t worry, it’s much easier than it sounds – you will simply be laying whichever color you aren’t using across the top of your work and crocheting over it until you are ready to use it again. Here is a video for this blanket if you’d like to watch before you get started!
Materials
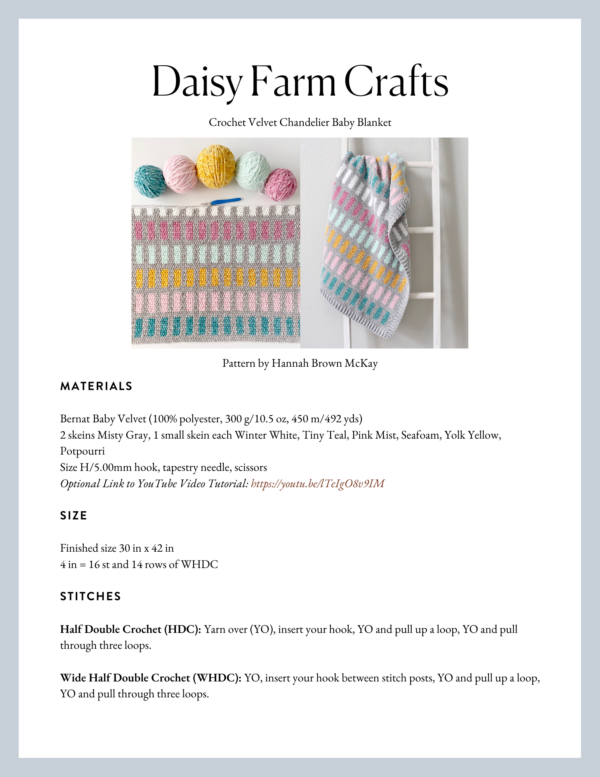
Bernat Baby Velvet* (100% polyester, 300 g/10.5 oz, 450 m/492 yds)
2 skeins Misty Gray, 1 small skein each Winter White, Tiny Teal, Pink Mist, Seafoam, Yolk Yellow, Potpourri
Size H/5.00mm hook, tapestry needle, scissors
Size
Finished size 30 in x 42 in
4 in = 16 st and 14 rows of WHDC
Stitches
Half Double Crochet (HDC): Yarn over (YO), insert your hook, YO and pull up a loop, YO, pull through all 3 loops on hook.
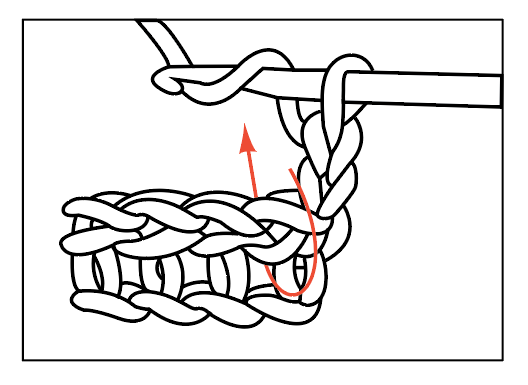
Wide Half Double Crochet (WHDC): YO, insert your hook between stitch posts, YO and pull up a loop, YO, pull through all 3 loops on hook.
Double Crochet (DC): YO, insert your hook, YO and pull up a loop, YO pull through two loops on hook, YO pull through remaining two loops.
Front and Back Post Double Crochet (FPDC & BPDC): A front post double crochet means you insert your hook from front to back around the post of the next DC and work a DC. A back post double crochet means you insert your hook from back to front around the post of the next DC and work a DC.
Pattern
Tips to know before you start:
- Pull through with the new color on the last step of the stitch.
- Lay whichever color you aren’t using along the top of your work and crochet over it as you go.
- To avoid your yarn getting twisted as you carry it along your work, it helps to always keep one color to the front and one color to the back each time you switch colors.
- When turning to a new row, wrap the color not in use around the side of your work and continue to crochet over it as you go.
Chain a multiple of 6, then add 5. (I chained 107.)
ROW 1: Starting in the 3rd chain from the hook, work a HDC into each chain with Main Color. Chain (CH) 2 and turn.
ROWS 2 – 3: Work a wide HDC into each space across the row. CH 2 and turn.
ROWS 4 – 11: Work a wide HDC into each of the first 3 spaces with Main Color, then work a wide HDC into each of the next 3 spaces with New Color, crocheting over the Main Color as you work. Continue alternating Main Color and New Color every three stitches, always laying whichever color you aren’t using along the top of your work and crocheting over it as you go. CH 2 and turn. (When you finish row 11, cut the New Color and leave yourself a tail you can weave into the blanket later.)
Tip: If you’d like, when working your wide HDCs you can insert your hook underneath the yarn you carried on the previous row to hide it better. This can also help keep your stitches tighter so that the velvet doesn’t cause any loops to slip loose.
ROWS 12 – 14: With Main Color, work a wide HDC into each space across the row. CH 2 and turn.
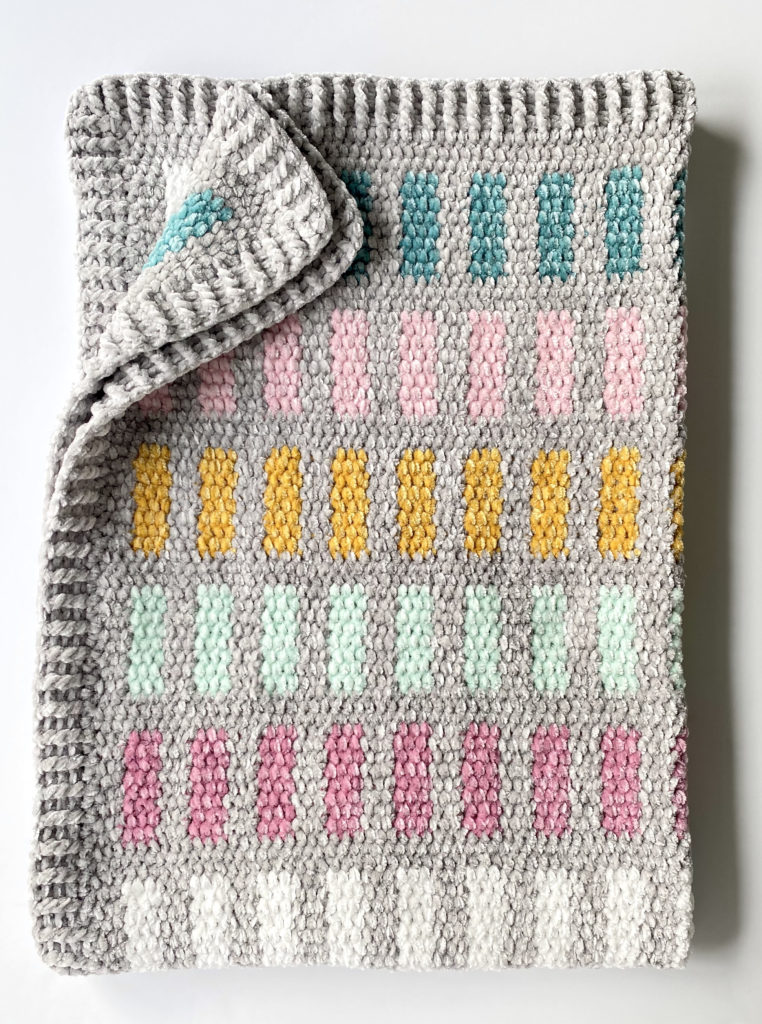
Repeat rows 4 through 14 for the remainder of the blanket, switching to a new color each time you repeat rows 4 through 11. Here is the color sequence I used for my blanket:
3 rows Misty Gray, 8 rows with Tiny Teal, 3 rows Misty Gray, 8 rows with Potpourri, 3 rows Misty Gray, 8 rows with Yolk Yellow, 3 rows Misty Gray, 8 rows with Seafoam, 3 rows Misty Gray, 8 rows with Pink Mist, 3 rows Misty Gray, 8 rows with Winter White, 3 rows Misty Gray, 8 rows with Tiny Teal, 3 rows Misty Gray, 8 rows with Potpourri, 3 rows Misty Gray, 8 rows with Yolk Yellow, 3 rows Misty Gray, 8 rows with Seafoam, 3 rows Misty Gray, 8 rows with Pink Mist, 3 rows Misty Gray, 8 rows with Winter White, 3 rows Misty Gray.
When you’re finished, weave all ends into the blanket with a tapestry needle. With velvet we like to leave long tails and discreetly knot them into the stitches as we are weaving them in. Just weave them around a stitch and back through the tail and knot the yarn to a stitch and continue weaving through. This will help the tails from slipping out.
![]()
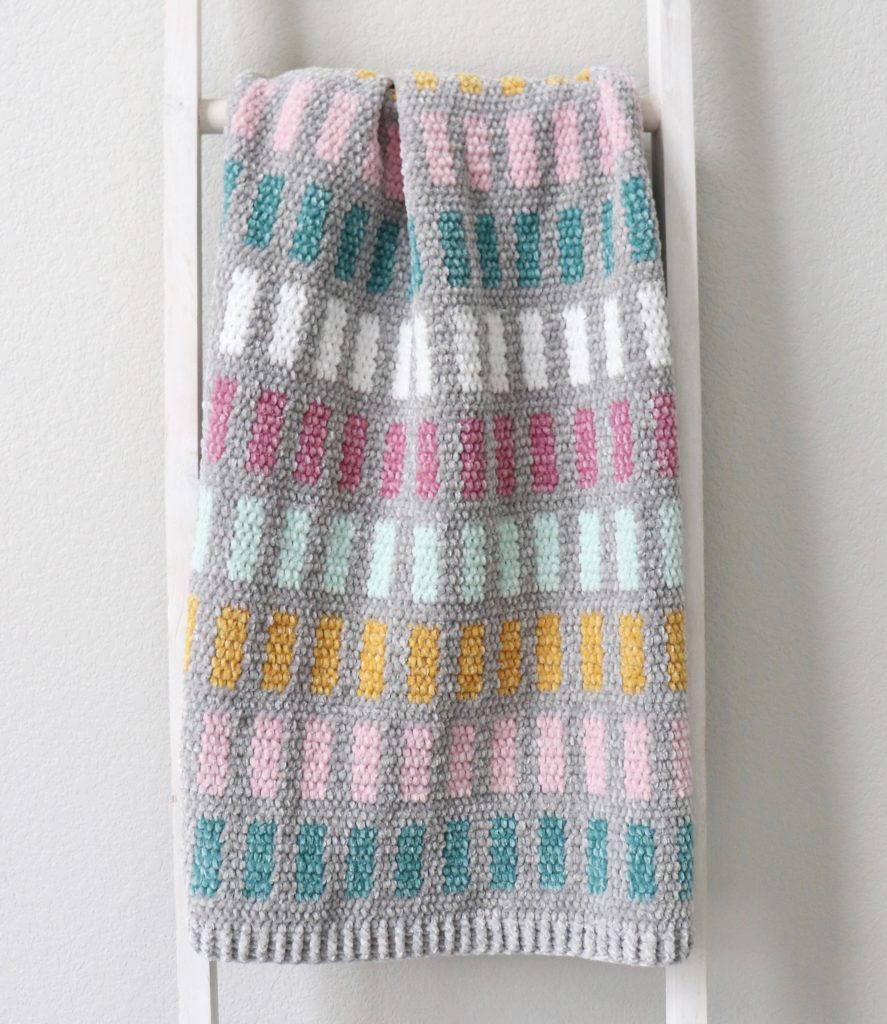
Border
ROUND 1: With Main Color, work 1 DC into each stitch and 1 DC per row on the sides of the blanket, and 3 DC into each corner space. Join with a slip stitch to the beginning DC. Continue in the same direction.
ROUND 2: Work alternating front and back post around each DC. When you reach a corner, work 3 alternating front and back post around the middle DC of the 3 DC that made the corner in the round prior. (In other words, if you get to the corner post and you are supposed to work a FPDC, then work a FPDC, a BPDC, and a FPDC all around that corner post. Then in the next stitch you would continue the alternating pattern, working the opposite of whichever stitch you just used.)
ROUNDS 3 – 4: Continue working in same direction and repeat round 2. Always match your post double crochets so that they are poking out in the same direction as the previous row. When you finish the last round of your border, slip stitch into the starting corner and tie off. Here’s a video for this border:
If you’d like to add finishing touches to your blanket, lay it out flat on a towel or foam blocking boards if you have them. Use a spray bottle with water to dampen the blanket. Press the blanket into straight lines, massaging the stitches and adjusting your tension. Pin with straight pins and let it dry.
Thank you so much for coming to read this pattern, I hope you enjoy making this blanket! When you’re finished, please come share a picture with us on Facebook or Instagram, we’d love to see! xo, Hannah
Click here or on image below for printable pattern
*Daisy Farm Crafts is sponsored in 2021 by Yarnspirations