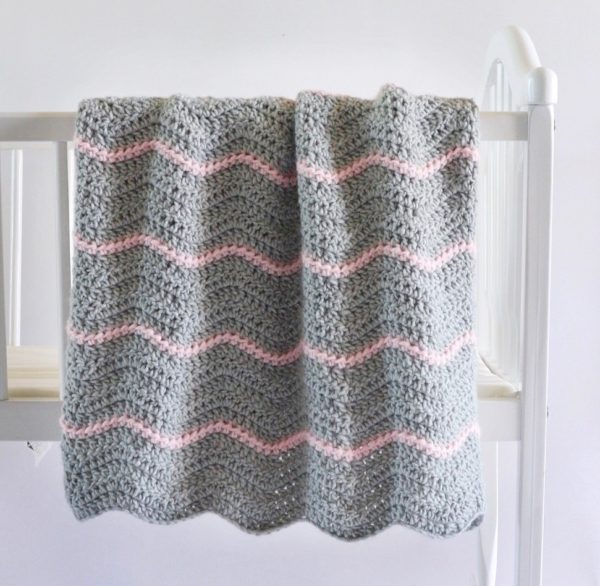
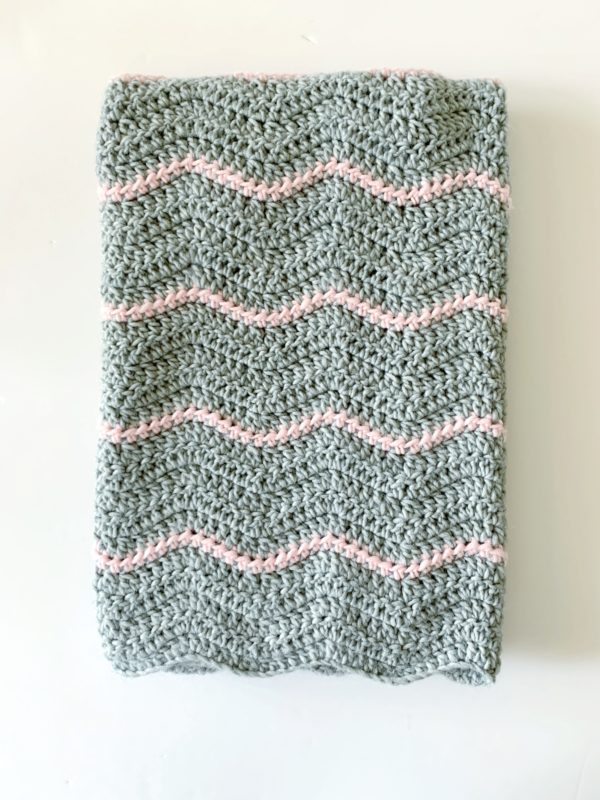
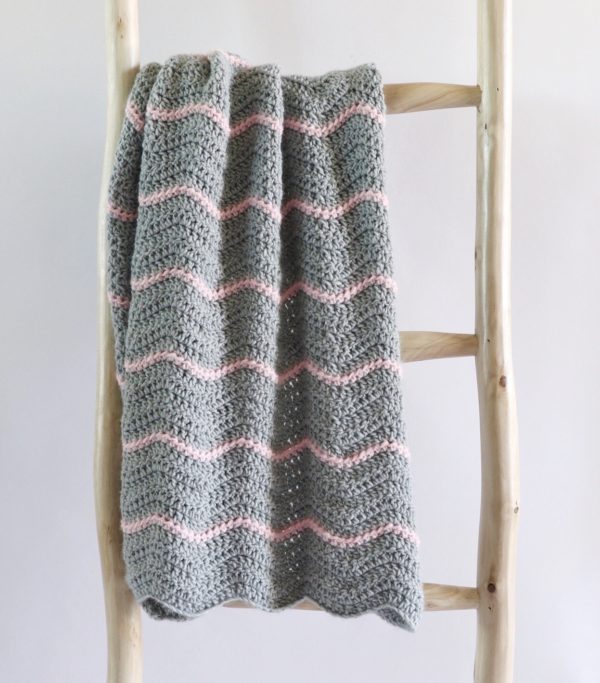
It’s been a while since I’ve made a ripple blanket and I love how the ripples look with this yarn! I wanted to make something to throw over a crib that was more neutral with just a pop of color.
If you’ve never made a ripple blanket before, the counting can be a little tricky at first, but it gets better once you get into the swing of the blanket. Here’s a video that shows the counting for this ripple blanket if you want to watch before you get started!
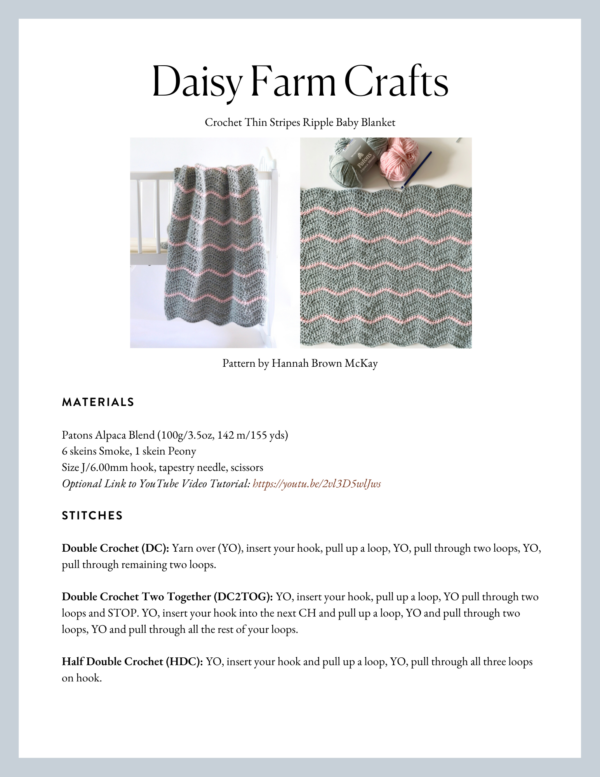
Materials
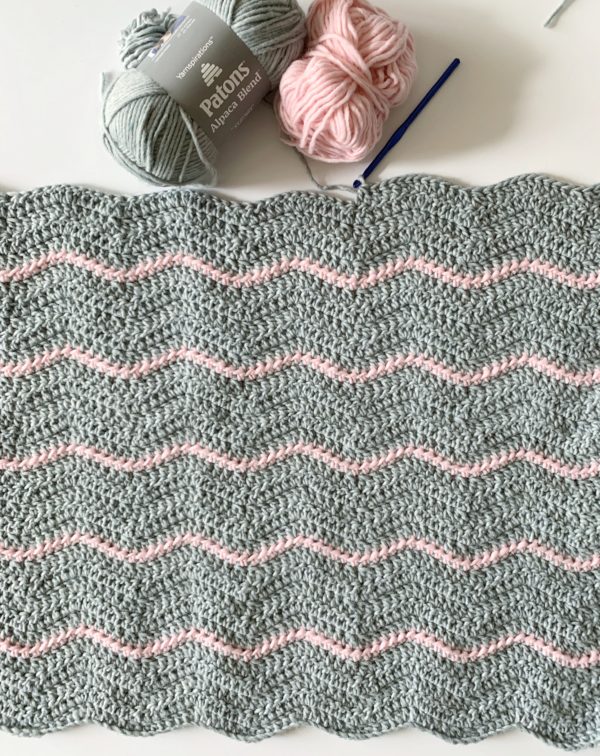
Patons Alpaca Blend (100g/3.5oz, 142 m/155 yds)
6 skeins Smoke, 1 skein Peony
Size J/6.00mm hook, tapestry needle, scissors
Stitches
Double Crochet (DC): Yarn over (YO), insert your hook, pull up a loop, YO, pull through two loops, YO, pull through remaining two loops.
Double Crochet Two Together (DC2TOG): YO, insert your hook, pull up a loop, YO pull through two loops and STOP. YO, insert your hook into the next CH and pull up a loop, YO and pull through two loops, YO and pull through all the rest of your loops.
Half Double Crochet (HDC): YO, insert your hook and pull up a loop, YO, pull through all three loops on hook.
Pattern
Chain 99 (Or chain any multiple of 12 and then add 3. If you’re trying to estimate the width, you can multiply the number of ripples you want by 12, and then add 3. For this blanket, I have 8 ripples (or peaks), so I multiplied 8 x 12 (96) and then added 3 (99).
Row 1: DC in the 4th chain from hook. (The first three chains counts as a DC.) *Work 1 DC in each of the next 3 CH. In the next two chains, DC2TOGDC2TOG again in the next two chains. Work 1 DC in each of the next 3 CH, then work 2DC in next CH, and another 2 DC in the next chain. Repeat from * across to the last CH. 2 DC into that last CH. CH 3 and turn.
Row 2: DC in the next stitch (if you count down from the hook it will be the 4th CH). *Work 1 DC in each of the next 3 CH. In the next two chains, DC2TOG. Then DC2TOG again in the next two chains. Work 1 DC in each of the next 3 CH, then work 2 DC in next CH, and another 2 DC in the next chain. Repeat from * across to the last CH. Work 2 DC into the top of the CH 3 turning chain from the previous row. CH 3 and turn.
Rows 3 – 5: Repeat row 2. At the end of row 5, pull through with Peony on the last DC. Chain 2 and turn.
Row 6: With Peony, work a HDC in each stitch across the row. Work one HDC into the turning chain at the end of the row, but before you finish the stitch, pull through with Smoke. Chain 3 and turn.
Row 7: With Smoke, DC in the first stitch (if you count down from the hook it will be the 4th CH). *Work 1 DC in each of the next 3 CH. In the next two chains, DC2TOG. Then DC2TOG again in the next two chains. Work 1 DC in each of the next 3 CH, then work 2 DC in next CH, and another 2 DC in the next chain. Repeat from * across the row. Work 2 DC into the top of the last HDC of the row below. (On this row you do not need to work into the turning chain.) Chain 3 and turn.
Rows 8 – 11: Repeat row 2.
Repeat rows 6 through 11 for the remainder of the blanket. (I finished when I had 10 sections of gray.)
Border
For this blanket, I liked the ends of the blanket the way they were, so I only put a border on the sides. After weaving in the ends, *pull up a loop in any corner and chain 2. Work 2 DC for each gray row of the blanket, and one DC for each pink row. When you reach the end, slip stitch into last stitch and tie off. Then repeat from * on the other side. (Be sure to start in the opposite corner so that you can keep the blanket facing the same way as you worked the other side – that way the stitches of the border look the same on each side.)
If you’d like to add finishing touches to your blanket, lay it out flat on a towel or foam blocking boards if you have them. Use a spray bottle with water to dampen the blanket. Press the blanket into straight lines, massaging the stitches and adjusting your tension. Pin with straight pins and let it dry.
Thank you so much for coming to read this pattern; I hope you enjoy making this simple ripple blanket! When you’re finished, please come share a picture with us on Facebook or Instagram using #daisyfarmcrafts, we’d love to see!
xo, Hannah
Click here or on image below for printable pattern