Hello! Hannah here. I am excited to share this pattern for my Crochet Strawberry Stripes Baby Blanket because I really love how it turned out. I wanted to make a fun summery blanket for a baby girl and I thought the Strawberry yarn in Caron Simply Soft would be fun to make with smaller stripes.
For this blanket I wanted to learn a new stitch and I decided to try out the Griddle Stitch, which is a great stitch for beginners since it is just alternating single and double crochet (I’ll explain the details below). I love the bumpy texture the stitch makes and how it makes the stripes look really straight from far away and gives them a cool design when you look closer.
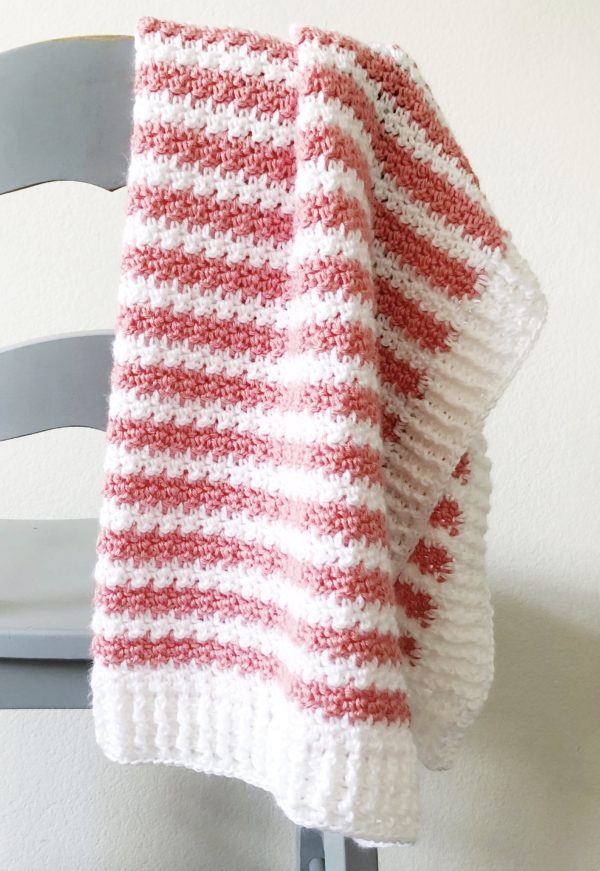
Sometimes it can be tedious to constantly change colors but the nice thing about this blanket is that I switched colors every two rows, which meant I could carry the yarn up the side without having to cut it and then I just covered it up later with the border. If you’ve never carried yarn up the side before, here is a picture of what it looks like:

You just leave the color you aren’t using at the end of the row and then pick it up again when you come back to change colors. Saves a lot of time from having to weave in ends!
Materials
Caron Simply Soft (100% acrylic, 170 g/6 oz, 288 m/315 yds)
2 skeins Strawberry, 3 skeins White
Size H/5.00mm hook, tapestry needle, scissors
Size
Finished size 33 in x 40 in

Stitches
Single Crochet (SC): Insert your hook, yarn over (YO) and pull up a loop, YO and pull through two loops on hook.
Double Crochet (DC): YO, insert your hook, YO and pull up a loop, YO and pull through two loops, YO and pull through remaining two loops on hook.
Front and Back Post Double Crochet (FPDC & BPDC): A front post DC means you insert your hook from front to back around the post of the next DC and work your DC. A back post DC means you insert your hook around the post from the back to the front and work a DC.
Pattern
Chain 95 (or any odd number) in White.
In the second chain from hook, work a single crochet (SC). In the next stitch, work a double crochet (DC). Alternate across the whole row SC and DC. The last stitch you make should be a DC. Chain one and turn. Single crochet into the DC you just made from the previous row. Then, double crochet into the SC. Alternate again across the whole row. Always DC into SC. Always SC into DC.
Work 2 rows in white, then pull through with Strawberry just before finishing your last DC (pull through the last two loops on your hook). Don’t cut the white yarn. Chain one and turn, then work two rows of the griddle stitch in Strawberry. When you reach the end of the second row, pull through with white, carrying the white yarn up the side.
Continue this pattern, switching colors every two rows and carrying the yarn up the side until you reach your desired length! To make the blanket 40 inches long, I ended up with 98 rows total.
Border
Before you start the border you’ll want to weave in all the ends with a tapestry needle.
For this border you will be making a ribbed stitch look on each side of the blanket, working one side at a time. I’ll explain how to do this first, and then you can watch a short video clip that shows how to work front post and back post double crochet.
Pick either side to work across. Using white, pull up a loop in the corner and chain 3. DC across the entire side. When you are working on the sides it can be hard to figure out how many DC’s to work so that the border doesn’t ripple or fan out. I found that the sides turned out the most even when I worked 3 DC’s into the sides of the white stripes and 2 DC’s into the sides of the pink stripes. This may be different for you depending on your personal tension.
Stop when you reach the first corner, chain 3 and turn. This counts as your first DC.
Insert your hook from front to back around the post of the next DC and work your DC (front post DC). Then, around the next DC, insert your hook from the back to the front and work your next DC (back post DC). Now continue alternating FPDC and BPDC around each DC. When you get to the last DC, work one DC into the top of the stitch. Chain 3 and turn.
Work back across the row with your alternating FPDC and BPDC matching each stitch to start making the ribbed look.
Go back and forth across the row until the border is as high as you would like it (I worked 5 rows for my ribbing – you’ll want to pick an odd number so you can work around the whole blanket without having to tie off.)
When you finish the ribbing for the side, do not tie off, simply chain 3, and start working across the end of the blanket, working DCs into the sides of the FPDC and BPDC stitches, and then one DC per stitch. Chain three and turn, then work back across in the same manner you did before and work your ribbed stitch, alternating FPDC and BPDC.
When you finish 5 rows, chain 3, and now work in the same manner up the side, again working one DC per stitch. When you finish working the ribbing up this side and then across the last end, chain 1 and work a SC into each DC all the way around the entire blanket, putting 3 SCs into each corner space. This helps to even everything out and give the corners a nice finished look.
Tie off and weave in the ends.
Here is the video that shows how to work FPDC and BPDC:
(Or click here to view on YouTube)
I hope you enjoy making this blanket! I really enjoyed working this griddle stitch and had a fun time making this blanket. The only negative thing I can say about it is that I spent most of my time making it while I was watching the new season of Anne with an E on Netflix…I wasn’t super impressed with the first season, but I thought I would give another chance. It didn’t redeem itself. I’m probably too stuck on my childhood nostalgia Anne of Green Gables movie, but I just can’t find the charm of this remake, as much as I want to because it seems like my list of good TV shows to watch keeps shrinking dramatically. Oh well. I guess I’ll just have to keep rewatching the original :).

Anyway, thanks for stopping by! Please share your finished blanket with us if you use this pattern, we’d love to see your creativity! You can share a picture to the Daisy Farm Crafts Facebook page or tag your picture with #daisyfarmcrafts on Instagram.
-Hannah
Click here or on image below for printable pattern
