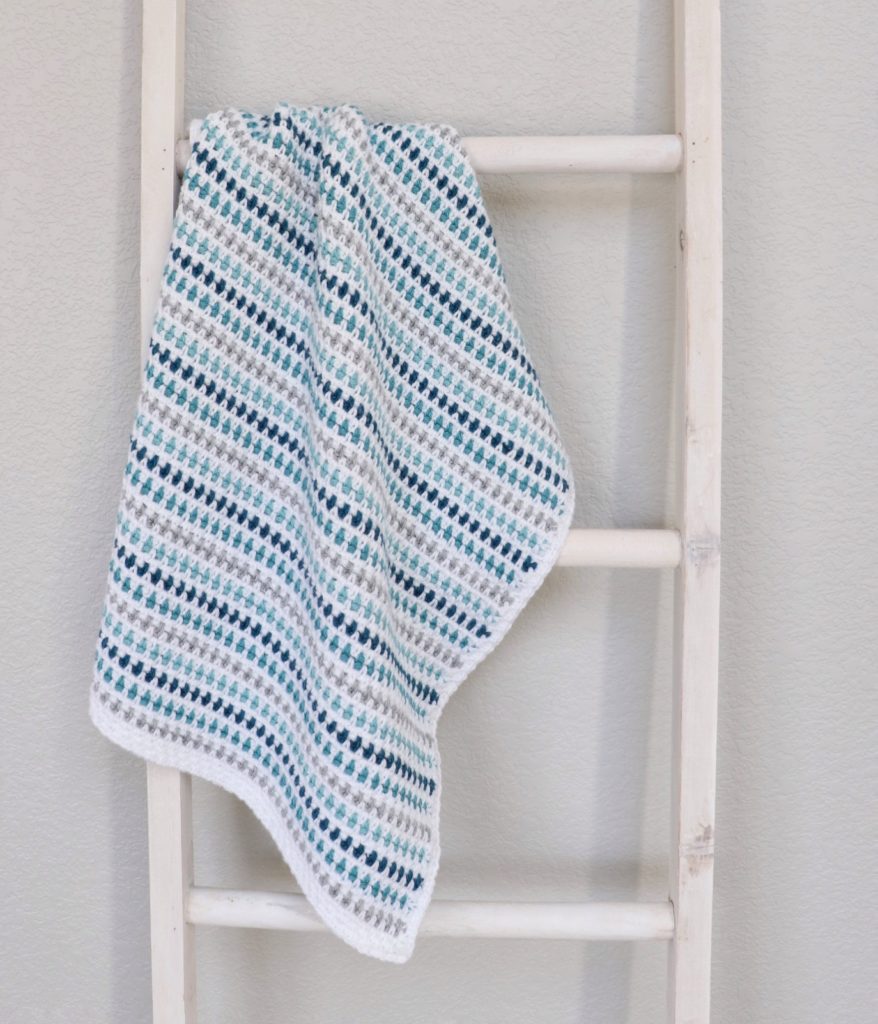
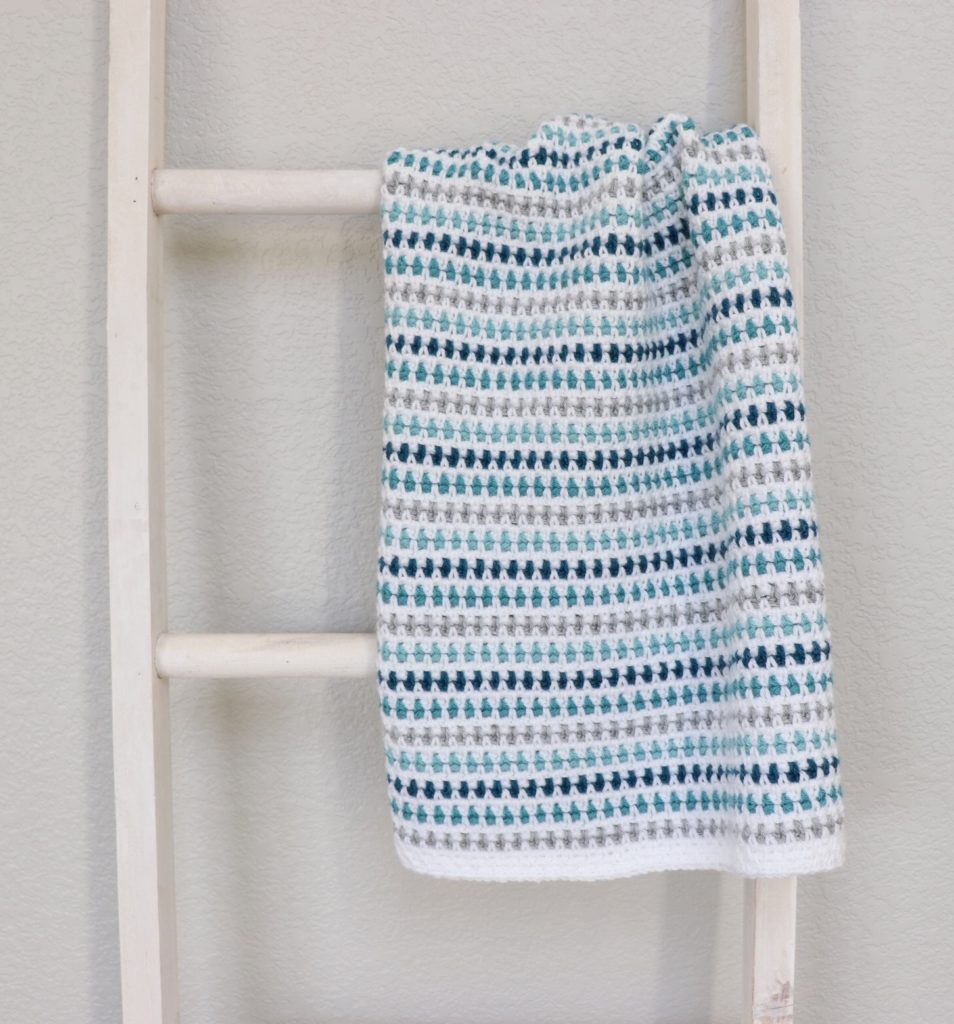
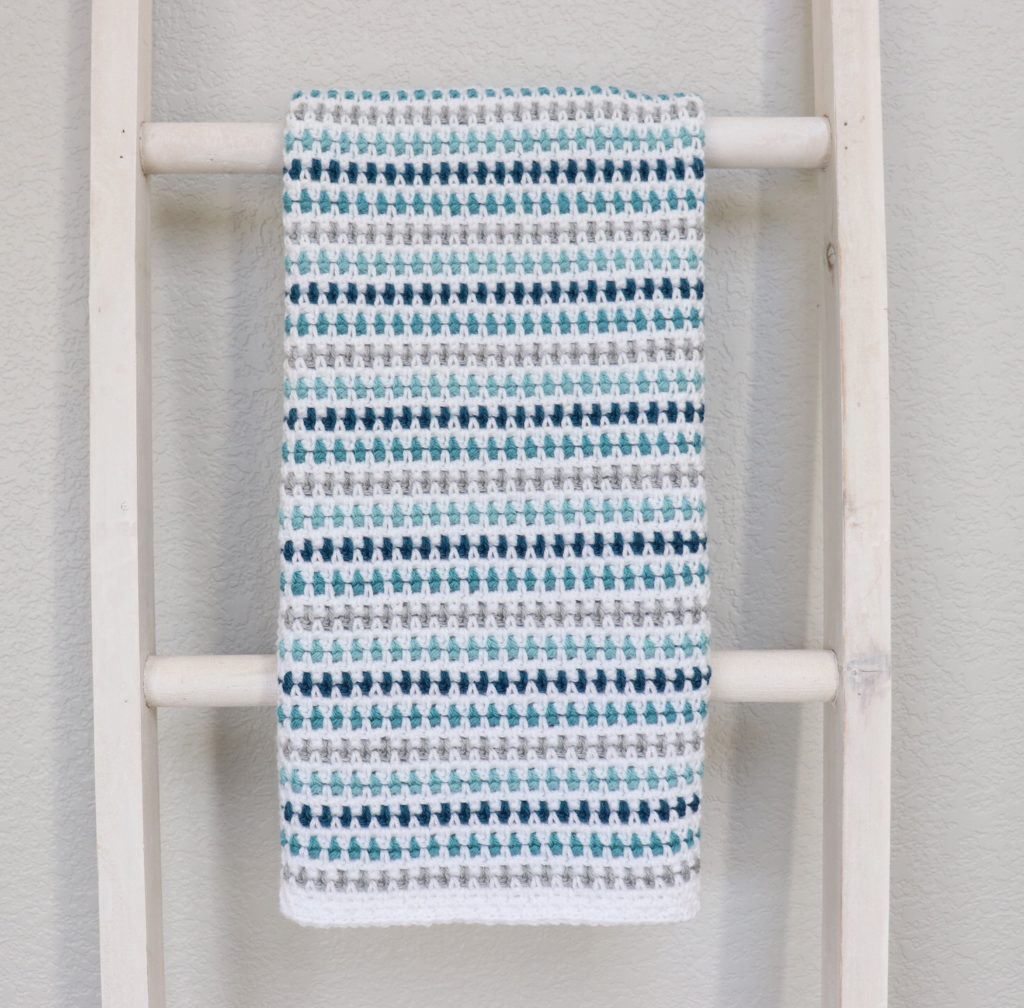
Hello crochet friends! Hannah here. I’m calling this the Speckled Moss Baby Blanket because I love how just doing one row of moss stitch in a different color makes more of a dotted line effect instead of a straight line, and with all the teal colors of this blanket it sort of reminded me of a blue speckled egg. 🙂
This blanket only uses one stitch, the moss stitch, which is just a series of single crochet and chain one, so I think it’s a pretty beginner friendly blanket. The only part that may be a little tricky is the constant change of colors, but I have some tips in the pattern below that will hopefully help the blanket work up faster and save you from weaving in a million ends!
If you’ve never used the moss stitch before and would like to see how it’s done before you get started, here is a video to show you how!
Materials
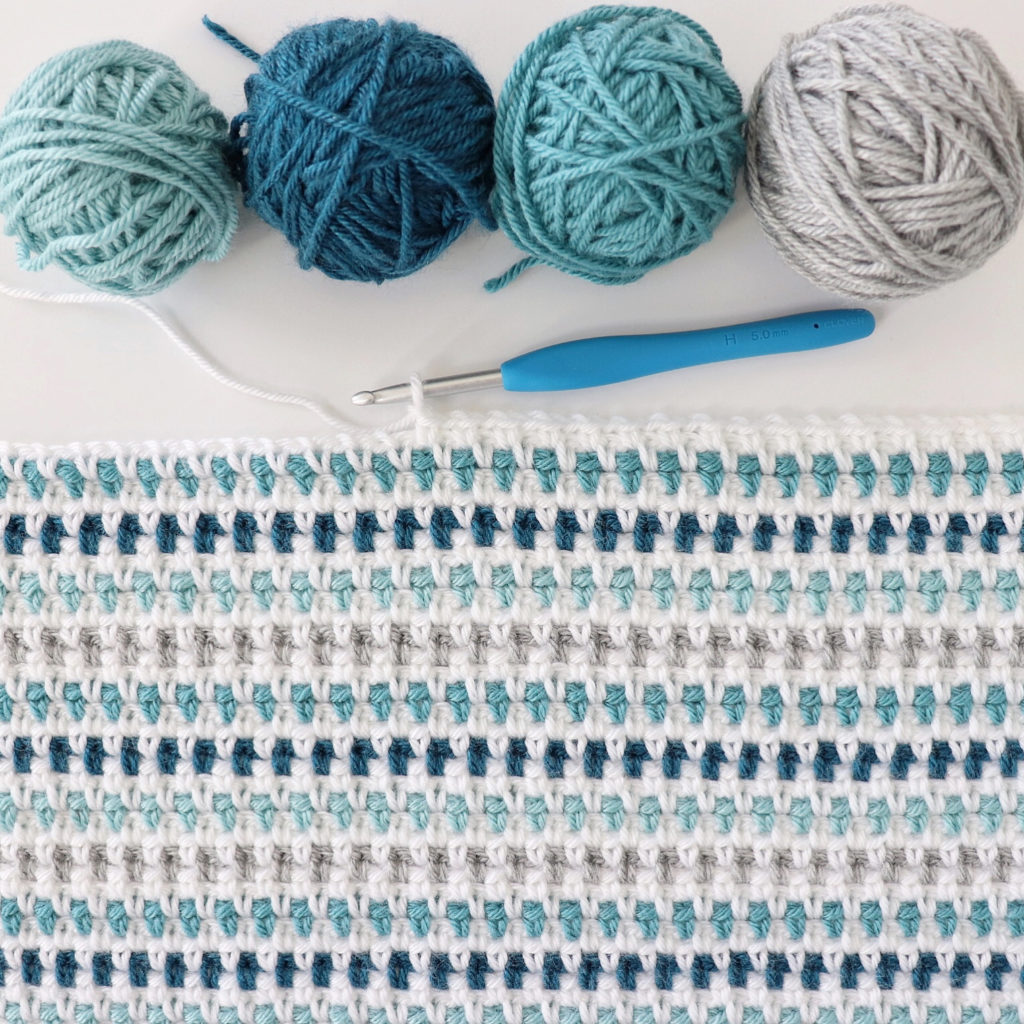
Patons Canadiana (100% acrylic, 100 g/3.5 oz, 187 m/205 yds)
4 skeins White, 1 skein each Pale Teal, Medium Teal, Teal Heather, Pale Gray Mix
Size H/5.00mm hook, tapestry needle, scissors
Size
Finished size 27 in x 28 in (stroller blanket size)
Stitches
Single Crochet (SC): Insert your hook, yarn over (YO) and pull up a loop, then YO and pull through two loops.
Pattern
Chain 130 with White. (To make your blanket bigger or smaller you can chain any even number.)
ROW 1: Starting in the 4th chain from the hook, work a SC, CH 1. Skip the next chain then work another SC, CH 1. Continue working SC, CH 1 in every other chain. You should end with one SC in the last chain. CH 2 and turn.
ROW 2: Work a SC, CH 1 into the chain one space of the row below (in the space underneath the 4th chain from the hook). Skip the next stitch, then work a SC, CH 1 in the next chain one space. Continue working SC, CH 1 into the all the chain one spaces from the row below. End with a SC that is between the last stitch and the turning chain of the row below, but before you finish the stitch, pull through with Gray (you should have two loops on your hook when you pull through). Then chain 2 with Gray and turn.
ROW 3: Repeat row 2 with Gray. When you reach the end of the row, pull through with White on the last stitch, then chain 2 and turn.
ROWS 4 – 5: Repeat row 2 with White. When you reach the end of the 5th row, pull through with Medium Teal on the last stitch, then chain 2 and turn.
ROW 6: Repeat row 2 with Medium Teal. When you reach the end of the row, pull through with White on the last stitch, then chain 2 and turn.
ROWS 7 – 8: Repeat row 2 with White. When you reach the end of the 8th row, pull through with Teal Heather on the last stitch, then chain 2 and turn.
ROW 9: Repeat row 2 with Teal Heather. When you reach the end of the row, pull through with White on the last stitch, then chain 2 and turn.
ROWS 10 – 11: Repeat row 2 with White. When you reach the end of the 11th row, pull through with Pale Teal on the last stitch, then chain 2 and turn.
ROW 12: Repeat row 2 with Pale Teal. When you reach the end of the row, pull through with White on the last stitch, then chain 2 and turn.
Repeat rows 1 through 12 for the remainder of the blanket, until you reach your desired length. (I repeated the sequence 10 times for the size of my blanket.)
Now, there are a few options for what you can do with the ends every time you switch colors. I chose to cut the yarn every time I switched, leaving about a six inch tail and then I wrapped the tail around the back of my work and crocheted over it on the next row, like this:
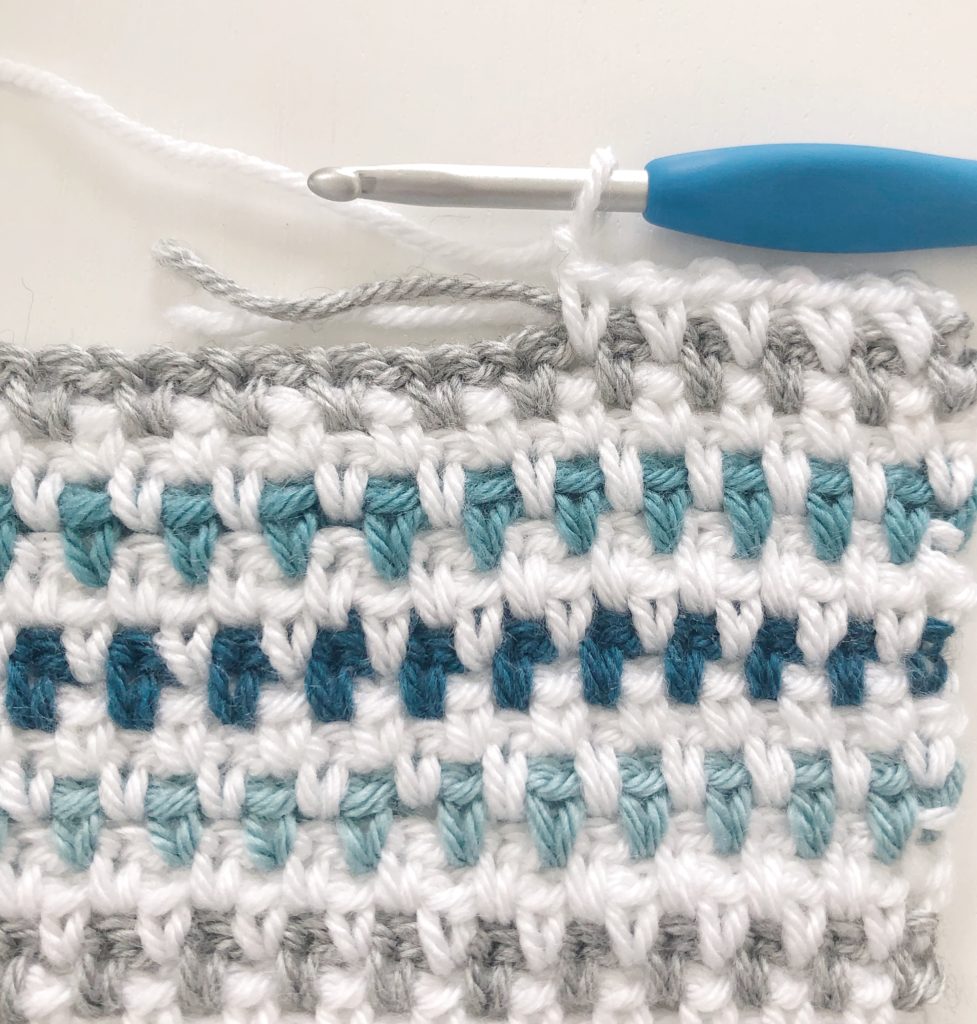
Then after I worked another row and came back to that side of the blanket, I inserted my hook underneath the tails I had crocheted over, just to make sure they were extra secure. Then I just snipped off the ends that were poking out.

Normally we don’t like to crochet over our ends because they tend to come loose, but with the moss stitch that allows you to crochet over them twice, I feel pretty confident that they will stay secure.
Another option for changing colors is that you can carry the white yarn along behind your work whenever you aren’t using it so that it’s always on the correct side when you need it. You will still have to cut the ends for the color rows, but it would save you from having to cut the white. Hopefully that makes sense! If not, here’s a quick video from another blanket that shows this same technique:
The last option is to cut the yarn every time and weave in all the tails with a tapestry needle, which is perfectly fine, just make sure you have a good TV show to binge while you’re doing it so it won’t seem too tedious :).
Border
I wanted to keep the border of this blanket pretty simple because sometimes it’s hard to keep a border from making your blanket wavy with the moss stitch, so I just did the moss stitch two times around the blanket.
Round 1: When you finish your last two rows of White on the blanket, chain 2 and start working down the side, working a SC, CH 1 at the end of every other row. Work 3 SCs into the corners. When you reach the corner you started with, slip stitch into the corner, then chain 2 and turn.
Round 2: Repeat round 1. When you reach the corner you started with, slip stitch into the corner and tie off.
After I was all finished with my blanket, I got it wet and pinned it on some foam board to block it, leaving it overnight to dry.
Thank you so much for coming to read this pattern; I hope you enjoy making this blanket! When you are finished, please come share a picture with us on Facebook or Instagram, we’d love to see!
xo, Hannah
Click here or on image below for printable pattern
![]()