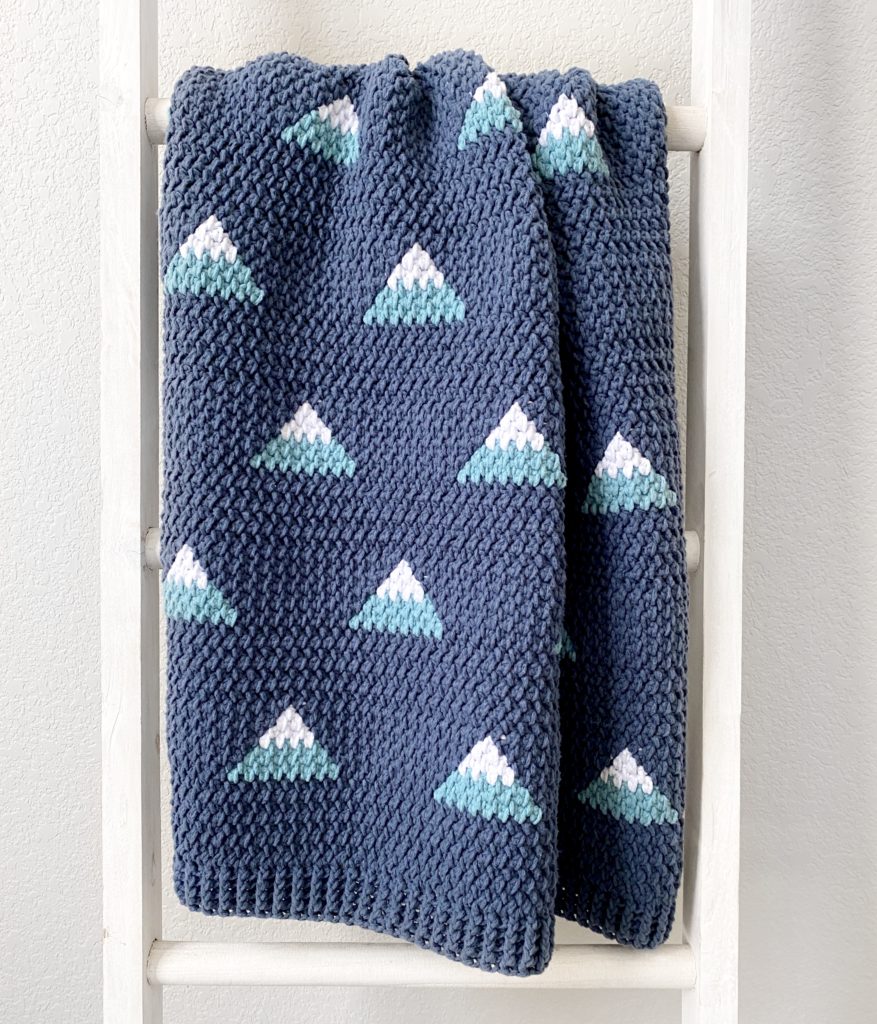
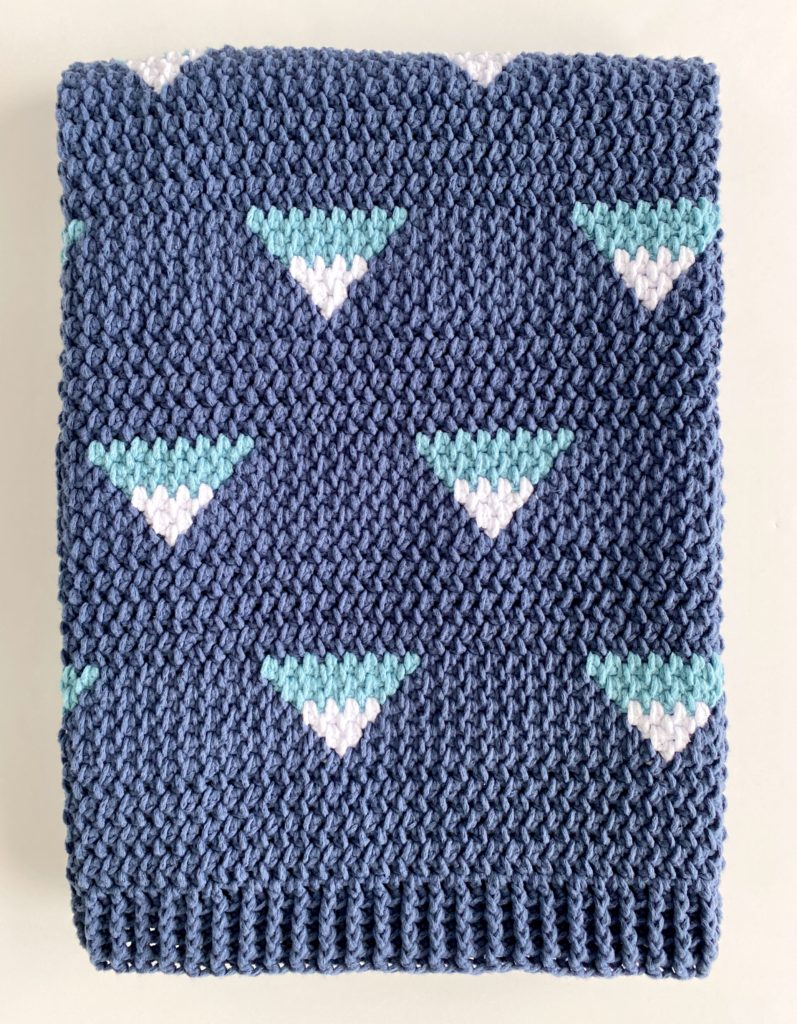
Hello, Hannah here, one of my friends here in Colorado is having a baby boy very soon and when I found out she was planning to decorate a national parks themed nursery I wanted to make another triangles blanket…except this time I added some snow on top to make little mountains!
This blanket is made with Bernat Bundle Up* yarn, which is a very soft and snuggly 100% polyester yarn that works up really well for baby blankets. I used the same stitch as when I made my Bundle Up Triangles Blanket, which is just a slightly thicker version of half double crochet to add some texture.
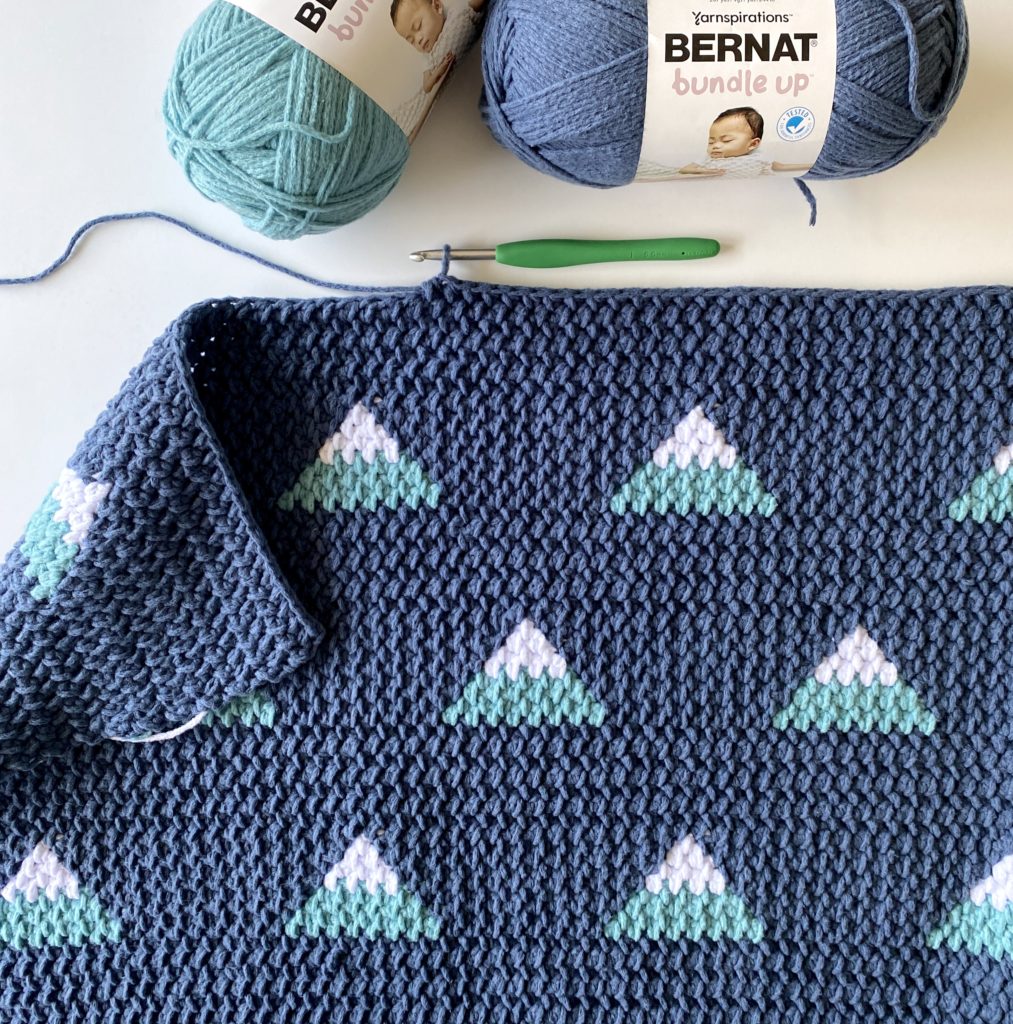
In order to have contrasting colors with the little triangle mountains I used the technique of carrying yarn so that I would be able t0 easily change colors across the triangle rows. If you’ve never carried yarn before or would like to see how to work the stitches before you get started, here is a video you can watch before you get started:
Materials
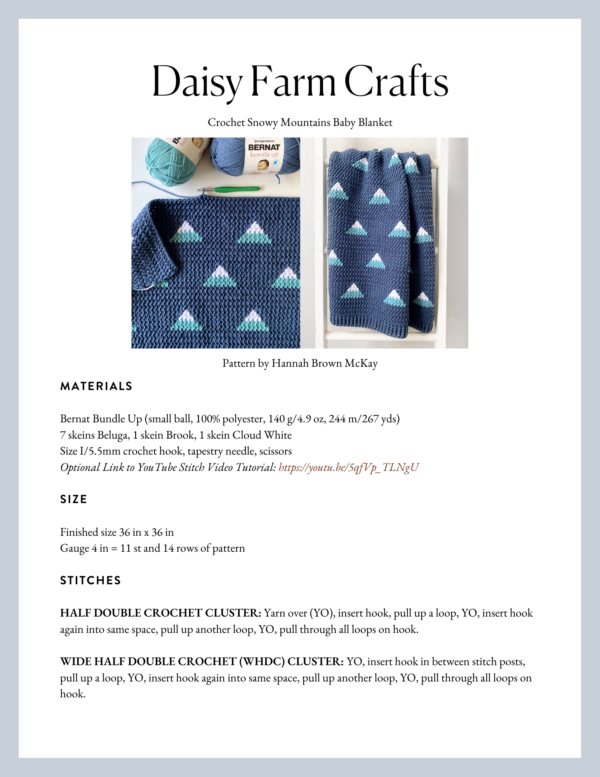
Bernat Bundle Up (small ball, 100% polyester, 140 g/4.9 oz, 244 m/267 yds)
7 skeins Beluga, 1 skein Brook, 1 skein Cloud White
Size I/5.5mm crochet hook, tapestry needle, scissors
Size
Finished size 36 in x 36 in
Gauge 4 in = 11 st and 14 rows of pattern
Stitches
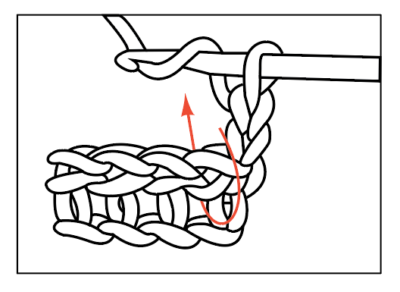
WIDE HALF DOUBLE CROCHET (WHDC) CLUSTER: Yarn over (YO), insert hook in between the posts of the row below, pull up a loop, YO, insert hook again into same space, pull up another loop, YO, pull through all loops on hook.
Here’s what I mean when I say to insert your hook in between the posts:
Pattern
MAIN COLOR – Beluga
COLOR A – Brook
COLOR B – Cloud White
Tips to know before you start:
Pull through with the new color on the last step of the stitch.
Lay whichever color you aren’t using along the top of your work and crochet over it as you go.
To avoid your yarn getting twisted as you carry it along your work, it helps to always keep one color to the front and one color to the back each time you switch colors.
When turning to a new row, wrap the color not in use around the side of your work and continue to crochet over it as you go.
To better cover up yarn that is being carried through, always insert your hook underneath the yarn that was carried across the previous row.
With Main Color, Chain 90. (Pattern repeat is a multiple of 16, plus 10.)
ROW 1: Starting in the 3rd chain from the hook, work HDC cluster into each chain. Chain 2 and turn.
ROWS 2 – 8: Work WHDC cluster into each space across the row. (Be sure not to miss the last stitch between the last post and the turning chain.) Chain 2 and turn.
ROW 9: *Work WHDC cluster in each of the first 8 spaces with Main Color, then work WHDC cluster in each of the next 8 spaces with Color A. Repeat from * across the row.
ROWS 10 – 12: Work as ROW 9, but decrease Color A on each triangle by one stitch on each row.
ROWS 13 – 16: Work as rows 10 through 12, but switch triangles to Color B, and decrease color on each triangle by one stitch on each row.
ROWS 17 – 24: With Main Color, work WHDC cluster in each space across the row. Chain 2 and turn.
ROW 25: Work WHDC cluster in each of the first 16 spaces with Main Color, then work WHDC cluster in each of the next 8 spaces with Color A. *Work WHDC cluster in each of the next 8 spaces with Main Color, then work WHDC cluster in each of the next 8 spaces with Color A. Repeat from * across the row, until you have 4 triangle bases. End the row with WHDC cluster in each space with Main Color. Chain 2 and turn.
ROWS 26 – 28: Work as ROW 25, but decrease Color A on each triangle by one stitch on each row.
ROWS 29 – 32: Work as rows 26 – 28, but switch triangles to Color B, and decrease color on each triangle by one stitch on each row.
ROWS 33 – 40: With Main Color, work WHDC cluster in each space across the row. Chain 2 and turn.
Repeat rows 9 through 40 until you have 7 sets of triangles.
Border
Weave in all ends with a tapestry needle.
ROUND 1: Pull up a loop in any corner and chain 3. Work one round of DC around the blanket, working one DC per row on the sides. On the ends of the blanket, continue inserting your hook in between the posts, and work *one DC in the first space, then 2 DC in the next space. Repeat from * across each end. Work 5 DCs into each corner.
ROUND 2: When you reach the corner you started with, work 5 DCs around the starting chain, then keep going around the blanket in the same direction, this time alternating front and back post double crochet (FPDC and BPDC).
A front post DC means you insert your hook from front to back around the post of the next DC and work your DC. A back post DC means you insert your hook from the back to the front and work a DC.
When you get to the corners of this row, you will want to continue the pattern of alternating front and back post double crochet, but you will work three stitches around the corner post.
So, for example, if you get to the corner post and you are supposed to work a front post DC, then work a front post DC, a back post DC, and a front post DC all around that corner post. Then in the next stitch you would continue the alternating pattern, working the opposite of whichever stitch you just used (in this example, you would work a back post DC).
Just remember that you are always alternating front and back post double crochet around the whole blanket, you just happen to be working three of those stitches around the same post when you are working the corners.
ROUNDS 3 – 5: When you finish round 2, work 3 alternating front post/back post DCs into the corner you started with and repeat round 2. Always match your post double crochets to so that they are poking out in the same direction as the row below. I did five rounds total for the border of my blanket, but you can go around as many times as you’d like to get your desired border height. When you are finished with your border, slip stitch into the starting stitch and tie off.
Thank you so much for visiting our blog, I hope you enjoy making this blanket! When you finish your project, please come share a picture with us on Facebook or Instagram using #daisyfarmcrafts, we’d love to see! xo, Hannah

Click here or on image below for printable pattern
Daisy Farm Crafts is sponsored in 2021 by Yarnspirations