Hello friends, Hannah here, with a new fun and easy throw pattern!
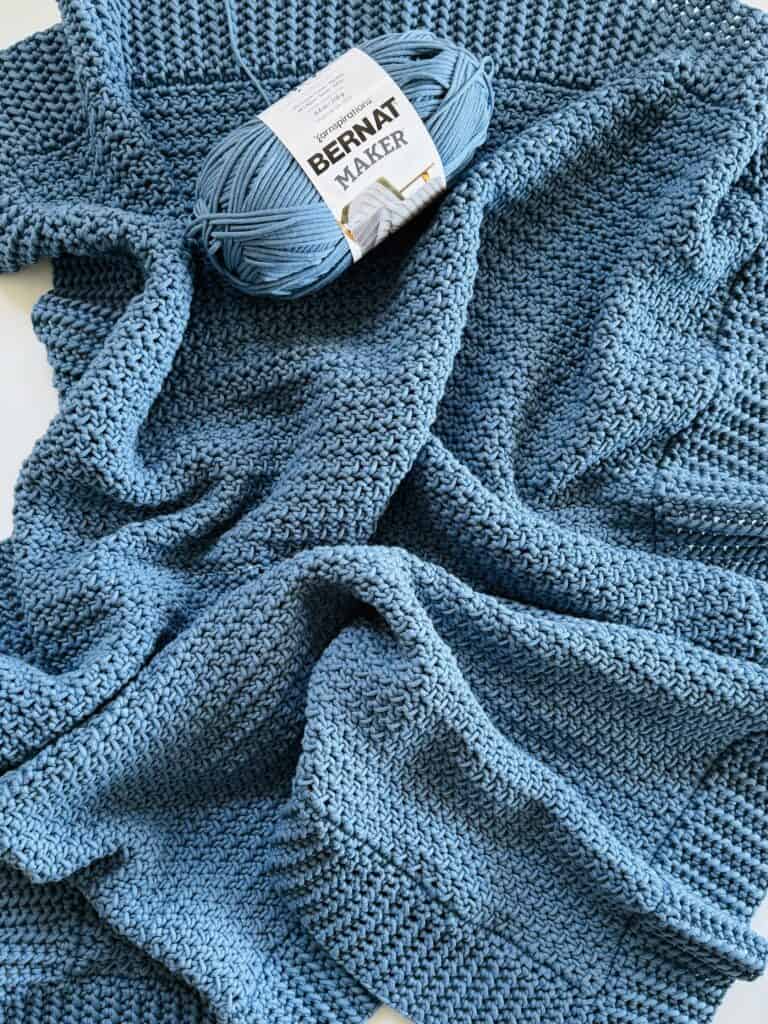
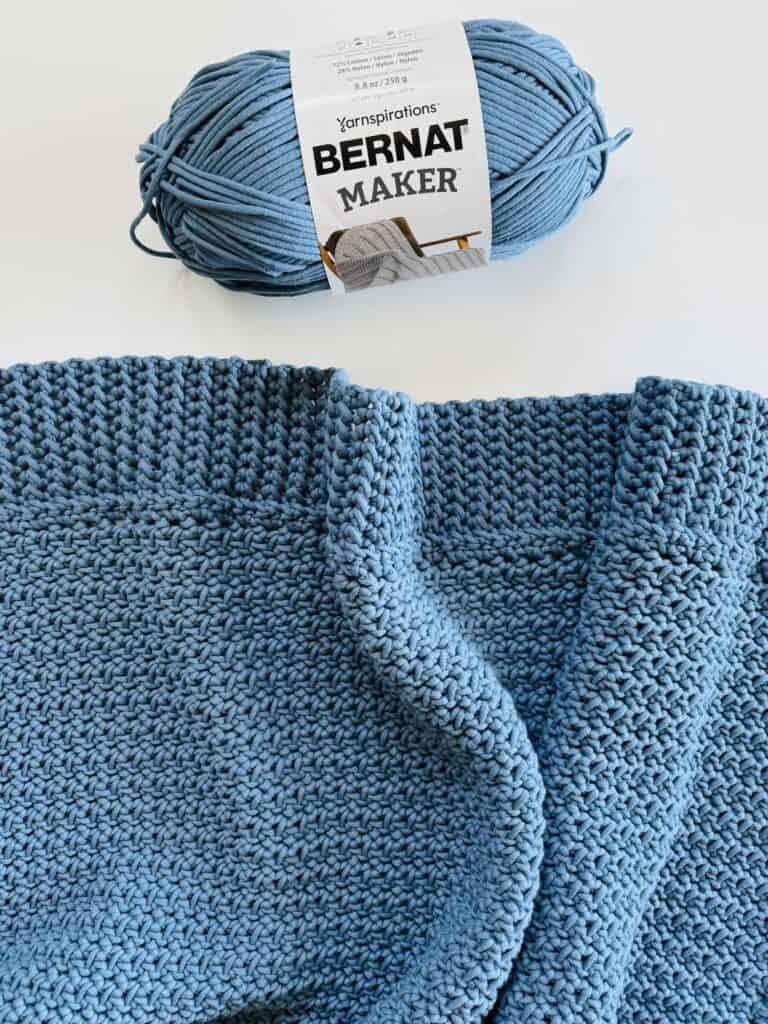
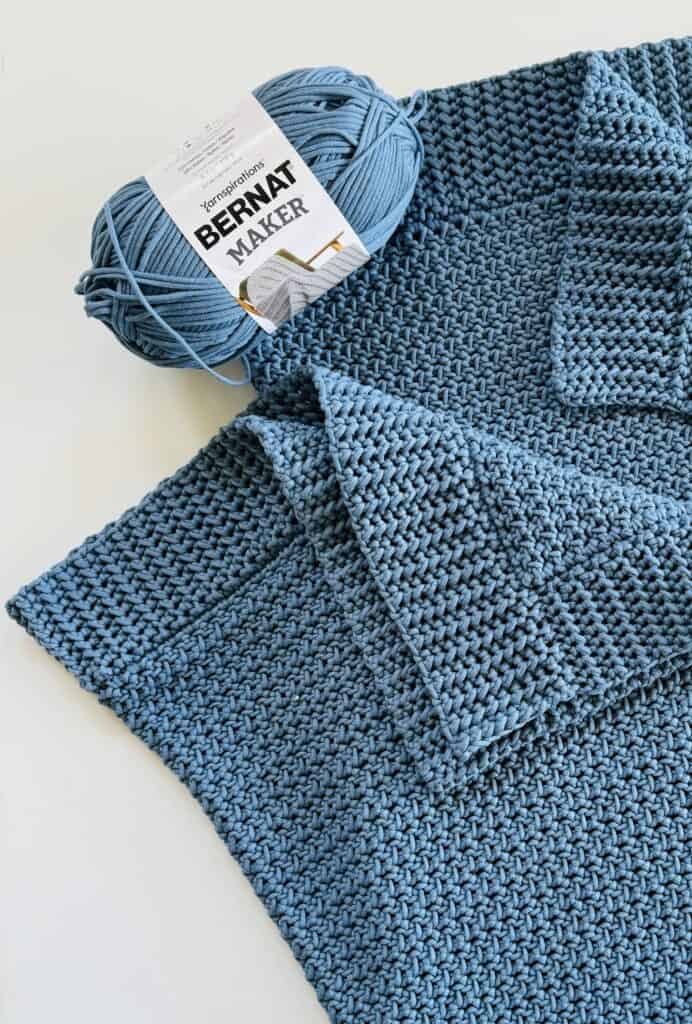
I’ve been wanting to try out this Bernat Maker yarn since it came out earlier this year, and I was really excited to finally get my hands on some! It’s a very soft and stretchy t-shirt like yarn and as soon as I felt it I knew it would be the perfect yarn for a new throw!
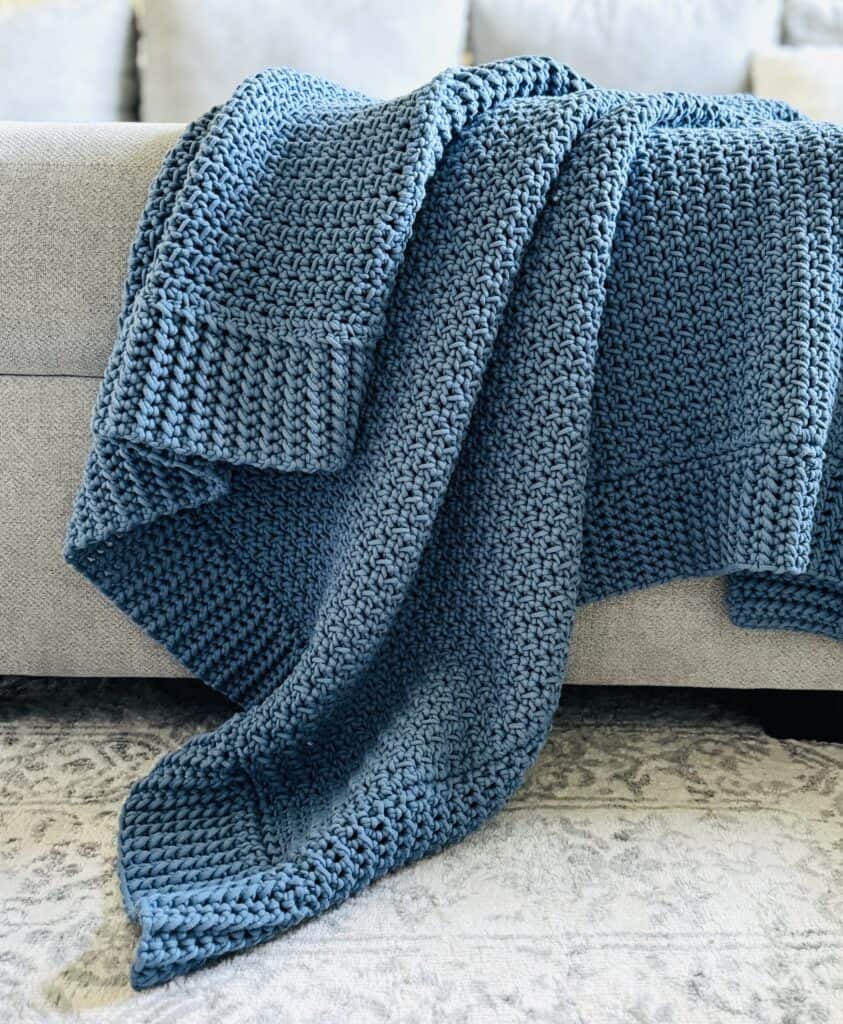
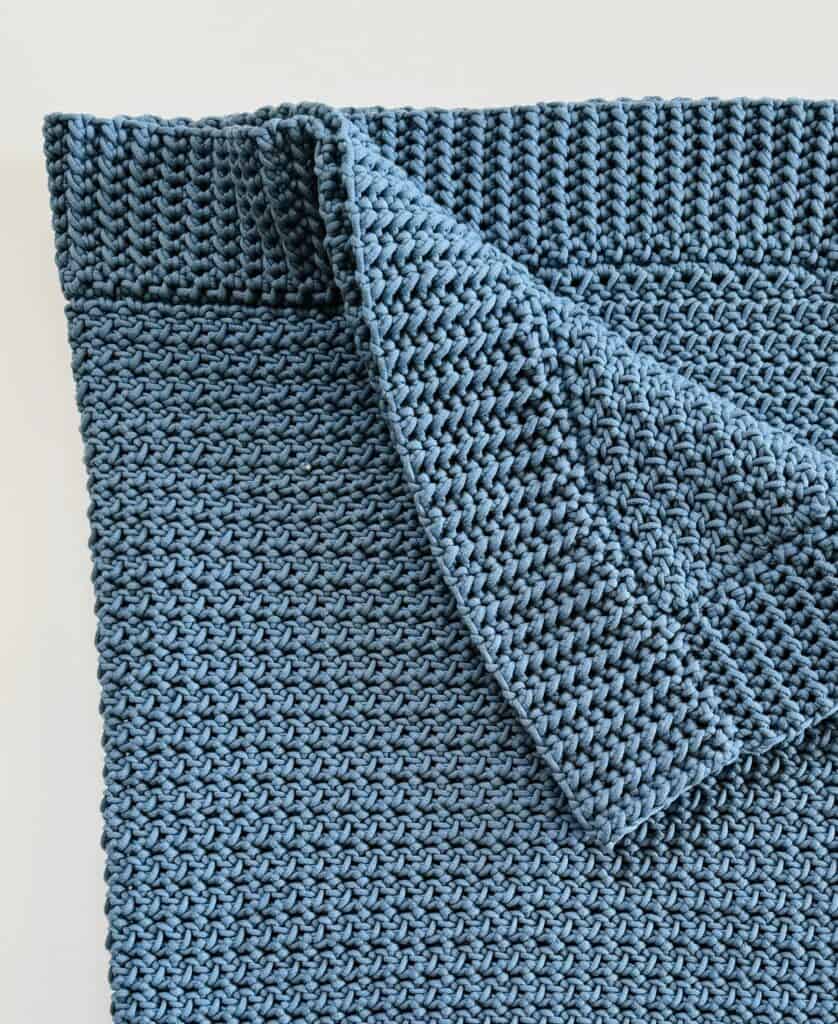
My husband and I recently moved to a new house so I’ve been working on getting all the rooms decorated and this shade of blue ended up working perfect for my new guest room. I’m trying to get a sort of coastal cottage look in that room and since the stitch of this blanket reminds me of little waves I decided to call it the Seaside Throw.

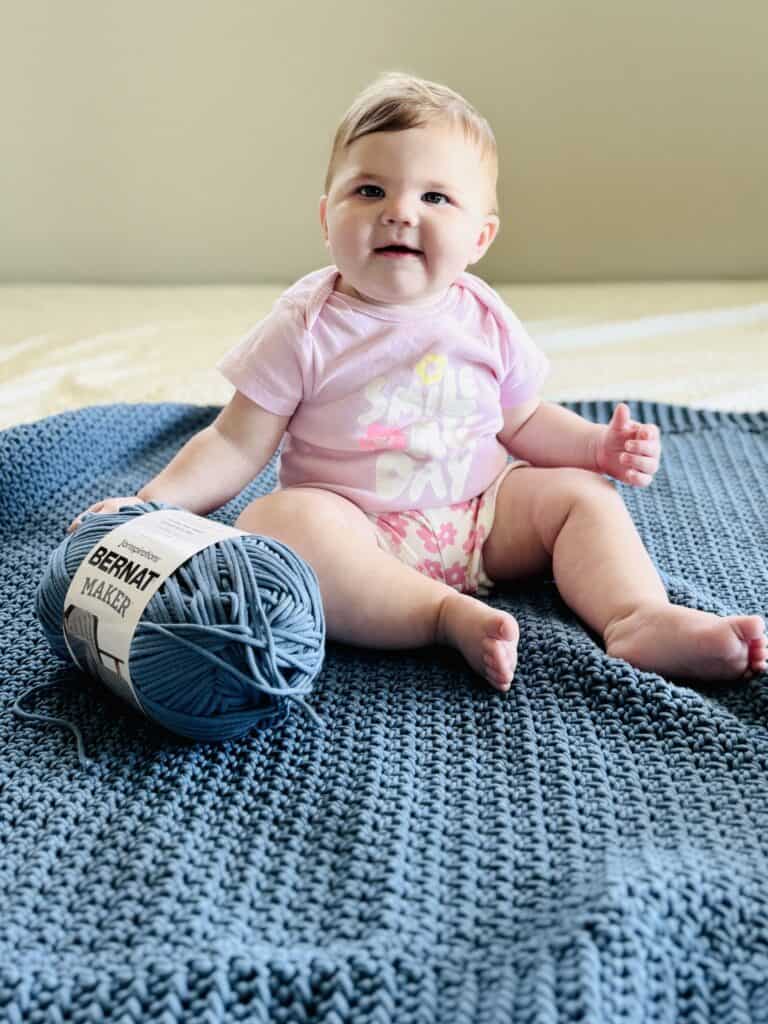
Baby Nora loves Bernat Maker, too! 🙂
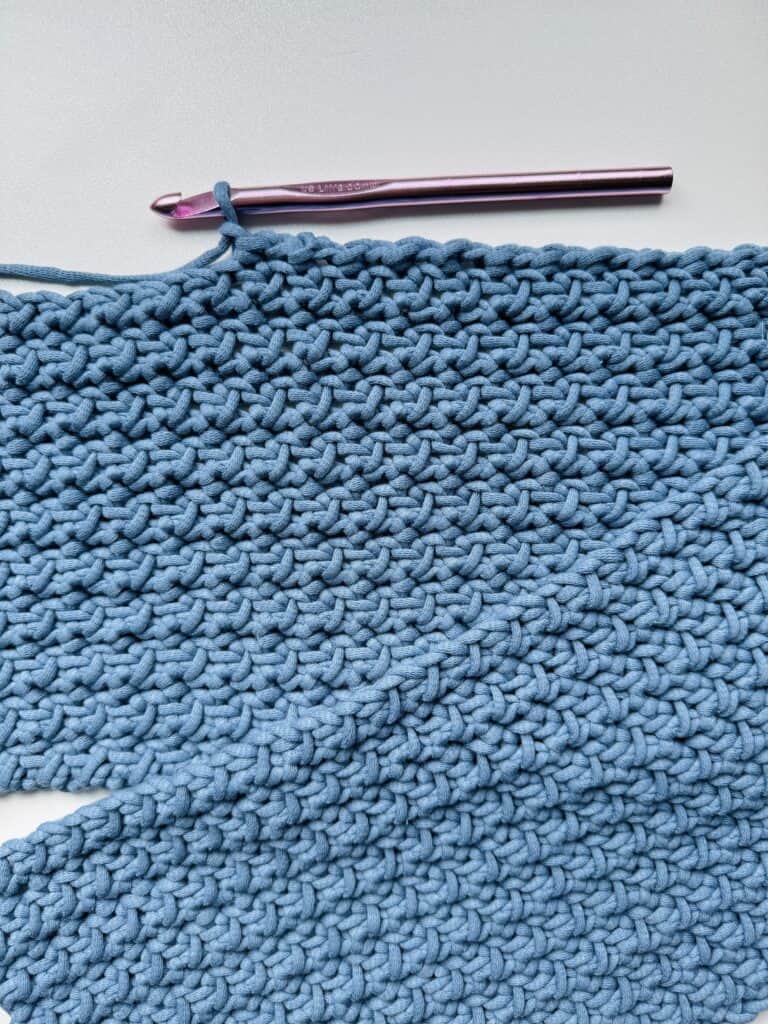
The main part of this blanket is made with the Mesh Stitch – except I am substituting Single Crochet with Half Double Slip Stitch, which is what gives the texture those cool little slanted lines. Here is the video tutorial for the blanket if you’d like to watch before you get started!
Materials
Bernat Maker (72% cotton, 28% cotton, 250 g/8.8 oz, 290 m/317 yds)
5 skeins Steel Blue
Size L/8.00mm crochet hook, tapestry needle, scissors
Stitches
Half Double Slip Stitch (HDSS): Yarn over (YO), insert your hook, YO and pull up a loop and pull directly through 2 loops on hook.
Single Crochet (SC): Insert your hook, YO and pull up a loop, YO and pull through 2 loops.
Slip Stitch: Insert your hook, YO, pull up a loop and pull directly through loop on hook.
Size
Finished size 40 in x 52 in
Gauge 4 in = 8 st and 11 rows of pattern
Pattern
Chain 120 (or any even number).
Row 1: Starting in the 2nd chain from the hook, work 1 HDSS, then CH 1. *Skip the next stitch, then work 1 HDSS in the next stitch and CH 1. Repeat to the end of the row. On the last stitch, work 1 HDSS, then CH 1 and turn.
Row 2: Work 1 HDSS in the first stitch, then CH 1. *Skip the next stitch, then work 1 HDSS in the next stitch and CH 1. Repeat to the end of the row. (You should always be working HDSS into the tops of the HDSSs from the previous row and skipping over the CH 1 spaces.) On the last stitch, work 1 HDSS, then CH 1 and turn.
Repeat row 2 until your blanket measures 50 – 53 inches or your desired length.
Border
When you reach your desired length, you can either tie off and weave in your ends, and then come back and pull up a loop in the corner, or you can CH 1 and begin working your border down the side of the blanket.
Round 1: Start the border by working SC down the side of the blanket, working 1 SC per row. On the end of the blanket, work SC, CH 1 in each of the chain 1 spaces. Work the next side and the other end in the same manner as the previous side and end. Work either 2 or 3 stitches in each corner so that the stitches evenly fan around the corner.
Side 1: When you return to the starting corner, slip stitch into the starting stitch and CH 10. Starting in the 2nd chain from the hook, work HDSS in each of the 9 chains back toward the edge of the blanket. *Slip stitch into the next unworked stitch, and in the next stitch. Turn and work HDSS in each of the 9 HDSS you just made. CH 1 and turn. Work back down and work 9 HDSS. (On the 9th stitch feel free to insert your hook under all three loops of the stitch – you don’t need to dig to find the top two loops.) Repeat from across * the side of the blanket.
Side 2: When you reach the first corner, stop when you get to the top of the border after working stitches up from the corner. (If you need to only work 1 slip stitch instead of 2 in order to stay at the corner, that’s fine.) At the top of the border CH 10. Begin working across the side of the blanket in the same manner as side 1.
Work the rest of the blanket in the same manner as sides 1 and 2. When you finish the border at the starting corner, tie off at the top of the border and weave in ends.
If you’d like to add finishing touches to your blanket, lay it out flat on a towel or foam blocking boards if you have them. Use a spray bottle with water to dampen. Press the blanket into straight lines, massaging the stitches and adjusting your tension. Pin with straight pins and let it dry.
Then sit back and enjoy your throw! Thank you so much for visiting Daisy Farm Crafts!
Click here or on image below for printable pattern
![]()