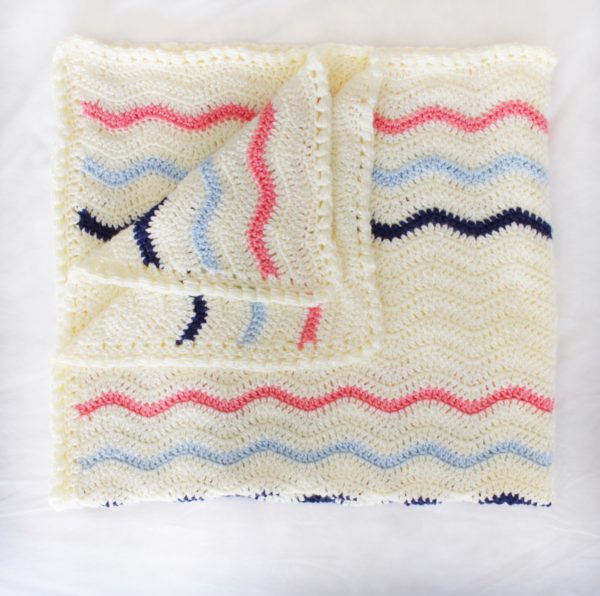
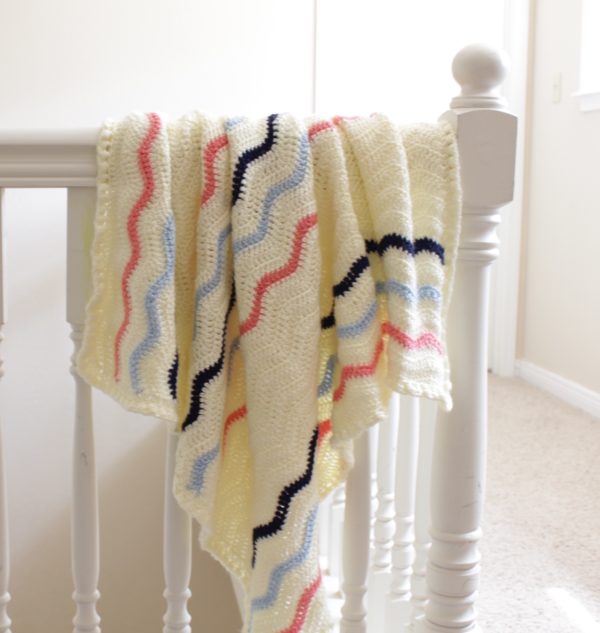
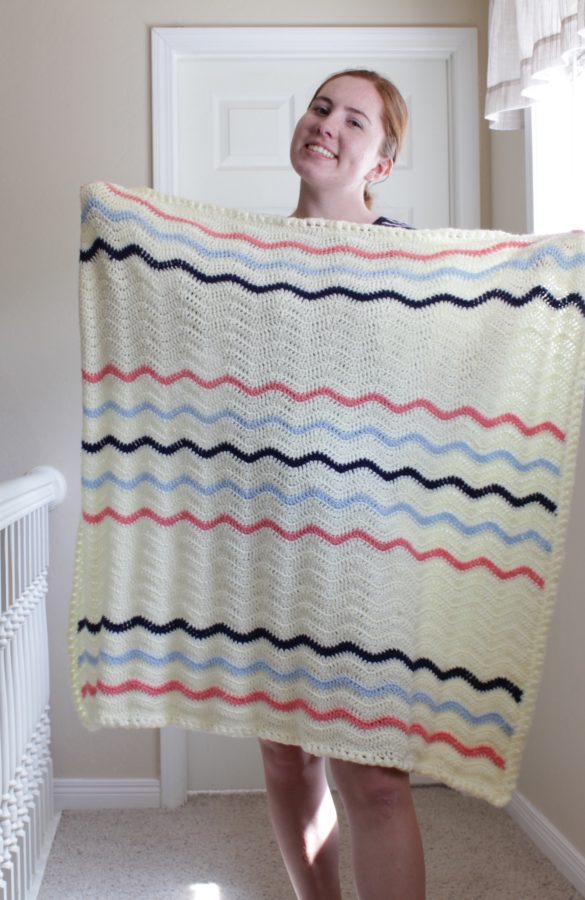
I love a double crochet ripple blanket. They work up so quickly and you can be as flexible as you want with color changes. I finished this crochet ripple blanket with a puff stitch border. I have made this border for a different project, but I will add the link to the blog post and video clip showing how it’s done at the end of this post.
Materials
Caron Simply Soft (100% acrylic, 170 g/6 oz, 288 m/315 yds)
4 skeins Off White, 1 skein each Light Blue, Navy, Strawberry
Size H/5.00mm hook, tapestry needle, scissors
Size
Finished size 36 in x 36 in
Pattern
CH a multiple of 12 + 3 to however wide you wish. I usually make my blankets 32 – 36 inches wide. About that high as well. I love to just give you the pattern repeat instead of an exact number of chains so you can decide how wide you’d like this project. If you are a beginner and don’t know what that means, crochet a multiple of 12 to however long you’d like, then add three.
Row 1: DC in 4th chain from hook, first three chains counts as a DC. *1dc in each of the next 3 CH, DC2TOG twice, 1 DC in each of the next 3 CH , 2 DC in next CH twice, repeat from * across to the last CH , 2 DC into that last CH .
Row 2: CH 3, DC in that next stitch, (if you count down from the hook it will be the 4th CH ) *1 DC in each of the next 3 stitches, 2DCTOG twice, 1 DC in each of the next 3 stitches, 2 DC in the next stitch twice, repeat from * across to the last chain, 2 DC into the top of the CH 3 turning chain from the previous row.
Repeat row 2 over and over. The color changes are completely up to you! Refer to the blanket picture below of my daughter Annie holding it up if you’d like to use the same sequence I did for this sample.
This is a fairly common pattern, I’ve seen it lots of other places and a good one to practice over and over to get comfortable finding the top of that dang turning chain! Keep it loose and try your best to go under both loops of that chain. It helps to make the sides very straight. Also, this ripple is pretty easy to keep track of your place. 3 DC separate each peak and valley. 2 DC on each end. Keep that in mind as you go and you’ll do great!
Notes
Now if you’d like to make a puff stitch border, you need to fill in the peaks and valleys first.
Please refer to this tutorial below. She does an excellent job explaining how to do this. Keep in mind however that her basic ripple blanket uses a different amount of DC in between each peak and valley, but that is easily adjusted. Also, she uses UK terms, so a DC is a TRC, I believe.
https://attic24.typepad.com/weblog/ripple-blanket-know-how.html
And then you will be ready for the puff edge. Click the link below to take you straight to that page.
Good luck on your ripple crochet blanket! I hope you’ll join me on Instagram and share with me a picture of your creation! Tag me so I can see! I love looking at all the different combinations that crocheters come up with! I also have a Facebook page, Pinterest page, and YouTube channel all named Daisy Farm Crafts.
Thank you for stopping by!
Tiffany