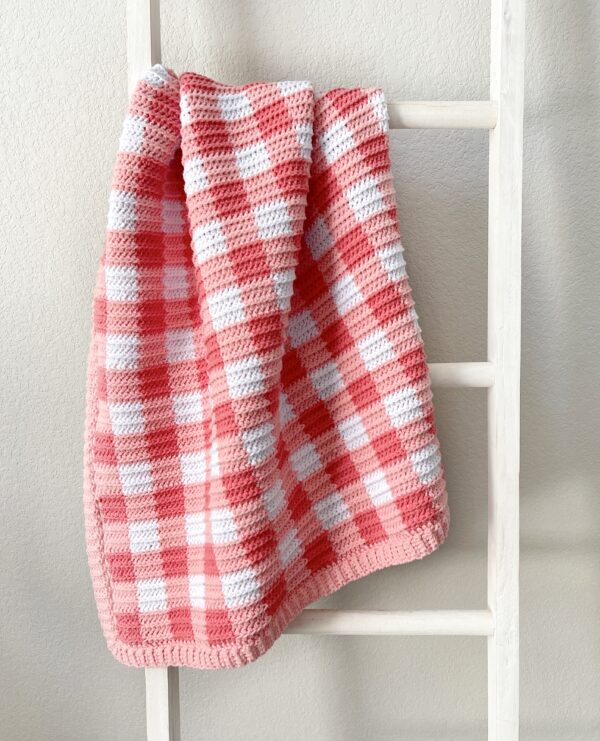
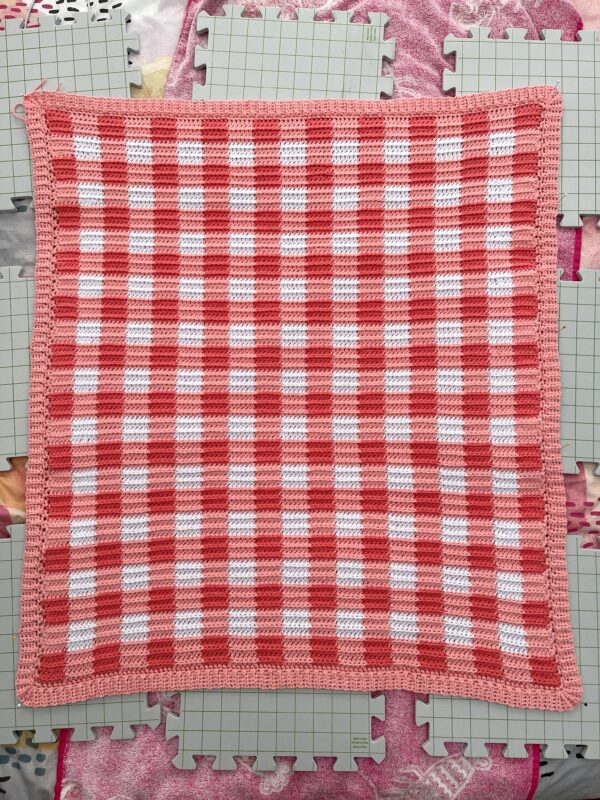
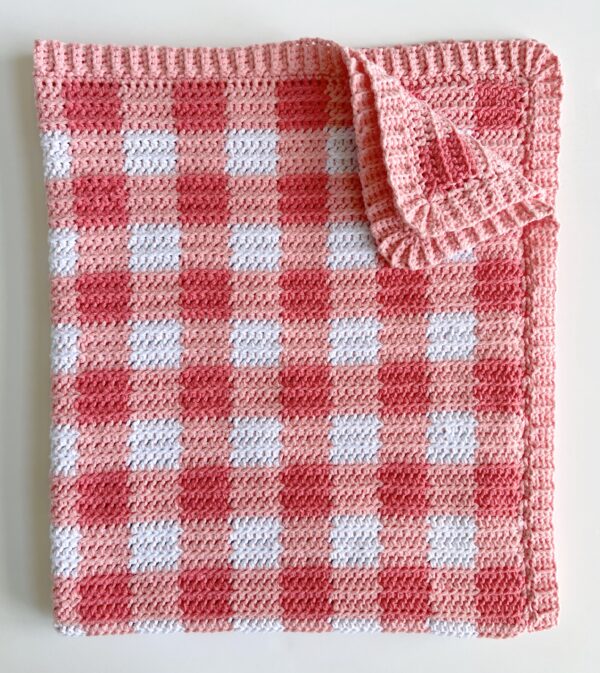
Hello friends, if you’ve been following Daisy Farm Crafts for a while, you know that my mom is fairly obsessed with making gingham blankets, but it occurred to me a few months ago that I have never actually made one myself!
The biggest challenge of making a gingham blanket is finding two shades of yarn that complement each other to create the gingham look, so once I saw these two shades of Bernat Bundle Up I wanted to give it a try. My husband’s brother and his wife are expecting a baby girl in a few months, so I thought this would be a great baby shower gift for her!
There are a couple different shade combinations that I think would work well for a gingham blanket in the Bernat Bundle Up line – you can check out this yarn at Yarnspirations or Joann. Bernat Bundle Up is a newer yarn from Yarnspirations that is 100% polyester. It is very soft and stretchy, so I love how it worked up with this pattern, but feel free to try this blanket with any other medium weight yarn – my only advice would be to do a small practice swatch first to make sure that you are using the size of hook that will make your blanket look its best.
For this blanket I ended up using both a size H and size I hooks – I found that using a smaller hook for the base chain and the border helped to keep my blanket from rippling. Again, it’s always a good idea to make a small practice swatch before starting your blanket so you can be sure that you are using the right hooks for your personal tension.
Here’s the video tutorial if you’d like to see how to work the stitches before you get started!
Materials
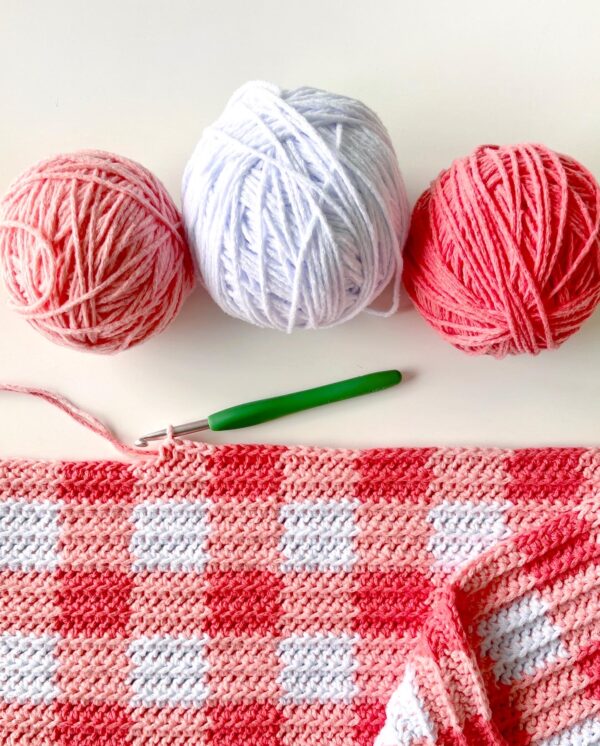
Bernat Bundle Up (100% polyester, 140 g/4.9 oz, 244 m/267 yds)
3 skeins Posy, 1 skein Red Wagon, 1 skein Cloud White
Size H/5.0mm hook, size I/5.5mm hook, tapestry needle, scissors
Size
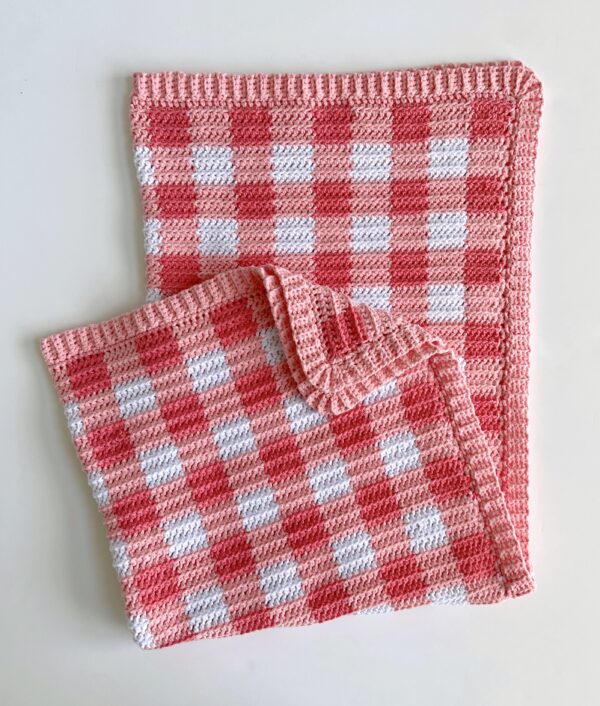
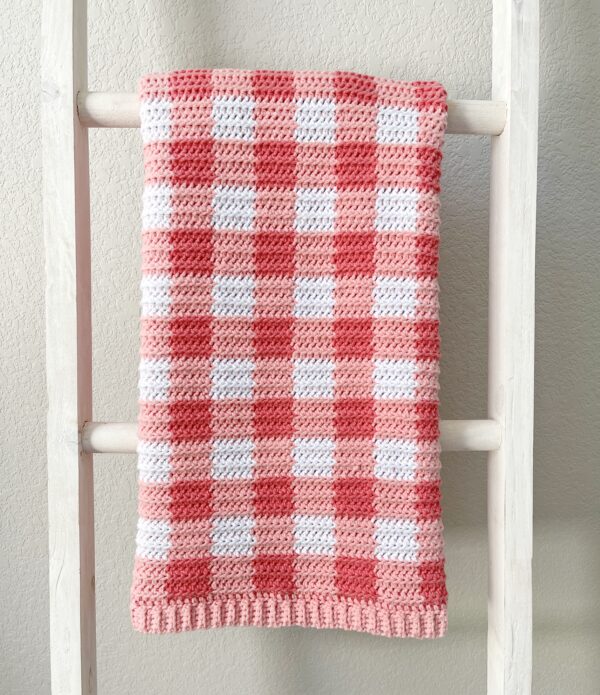
Finished size 30 in x 35 in
Gauge 4 in = 17 st and 14 rows of front two loop HDC
Stitches
Half Double Crochet (HDC): Yarn over (YO), insert your hook, YO and pull up a loop, YO and pull through three loops on hook.
Single Crochet (SC): Insert your hook, YO and pull up a loop, YO and pull through two loops on hook.
Slip Stitch: Insert your hook, YO, pull up a loop and pull directly through loop on hook.
Pattern
Instructions
-Pull through with the new color on the last step of the stitch.
-Lay whichever color you aren’t using along the top of your work and crochet over it as you go.
-To avoid your yarn getting twisted as you carry it along your work, it helps to always keep one color to the front and one color to the back each time you switch colors.
-When turning to a new row, wrap the color not in use around the side of your work and continue to crochet over it as you go.
Chain 116 with Red Wagon and size H hook. (Pattern repeat is 6 multiplied by an odd number, plus 2.)
Row 1: Switch to size I hook. Starting in the 3rd chain from the hook, work 1 HDC in each of the first 6 chains with Red Wagon. *Work 1 HDC in each of the next 6 chains with Posy, then work 1 HDC in each of the next 6 chains with Red Wagon. Repeat from * to the end of the row. CH 2 and turn.
Rows 2 – 5: (turning chain does not count as stitch) Work 1 HDC in each of the first 6 stitches with Red Wagon, inserting your hook up through the front two loops only. *Work 1 front two loop HDC in each of the next 6 stitches with Posy, then work 1 front two loop HDC in each of the next 6 stitches with Red Wagon. Repeat from * to the end of the row. CH 2 and turn.
Rows 6 – 10: Work 1 front two loop HDC in each of the first 6 stitches with Posy. *Work 1 front two loop HDC in each of the next 6 stitches with White, then work 1 front two loop HDC in each of the next 6 stitches with Posy. Repeat from * to the end of the row. CH 2 and turn.
Rows 11 – 15: Work 1 front two loop HDC in each of the first 6 stitches with Red Wagon. *Work 1 front two loop HDC in each of the next 6 stitches with Posy, then work 1 front two loop HDC in each of the next 6 stitches with Red Wagon. Repeat from * to the end of the row. CH 2 and turn.
Repeat rows 6 – 15 until you have 23 sets of squares total or you reach your desired length (you want to be sure to end the blanket with rows 11 – 15 to match the beginning of the blanket).
Border
Weave in all ends with a tapestry needle. Switch to size H hook.
Round 1: Pull up a loop in corner and chain 1. Work one round of SC around the blanket, working 2 SC in every other space on the sides of the blanket, and 1 SC per stitch on the ends of the blanket. (On the base chain end, try inserting your hook between the stitches to avoid the base chain pulling away from the blanket.) Work 3 SC into each corner.
Round 2: At starting corner, slip stitch into starting stitch, then chain 5. Continuing working in same direction. Starting in the 2nd chain from the hook, work a SC in each of the 4 chains back toward the edge of the blanket. Slip stitch into the next stitch, and in the next stitch. Turn and work in the back loops of each of the 4 SC you just made. CH 1 and turn. Work back down and SC in the back loops only. (Be careful not to miss the 4th stitch, it sometimes pulls tight and is hard to see.) Continue repeating around the blanket.
When you reach the corners, *only slip stitch once into the corner, before turning and working back loop SC back up to the top of the border. Return and slip stitch into the corner space. Repeat from * two more times so that your border is neatly fanned around the corner. After finishing the corner, continue working around the blanket as before.
When you reach the corner you started with, work the corner as you did previous corners, then tie off when you are at the top of the border, leaving yourself a long tail. Then use the tail to sew the sides of the corners together with a tapestry needle.
If you’d like to add finishing touches to your blanket, lay it out flat on a towel or foam blocking boards if you have them. Use a spray bottle with water to dampen the blanket. Press the blanket into straight lines, massaging the stitches and adjusting your tension. Pin with straight pins and let it dry.
Thank you so much for visiting Daisy Farm Crafts! Happy Crocheting! xo, Hannah
Click here or on image below for printable pattern
![]()