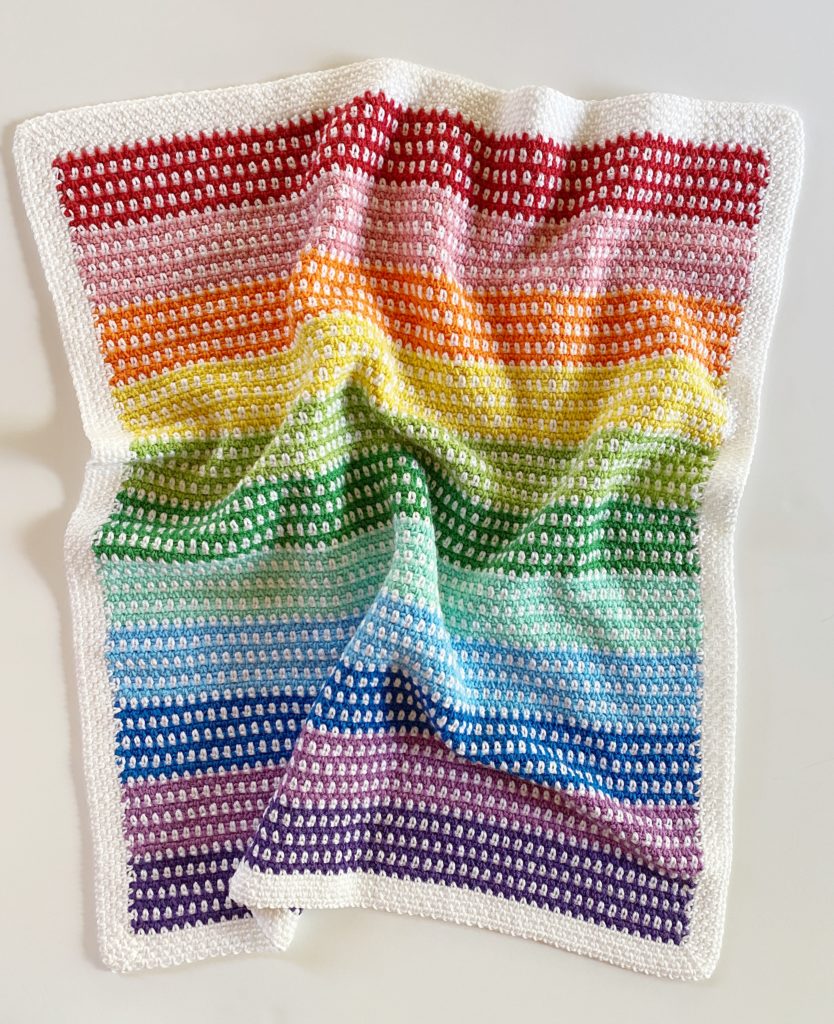
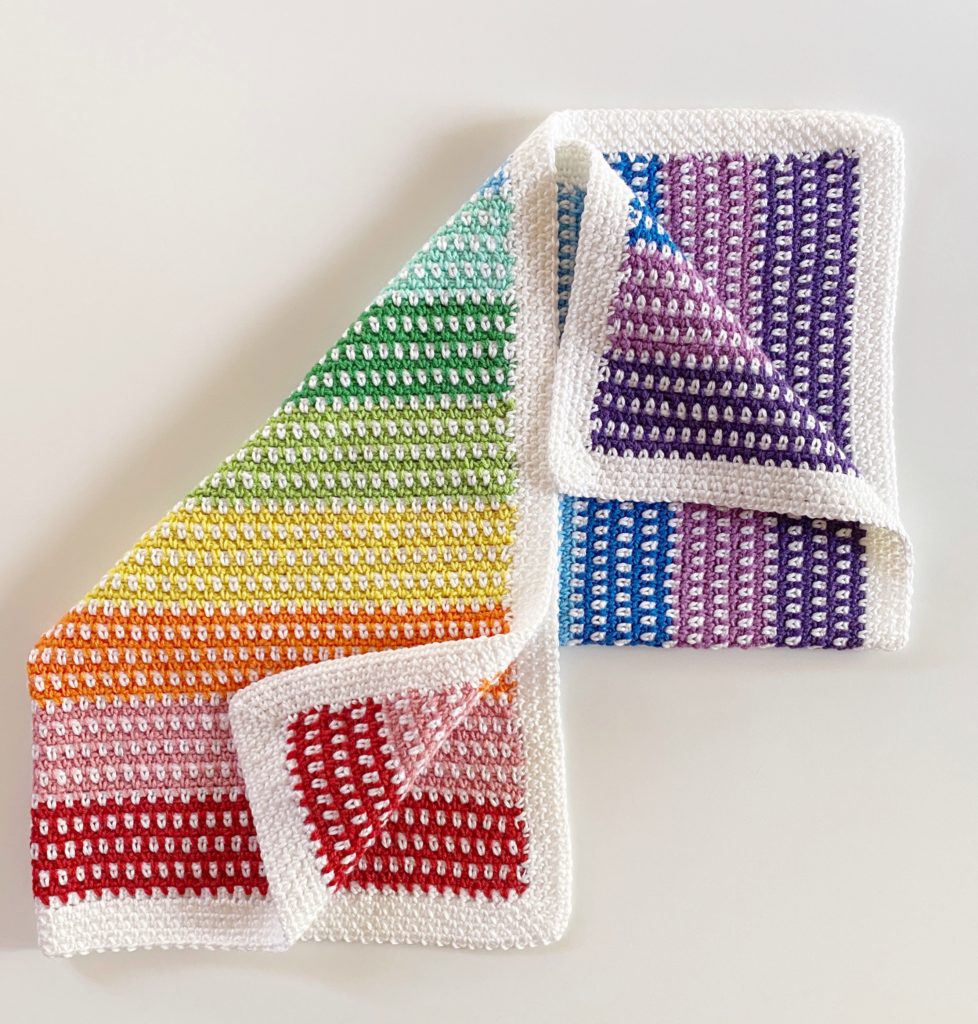
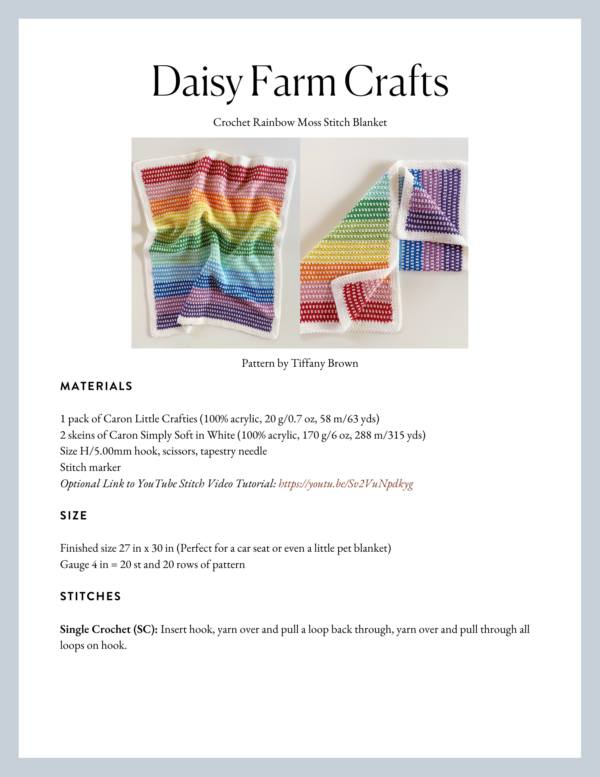
This little crocheted rainbow blanket turned out to be an absolute delight to make! It was so fun to change colors every eight rows and see the rainbow take effect.
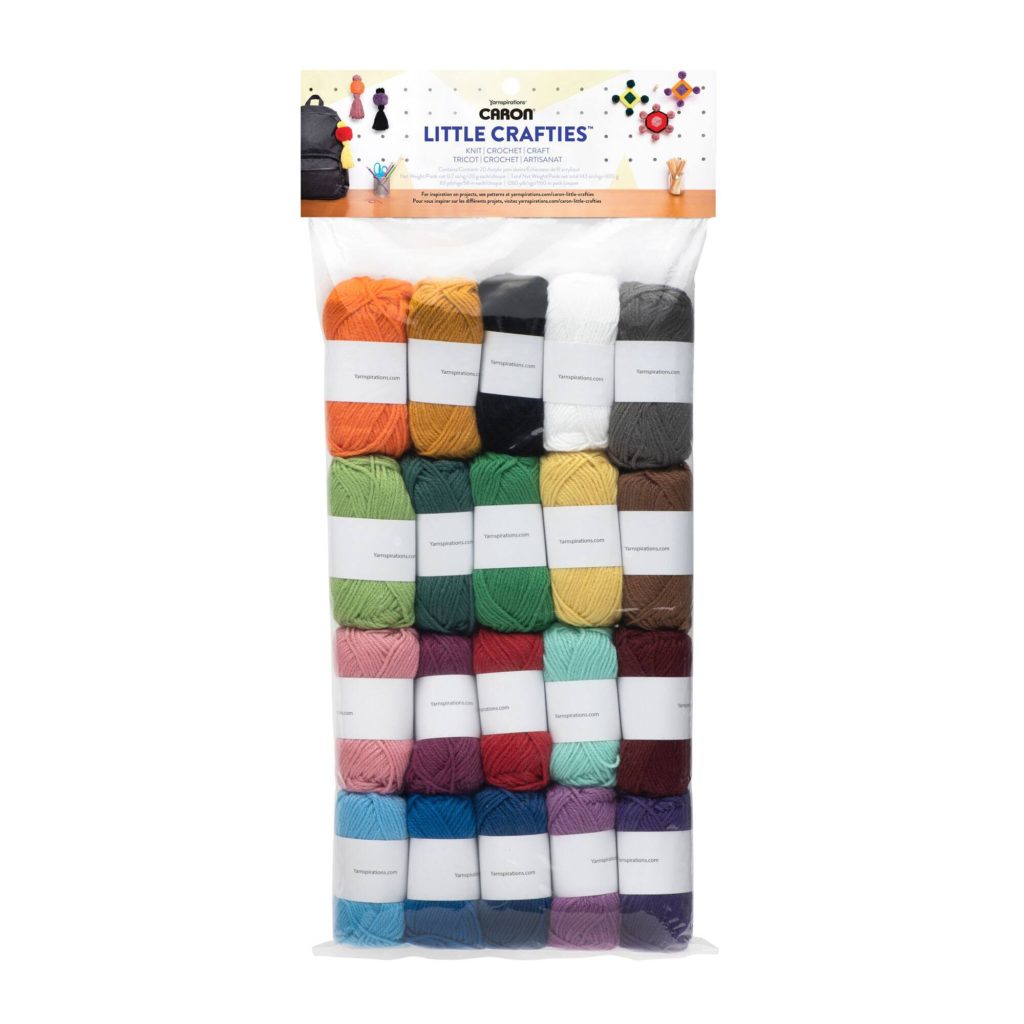
What made this even easier is that I used a pack of yarn sent to us by our friends at *Yarnspirations.com called Caron Little Crafties.
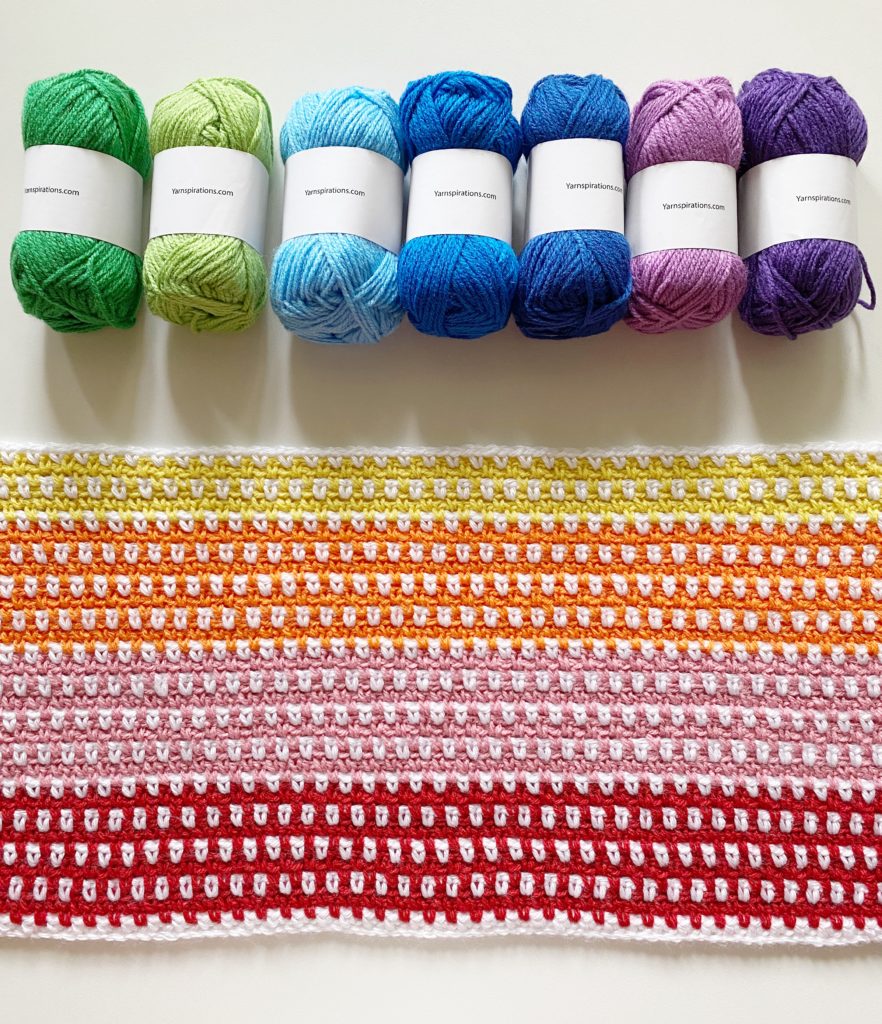
The smaller balls of yarn were perfect to use. There are 20 different colors to choose from in the pack, however, I selected to only use the brighter primary colors.
I also chose to use Caron Simply Soft in White to use as a base and to give the blanket a little more weight. While both yarns are acrylic, the little balls are thinner and I felt like the blanket would have more drape and softness adding in the Caron Simply Soft.
And now that I have finished the blanket, I really think this is such a handy way to make a colorful blanket! It saved me from having to find a line of yarn that sells all the rainbow colors and it saved me from wasting extra yarn.
This is a car seat size blanket but you could adjust the width of the row to make it wider if you’d like, it possibly would make your sections of color not as many rows, but there are plenty of colors in the pack you could add into the rainbow (or not make a rainbow at all.)
Materials
1 pack of Caron Little Crafties (100% acrylic, 20 g/0.7 oz, 58 m/63 yds)
2 skeins of Caron Simply Soft in White (100% acrylic, 170 g/6 oz, 288 m/315 yds)
Size H/5.00mm hook, scissors, tapestry needle
Stitch marker
Size
Finished size 27 in x 30 in (Perfect for a car seat or even a little pet blanket)
Gauge 4 in = 20 st and 20 rows of pattern
Stitches
Single Crochet (SC): Insert hook, yarn over and pull a loop back through, yarn over and pull through all loops on hook.
Pattern
Chain 126 with White.
(If you want your blanket wider, use any EVEN number, the maximum number I’m estimating to use is 134 if you want to have enough yarn to use for 8 rows of Color. A wider blanket than that, you’ll probably have enough yarn in each color for six rows. Your colored sections will be narrower.)
ROW 1: SC in the 4th chain from hook, *CH 1, SK next CH, SC in next CH, repeat from * to the end of the row. On the last SC of the row, pull through with Color, CH 2 and turn.
ROW 2 and 3: SC in first CH 1 space from the previous row, *CH 1, SK 1 single crochet stitch, SC in next CH 1 space, repeat from * to the very end, the last SC should be worked into the space between the CH 2 turning chain and SC from the previous row. On the last stitch of row 3, pull through with White, CH 2 and turn.
(Going forward I will refer to the combo of stitches and how it was worked in Row 2 and 3 as the Moss Stitch)
ROW 4: Work Moss Stitch with White, carrying the color along the row and pulling through with the new color at the end of the row.
ROW 5 and 6: Work Moss Stitch with Color. Pull through with White at the end of row 6.
Repeat rows 4 through 6 for the rest of the blanket making the following Color changes after every 8 rows of color:
Red, Pink, Orange, Lemon Yellow, Soft Green, Kelly Green, Mint Green, Light Blue, Dark Blue, Light Purple, Dark Purple

Tip: Each section is 2 rows of Color separated by 1 row of White for a total of 8 rows of color and 4 rows of White
Place a stitch marker in the final stitch of the row. Weave in all the ends before beginning the border.
Border
Round 1: Remove stitch marker and begin the border by working “SC, CH 1, SC” in the corner (and in each corner.) Work Moss Stitch around. (Work 1 SC at the end of a row, CH 1, skip a row, SC into the end of the next row.) Join with a slip stitch to first SC, CH 1 and turn.
Rounds 2 through 6: Work Moss Sitch around working “SC, CH 1 SC,” around the chain 1 space for each corner. Join with a slip stitch and turn for each round.
See below for a link to a Youtube Tutorial if you need any help at all:
Thank you so much for stopping by! Good luck with your Rainbow Blanket! XO, Tiffany
Click here or on image below for printable pattern
*We are sponsored Stitch Ambassadors for Yarnspirations.com