
My mom, Jannet, crocheted a white blessing blanket for each one of her thirty grandchildren. Hannah, my daughter, is the oldest of all her grandchildren and the first recipient of this tradition my mom started.
I followed in her footsteps and have made each one of my grandchildren so far, their own blessing blankets. I have been so honored and thrilled that many of you have made them yourselves. I think it is a beautiful and wonderful thing to welcome each baby into the world with a handmade crochet blanket, a handmade hug.
My first grandchild is Jack and I made him the Windowpane Puff baby blanket:
I then followed that theme for my second grandbaby James. I made him the Crochet Berry Stitch Windowpane Blanket:
And for my third grandbaby Kate, I decided to make her a classic double crochet crossed stitch baby blanket and just called it Baby Kate’s Blessing Blanket:

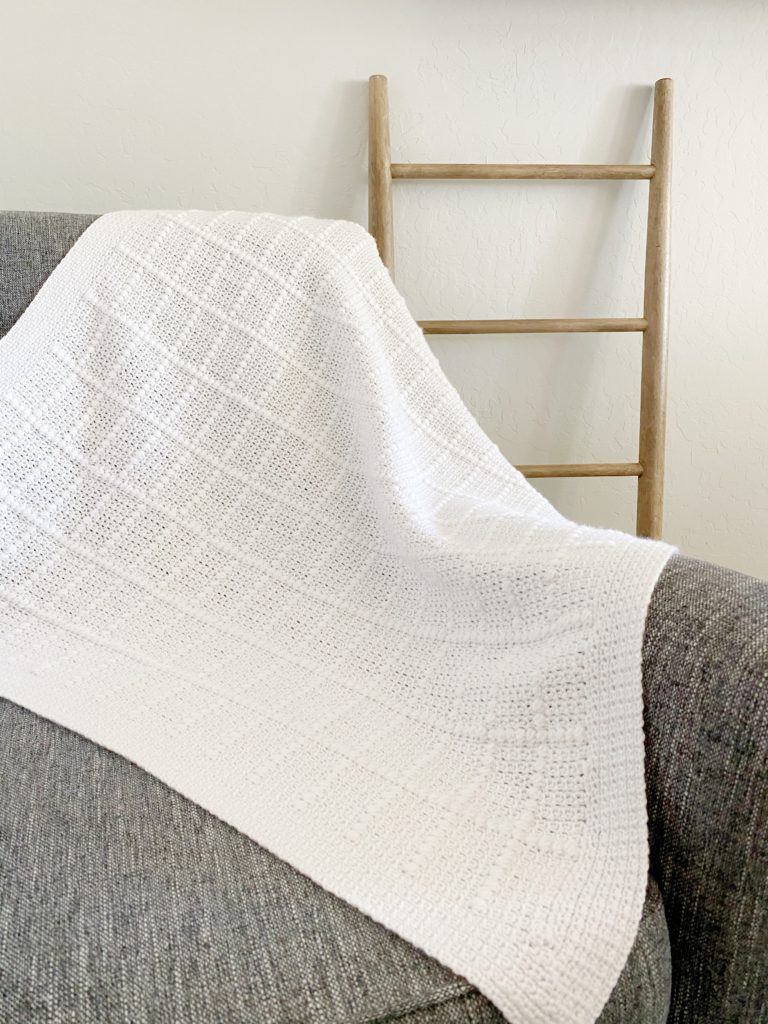
But for Nora, I had a different idea pop into my head. When Hannah was a baby, she became attached to the blessing blanket that my mom made for her. It became her “dissy” and dissy went with her everywhere until she was about 5 years old.
She loved that blanket so much it turned brown with age. I saved it away all these 34 years and decided to get it out of storage and re-create Hannah’s dissy for baby Nora.
And, if Nora decides to sleep with it, and drag it all over the place like Hannah did, I would be absolutely thrilled. It is my special hug for her and all my grandbabies, even though I make them lots of blankets, it’s the white ones, made for their blessings that I hope they keep for years to come.
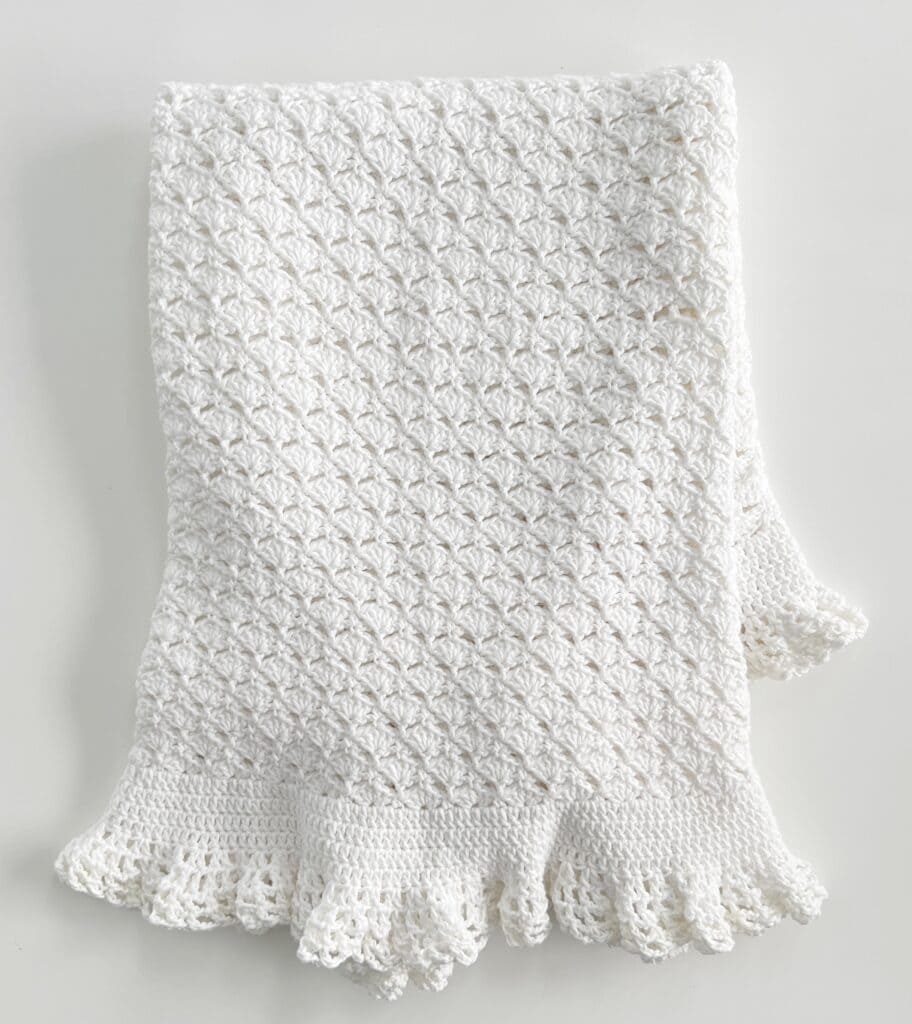
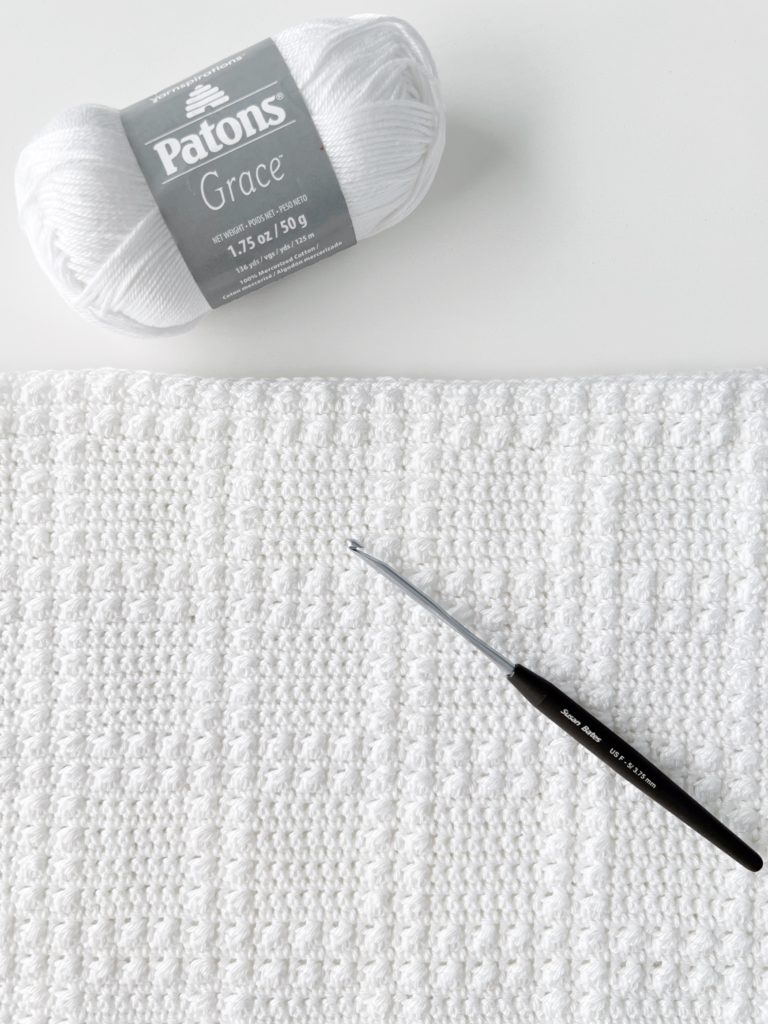
I found the stitch she used in the middle of the blanket from one of her vintage stitch books. It’s called fantail. In other books I have it’s referred as little fan. Her border is rows of double crochet and then rows of ruffled double crochet and chains.
I found the pattern quite easy to memorize after about a dozen rows or so. The border is easy to learn, but it was tedious to make since there are many rounds. It made me appreciate the hours my mom spent making the original blessing blanket for Hannah.
I was able to film a video tutorial that you can view here on the site or find it on our YouTube channel.
Be sure and scroll to the end of the post for the free printable pdf. (All our patterns include a free printable, they are at the end of each post.)
Materials
Bernat Softee Cotton, (60% Cotton, 40% Acrylic Ball Size: 120 g/ 4.2 oz, 232 m/ 254 yds, 3 weight)
*As an Amazon Affiliate, we may earn from qualifying purchases. At this time, the color Clear White is available on the Bernat Yarn Amazon shop instead of on Yarnspirations.com, tap here to shop.)
G- 4mm hook, scissors, tapestry needle
Stitches
Single Crochet (SC): Insert hook, YO, pull loop back through, YO, pull through two loops on hook.
Double Crochet (DC): YO, insert your hook, YO and pull up a loop, YO and pull through two loops, YO and pull through remaining two loops.
Size
Approximate size 36 x 36 inches
Pattern
Chain 158 (or any number times 6 plus 2)
ROW 1: Begin in the 5th chain from the hook with 5 DC. Skip 2 chains, 1 SC into the next chain. *Skip 2 chs, 5 DC into the next ch. Skip 2 chs, 1 SC into the next ch. Repeat from * across the row ending with 1 SC into the last chain of the row, Chain 5 and turn.
ROW 2: (The chain 5 counts as the first DC and chain 2 of the row.) Skip over the SC and 2 DC, work 1 SC into the next DC. (This is the third DC of the 5 DC’s of the previous row.) CH 2, *skip over the next 2 DC and work 1 DC into the SC of the previous row, CH 2, skip SC and 2 DC, SC into the next DC. CH 2. Repeat from * ending the row with DC into the top of the turning chain. CH 3 and turn.
ROW 3: (CH 3 counts as first DC of the row.) Work 2 DC into the first DC of previous row. *Skip 2 chains, SC into the SC of previous row. Skip 2 chains, 5 DC into the DC of previous row. Repeat from * across the row. Ending with 3 DC into the top of the turning chain (3rd chain). CH 1 and turn.
ROW 4: SC into the first DC, *CH 2, skip 2 DC, DC into SC, CH 2, skip 2 DC, SC into next DC. Repeat from * across the row ending with SC into the top of the turning chain. CH 1 and turn.
ROW 5: SC into the first SC. *Skip 2 chains, 5 DC into the DC, skip 2 chains, SC into SC. Repeat from * across the row, ending with SC in last SC.
Repeat rows 2 through 5 until you have the length desired. Make the final row of the blanket Row 4 instructions to prepare for the border.
BORDER:
ROUND 1: After finishing the final row of the blanket (row 4 instructions.) Chain 3 and turn. *Work 3 DC around each chain 2’s. Work 3 DC into the final SC of the row. Turn to work down the side of the blanket. Work 2 DC per the end of rows that end with chain 3 or DC, work 1 DC around the rows that end with SC. 3 DC into the corner. Repeat from * to finish the first round of the border. End with 2 DC close to the base of the first ch 3 of the round. SL ST, CH 3, do not turn.
ROUND 2: *Work 1 DC into each DC to the 3 DC that make the corner. Work 2 DC into the first DC of the corner, 3 DC into the middle DC, 2 DC into the 3rd DC. Repeat from * around the blanket. Join with a SL ST to the first DC of the round, CH 3 and do not turn.
Tip: (In the next rounds the 3 DC sts become the new corner sts. You will work just 1 DC per DC except in the 3 DC’s that make the corner.)
ROUND 3 and 4: Repeat round 2.
ROUND 5: Work DC into the first DC. *CH 1, skip 1 DC, 2 DC into the next DC. Repeat from * around, omitting skipping a st on the corners. Work 2 DC, CH 1, into each of the 3 DC that make the corner. Join the round with a SL ST to the first DC, CH 6 and do not turn.
ROUND 6-9: (CH 6 counts as first DC and chain 3.) *Work DC into next DC, CH 3. Repeat from * around. Join the round with a SL ST to the first DC, CH 6 and do not turn.
(Tip: Work into each DC with DC and CH 3 in between, even around the corners.)
Tie off and weave in all the ends.
Thank you so much for stopping by! I wish you so much luck on your blanket if you choose to make it and share in our tradition of blessing blankets.
Sending you my love,
Tiffany
Click here or image below to download pattern pdf.
![]()